
Related Manuals for Teac CR-H260i


Summary of Contents for Teac CR-H260i
- Page 1 7202-023800200 CR - H260i CD Receiver OWNER'S MANUAL MODE D’EMPLOI MANUAL DEL USUARIO CR-H260i_OM_EFS_vA_CS6.indb 1 12/10/11 12:01...
- Page 2 This equipment should be installed and operated with minimum distance 20cm < IF YOU ARE EXPERIENCING PROBLEMS WITH THIS between the radiator & your body PRODUCT, CONTACT TEAC FOR A SERVICE REFERRAL. DO CAUTION NOT USE THE PRODUCT UNTIL IT HAS BEEN REPAIRED.
- Page 3 Q Precautions concerning batteries This product has been designed and manufactured according to FDA regulations “title 21, CFR, chapter 1, sub- Misuse of batteries could cause them to rupture or leak chapter J, based on the Radiation Control for Health and leading to fire, injury or the staining of nearby things.
- Page 4 The Bluetooth® word mark and logos are registered trade- cause hearing loss. marks owned by Bluetooth SIG, Inc. and any use of such marks by TEAC is under license. Other company names and product names in this docu- ment are the trademarks or registered trademarks of their respective owners.
- Page 5 For European Customers Disposal of electrical and electronic equipment (a) All electrical and electronic equipment should be disposed of separately from the municipal waste stream via collection facilities designated by the government or local authorities. (b) By disposing of electrical and electronic equipment correctly, you will help save valuable resources and prevent any potential negative effects on human health and the environment.
-
Page 6: Table Of Contents
Contents Before use Thank you for choosing TEAC. Read this manual care- What's in the box fully to get the best performance from this unit. Check to be sure the box includes all the supplied accesso- Before use ......... . 6 ries shown below. - Page 7 If a for- eign object should get into the unit, contact your dealer or TEAC service company. p When removing the power plug from the wall outlet, always pull directly on the plug; never yank on the cord.
-
Page 8: Compact Discs
If you use such discs in this unit, How to remove the disc How to hold the disc TEAC and its subsidiaries will not be responsible for any consequences or guarantee the quality of reproduction. If you experience problems with such non-standard discs, you should contact their issuers. - Page 9 Storage precautions Maintenance p Discs should be returned to their cases after use to p If a disc becomes dirty, wipe its surface radially from the avoid dust and scratches that could cause the laser center hole outward towards the outer edge with a soft, pickup to “skip.
-
Page 10: Mp3/Wma Files
MP3/WMA files p This unit can play back WMA files with a sampling rate This unit can play MP3 and WMA files that are on CD-R/ CD-RW discs, SD cards, and external USB flash drives*. See of 44.1 kHz and a bit rate of 192 kbps or less. the manual for the software that you are using when you p Variable bit rate files might not play back correctly. -
Page 11: Using The Remote Control
Using the remote control Precautions for use Battery installation V Misuse of batteries could cause them to rupture Remove the cover from the back of the remote control and insert two AAA batteries with their ¥/^ ends oriented in or leak leading to fire, injury or the staining of items nearby. -
Page 12: Using An Ipod/Iphone/Ipad
Using an iPod/iPhone/iPad Connecting antennas Compatible iPod/iPhone/iPad models AM antennas This unit can be connected to and used with the following AM indoor loop antenna iPod/iPhone/iPad models. To stand the loop antenna on a surface, insert the claw iPod nano (2nd, 3rd, 4th, 5th and 6th generations) into the slot in the antenna base. - Page 13 FM outdoor antenna FM antennas In an area where FM radio signals are weak, use a three-ele- ment outdoor antenna (commercially available), and use a FM indoor antenna 75 Ω coaxial cable to connect it. Connect the included FM antenna to the FM antenna con- In an area where radio signals are particularly weak, use a nector on the rear panel and extend the antenna.
-
Page 14: Making Connections
Making connections (1) V Precautions when making connections p Complete all other connections before connecting power plugs to power outlets. p Read the owner’s manuals of all devices that will be connected, and follow their instructions. p Do not bundle connecting cables with power cords. Doing so could cause noise. DVD player, etc. - Page 15 Analog audio input/output jacks Bluetooth antenna (Bluetooth) This is used for communication with other Bluetooth [AUX1/AUX2] devices. Use to input/output analog audio signals. Connect this unit's input and output jacks to the output and input jacks of other devices using commercially available audio cables.
-
Page 16: Connecting Bluetooth Devices
Making connections (2) Connecting Bluetooth devices Select “CR-H260i” (this unit) from any other You can use this unit to listen wirelessly to music playing Bluetooth devices shown to connect them. back on Bluetooth-enabled devices. After successfully connecting them, “Connected” will Bluetooth devices must first be paired to enable communi- appear on the display. -
Page 17: Speaker Connections
Speaker connections Insert the wire into the terminal and turn the terminal cap clockwise to securely connect it. Make sure it is fastened firmly by pulling the cable lightly. Connecting speakers using banana plugs You can also connect speakers using commercially available banana plugs. -
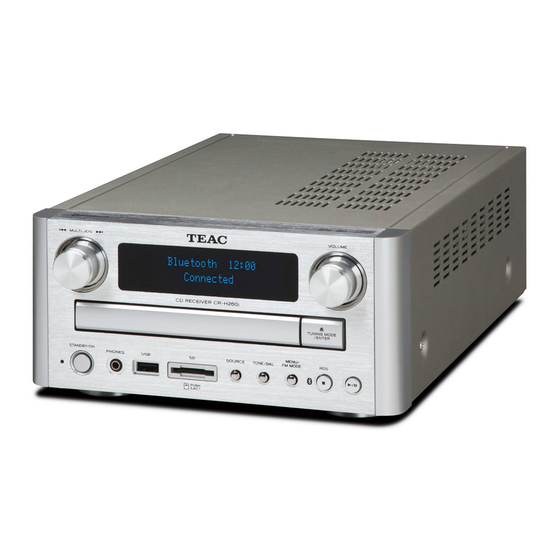
Page 18: Names And Functions Of Parts (Main Unit)
Names and functions of parts (main unit) CR-H260i_OM_EFS_vA_CS6.indb 18 12/10/11 12:02... - Page 19 MULTI JOG knob USB port In CD/USB/SD mode, use this knob to skip to the pre- Connect an iPod/iPhone/iPad or USB flash drive here. vious or next track or file (page 33). In iPod mode, use this knob to scroll up and down the SD memory card slot menu.
-
Page 20: Names And Functions Of Parts (Remote Control) (1
Names and functions of parts (remote control) (1) STANDBY/ON button [ Press this button to turn the unit on or put it in standby mode. Number buttons In CD/USB/SD mode, use these buttons to select a track/file number. For detailed information about selecting a track or file with the number buttons, see page 34. - Page 21 MENU button SLEEP button In iPod mode, use this button to return to the previous Use this button to set the sleep timer (page 25). menu. TIMER button ENTER button Use this button to turn the sleep timer on and off In CD/USB/SD mode, use this button to confirm selec- (page 46).
-
Page 22: Basic Operation
Names and functions of parts (RC) (2) Basic operation (1) REPEAT 1/ALL button In CD/USB/SD/iPod mode, use this button to set the repeat playback mode (page 37). DISPLAY button In CD/USB/SD mode, use this button to change the Press the STANDBY/ON button to turn the information shown on the display during playback. - Page 23 p To listen to an external source connected to an Automatic standby AUX IN jack, select the corresponding “AUX 1 IN” or “AUX 2 IN” setting. In order to reduce power consumption, if there is no play- back signal from the selected input source and this unit is p If the source is set to USB when an iPod/iPhone/ not operated for 30 minutes, this unit will enter standby iPad is connected to the USB port, “USB”...
- Page 24 Basic operation (2) Dimmer Within 3 seconds, turn the MULTI JOG knob to adjust the setting. You can dim the brightness of the display. When the dimmer is turned on, “DIMMER ON” appears on the display briefly and the display darkens. Wait for 3 seconds after adjusting the item to finish setting it.
-
Page 25: Sleep Timer
Sleep timer Connecting headphones The power can be set to turn off after a specified amount To listen with headphones, first reduce the volume level to of time. the minimum. Then, insert the headphones plug into the Press the SLEEP button repeatedly until the desired setting PHONES jack and adjust the volume using the VOLUME appears on the display. -
Page 26: Listening To An Ipod
Listening to an iPod p The iPod's battery will be recharged when it is con- Before starting iPod playback, read “Using an iPod/iPhone/ iPad” on page 12. nected and this unit is turned on. Charging will The following explanations refer to an iPod, but they also stop once the iPod is fully charged. -
Page 27: Repeat Playback
Searching for a part of a track/file Repeat playback During playback, press and hold a Search button (m/,) Press the REPEAT 1/ALL button to cycle through the iPod's to search forward or backward in the track or file. Release the repeat modes as follows: button when you find the part you want to hear. -
Page 28: Listening To A Cd
Listening to a CD Press the Open/Close button(-). The disc tray closes. Be careful not to let any of your fingers get pinched by the tray. Press the SOURCE button repeatedly to p Loading a disc takes a few seconds. p During loading, no buttons will work. -
Page 29: Usb Playback
USB playback Press the Play/Pause button (7/9). Playback starts from the first track/file. When an audio CD is played back: This unit can play MP3/WMA files stored on USB flash drives. Example: p This unit can play USB flash drives with capacities of up CD/Play AM09:00 to 32 GB. -
Page 30: Sd Playback
SD playback Bluetooth device playback This unit can play MP3/WMA files contained on SD memory This unit can transmit audio played back on a Bluetooth cards. device. Connect a Bluetooth device in advance (page 16). Press the SOURCE button repeatedly to Press the SOURCE button repeatedly to select “SD CARD”. -
Page 31: Information Shown On The Display
Information shown on the display MP3/WMA (SD,USB flash drive, CD-R/RW): Default display (current file number and the elapsed time of the file) Current file name Title, artist name and album name * Current folder number and track number * For file names and ID3 tag information, the display of this During playback, press the DISPLAY button to cycle through unit can only show single-byte alphanumeric characters. -
Page 32: General Playback (Cd/Usb/Sd)
General playback (CD/USB/SD) Searching for a part of a track/file Suspending playback temporarily Press a search button (m or ,) once during playback to start searching backward or forward. Press the Play/Pause Press the Play/Pause button (G/J) during playback to pause button (7/9) when you find the beginning of the part you playback at the current position. -
Page 33: Programmed Playback (Cd/Usb/Sd) (1
Programmed Playback (CD/USB/SD) (1) Up to 30 tracks/files can be programmed in the desired Searching for the desired track/file order. Press the PROGRAM button when playback is stopped. Example: During playback, turn the MULTI JOG knob until you find the desired track/file. - Page 34 Programmed Playback (CD/USB/SD) (2) Press the ENTER button. Repeat steps to program more tracks/files. p If you make a mistake, press the CLEAR button to remove the last input track/file number. p Up to 30 tracks/files can be programmed. If you attempt to program more than 30 tracks/files, “PROG FULL”...
- Page 35 Checking the programmed order Use the Number buttons to select the track/ file that you want to add and then press the ENTER button. When programmed playback is stopped, press the ENTER button repeatedly. The track number and program number will be shown on the display.
-
Page 36: Direct Playback (Cd/Usb/Sd)
Programmed Playback (CD/USB/SD) (3) Direct playback (CD/USB/SD) You can use the remote control's Number buttons to select Clearing the program a track/file during playback and when playback is stopped. Press the PROGRAM button when playback is stopped to Press the Number buttons to select a track/file. clear all program contents. -
Page 37: Repeat Playback (Cd/Usb/Sd)
Random playback (CD/USB/SD) Repeat Playback (CD/USB/SD) Press the REPEAT 1/ALL button during playback to cycle Press the RANDOM button during playback or when play- through repeat modes as follows: back is stopped to play the tracks/files in random order. “Random” appears on the display when this mode is active. RPT 1 RPT Folder (MP3/WMA only) -
Page 38: Listening To The Radio
Listening to the radio (1) Manual tune Turn the MULTI JOG knob until you find the station you want. On the remote control unit, press the Scroll buttons (k/j). The frequency changes by fixed steps (FM: 0.05 MHz for European model and 0.1 MHz for North American model, AM: 9 kHz). -
Page 39: Preset Tuning
Preset tuning (1) You can store presets for up to 30 FM and 15 AM stations. FM mode Automatically setting station When a stereo FM program is tuned in, you can select between stereo and mono by pressing the FM MODE button. presets Select “TUNER FM”... -
Page 40: Listening To A Preset Station
Preset tuning (2) p For example, to set preset number 15, press “1”, “5” Manually setting station presets and the ENTER button. p If you do not press the ENTER button within 20 sec- Tune in to a station you want to add as a pre- onds of selecting the channel, the selection will be cancelled. -
Page 41: Listening To A Connected Device
Listening to a connected device RDS (only for Europe) (1) You can listen to the audio signals of video players, televi- The Radio Data System (RDS) is a broadcasting service that sions, portable audio players, cassette decks and other allows stations to send additional information along with devices by connecting their line level or headphone out- the regular radio program signal. -
Page 42: Pty Search (Only For Europe) (1
RDS (only for Europe) (2) PTY search (only for Europe) (1) RDS Clock time (CT) Displays time information provided by the station. When you select RDS Clock time, “RDS CLOCK TIME” will blink for about 3 seconds and then the provided clock time will be displayed. - Page 43 Select the desired program type using the Turn the MULTI JOG knob. MULTI JOG knob. The unit starts searching. You can select from 31 program types (PTY). p You can also start searching by pressing a Cursor button The program type blinks. (l or ;) on the remote control unit.
- Page 44 PTY search (only for Europe) (2) NEWS: WEATHER: Brief announcements, events, public opinion, reports and Weather reports and forecasts. real situations. FINANCE: AFFAIRS: Financial reports, commerce and trading. Suggestions, including practical announcements other CHILDREN: than news, documents, discussion and analysis. Children's programs.
-
Page 45: Setting The Clock
Setting the clock Press and hold the TIME MODE button for Press the ENTER button. more than 2 seconds. The minute value blinks. “CLOCK SETTING” appears on the display. Press the Scroll buttons (k/j) to set the p The European model of this unit uses 24-hour “mili- current minute. -
Page 46: Using The Timer
Using the timer (1) p The unit can be programmed to turn on and off at spec- Press the Scroll buttons (k/j) to set the ified times. p Adjust the clock before setting the timer. minute of the start time and press the ENTER p If no action is taken for 20 seconds, timer setting will button. - Page 47 Press the Scroll buttons (k/j) to set the Press the Scroll buttons (k/j) to set the minute of the stop time and press the volume level and press the ENTER button. ENTER button. The timer setting is now stored in memory. The source name blinks.
- Page 48 Using the timer (2) Turning off the timer Prepare the source you want to play when the timer goes off. Press the TIMER button to turn the timer off. If you have selected “CD”, place a disc in the disc tray. If you have selected “USB”, connect a USB flash drive or an iPod.
-
Page 49: Troubleshooting
If it still does not operate correctly, contact the retailer where you pur- Will not play. chased the unit or TEAC customer support (See the back e Load a disc with the label side up. cover for contact information). - Page 50 Troubleshooting (2) MP3/WMA files Radio (SD card, USB flash drive, CD-R/RW) Cannot listen to any station or the signal is too weak. e Tune in a station properly. Will not play. e Check the file format. (See page 10) e Adjust the FM or AM antenna to the best reception position.
-
Page 51: Restoring Factory Default Settings
Restoring factory default settings If the unit does not operate properly, follow the procedures Unplug the power cord from the AC socket. below to restore the unit to its factory default settings. This might return it to ordinary operation. Plug the power cord into the AC socket again. -
Page 52: Specifications
Specifications Amplifier Playable files Output power ....25 W + 25 W (6 Ω, 1 kHz, 0.5%) Input sensitivity......340 mV/47 kΩ Format .
Need help?
Do you have a question about the CR-H260i and is the answer not in the manual?
Questions and answers