Table of Contents
Advertisement
Quick Links
Advertisement
Table of Contents

Subscribe to Our Youtube Channel
Related Manuals for Fimap MINNY 20


Summary of Contents for Fimap MINNY 20
- Page 1 USE AND MAINTENANCE MINNY 20 – 20 CB ED. 10-2007 Doc. 10006510...
- Page 2 The contained descriptions in the present publication are not binding. The company therefore reserves itself the right to bring in whatever moment possible organs changes, details or supplies of accessories, that it holds convenient for an improvement, or for any demand of constructive or commercial character.
-
Page 3: Table Of Contents
2. THE MACHINE DOES NOT CLEAN WELL ..............................19 3. THE SQUEEGEE DOES NOT DRY PERFECTLY..............................19 4. TOO MUCH FOAM IS GENERATED ................................19 BRUSH SELECTION AND USE .....................................20 WASTE DISPOSAL ......................................21 CE STATEMENT OF COMPLIANCE MODEL MINNY 20 CB ............................22 CE STATEMENT OF COMPLIANCE MODEL MINNY 20............................23... - Page 4 Receiving the machine Identification plate Immediately check, when receiving the machine, that all the material indicated on delivery documents has been received and also that the machine has not been damaged in transit. If it has been damaged, this damage must be immediately reported to the shipper and also to our customer service department.
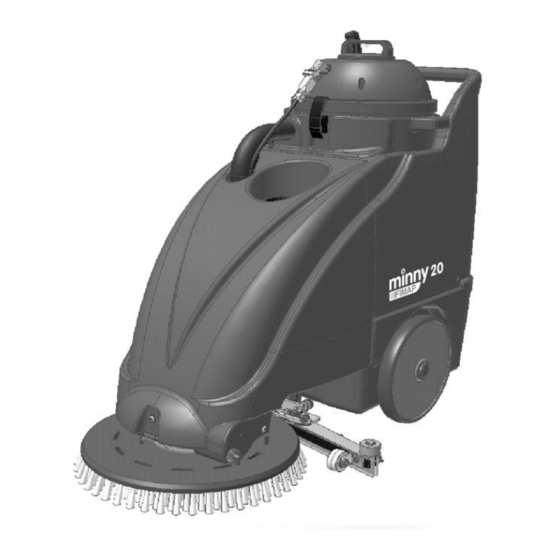
- Page 5 TECHNICAL DESCRIPTION Minny 20 Minny 20 CB Working width Squeegee width Working capacity, up to 1750 1750 Brush diameter Brush revolutions Pressure on the brush Brush motor, supply voltage Brush motor, rated power Drive type Semi-aut. Semi-aut. Maximum slope Suction motor, supply voltage...
-
Page 6: Symbols Used On The Machine
SYMBOLS USED ON THE MACHINE Cock symbol Used to indicate the cock opening solenoid valve switch Brush symbol Used to indicate the main/brush motor switch Battery symbol SYMBOLS USED IN THE MANUAL Indicates the waste disposal. Keep the regulations. . -
Page 7: General Safety Regulations
Dispose of consumables in accordance with existing laws. When, after years of precious work, a FIMAP machine is ready to be retired all of its component materials must be properly disposed of: they contain oils and electronic components. Remember that the machine itself was built using totally recyclable materials Use only the brushes supplied with the appliance or those specified in the instruction manual (page 21). -
Page 8: Preparing The Machine
PREPARING THE MACHINE 1. HANDLING THE PACKAGED MACHINE Figure 1 The machine is contained in a specifically designed package with platform for being handled by fork lifts. No more than two packages can be stacked. Total weight is 80 kg (without batteries) Package dimensions are: A : 1240 mm 660 mm... -
Page 9: Inserting The Batteries In The Machine
PREPARING THE MACHINE Figure 4 6. Check that the squeegee body is lifted. Otherwise use the control lever as described in the figure. Figure 5 7. Use a ramp to lower the machine from the platform, pushing it in reverse. Avoid violent blows to the base. -
Page 10: Ricarica Batterie
PREPARING THE MACHINE Figure 7 To insert the batteries proceed as follows: 1. Open the rear hook and pull out the battery compartment (1) 2. The machine is supported by stand (2) that automatically lowers when the battery compartment is removed 3. -
Page 11: Connecting The Battery/System Connector
PREPARING THE MACHINE 5. CONNECTING THE BATTERY/SYSTEM CONNECTOR Figure 11 Battery connector (2) must be connected to machine connector (1). 6. BATTERY CHARGE LEVEL GAUGE Figure 12 The battery charge level gauge operates with a microprocessor. The lighted LEDs on the display give an approximate reading of the level of charge: 4 = maximum charge, 3 = 3/4 charge, 2 = 2/4 charge, 1 = 1/4 charge,... -
Page 12: Adjusting The Height Of The Squeegee
PREPARING THE MACHINE Figure 14 Install the squeegee, threading the studs in their holes on the support. Before threading stud (1) release lock lever (2), rotating it counterclockwise. Connect the suction tube to the squeegee by threading the sleeve in body (3) 8. -
Page 13: Installing The Brush
PREPARING THE MACHINE 10. INSTALLING THE BRUSH Figure 17 Lift the machine (fig.3) and position the brush in the central part of the base. Lower the machine on the brush (fig.3). The brush will automatically hook up when the motor is actuated (fig.21-23). 11. -
Page 14: Operation
OPERATION 1. PREPARING TO WORK Check that the connectors (suction and supply cowlings) are correctly connected (fig.11-18) Figure 22 1. Press main/brush switch (1) 2. Press cock/solenoid valve switch (2) Figure 23 3. Use the lever to lower the squeegee body. The suction motor will start to operate. 2. -
Page 15: After Work Is Terminated
AFTER WORK IS TERMINATED Figure 27 After finishing work and before performing any type of maintenance: 1. Press cock push-button (2) to close the water exit solenoid valve. 2. Wait a few seconds and then lift the squeegee using the lever (fig.4) to turn the suction motor off. This lets the inside of the squeegee body tube to dry out. -
Page 16: Daily Maintenance
DAILY MAINTENANCE 1. CLEANING THE RECOVERY TANK WARNING: Always wear gloves when doing this operation to protect yourself from contact with hazardous solutions. Figure 29 Disconnect the power supply connector located between the suction cowling and the recovery tank (1). Remove the suction unit from the tank after freeing it from the two safety hooks (2) Figure 30 Rinse the inside of the tank with a jet of running water and drain directly using the tube... -
Page 17: Replacing The Rear Squeegee Rubber
DAILY MAINTENANCE 4. REPLACING THE REAR SQUEEGEE RUBBER Figure 33 The drying edge of the rear squeegee rubber can be changed if it is worn and no longer dries properly. To do this proceed as follows: 1. Pull out the squeegee body as specified in “CLEANING THE SQUEEGEE” 2. -
Page 18: Weekly Maintenance
WEEKLY MAINTENANCE 1. CLEANING THE SQUEEGEE TUBE Figure 36 1. If suction is inadequate check that the suction tube is not clogged. Clean out as necessary by introducing a jet of water from the top part of the tank. 2. CLEANING THE SOLUTION TANK Figure 37 1. -
Page 19: Checking Operation
CHECKING OPERATION 1. INSUFFICIENT WATER ON THE BRUSHES 1. Check that the main switches and solenoid valve are on (fig. 22) 2. Check that the cock is open (fig. 16) 3. Check that there is water in the solution tank. 2. -
Page 20: Brush Selection And Use
BRUSH SELECTION TABLE Machine No. Brushes Code Type of bristle Ø bristle Ø Brush Notes 405661 0.45 405654 20” 405658 Abrasive 423760 Drive disk Minny 20 Minny 20 CB 405644 405659 0.45 405645 405653 17” 405646 405647 Abrasive 405529 Drive disk... -
Page 21: Waste Disposal
WASTE DISPOSAL Product subject to WEEE 2002/96/CE normative... -
Page 22: Ce Statement Of Compliance Model Minny 20 Cb
CE STATEMENT OF COMPLIANCE model Minny 20 CB The undersigned company: FIMAP S.p.A. Via Invalidi del Lavoro No.1 37050 Santa Maria di Zevio (VR) states under its own exclusive responsibility that the product FLOOR SCRUBBING MACHINE model Minny 20 CB complies with the provisions of Directives: •... -
Page 23: Ce Statement Of Compliance Model Minny 20
CE STATEMENT OF COMPLIANCE model Minny 20 The undersigned company: FIMAP S.p.A. Via Invalidi del Lavoro No.1 37050 Santa Maria di Zevio (VR) states under its own exclusive responsibility that the product FLOOR SCRUBBING MACHINE model Minny 20 complies with the provisions of Directives: •... - Page 24 FIMAP spa Via Invalidi del Lavoro, 1 - 37050 S.Maria di Zevio (Verona) Italy Tel. +39 045 6060411 r.a. - Fax +39 045 6060417 - E-mail:fimap@fimap.com - www.fimap.com...
Need help?
Do you have a question about the MINNY 20 and is the answer not in the manual?
Questions and answers