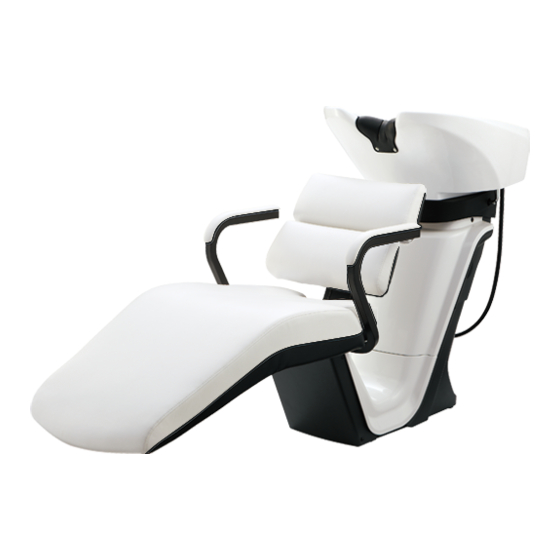
Takara Belmont RS III Operating Manual
Hide thumbs Also See for RS III:

Advertisement

Quick Links

(
Image is of
)
-
-
(
)
Image is of
-
-
This product is designed for shampooing and hair/scalp care.
Operating Manual
(
Image is of
-
-
Thank you for purchasing this Takara Belmont product.
The instructions contained in this booklet should be thoroughly read and understood
before use.
Using this product before reading this operating manual may result in an accident.
This product is an industrial shampoo unit designed for barbers and hair salons.
Only use this product for its intended purpose and do not use it for non-hairdressing work.
Keep this manual and refer back to them when required.

Table of Contents

Precautions for Plated Parts
)
Dimensions
MEMO
July 2015
Version 1

Advertisement

Table of Contents
loading

Summary of Contents for Takara Belmont RS III

  • Page 1: Table Of Contents

    Image is of Procedures for Daily Inspections MEMO Thank you for purchasing this Takara Belmont product. The instructions contained in this booklet should be thoroughly read and understood before use. Using this product before reading this operating manual may result in an accident.
  • Page 2: Description Of Warning Symbols

    These precautions are important for ensuring safety. Adhere to these precautions at all times. Takara Belmont is not responsible for any damage or risk to the person using this product or those around them due to accidents if this product is used without adhering to the "Safety Precautions", "Precautions for Use"...
  • Page 3 Warning Adjust the water temperature while Do not use hot water (boiling water) checking the temperature by hand. of 60 or higher. CAUTION Using hot water of 60 or higher may deform or When adjusting the temperature of the water, Hot water damage the parts such as the basin, shower head reduce the volume of water, point the shower...
  • Page 4 Caution Do not hit the unit with objects. Do not touch the hot water supply pipe or mixing pipe. Do not hit the unit with hard objects. Failure to follow this instruction may cause deformation or The hot water supply pipe or mixing pipe may damage to the unit.
  • Page 5: Precautions For Use

    Precautions for Use Caution Set the water temperature for this Do not use peppermint or aroma oil. product to 60 or less. Do not use peppermint or aroma oil containing Failure to follow this instruction may cause malfunctions menthol. Failure to take this precaution may or damage in parts such as the stop valve, check valve, damage the resin parts, such as the flexble pipe, and fauset.
  • Page 6 Caution Do not wet the shower head bracket Do not strike the resin (plated) parts with water. with a hard object. Do not wet the shower head bracket with water. Do not strike the resin (plated) parts, such as the Failure to follow this instruction may cause water Water control knob, with a hard object.
  • Page 7 Caution Do not leave the shower head Do not drop heavy objects on to the basin. immersed in water. Do not place or drop heavy objects on to the If pressure in the water pipes decreases due to basin. Failure to follow this instruction may cause repairs that follow water stoppages, the water in damage such as scratches or cracks to the basin.
  • Page 8: Precautions For Handling Synthetic Leather

    Precautions for Handling Synthetic Leather Handling precautions Stains caused by clothing dyes The synthetic leather of this product may become stained by direct contact with clothes or belts. If there is stains, wipe clean as quickly as possible with a 10% detergent solution diluted using water to prevent permanent staining. Take care of deformation or stains due to direct contact •...
  • Page 9: Before Using This Product

    Check to ensure that there are no flaws, cracks, or peeling of the plated surface of the knobs Caution before using the product. If peeling is observed, immediately stop using the product and contact your closest dealer or Takara Belmont. Continued operation may result in injuries. Example of Peeling of the Example of Flaws on the...
  • Page 10: Accessories

    Backrest Backrest Armre st p a d Armre s t Seat Seat Th e ill u str at ion s sho w t h e Th e ill u str at ion s sho w t h e AY-LU X / AY-P 0 73 X AY-S 1 95X / AY- P07 3X Backrest L um ba r...
  • Page 11: Preparations

    Preparations Attach neck cushion on the basin Chair Side As shown in the illustrations, check the proper Chair Side direction of the neck cushion and fit it to the basin along the basin edge. Neck Cushion Check the front and back. Basin Side When the cushion is mounted in Caution...
  • Page 12: How To Use

    How to Use Allow the customer to be seated in the chair and then apply the shampoo cloth. The customer may place the feet on the step as required. When seated, inform the customer not to place any weight on the backrest in advance. Caution Failure to take this precaution may result in the customer's body hitting the basin.
  • Page 13 After using the product, wipe off any moisture. - Moisture from the shower hose that dripped onto the floor. - Moisture adhered to the main unit cover and outside the basin. After use, be sure to wipe off any moisture from all parts other than the basin.
  • Page 14 Adjusting the volume of water, and adjusting the water temperature Push the knob to forward direction and adjust the volume of water according to an angle of the knob. < Output the water > < Close the water > Water control knob A gushing sound may be emitted from the main body depending on the environment or conditions that it is used in.
  • Page 15 Accumulating Hot Water To accumulate hot water for emulsification of hair color, rotate the drain cap in the clockwise direction to Drain cap Shower Hose Slot close the drain outlet. The amount of water should be below the level shown by the dotted line in the illustration on the right (just below the shower hose slot).
  • Page 16: Maintenance

    Maintenance Never use volatile chemicals such as thinners, alcohol, gasoline or kerosene, cleaning products such as abrasire wax , a sponge with a scourer, detergents that include organic solvents, Caution acidic, alkaline or chlorine-based detergents, or scouring pads. Failure to follow this instruction may cause scratches or discoloration.
  • Page 17 Drain cap Wash around the drain cap, and remove any hair or dirt from solvents. The drain cap is a consumable supply. Drain cap If it is extremely dirty, remove the packing from the drain cap, wash with detergent solution diluted using water, and rinse carefully with water.
  • Page 18 <The case of Spa-showerhead> [ Spa-showerhead is an optional part] Rotate and detach the sprinkling filter unit and remove the Showerhead Main Unit three parts (sprinkling filter unit, air bubble unit, and rubber O-ring gasket). Do not detach the O-ring.) Rubber Gasket Clean the sprinkling filter unit (with water).
  • Page 19 Synthetic leather parts Clean the leather every day after work. Leaving dirt uncleaned may cause mold to grow. Wipe with a soft, dry cloth or a damp cloth. If the leather is extremely dirty, wipe with a 10% detergent solution diluted using water, followed by a damp cloth, then wipe dry.
  • Page 20 Drain the water from the trap and clean the trap. Note After draining the water and cleaning the trap by According to the instractions of trap used,please care. removing dust and dirt, tighten the drain part firmly. The water in the trap serves to prevent odors from sewage water.
  • Page 21: Daily Inspections

    Daily Inspections To ensure that this product can be used for a long period of time, follow the procedures outlined in "Procedures for Daily Inspections" on page 35 to 36 of this instruction manual. Always inspect this product following the procedures outlined in "Procedures for Daily Inspections". Continuing to use this product without performing the daily inspections may cause malfunctions or accidents.
  • Page 22: Before Requesting Repairs

    Before Requesting Repairs If the following problems arise, conduct the checks outlined before requesting repairs. Symptom Check this Solution Is the water stop valve of the Open the water stop valves. Water does not come out. pipe open? Is the temperature setup of the Adjust the temperature setup of the The water temperature hot-water supply equipment proper?
  • Page 23: Disposing Of This Product

    Difference between hot-water supply pressure and water supply pressure: Within 0.2 MPa (2kgf/cm Weight Main unit Basin free tilt type 42.0kg Chair Chair (PRIME) 17.0kg Chair (ELITE) 18.5kg Chair (LUXIS) 9.0kg For details of the hot-water supply temperature, hot-water/water supply pressures, see the RS III Installation Instructions.
  • Page 24 Product Dimensions [Unit mm] Top View Side View 12° -8° Center of Drain Pipe Practice in Standing Posture: 600 or over, Sitting Posture: 630 or over 1254 Standing Posture: 2560 or over; Sitting Posture: 2590 or over Top View Side View 12°...
  • Page 25 Product Dimensions [Unit mm] Top View Side View Center of Drain Pipe Practice in Standing Posture: 600 or over, Sitting Posture: 630 or over Standing Posture: 2560 or over; Sitting Posture: 2590 or over...
  • Page 26: Procedures For Daily Inspections

    Procedures for Daily Inspections To ensure that this product can be used for a long period of time, conduct the inspections below. Inspect the product every day Inspection item Inspection method If the inspection results show defects Is the plating of the Visually check the water control Flaws, cracks, or peeling of the plated surface water control knob...
  • Page 27 Procedures for Daily Inspections (Continued) Items that must be inspected after closing for the day Inspection method Inspection item If the inspection results show defects Check that the drain is not blocked Remove the object that is blocking the drain. If the Is the drain blocked? with the drain cap, towel or drain is blocked, water that is turned on...
  • Page 28 Book Number...

This manual is also suitable for:

PrimeLuxisEliteAy-s195xAy-p073xAy-lux ... Show all

Table of Contents