Table of Contents
Advertisement
Quick Links
PRIME
●
(
)
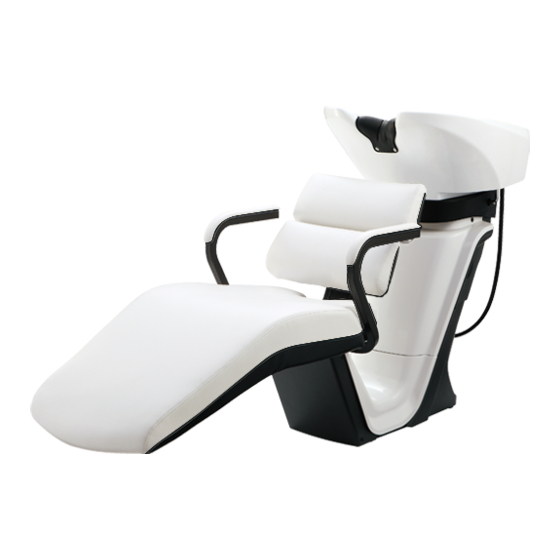
Image is of
AY-S195X
AY-P069X
ELITE
●
(
)
Image is of
AY-ELI
AY-P075X
This product is designed for shampooing and hair/scalp care.
Operating Manual
LUXIS
●
(
)
Image is of
AY-LUX
AY-P069X
AXIS
●
PRIMO
●
COMFORT
●
LITE
●
Thank you for purchasing this Takara Belmont product.
The instructions contained in this booklet should be thoroughly read and understood
before use.
Using this product before reading this operating manual may result in an accident.
This product is an industrial shampoo unit designed for barbers and hair salons.
Only use this product for its intended purpose and do not use it for non-hairdressing work.
Keep this manual and refer back to them when required.
Table of Contents
1
2021.09
Version 3
2
2
5
8
8
8
9
9
10
11
11
12
20
27
27
27
28
28
29
29
30
31
35
Advertisement
Table of Contents

Related Manuals for Takara Belmont RS III


Summary of Contents for Takara Belmont RS III
-
Page 1: Table Of Contents
COMFORT ● LITE ● Thank you for purchasing this Takara Belmont product. The instructions contained in this booklet should be thoroughly read and understood before use. Using this product before reading this operating manual may result in an accident. This product is an industrial shampoo unit designed for barbers and hair salons. -
Page 2: Description Of Warning Symbols
These precautions are important for ensuring safety. Adhere to these precautions at all times. Takara Belmont is not responsible for any damage or risk to the person using this product or those around them due to accidents if this product is used without adhering to the "Safety Precautions", "Precautions for Use"... - Page 3 Warning Do not use hot water (boiling water) Adhere to the following when of 60℃ or higher. operating the seat. C AU T ION Using hot water of 60℃ or higher may deform or When operating the seat, check and make sure Hot water damage the parts such as the basin, shower head that there are no people or objects around the...
- Page 4 Caution Do not hit the unit with objects. Do not touch the hot water supply pipe or mixing pipe. Do not hit the unit with hard objects. Failure to follow this instruction may cause deformation or The hot water supply pipe or mixing pipe may damage to the unit.
-
Page 5: Precautions For Use
Precautions for Use Caution Set the water temperature for this Do not use peppermint or aroma oil. product to 80℃ or less. Do not use peppermint or aroma oil containing Failure to follow this instruction may cause malfunctions menthol. Failure to take this precaution may or damage in parts such as the stop valve, check valve, damage the resin parts, such as the flexible pipe and thermostatic control water valve. - Page 6 Caution Do not wet the shower head bracket Do not strike the resin (plated) parts with water. with a hard object. Do not wet the shower head bracket with water. Do not strike the resin (plated) parts, such as the Failure to follow this instruction may cause water tap and thermostatic control knob leaks.
- Page 7 Caution Do not leave the shower head Do not drop heavy objects on to the basin. immersed in water. Do not place or drop heavy objects on to the If pressure in the water pipes decreases due to basin. Failure to follow this instruction may cause repairs that follow water stoppages, the water in damage such as scratches or cracks to the basin.
-
Page 8: Precautions For Handling Synthetic Leather
Precautions for Handling Synthetic Leather Handling precautions Stains caused by clothing dyes The synthetic leather of this product may become stained by direct contact with clothes or belts. If there is stains, wipe clean as quickly as possible with a 10% detergent solution diluted using water to prevent permanent staining. ... -
Page 9: Before Using This Product
If peeling is observed, immediately stop using the product and contact your closest dealer or Takara Belmont. Continued operation may result in injuries. E x amp l e o f s cr atc h e s on t h e... - Page 10 PRIMO COMFORT Backrest Backrest L u mba r L umb a r Ar mr e s t pa d Ar mr e s t Ar mr e s t Seat L e g r e s t l e ver Seat T h e illus t r at i on s sh ow t he Legrest...
-
Page 11: Accessories
Accessories □Neck cushion…1 □Drain cap…1 □Hair catcher…1 □ Trickle stopper rubber…1 □Wrench…1 □Hexagonal-head wrench…1 □Installation instructions…1 □Operating Manual…1 □Setting sheet…1 □Shower Head Cleaning Instruction Manual…1 □Operation Instruction Manual for Trickle Stopper Rubber …1 Preparations ■ Attach neck cushion on the basin Chair Side As shown in the illustrations, check the proper Chair Side... -
Page 12: How To Use
How to Use ■Operation Procedures Basin with lock tilt function To prevent accidents, the customer should be informed before being seated that the seat Caution will slide. Allow the customer to sit in the chair and then apply the shampoo cloth. The customer may place the feet on the step. - Page 13 Hold the seat slide handle with your hand and move it back and forth, as required, to adjust the amount of the slide. When sliding the seat, be sure to hold the customer's head with your hand. Failure to Caution To be Fixed take this precaution will result in an additional load on the customer's neck.
- Page 14 While holding the seat slide handle, release the lock lever. Restore the seat slowly back to the initial position, while raising the customer by supporting the head. When sliding the seat, do not put your hand close to any moving parts. Failure to take this Caution precaution may lead to catching your hand in the moving parts resulting in personal injury.
- Page 15 Basin with free tilt function Allow the customer to be seated in the chair and then apply the shampoo cloth. The customer may place the feet on the step as required. When seated, inform the customer not to place any weight on the backrest in advance. Caution Failure to take this precaution may result in the customer's body hitting the basin.
- Page 16 After using the product, wipe off any moisture. - Moisture from the shower hose that dripped onto the floor. - Moisture adhered to the main unit cover and outside the basin. - Moisture collected in the water catcher. Water Catcher ...
- Page 17 ■Using the Dual Function Shower Head Changing the selection switch position switches between Shower Mode and Low-splash Mode. Protrusion Selection Switch <Shower Mode> <Low-splash Mode> Shower head ・ Press the switch on the side ・ Press the switch on the flat side. Shower Head Plate with the protrusion.
- Page 18 ■Adjusting the water temperature (excluding AY-P073X,AY-074X) Turn the thermostatic control knob in the H or C direction to set the temperature to an appropriate level. (C) Cold When adjusting the water temperature, reduce the (H) Hot volume of water, point the shower head away from Caution the customer and check the temperature by hand.
- Page 19 ■Adjusting the volume of water, and adjusting the water temperature (AY-P073X,AY-074X) Push the knob to forward direction and adjust the volume of water according to an angle of the knob. Knob Push Faucet A gushing sound may be emitted from the main body depending on the environment or conditions that it is used in.
- Page 20 ■To Fill up the Basin with Water Drain cap Shower Hose Slot To fill the basin with water, rotate the drain cap in the clockwise direction to close the drain outlet. The amount of water should be below the level shown by the dotted line in the illustration below (just below the shower hose slot).
-
Page 21: Maintenance
Maintenance Never use volatile chemicals, such as thinner, alcohol, remover, gasoline, and kerosene, acid, alkaline or chlorine-based detergents, antiseptic solution strongly corrosive to metals Caution (Povidone Iodine, sodium hypochlorite, etc.), waxes containing abrading agent, sponges containing abrading agent and scrubbing brushes, or other cleaning tools. Failure to follow this instruction may cause peeling or discolouration. - Page 22 ■ Basin Wipe any dirt clean using detergent diluted with water. Area of Fixing Pins If streaked scratches appear due to contact with metallic objects such as watch bands, rub the area with a nylon scourer. Do not use a metallic scourer or sandpaper, Caution as this will damage the basin.
- Page 23 ■ Water Catcher The product is provided with a water catcher to prevent water leaks from the neck area trickling onto the cover or the floor when shampooing. The amount of water that can accumulate in the water catcher is limited. Be sure to wipe off the Caution water or clean the catcher to prevent contamination after finishing shampooing.
- Page 24 Rotate and loosen the air bubble fixture with the wrench. Loosening Remove the three parts (rubber gasket, air bubble unit, and air bubble fixture) and wash with water using a nylon or similar brush. The air bubble unit should be rinsed with running water in the direction shown in the illustration below: Tightening Running Water...
- Page 25 ■Maintenance of the inside of the main unit <water draining and cleaning procedures> excluding AY-P073X,AY-P074X To use the basin for a long period of time, clean the strainer (inside the check valve) regularly. If temperatures are expected to drop below freezing in cold regions, drain the water from the check valve. In cold regions, always drain the water as a measure to prevent freezing.
- Page 26 Close the hot water and water stop valves. To prevent water leakage, always check that the stop valves are completely closed Caution before cleaning or draining the water from Check Valve the strainer. Loosen Attach Clean the strainer. When the strainer is detached, the water in the pipe will come Tighten Detach out.
-
Page 27: Daily Inspections
Daily Inspections To ensure that this product can be used for a long period of time, follow the procedures outlined in "Procedures for Daily Inspections" on page 35 to 36 of this instruction manual. Always inspect this product following the procedures outlined in "Procedures for Daily Inspections". Continuing to use this product without performing the daily inspections may cause malfunctions or accidents. -
Page 28: Before Requesting Repairs
Before Requesting Repairs If the following problems arise, conduct the checks outlined before requesting repairs. Symptom Check this Solution Open the water stop faucet. Is the water stop faucet of the ⇒ Water does not come out. (See pages 25 and 26.) pipe open? Is the temperature setup of the Adjust the temperature setup of the... -
Page 29: Disposing Of This Product
Disposing of This Product When disposing of this product or replaced parts, adhere with current regulations and dispose of them appropriately. After-sales Service To request after-sales service, contact your local Takara Belmont dealer. -
Page 30: Specifications
(※The chair weight does not include the weight of step and leg rest) Step (floor step) 3.0kg Step (U-step) 2.0kg Step (Double step) 2.5kg Step (Leg rest) 6.0kg ※For details of the hot-water supply temperature, hot-water/water supply pressures, see the RS III Installation Instructions. -
Page 31: Dimensions
Product Dimensions AXIS ■Top View [Unit : mm] ※Basin Unit : AY-RS3-1 ■Side View L:58゚/S:56゚ Practice in Standing Posture: 600 or over, Sitting Posture: 630 or over 1375(U-Step Specification) 1517(Double Step Specification) Standing Posture: 2560 or over; Sitting Posture: 2590 or over ※The dimensions are subject to slight fluctuations according to the products. - Page 32 Product Dimensions COMFORT [Unit : mm] ■Top View ■Side View L:58゚/S:56゚ Centre of Drain Pipe Practice in Standing Posture: 600 or over, Sitting Posture: 630 or over 1660 Standing Posture: 2760 or over; Sitting Posture: 2790 or over ※The dimensions are subject to slight fluctuations according to the products. ※The dimensions in parentheses indicate the dimensions when the basin is tilted forward (only for the lock-tilt specification).
- Page 33 Product Dimensions PRIME [Unit : mm] ■Top View ■Side View 12° (0° ) -8° Centre of Drain Pipe Practice in Standing Posture: 600 or over, Sitting Posture: 630 or over 1254 Standing Posture: 2560 or over; Sitting Posture: 2590 or over ELITE ■Top View ■Side View...
- Page 34 Product Dimensions LUXIS [Unit : mm] ■Top View ■Side View 12° (0° ) -8° Centre of Drain Pipe Practice in Standing Posture: 600 or over, Sitting Posture: 630 or over 1195 Standing Posture: 2560 or over; Sitting Posture: 2590 or over...
-
Page 35: Procedures For Daily Inspections
Procedures for Daily Inspections To ensure that this product can be used for a long period of time, conduct the inspections below. ■Inspect the product every day Inspection item Inspection method If the inspection results show defects Is the plating of the Visually check the tap Scratches, cracks, or peeling of the plated surface □... - Page 36 (see page Leaving the spray nozzle uncleaned will lead to nozzle? 23, 24). blockage, and water may not be output from the shower head properly. TAKARA BELMONT CORPORATION 1-1, 2-Chome, Higashi-shinsaibashi,Chuo-ku,Osaka,Japan TEL : +81-6-6213-5945 FAX : +81-6-6212-3680 Printed in Japan 1E02VXA0...
Need help?
Do you have a question about the RS III and is the answer not in the manual?
Questions and answers