
Related Manuals for Thermo Scientific Dionex RFC


Summary of Contents for Thermo Scientific Dionex RFC
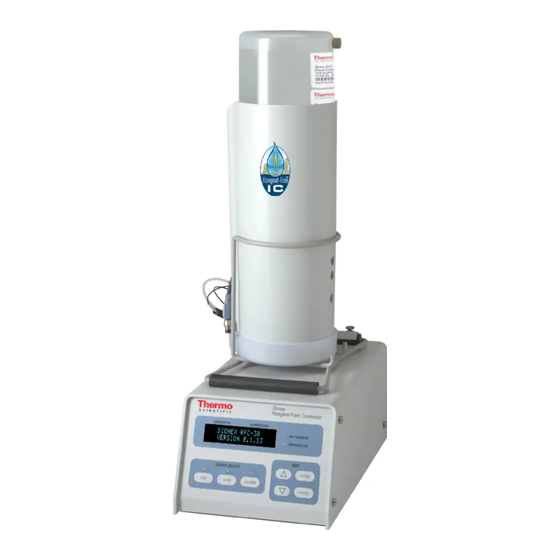
- Page 1 Dionex Reagent-Free Controller Operator’s Manual Document No. 031880 Revision 04 January 2012...
- Page 2 © 2012 by Thermo Fisher Scientific Inc. All rights reserved. PeakNet, and SRS are registered trademarks of Thermo Fisher Scientific Inc. in the United States. Windows is a registered trademark of Microsoft Corporation in the United States and other countries. VELCRO is a registered trademark of Velcro Industries B.V.
-
Page 3: Table Of Contents
Dionex RFC Features ........ - Page 4 Replacing an EGC Holder ......59 Dionex RFC Specifications ........62 Installation .
-
Page 5: Introduction
Electrolytic Suppressor or a Thermo Scientific Dionex SRS™ Self-Regenerating Suppressor. • The Dionex RFC-30 controls a Dionex AES or Dionex SRS, as well as an Thermo Scientific Dionex EluGen eluent generator cartridge (EGC) and a Thermo Scientific Dionex CR-TC Continuously Regenerated Trap Column. -
Page 6: Safety Messages And Notes
Dionex Reagent-Free Controller Safety Messages and Notes This manual contains warnings and precautionary statements that can prevent personal injury and/or damage to the Dionex RFC when properly followed. Safety messages appear in bold type and are accompanied by icons, as shown below. - Page 7 Introduction Warnhinweise in Deutsch Bedeutet unmittelbare Gefahr. Mißachtung kann zum Tod oder schwerwiegenden Verletzungen führen. Bedeutet eine mögliche Gefährdung. Mißachtung kann zum Tod oder schwerwiegenden Verletzungen führen. Bedeutet eine mögliche Gefährdung. Mißachtung kann zu kleineren oder mittelschweren Verletzungen führen. Wird auch verwendet, wenn eine Situation zu schweren Schäden am Gerät führen kann, jedoch keine Verletzungsgefahr besteht.
-
Page 8: Safety Labels
EN 61010-1:2001 (safety), CAN/CSA-C22.2 No. 1010.1-92+A2:97 (safety), UL 61010C-1:2002 R8.02 (safety), and EN 61326:1997+A1:1998 (susceptibility and immunity). The symbols below appear on the Dionex RFC or on Dionex RFC labels. Alternating current Protective conductor terminal (earth ground) Power supply is on Power supply is off Indicates a potential hazard. -
Page 9: Dionex Rfc Features
Dionex RFC Features Overview of Device Control The Dionex RFC can provide power to a device (suppressor, EGC, or CR-TC) only when the pump flow is on. A TTL or AC connection between the Dionex RFC and the pump or DX-120 signals the Dionex RFC when the pump flow is on. -
Page 10: Front Panel
RFC ENABLED LED CANCEL (On)—Indicates the Dionex RFC is ready to supply power to the installed devices. Figure 2. Dionex RFC Front Panel GRADIENT ON LED (RFC-30 only) (On)—Indicates a gradient is in progress. DEVICE SELECT (EGC, CR-TC, AES/SRS) Buttons turn on or off control of an installed device. -
Page 11: Display Screens
The list wraps around if you scroll down from the last screen or up from the first screen. Figure 3 lists the available screens for the Dionex RFC-10 and the Dionex RFC-30. Dionex RFC-10 Dionex RFC-30... -
Page 12: Rear Panel
Pump input connects to a TTL output on the pump or to a DX-120 adapter cable. The pump or DX-120 then signals the Dionex RFC when the pump flow is on. The connector is used only with Dionex RFC-30 eluent generator Gradient Doc. -
Page 13: Eluent Generator (Dionex Rfc-30 Only)
It connects to a TTL (or relay) output and is used to signal the Dionex RFC-30 to run a gradient. See Section 3.7 for how to set up and run gradients. Eluent Generator (Dionex RFC-30 Only) The eluent generator produces high-purity eluents online, using only deionized water as the carrier. - Page 14 Figure 6). For details about the CR-TC, refer to the CR-TC manual (Document No. 031910), on the Thermo Scientific Reference Library DVD (P/N 053891). The CD is provided in the Dionex RFC Ship Kit (Dionex RFC-10, P/N 060310; Dionex RFC-30, P/N 060299).
- Page 15 Dionex RFC Features • Deionized water flows from the pump into the EGC , which generates the programmed concentration of eluent. • Eluent exits the cartridge and flows through the CR-TC , through the EGC ...
-
Page 16: Operation
(see Section 3.2) displays the suppressor current and EGC concentration values as they count up. In some cases, the Dionex RFC is not able to ramp up to the set point at the maximum rate. This occurs because the fast increase in current causes the Dionex RFC to reach its maximum voltage limits. - Page 17 Concentration Suppressor Type EGC Type Figure 7. Example Default Status Screen (Dionex RFC-30 Shown) If control for the eluent generator is not installed (as in the Dionex RFC-10), the side of the screen is blank (see Figure 8). If GENERATOR...
-
Page 18: Dionex Rfc-10 Operation
(see Figure 10). Press any key to display the default status screen. Figure 10. Screen Saver Dionex RFC-10 Operation The Dionex RFC-10 controls the suppressor by supplying current to the device. The front panel LEDs indicate when the suppressor is on (current is being supplied):... -
Page 19: Dionex Rfc-10 Setup
Turning off the pump automatically turns off the suppressor. When priming the pump, turn off the suppressor. During priming, the pump is on and the Dionex RFC is enabled, but there is no flow to the device. Dionex RFC-10 Setup... - Page 20 NOTE The SRSXCALC and AESXCALC types are not used with the Dionex RFC-10. 4. Press to save the entry. ENTER Setting the Dionex RFC-10 Flow Rate The flow rate screen lets you enter the flow rate used in your application. 1. Press until the pump flow rate screen (see Figure 14) is displayed.
- Page 21 Refer to the suppressor manual for the recommended current setting for your application. Suppressor manuals are included on the Thermo Scientific Reference Library DVD (P/N 053891). Before setting the current, verify that the correct suppressor type and flow rate are selected.
-
Page 22: Dionex Rfc-30 Operation
AES/SRS immediately. Dionex RFC-30 Operation The Dionex RFC-30 can control a suppressor, an eluent generator, and a CR-TC. The Dionex RFC-30 controls these devices by supplying current (to the suppressor and eluent generator) and voltage (to the CR-TC). The front panel LEDs indicate when a device is on (current or voltage is... - Page 23 DEVICE SELECT pump. When priming the pump, turn off all devices (suppressor, EGC, and CR-TC). During priming, the pump is on and the Dionex RFC is enabled, but there is no flow to the devices. Doc. 031880-04 1/12...
-
Page 24: Dionex Rfc-30 Setup
For optimal suppressor performance, use the suppressor current recommended for your target application. The setting to use depends on several variables: the suppressor type, the column, the eluent type and concentration, and the flow rate. The Dionex RFC-30 provides two methods for setting the suppressor current: •... - Page 25 Operation Note Regarding the “NONE” EGC and Suppressor Types Before initial setup, the Dionex RFC-30 sets the EGC and suppressor types to to designate that the types have not yet been selected. After initial setup, the NONE Dionex RFC-30 sets the suppressor type to...
- Page 26 Dionex Reagent-Free Controller The suppressor type, EGC type, and flow rate determine the maximum eluent concentration. However, the maximum never exceeds 100 mM. Suppressor Type EGC type Pump Flow Rate Maximum Eluent Concentration Dionex 0.1 – 0.25 mL/min Max Conc = 30/Flow ASRS_2MM 0.26 –...
- Page 27 Operation The Dionex RFC-30 uses the formulas shown in Table 6 to calculate current ranges. The Dionex RFC-30 sets the current to the minimum value. You can select a different value, provided it is within the range. If the calculated maximum current exceeds the absolute maximum allowed for the suppressor type (see Table 7), the absolute value is used for the upper limit of the range.
- Page 28 (EGC type, suppressor type, and flow) determine the upper limit for eluent concentration (see Table 5). • The suppressor current set by the Dionex RFC-30 is the lower limit of the calculated current range (see Table 6). •...
- Page 29 Example Dionex RFC-30 Setup for Automatic Calculation This example shows how to set up a Dionex RFC-30 for use with a system with the following operating conditions: AS18 column, 2-mm ASRS suppressor, 1.0 mL/min flow rate, and a KOH EGC.
- Page 30 Dionex Reagent-Free Controller To set the suppressor type: 1. Press to display the suppressor type screen. Figure 19. Suppressor Type Screen 2. Press . The entry field is highlighted. ENTER SUPP TYPE = Figure 20. Selecting the Suppressor Type ...
- Page 31 Operation To set the eluent concentration and check the calculated current: 1. Press to display the EGC concentration screen. Concentration limits for the selected EGC type, suppressor type, and flow rate Figure 24. EGC Concentration Screen 2. Press ENTER ...
- Page 32 Dionex Reagent-Free Controller Setting Up the Dionex RFC-30 for Manual Current Entry If you do not want the Dionex RFC-30 to automatically calculate and set the suppressor current as described in the previous section, you can turn off automatic calculation. To do this, select one of the following...
-
Page 33: Gradient Operation (Dionex Rfc-30 Only)
Gradient Operation (Dionex RFC-30 Only) A change in the eluent concentration during an analysis is referred to as a gradient. The Dionex RFC can run a linear ramp gradient, which is a uniform change in eluent concentration over a specified time. - Page 34 Dionex Reagent-Free Controller Note Regarding CO3 Cartridges is the selected EGC type, gradient operation is not available and the EGC gradient time screen displays (see Figure 32). ISOCRATIC ONLY Figure 32. EGC Gradient Time Screen: CO3 Cartridge Installed Setting Up a Gradient 1.
- Page 35 Final Gradient Concentration Figure 36. EGC Final Concentration Screen NOTE If the Dionex RFC-30 is set up for automatic calculation (see “Setting Up the Dionex RFC-30 for Automatic Current Calculation” on page 24) the Dionex RFC-30 uses the highest concentration entered to calculate the suppressor current.
- Page 36 LEDs are on. RFC ENABLED 3. Turn on (activate) the TTL. This signals the Dionex RFC to Gradient start the gradient. See “Controlling the Gradient TTL” on page 32 for how to turn on and off the TTL.
- Page 37 Figure 37. DX-120 Method Setup Example 4. In the Editor, enter two timed events (or edit existing events). In the first event, select the Dionex RFC Gradient output check box to turn on the TTL. In the second event, clear the check box to turn...
- Page 38 Dionex RFC, or create a new program. 2. Add two commands to the program. The first command turns on the TTL (or relay) output that is connected to the Dionex RFC Gradient TTL input. The second command turns off the TTL (or relay) output.
- Page 39 Dionex RFC Gradient input. In this example, the Dionex RFC Gradient TTL input is connected to the TTL1 output on an IS25 pump. 1. From the front panel of the pump, go to the screen.
-
Page 40: Monitoring Eluent Generator Cartridge Use
• When you install a new cartridge, set the cartridge ion count to 100%. As the cartridge is used, the Dionex RFC decrements the percentage. • If you remove a partially used cartridge, note the percentage of ions remaining. Then, if you later reinstall the cartridge, re-enter the percentage. -
Page 41: Shutting Down The Dionex Rfc
Shutting Down the Dionex RFC Setting the Ion Count Percentage 1. Press to display the EGC ion count screen (see Figure 41). Percentage of ions remaining in the cartridge Figure 41. EGC Ion Count Screen 2. Press ENTER value on the screen is highlighted. -
Page 42: Troubleshooting
Other messages remain for three seconds only, and then the display reverts to the previous screen. For some errors, the Dionex RFC displays a relevant screen as a prompt to enter needed information (see error 105 for an example). - Page 43 • ERR:OVER VOLTAGE SUPP [120] This error appears if you press the button AES/SRS DEVICE SELECT and the Dionex RFC cannot establish a connection with the suppressor. To troubleshoot: • Check the suppressor cable connections.
- Page 44 • ERR:OVER POWER SUPP [122] This error appears when, in order to maintain the selected current, the Dionex RFC is required to apply a higher voltage than the suppressor can support. To troubleshoot: •...
- Page 45 • ERR:OVER VOLTAGE EGC1 [141] This error appears if you press the button AES/SRS DEVICE SELECT and the Dionex RFC cannot establish a connection with the suppressor. To troubleshoot: • Check the suppressor cable connections.
- Page 46 This warning informs you when it is time to replace a cartridge that is nearing depletion. In order for the Dionex RFC to determine when the ion percentage is low, you must set the percentage to 100 when a new cartridge is installed.
- Page 47 If the error persists after replacing the EGC, call Thermo Fisher Scientific for assistance. • ERR: OVERPOWER EGC1 [148] This error appears when, in order to maintain the selected current, the Dionex RFC is required to apply a higher voltage than the EGC can support. To troubleshoot: •...
- Page 48 Dionex Reagent-Free Controller • ERR: NO BOARD PRESENT [150] The Dionex RFC does not recognize the installed electronics board(s) or no board is installed. To troubleshoot: • If this error appears, call Thermo Fisher Scientific for assistance. The Dionex RFC electronics components cannot be serviced by the user.
-
Page 49: Other Operating Problems
For the Dionex AES, the maximum current allowed is 150 mA. For the SRS, the maximum current is 500 mA. If you are using a Dionex RFC-30 that is set up for automatic current calculation, also check the settings for flow rate and EGC concentrations. - Page 50 See Section 3.4 for Dionex RFC-10 setup or Section 3.6 for Dionex RFC-30 setup. Leakage from the degas Replace the EGC holder (P/N 057931) (see assembly in the EGC holder.
-
Page 51: Service Procedures
Service Procedures Service Procedures This chapter describes Dionex RFC service and repair procedures that the user can perform. All procedures not included here, including electronics-related repair procedures, must be performed by Thermo Fisher Scientific personnel. For assistance, contact Technical Support for Dionex products. In the U.S. and Canada, call 1-800-346-6390. -
Page 52: Calibrating The Dionex Rfc
6. Select the computer serial port and click . A Moduleware download dialog box appears. 7. Click to start the download. When complete, the Dionex RFC screen displays the new Moduleware version number. 8. Set the button on the Dionex RFC rear panel to Download/Operation (out) position. -
Page 53: Changing Main Power Fuses
2. The fuse holder is part of the main power receptacle (see Figure 43) on the Dionex RFC rear panel. To remove the fuse holder, squeeze the tab on the top of the holder to release it and pull the holder straight out of its compartment. -
Page 54: Replacing An Egc
If you reinstall the EGC later, re-enter this percentage on the screen. See Section 3.8 for details. 2. Turn off the power to the Dionex RFC-30. 3. Disconnect the Dionex RFC-30 cable from the EGC cable. - Page 55 EGC OUT outlet ports. 8. Follow the instructions in the EGC manual (Document No. 031908), on the Thermo Scientific Reference Library DVD (P/N 053891), to prepare an expended EGC for disposal or to store a partially used EGC for later use.
- Page 56 Dionex Reagent-Free Controller 11. Connect EGC IN the EGC INLET EGC IN port (see INLET Port Figure 12). Figure 47. EGC Inlet Connection 12. Locate the yellow 0.5 mL/min, 1000 Pressure Restrictor psi (7 MPa) Coil pressure restrictor coil (P/N 053765) in the Dionex RFC-30 Ship Kit OUTLET...
- Page 57 EGC cable. Push the EG-1 two cables together and twist the locking ring to connect them. 4. Turn on the power to the Dionex RFC-30. 5. Go to the flow screen and set the flow rate to 1 mL/min. Doc. 031880-04 1/12...
- Page 58 CR-TC. 8. Turn on the pump. 9. Press the button on the Dionex RFC-30 front EGC DEVICE SELECT panel to turn on the EGC. 10. Run at the selected settings (1 mL/min at 50 mM) for 30 min.
-
Page 59: Replacing A Cr-Tc
Figure 52. EGC Ion Count Screen Replacing a CR-TC 1. Turn off the power to the Dionex RFC. 2. Follow the instructions in Section 6.4, Steps 3 through 7 to disconnect the EGC cable, cap the EGC vent opening, remove the EGC from the holder, and disconnect the inlet and outlet tubing. - Page 60 Dionex Reagent-Free Controller 6. Lift the holder out of the Disconnect liquid rack, turn it upside lines from 4 ports down, and set it on the workbench. 7. Grasp the top of the CR-TC and lift up to disconnect it from the holder.
- Page 61 Service Procedures 12. Feed the CR-TC cable through the slot on the side of the EGC holder (see Figure 55). 13. Turn the EGC holder right side up. CR-TC Cable Figure 55. CR-TC Cable 14. Reconnect the lines to the EGC inlet and outlet EGC IN EGC OUT ports.
- Page 62 8. Connect the cable from the CR-TC to the cable from the CR-TC Dionex RFC and connect the cable from the EGC to the Dionex RFC cable. Push two cables together and twist the locking ring to EG-1 connect them.
-
Page 63: Replacing An Egc Holder
Service Procedures Replacing an EGC Holder 1. Turn off the power to the Dionex RFC. 2. Disconnect the holder liquid lines: • Disconnect from the port TO SRS/AES REGEN OUT REGEN OUT on the suppressor. • Disconnect from port on the injection valve. - Page 64 Dionex Reagent-Free Controller 9. Turn the new holder upside down (see Figure 56) and connect Unions the liquid lines to the CR-TC. NOTE To help retain the fittings and ferrules on the lines, remove the union from each line just before connecting the line to a port.
- Page 65 4 to 6 inches. 21. Reconnect the CR-TC and EGC cables. 22. Connect the holder liquid lines to the pump, suppressor, injection valve, and gas separator waste tube assembly. 23. Turn on the power to the Dionex RFC. Doc. 031880-04 1/12...
-
Page 66: Dionex Rfc Specifications
90 – 264 Vac, 47 – 63 Hz Maximum AC Power Draw 45 W Maximum AC Current Draw 0.75 A Typical AC Current Draw Dionex RFC-10: 0.4 A Dionex RFC-30: 0.5 A Output Operating Range AES: : 0 – 150 mA, 0 – 50 VDC SRS: 0 –... -
Page 67: Installation
Service Procedures Installation NOTE These installation instructions are also shipped with the Dionex RFC as a printed manual, (Document No. 031895). NOTE In this appendix, the symbol indicates information that pertains to the RFC-30 only. Dionex RFC Cable Connections AES/SRS... -
Page 68: Dx-320, Dx-500, And Dx-600 Ttl Connections
4. If you are installing a Dionex RFC in a DX-320, DX-500, or DX-600 system, go on to Section B.2. 5. If you are installing a Dionex RFC in a DX-120, go to Section B.3. DX-320, DX-500, and DX-600 TTL Connections NOTE For DX-120 TTL connections, go to Section B.3. - Page 69 TTL-2 out to enable and disable the Dionex RFC. 5. Route the TTL cable(s) from the Dionex RFC rear panel to the pump or combination pump/detector electronics chassis. 6. Connect the red-and-black cable to .
-
Page 70: Ttl Connections
Dionex Reagent-Free Controller DX-120 TTL Connections NOTE See Section B.2 for DX-320, DX-500, or DX-600 TTL connections. NOTE: If TTL-2 OUT is already in use, connect the gradient TTL cable to TTL-1 OUT Figure 62. DX-120 TTL Connections Overview 1. Locate the two TTL Yellow-and-Black cables in the Ship Kit Twisted Wire... - Page 71 Service Procedures 2. Connect one end of the red-and-black TTL cable to the Pump input on the Dionex RFC rear panel (see Figure 64). Connect one end of the yellow-and-black TTL cable to the TTL input (see Figure 64). Gradient NOTE TTL cables are color coded for easier identification, but are identical in all other respects.
- Page 72 (see Figure 65). 7. Connect the black 4-pin connector on the adapter cable to the DX-120 connector (see Figure 65). SRS A NOTE To install the Dionex RFC-30 for Column B in a dual-column configuration, connect the adapter cable to SRS B 8.
-
Page 73: Power Connection
1. Connect the power cord (IEC 320 C13) from the main power receptacle on the rear panel to a grounded power source. 2. Turn on the power to the Dionex RFC and to all other system modules. SHOCK HAZARD—To avoid electrical shock, use a grounded receptacle. -
Page 74: Pump Setup
0 FLOW turns on TTL2 when the flow is on. This enables the Dionex RFC. When the pump flow is off (0 flow), the pump turns off TTL2 and the Dionex RFC is disabled. Doc. 031880-04 1/12... - Page 75 Dionex chromatography software, pressure limits can also be set from the software. 3. If you are installing a Dionex RFC-10, go on to Section B.6. If you are installing a Dionex RFC-30, go on to Section B.7. Doc. 031880-04 1/12...
-
Page 76: Dionex Rfc-10 Initial Setup
DIP Switch 1 Figure 69. DX-120 High and Low Pressure Alarm DIP Switch Settings If you are installing a Dionex RFC-10, go on to Section B.6. If you are installing a Dionex RFC-30, go on to Section B.7. Dionex RFC-10 Initial Setup NOTE See Section B.7 for Dionex RFC-30 setup. - Page 77 Service Procedures Example Initial Setup for Dionex RFC-10 This example shows how to set up a Dionex RFC-10 for use with a system with the following operating conditions: AS18 column, 2-mm ASRS suppressor, 1.0 mL/min flow rate, and 47 mM KOH eluent.
-
Page 78: Dionex Rfc-30 Initial Setup
10. Press to select the current, for example, 117 mA. Press ENTER Figure 75. Example Suppressor Current Selection Dionex RFC-30 Initial Setup Set the EGC Type 1. From the default screen, press twice to display the generator type screen. - Page 79 Service Procedures Set the Initial Flow Rate 1. Press three times to display the pump flow screen. Figure 79. Pump Flow Screen 2. Press ENTER 3. Press to select a flow rate of 1.00 mL/min. Note: This is the flow rate required for initial set up of the EGC.
-
Page 80: Dionex Rfc-30 Eluent Generator Installation
Dionex Reagent-Free Controller Dionex RFC-30 Eluent Generator Installation Figure 83 shows the controller and the components used for installing an eluent generator. EGC Rack EGC Holder with EGC Degas Assembly Drip Tray Reagent-Free Controller Bracket Luer Vent CR-TC Fittings Tubing... - Page 81 Service Procedures EGC VENT Send To Waste INLET OUTLET Connect To TO PUMP/ Pump Outlet DAMPER TO DEGAS ELUENT IN DEGAS TO DEGAS ELUENT OUT DEGAS ELUENT OUT CR-TC Regen In TO CR-TC Eluent Out TO CR-TC ELUENT OUT ELUENT IN WASTE, (yellow) (red)
- Page 82 Dionex Reagent-Free Controller Installing the CR-TC 1. Turn the EGC holder upside down to view the bottom of the holder (see Figure 85). Unions Metal stud for mounting the CR-TC Figure 85. EGC Holder (upside down) 2. Before installing the CR-TC, notice the opening on the CR-TC mounting plate (see Figure 86).
- Page 83 Service Procedures 4. With the CR-TC oriented as shown in Figure 87, connect the lines to the corresponding ports on the CR-TC. Match the color coded labels on the EGC holder lines to the color coded labels for the CR-TC ports.
- Page 84 Dionex Reagent-Free Controller 6. Feed the CR-TC cable through the slot on the side of the EGC holder (see Figure 89). CR-TC Cable Figure 89. Installing the CR-TC 7. Turn the EGC holder right side up. 8. Pull the bundled liquid lines from inside the holder to the outside. Installing the EGC 1.
- Page 85 Figure 91. EGC Inlet Connection 3. Locate the yellow 0.5 mL/min, 1000 psi (7 MPa) pressure restrictor coil (P/N 053765) in the Dionex RFC-30 Ship Kit. Connect this coil to the EGC port (see Figure 48). Note: This is a temporary...
- Page 86 EGC as you turn it over. Figure 93. EGC Installation 6. Connect the cable from the Dionex RFC-30 rear panel to the EG-1 EGC cable exiting the holder. To connect the cables, push them together and twist the locking ring.
- Page 87 3. Turn on the pump. 4. Press the button on the Dionex RFC-30 front EGC DEVICE SELECT panel to turn on the EGC. 5. Run the EGC at the initial flow rate and concentration settings (1 mL/min at 50 mM) for 30 min.
- Page 88 12. Reinstall the EGC in the holder. Installing the EGC Holder in the Rack 1. Set the EGC rack on top of the Dionex RFC with the vertical posts oriented toward the side nearest the chromatography module or DX-120 (see Figure 96). Secure the rack with the bracket.
- Page 89 Service Procedures 2. Locate the corrugated drain tubing in the Dionex RFC Ship Kit. Push the tubing onto the fitting on the drip tray spout. Install the drip tray with the spout and drain line between the vertical posts in the rack (see Figure 97).
- Page 90 Dionex Reagent-Free Controller 5. Locate the EGC vent line tubing, label, tubing clips, and barbed luer lock, supplied with the holder. Locate the luer adapter and cap, supplied with the EGC. Slide the label onto one end of the tubing and then push the barbed luer lock onto the tubing.
- Page 91 Service Procedures 9. Remove the paper backing from the black tubing clips and press the clips onto the sides of the EGC holder (see Figure 100). Attach the vent line to the clips. Tubing Clips Figure 100. EGC Vent Line and Tubing Clips 10.
- Page 92 Dionex Reagent-Free Controller Le eluent generator produit des éluants par électrolyse, résultant en la production de petites quantités de gaz d'oxygène et d'hydrogène. Pour veiller à ce que les gaz ne soient pas emprisonnés dans un contenant fermé où ils pourraient se concentrer, installez un tube d'évacuation du séparateur de gaz noir ID (réf.
- Page 93 REGEN OUT assembly (P/N 061336), provided in the Ship Kit. 3. Connect the cable from the Dionex RFC-30 rear panel to the CR-TC CR-TC cable exiting the EGC holder (see Figure 101). Push the cables together and twist the locking ring to connect them.
-
Page 94: Ttl Control
• Activating the TTL enables the power output to the suppressor, eluent Pump generator (Dionex RFC-30 only), and CR-TC (Dionex RFC-30 only). For DX-320, DX-500, or DX-600 systems, the TTL must be connected to Pump the TTL-2 output on the pump or combination pump/detector module. See Section B.2 for installation instructions. -
Page 95: Disconnecting A Suppressor From An Internal Power Supply
Disconnecting a Suppressor from an Internal Power Supply If you want to use the Dionex RFC to control the suppressor, but the system currently includes a suppressor controlled by an internal power supply, follow the instructions in this section to disconnect the suppressor from the internal power supply. -
Page 96: Disconnecting The Suppressor From A Dx-120 System
Dionex Reagent-Free Controller 4. Disconnect the suppressor power source cable from the suppressor cable (see Figure 103). Figure 103. Disconnecting the SRS Power Source Cable from the SRS Cable Disconnecting the Suppressor from a DX-120 System 1. Open the front door of the DX-120. 2. - Page 97 Service Procedures 3. Firmly grip the SRS A power source cable at the connector and unplug it from the electronics card. 4. Disconnect the SRS A power source cable from the suppressor cable and remove it (see Figure 105). Store the cable for future use. Figure 105.
- Page 98 Dionex Reagent-Free Controller Doc. 031880-04 1/12...
- Page 99 Index Calibrating the RFC, 48 Cancel button, 6 AAES, 17, 23 Carbonate, 30 AC Control button, 8, 45 Cartridge AES, 1 See EGC See also Suppressor AESXCALC, 16, 20 Concentration upper limits, 22 Application Isocratic only, 30 Setting the current, 17 Concentration Arrow buttons, 6 Changing, 24...
- Page 100 Dionex Reagent-Free Controller Degas tubing assembly (RFC-30), 9 Device control Edit buttons, 6 CR-TC, 5 EGC (RFC-30) EGC, 5 Cable connection, 63 Overview, 5 Concentration, 27 Suppressor, 5 Concentration upper limits, 22 Device Select buttons, 5 – 6 Control of, 5 Device Select LEDs, 5 –...
- Page 101 Index New Board Found Must Calibrate, 44 Overview, 29 No Board Present, 44 PeakNet 5.2 Method example, 32 Over Current CR-TC, 41 PeakNet 6 program example, 34 Over Current EGC, 41 Running a gradient, 31 Over Current Suppressor, 40 Setting up, 30 Over Power EGC, 43 Suppressor current calculation, 23 Over Power Suppressor, 40...
- Page 102 Dionex Reagent-Free Controller Method Power switch, 8 PeakNet 5.2 gradient example, 32 Power up, 12 Moduleware Pressure, 89 Downloading, 8, 47 Product warranty, 47 Program Concentration upper limits, 22 PeakNet 6 gradient example, 34 Pump Enabling/disabling the RFC, 5 Flow screen, 16 TTL control, 70 Noise, 62 TTL ignored message, 45...
- Page 103 Index TTL connections Specifications, 62 Safety messages, 2 TTL Control Input connectors, 8 Screen, 6 TTL control See also Display screen Description, 90 Screen saver, 14 TTL Control/AC Control button, 8 Serial port, 47 TTL gradient control (RFC-30), 32 Service procedures Calibrating the RFC, 48 Downloading Moduleware, 47 Fuse replacement, 49...
- Page 104 Dionex Reagent-Free Controller Index-6 Doc. 031880-04 1/12...
Need help?
Do you have a question about the Dionex RFC and is the answer not in the manual?
Questions and answers