Table of Contents
Advertisement
Quick Links
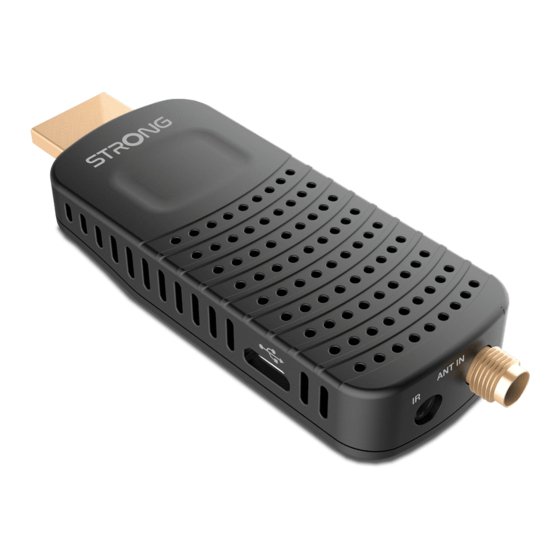
Terrestrial HDMI Receiver for your TV
SRT 82
Používateľská príručka
User Manual
Telepítési Utasítás
Bedienungsanleitung
Manuel d'utilisation
Bruksanvisning
Manuale d'uso
Uživatelská příručka
Korisnički priručnik
Manuale utente
Manual del usuario
Používateľská príručka
Instrucciones de instalación
Руководство пользователя
Návod k obsluze
Εγχειρίδιο χρήστη
Advertisement
Table of Contents

Related Manuals for Strong SRT 82


Summary of Contents for Strong SRT 82
- Page 1 Terrestrial HDMI Receiver for your TV SRT 82 Používateľská príručka User Manual Telepítési Utasítás Bedienungsanleitung Manuel d’utilisation Bruksanvisning Manuale d’uso Uživatelská příručka Korisnički priručnik Manuale utente Manual del usuario Používateľská príručka Instrucciones de instalación Руководство пользователя Návod k obsluze Εγχειρίδιο χρήστη...
- Page 2 INFO SLEEP AUDIO TEXT MENU EXIT GOTO TV/R RECALL TIMESHIFT ZOOM ASPECT V.F. TIMER INFO SLEEP AUDIO TEXT MENU EXIT GOTO TV/R RECALL TIMESHIFT ZOOM ASPECT V.F. TIMER...
- Page 4 0180 501 49 91 support_nl@strong.tv support_de@strong.tv € 0,14/Min. deutsches Festnetz 801 702 017 € 0,42/Min. max. Mobilfunknetze support_pl@strong.tv +380(44)238 61 50 support_dk@strong.tv support_ua@strong.tv Supplied by STRONG Austria Represented by STRONG Ges.m.b.H. Teinfaltstraße 8/4.Stock 1010 Vienna Austria Email: support_at@strong.tv 18 Jan 2022 18:15...
- Page 5 Licenses THIS PRODUCT IS LICENSED UNDER THE AVC PATENT PORTFOLIO LICENSE FOR THE PERSONAL AND NONCOMMERCIAL USE OF A CONSUMER TO (i) ENCODE VIDEO IN COMPLIANCE WITH THE AVC STANDARD (“AVC VIDEO”) AND/OR (ii) DECODE AVC VIDEO THAT WAS ENCODED BY A CONSUMER ENGAGED IN A PERSONAL AND NON-COMMERCIAL ACTIVITY AND/OR WAS OBTAINED FROM A VIDEO PROVIDER LICENSED TO PROVIDE AVC VIDEO.
-
Page 6: Table Of Contents
Hereby, STRONG declares that the device SRT 82 is in compliance with Directive 2014/53/EU. The full text of the EU declaration of conformity is available at the following internet address: https://www.strong.tv/en/doc Subject to alterations. In consequence of continuous research and development technical specifications, design and appearance of products may change. -
Page 7: Introduction
1.0 INTRODUCTION 1.1 Safety Instructions Read all of the instructions before operating the device. Keep these instructions well for later use. „ Only use attachments/accessories specified or provided by the manufacturer (such as the „ exclusive supply adapter, battery etc.). Please refer to the information on the product enclosure for electrical and safety information „... -
Page 8: Storage
It is a necessity that you only use an approved extension and compatible wiring that is suitable for the electrical power consumption of the installed equipment. Please ensure that the electrical power supply corresponds with the voltage on the electrical identification plate at the back of the device. Operating Environment Do not install this equipment in a confined space such as a bookcase or similar unit. -
Page 9: Usage Of External Usb Devices
„ Always make backups of data on your USB storage device before using it with this receiver. STRONG will not take responsibility for any loss of information or circumstances caused by loss of information. Please ensure that either the USB device is already formatted to NTFS or FAT32 or format the USB „... -
Page 10: Remote Control
2.3 Remote Control Fig. 2 1. q Turns the receiver On/Standby 2. INFO Shows the actual channel information 3. SLEEP Press SLEEP repeatedly to select an automatic switch off time 4. ! Mutes audio output of the receiver 5. AUDIO Sets the current audio channel to left, right or stereo 6. -
Page 11: Using The Remote Control And The Ir Extender
2.5 Using the remote control and the IR extender. Connect the external IR extender to the unit at the IR connector and place the sensor end somewhere convenient, where it can be “seen” by the Remote Control, for example on the TV front panels bezel. Use the provided double sided sticker. -
Page 12: Starting Up For The First Time
5.0 QUICK GUIDE TO USING YOUR RECEIVER We at STRONG understand that you can't wait to enjoy your new high definition digital terrestrial receiver. The following quick guide will make you familiar with the basic operation of this device. We do, however, advice you to read the full manual to get the best performance from your receiver. -
Page 13: Changing Channels
6.1 Changing channels Your new receiver is equipped with four ways to change channels. Via direct access using the 0~9 buttons. Via the channel list trough OK button. Via the PG+ and PG- keys in (long) channel list. Via the pq keys. 6.1.1 Direct access via 0~9 buttons To gain direct access to a certain channel, simply input its number with the 0~9 keys on the remote control. -
Page 14: Subtitles
to select subpages, if indicated at the bottom of the screen. Press EXIT or TEXT to get back to viewing mode. 6.5 Subtitles Some channels support a choice of subtitle languages. Press SUB in viewing mode to display a list of available subtitle languages. -
Page 15: Main Menu
7.0 MAIN MENU The main menu gives you access to settings and multimedia functions. To access the main menu, press MENU in viewing mode. The main menu consists of the following sub menus: Programme, Picture, Channel Search, Time, Option, System and USB. Throughout the main menu, MENU or EXIT can be used to get back to the previous screen. -
Page 16: Epg (Electronic Programme Guide)
NOTE: Deleted channels can only be retrieved if you do a frequency scan in the Channel Search menu again. Adding channels to favourite lists Channels from the can be added to up to 4 different favourite groups. Press FAV in Programme Edit to access the function. -
Page 17: Picture
NOTE: For successful editing of channel list (see ch 7.1), switch Off LCN function. 7.4 Picture Use this menu to match your receiver to your TV set. The following settings are available: Aspect Ratio: Select the aspect ratio that matches your TV. The options are: Auto In most cases this default setting should suffice, but it can be changed to cope with broadcast errors or personal taste. -
Page 18: Time
7.6 Time Set up your time zone for clock/time in your menu and system. Time Offset The GMT time can automatically be determined from the incoming TV broadcast if set to Auto. The time zone is determined from the Country setting in the Channel Search menu. -
Page 19: Usb
first. Then select an age, above which the channel must be protected. Options are: Off, 1 to 18. Default is Off. Set password To set another password than the default one, enter the old 4-digit password first, then enter a new password and confirm it, by entering it again. Restore Factory Default Reset your receiver to the default factory settings. -
Page 20: Troubleshooting
If the receiver does not work properly after checking it, please contact your dealer or the local Service Hotline or send email to our Support via www.strong.tv. Do NOT try to open or disassemble the receiver. It may cause a dangerous situation and warranty will be void. - Page 21 Problem Possible cause What to do No signal. The receiver is not connected to Check the lead of the antenna the signal source (DVB-C) or to or cable. the antenna (terrestrial or satellite Check that the coaxial cable is antenna). correctly fitted to the antenna input on the receiver.
- Page 22 Problem Possible cause What to do No sound on TV or The volume of the TV is set too Increase the volume of the TV amplifier. low. with its remote control. The volume of the receiver is set Increase the volume of the too low.
- Page 23 (refer to the user manual of your Device). Contact your local Service Hotline or send an email to our Support via www.strong.tv Forgotten channel lock Contact your local Service Hotline code. or send an email to our Support via www.strong.tv...
-
Page 24: Technical Specifications
9.0 TECHNICAL SPECIFICATIONS Demodulator: Demodulator: DVB-T/T2 COFDM; 16 QAM/64 QAM; QPSK; 128/256QAM Transmission mode: 2 K - 8 K Video Decoder: Profile level: HEVC (H265) AVC/H.264HP@L4.1, MPEG-4 ASP supported Video resolution: 480i, 480p, 576i, 576p, 720p, 1080i, 1080p Decoding: PAL/NTSC Aspect ratio: 4:3 Letterbox, 4:3 Pan &...
Need help?
Do you have a question about the SRT 82 and is the answer not in the manual?
Questions and answers