Goodwe HT Series User Manual
Solar inverter
Hide thumbs
Also See for HT Series:
- User manual (60 pages) ,
- Quick installation manual (2 pages) ,
- User manual (38 pages)
Table of Contents
Advertisement
Quick Links
SolarGo APP
SEMS Portal App
SEMS Portal website
GOODWE (Germany)
Fürstenrieder Str. 279a 81377 München, Germany
T: +49 8974120210 +49 421 83570-170 (service)
sales.de@goodwe.com
service.de@goodwe.com
GOODWE (Netherlands)
Franciscusdreef 42C, 3565AC Utrecht, the Netherlands
T: +31 (0) 30 737 1140
sales@goodwe.com
service.nl@goodwe.com
GOODWE (India)
1202, G-Square Business Park, Sector 30A, Opp. Sanpada
Railway Stn., Vashi, Navi Mumbai- 400703
T: +91 (0) 2249746788
sales@goodwe.com / service.in@goodwe.com
GOODWE (Turkey)
Adalet Mah. Megapol Tower K: 9 No: 110 Bayraklı - Izmir
T: +90 (232) 935 68 18
info@goodwe.com.tr
service@goodwe.com.tr
GOODWE (Mexico)
Oswaldo Sanchez Norte 3615, Col. Hidalgo, Monterrey,
Nuevo Leon, Mexico, C.P. 64290
T: +52 1 81 2871 2871
sales@goodwe.com / soporte.latam@goodwe.com
Note: The above contact information is subject to change without notice. For details, refer to the
company's official website www.goodwe.com
340-00522-00
Offical Website
GOODWE (China)
No. 90 Zijin Rd., New District, Suzhou, 215011, China
T: +86 (0) 512 6958 2201
sales@goodwe.com (sales)
service@goodwe.com (service)
GOODWE (Brazil)
Rua Abelardo 45, Recife/PE, 52050-310
T: +55 81 991239286
sergio@goodwe.com
servico.br@goodwe.com
GOODWE (UK)
6 Dunhams Court, Dunhams Lane, Letchworth
Garden City, SG6 1WB UK
T:+ 44 (0) 333 358 3184
enquiries@goodwe.com.uk / service@goodwe.com.uk
GOODWE (Italy)
Via Cesare Braico 61, 72100 Brindisi, Italy
T: +39 338 879 38 81; +39 831 162 35 52
valter.pische@goodwe.com (sales)
operazioni@topsenergy.com; goodwe@arsimp.it (service)
GOODWE (Australia)
Level 14, 380 St. Kilda Road, Melbourne,
Victoria, 3004, Australia
T: +61 (0) 3 9918 3905
sales@goodwe.com / service.au@goodwe.com
GOODWE (Korea)
8F Invest Korea Plaza, 7 Heoleung-ro
Seocho-gu Seoul Korea (06792)
T: 82 (2) 3497 1066
sales@goodwe.com / Larry.Kim@goodwe.com
HT SERIES USER MANUAL
SOLAR INVERTER
Photovoltaic
Grid-Tie Inverter
Ver 2.0
2021/04/10
Advertisement
Table of Contents

Related Manuals for Goodwe HT Series


Summary of Contents for Goodwe HT Series
- Page 1 GOODWE (China) No. 90 Zijin Rd., New District, Suzhou, 215011, China T: +86 (0) 512 6958 2201 sales@goodwe.com (sales) service@goodwe.com (service) HT SERIES USER MANUAL GOODWE (Germany) GOODWE (Brazil) Fürstenrieder Str. 279a 81377 München, Germany Rua Abelardo 45, Recife/PE, 52050-310...
-
Page 2: Table Of Contents
1 Symbol Definition ....................01 2 Safety Instructions ....................02 3 Product Introduction ..................03 3.1 Product Naming Rules ......................03 3.2 Packaging Information......................04 3.3 Appearance Introduction......................05 4 Installation Method ....................07 4.1 Installation Instructions......................07 4.2 Select Installation Location...................... -
Page 3: Symbol Definition
Stacking limit, up to 4 layers can be stacked • Ensure that the DC input voltage is less than the maximum input voltage of the inverter, otherwise the inverter will be damaged. GOODWE will not be responsible for this damage, and the warranty will be void. -
Page 4: Product Introduction
Model Description (taking GW100K-HT as an example): 1. GW - abbreviation for company name The grid structures supported by HT series 136K are TN-S, TN-C, TN-C-S, TT, IT, as shown in the 2. 100K - rated output power diagram below: 3. -
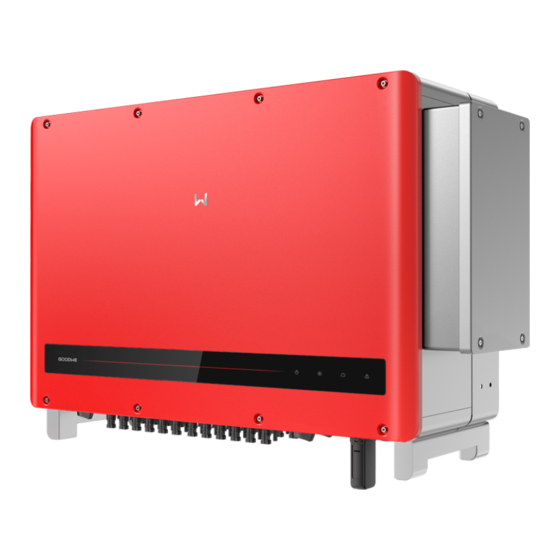
Page 5: Appearance Introduction
[1] DC connector*: 20 pairs for 100kw, 24 pairs for GW73KLV-HT&110kw&120kw&136kw. GW100K-HT Bottom view [2] Optional module. [3] The number of accessories is subject to change without notice. [4] Text materials*: Include manuals. 3.3 Appearance Introduction After opening the package, check the product to confirm whether it is consistent with the Name Description specifications of the inverter you purchased. -
Page 6: Installation Instructions
4 Equipment Installation 4.3 Inverter Installation 4.3.1 Wall Installation Procedure: 4.1 Installation Instructions • The installation height shall be parallel to the line of sight for easy operation and maintenance. Step 1: Use the back hanger for Step 2: Use the expansion screws in the positioning. -
Page 7: Electrical Installation
4.4 Electrical Installation 4.3.2 Bracket Installation Procedures: 4.4.1 AC Terminal Connection 1. Measure the voltage and frequency of the grid-tie connection point to confirm that it meets the grid-tie specifications of the inverter. Step 1: Take the back hanger out from Step 2: Use the expansion screws in the 2. - Page 8 Step 7: Tighten the screws and place firefighting mud before installing the cover. Tighten the heat shrink tube Crimp with hydraulic pliers. with the heat gun. Step 3: Adjust the aperture of the crimping module. Notice: To ensure the equipment is sealed, please adjust the aperture of the crimping module to match the cable.
- Page 9 4.4.2 AC circuit breaker and leakage current protection device Step 2: Take the DC terminal from the accessory pack, turn the nut to remove it, and take To ensure that the inverter can be safely and reliably disconnected from the grid, install a circuit out the waterproof rubber ring.
- Page 10 4.4.4 External Ground Terminal Connection Step 5: Insert the crimped DC cable into the DC terminal, then insert the waterproof rubber According to EN50178 requirements, the inverter must have a protective ground connection. The ring into the DC terminal and tighten the nut. user must connect this terminal to a protective ground wire while installing the equipment.
-
Page 11: Communication Installation
4.5 Communication Installation Step 2: Choose RS485 shielded twisted pair wire and strip it as shown in the diagram below, then connect the terminal and crimp it tightly. 4.5.1 RS485 communication 6.5mm This function is only applicable to RS485 models. The RS485 port of the inverter is used to connect to the data collector, and the total length of the connecting cable must not exceed 1000m. - Page 12 After the communication configuration is completed, scan the QR code on the back of this method of WiFi communication module is shown in the diagram below. manual or visit www.sems.com.cn. Download the goodwe.cloudview APP and complete the Note: The communication module must be aligned and inserted vertically into the communica- registration to use the cloud monitoring function.
-
Page 13: Operating Instructions
5.2 Description of Display Screen and Buttons 5 Operating Instructions 5.1 indicator Description Note: For inverters without display, scan the QR code on the left to download Model without display and install the SolarGo App, and complete the corresponding configuration operations in the App. SolarGo App Setting the country of safety regulations: If the LCD displays “GW100K-HT Power = XXXXX watts”... - Page 14 (5) Menu Introduction set by short pressing the button. To switch to the next digit, long press for 2 seconds. If you *After the machine is powered on, the default display is the first level menu. entered the second level screen without making any changes, and did not press the button *The status display is the first menu of the first level menu, which displays the current status of within 20 seconds, the display backlight will go off...
-
Page 15: Failure Information
5.3 Failure Information First level menu Second level menu Grid-tie power generation Long press for 2s 50Hz grid voltage Power = XXXXX watts The error message in the following table will be displayed on the screen when the abnormal Short press Daily power generation: Long press for 2s Locked... -
Page 16: Frequently Asked Questions
6 Frequently Asked Questions Type Display Troubleshooting Under normal conditions, the inverter requires no maintenance. If the inverter cannot work normally, refer to the following instructions: Relay Check Failure • When a problem occurs, the red light on the operation panel will light up, and relevant information will be displayed on the APP. -
Page 17: Maintenance
2. Turn the DC switch of the inverter to the "OFF" position. If the startup and shutdown sequences given above are not followed strictly, the The external fan of the HT series inverter needs to be cleaned with a vacuum cleaner every inverter may be damaged. -
Page 18: Product Specifications
8 Technical Data Technical Data GW100K-HT GW110K-HT GW120K-HT GW136K-HTH General Data 8.1 Product Specifications Operating Temperature Range ( ﹣ ℃) 30 ~ 60 Relative Humidity 0~100% Technical Data GW100K-HT GW110K-HT GW120K-HT GW136K-HTH 5000 (>4000 derating) Max. Operating Altitude (m) Input Cooling Method Smart Fan Cooling Max. - Page 19 Technical Data GW73KLV-HT Technical Data GW73KLV-HT PV String Input Data General Data Cooling Fan Cooling Max. DC Input Power (W) 112500 Display LED(Standard), LCD(Optional) ,Bluetooth+APP Max. DC Input Voltage (V) Communication RS485 or WiFi MPPT Range (V) 180~650 Weight 98.5 Start-up Voltage (V) Nominal DC Input Voltage (V) Size (Width*Height*Depth mm)...
-
Page 20: Schematic Diagram Of Main Circuit
8.2 Schematic Diagram of Main Circuit Interpretation of overvoltage levels: If operating voltage of MPPT is greater than 850V, the AC output power decreases when the The main circuit of GW100K-HT is shown in the following diagram: voltage increases. Overvoltage level I: Connect the product to a circuit with measures to limit instantaneous overvoltage to a relatively low level.
Need help?
Do you have a question about the HT Series and is the answer not in the manual?
Questions and answers