Goodwe GW250K-HT User Manual
Solar inverter. photovoltaic grid-tie inverter
Hide thumbs
Also See for GW250K-HT:
- User manual (56 pages) ,
- Quick installation manual (2 pages) ,
- User manual (38 pages)
Table of Contents
Advertisement
SolarGo APP
SEMS Portal App
SEMS Portal website
GOODWE (China)
90 Zijin Road, High-tech Zone, Suzhou, China
T: +86 512 6239 6771
sales@goodwe.com.cn
service.chn@goodwe.com.cn
GOODWE (Netherlands)
sales@goodwe.com.cn
service.nl@goodwe.com.cn
Note: The above contact information is subject to change without notice. For details, refer to the company's
official website www.goodwe.com
340-00459-02
Official Website
GOODWE (Australia)
sales@goodwe.com.cn
service.au@goodwe.com.cn
GOODWE (UK)
enquiries@goodwe.co.uk
service@goodwe.co.uk
HT Series User Manual
SOLAR INVERTER
Photovoltaic
Grid-Tie Inverter
Ver 1.2
Advertisement
Table of Contents

Subscribe to Our Youtube Channel
Related Manuals for Goodwe GW250K-HT


Summary of Contents for Goodwe GW250K-HT
- Page 1 T: +86 512 6239 6771 service.au@goodwe.com.cn sales@goodwe.com.cn SOLAR INVERTER service.chn@goodwe.com.cn Photovoltaic GOODWE (Netherlands) GOODWE (UK) Grid-Tie Inverter sales@goodwe.com.cn enquiries@goodwe.co.uk Ver 1.2 service.nl@goodwe.com.cn service@goodwe.co.uk Note: The above contact information is subject to change without notice. For details, refer to the company's official website www.goodwe.com...
-
Page 2: Table Of Contents
1 Symbol Definition ....................01 2 Safety Instructions ....................02 3 Product Introduction ................... 03 3.1 Product Naming Rules ....................... 03 3.2 Application..........................03 3.3 Items Supplied..........................04 3.4 Appearance..........................05 4 Installation ........................08 4.1 Installation Instructions......................08 4.2 Select Installation Position..................... 08 4.3 Install the Inverter ........................09 4.4 Electrical Connections....................... -
Page 3: Symbol Definition
• Make sure that the DC input voltage is less than the max input voltage of the inverter. If the inverter is damaged due to this reason, GOODWE will not be liable for the consequence, and the damage is also beyond the warranty scope. -
Page 4: Product Introduction
Communication connector Bluetooth box Expansion screw Connection terminal Documents [1] Screwdriver The GW250K-HT is powered by a dedicated power transformer instead of connecting to [1] Documents: user manual, business license and certificate. low-voltage overhead power lines. Item Type Notes PV string Monocrystalline silicon, polycrystalline silicon, thin film pv panels without grounding... -
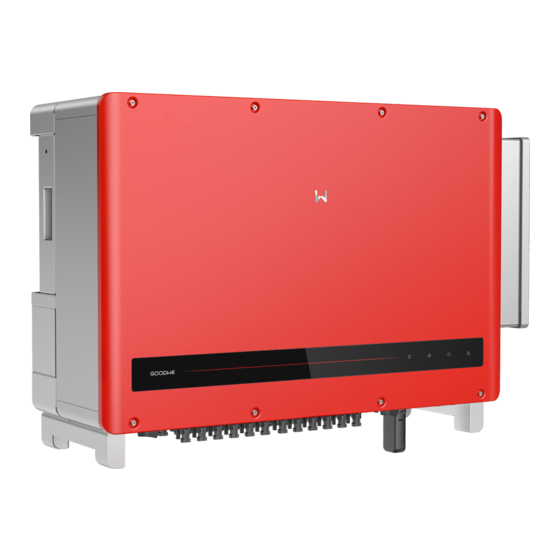
Page 5: Appearance
3.4 Appearance Name Description Check the product to confirm it is the right model you purchased after unpacking the package. Used to safely disconnect the DC input when it' Product appearance shows as below. s necessary. The inverter will automatically start working when input or output meets require- DC switch Front/Side/Bottom View... -
Page 6: Installation
4 Installation Indicator Description 4.1 Installation Instructions • The inverters work optimally when the ambient temperature is not higher than 45°C. Model without LCD • The installation height should preferably be parallel to the line of sight for easier operation and maintenance. •... -
Page 7: Install The Inverter
4.3 Install the Inverter 4.3.2 Mount on the bracket: 4.3.1 Mount on the wall: Step 1: Mark position holes with the Step 2: Fix the mounting bracket on the wall with Step 1: Mark position holes with the Step 2: Fix the mounting bracket on the mounting bracket, then drill holes with a expansion screws. -
Page 8: Electrical Connections
4.4 Electrical Connections Step 2: Adjust the waterproof silicone ring 4.4.1 AC Terminal Connection according to actual needs, and route the AC 1. Measure the voltage and frequency of the grid-tied connection point to make sure that they cables through the ring. Adjust aperture of waterproof silicone meet the requirements for the grid-tied inverter. - Page 9 Connection of A Single-core Cable 4. Do not use the DC connector other than the one provided by GOODWE. 5. Do not connect the polarities of the PV string to the PE cable. Otherwise, the inverter will be damaged.
- Page 10 Step 2: There’ s a DC terminal in the accessory kit. Separate the nut from the terminal and Step 5: Insert the crimped DC cable into the DC terminal, then place the waterproof rubber take out the waterproof rubber ring. ring into the DC terminal and tighten the nut.
-
Page 11: Communication Connections
4.5 Communication Connections 4.4.4 External Ground Terminal Connection According to EN50178, a PE connector has been added. Customers have to connect this connector 4.5.1 RS485 communication to the PE cable when installing the inverter. Please complete the connection following the steps Apply to RS485 models only. - Page 12 4.5.3 Cloud Monitoring After installation, please scan the QR code on the back of this manual or visit www.sems.com.cn. to download goodwe.cloudview APP. Complete the registration, then you can start the cloud Completed example Use tools to crimp the terminals monitoring function.
-
Page 13: Operation Instructions
Safety Country Setting: the mains frequency in "Hz". If the LCD displays “GW250K-HT Power = XXXXX watts” or “GW225K-HT Power = XXXXX watts” , press and hold for 2s to enter the submenu “max voltage in China” . Select safety *Check failure code country in the submenu according to your location and wait for 10s after selecting the country. -
Page 14: Fault Information
Setup successfully Long Relay Fail PV soft OverCurr Wait Short press press Setting up... ······ for 2 s GW250K-HT Setup failed Power = XXXXX watts Long press for 2 s Relay Fail Model Error Wait 2000-00-00 00:00 Short press Software version: V1.XX.XX.XX... -
Page 15: Frequently Asked Questions
6 Frequently Asked Questions Type Display Troubleshooting Normally, the inverter requires no maintenance. If the inverter cannot work normally, refer to the following 1. Disconnect the DC switch and remove the DC instructions: connector to measure the PV string voltage. Confirm whether it exceeds the inverter input voltage specifica- •... -
Page 16: Technical Parameters
Overvoltage II: Energy-consuming devices powered by fixed power distribution equipment, including appliances, portable tools, and other household and similar equipment. Overvoltage III Technical Data GW250K-HT GW225K-HT Input is also applicable if there are special requirements for the reliability and applicability of the Max. -
Page 17: Main Circuit Diagram
8 Product Maintenance 7.2 Main Circuit Diagram The main circuit diagram is shown as below: Regular maintenance will ensure service life and the best efficiency of the inverter. Note: Before maintenance, turn off the AC circuit breaker, then the DC circuit breaker, and wait for 5 minutes until the residual voltage is released. -
Page 18: Electrical Connection Check
Startup sequence 1. Turn the circuit breaker on the AC side to "ON". 2. Turn the DC switch of the inverter to "ON". Shutdown sequence 1. Turn the circuit breaker on the AC side to "OFF". 2. Turn the DC switch of the inverter to "OFF". The inverter may be damaged if you do not follow the sequences above strictly.
Need help?
Do you have a question about the GW250K-HT and is the answer not in the manual?
Questions and answers