
Subscribe to Our Youtube Channel
Related Manuals for Satel INT-SK


Summary of Contents for Satel INT-SK
- Page 1 INT-SK Partition keypad Firmware version 2.02 int-sk_en 08/20 SATEL sp. z o.o. • ul. Budowlanych 66 • 80-298 Gdańsk • POLAND tel. +48 58 320 94 00 www.satel.eu...
- Page 2 Changes, modifications or repairs not authorized by the manufacturer shall void your rights under the warranty. SATEL aims to continually improve the quality of its products, which may result in changes in their technical specifications and software. Current information about the changes being introduced is available on our website.
-
Page 3: Table Of Contents
CONTENTS Features ........................... 2 Installation ........................2 Address setting ......................3 Description of terminals ....................4 Configuring ........................4 Description of parameters and options ............... 4 Using ..........................8 LED indicators ......................8 Sound signaling ......................8 4.2.1 Beeps generated when operating ................ 8 4.2.2 Signaling events .................... -
Page 4: Features
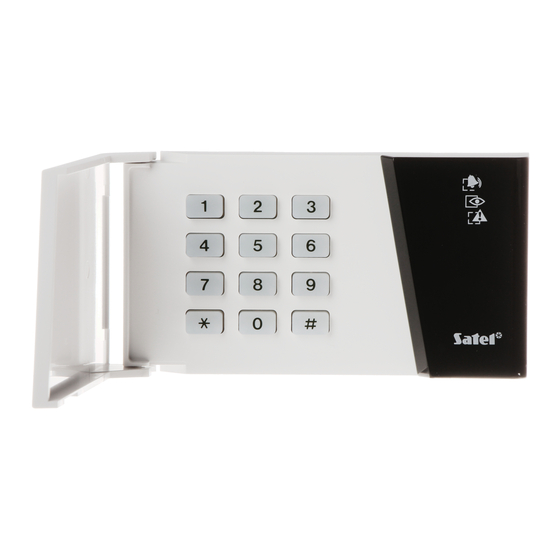
• can control the access to a single door. The keypad is compatible with the INTEGRA / INTEGRA Plus alarm control panels. Fig. 1. INT-SK partition keypad with closed and open flap cover. 1. Features • Arming / disarming and alarm clearing in partition. -
Page 5: Address Setting
SATEL INT-SK The keypad is designed for indoor installation. The place of installation should be readily accessible to the system users. 1. Open the keypad enclosure. 2. Set the partition keypad address (see “Address setting” p. 3). 3. Place the enclosure base on the wall and mark the location of mounting holes. -
Page 6: Description Of Terminals
INT-SK SATEL To set the address, use the DIP switches on the electronics board. The switches have numbers assigned to them. The number for OFF position is 0. The numbers assigned to the switches in ON position are presented in the table 1. The sum of these numbers is the address set. - Page 7 SATEL INT-SK Lock features [Lock function] – mode of operation of the relay output after the access is granted: ON if partition armed [On if part.armed] – the relay output will be turned on until the partition is armed. When the partition is armed, users cannot get access (to get access, the user must disarm the partition).
- Page 8 INT-SK SATEL NC [Normal.closed NC] – the relay contacts are closed (they open on activating the relay). Authorization control [Unauth. event] – if this option is enabled, unauthorized opening of the door will save the event to the control panel memory.
- Page 9 SATEL INT-SK Partition blocking [Part.blocking] – if the option is enabled, using the code by a user of the “Blocking partition” or “Guard” type will block the armed partition (violating a zone belonging to the partition will trigger no alarm). The duration of blocking is to be defined for the partition or the user (the user of “Blocking partition”...
-
Page 10: Using
INT-SK SATEL Object fire alarm [on object fire] – the door will be unlocked in the event of fire alarm in the object to which the keypad is assigned. Fire alarm [on any fire] – the door will be unlocked in the event of fire alarm in the alarm system. -
Page 11: Code
SATEL INT-SK A sequence of 7 beeps of diminishing duration, repeated every few seconds – countdown of auto-arming delay. 2 short beeps every second – countdown of entry delay. Continuous beep – alarm. Long beep every 2 seconds – alarm memory. -
Page 12: Quick Arming
INT-SK SATEL • clear alarm, • gain access (turn on the expander relay output), • toggle the state of “25. BI switch” type outputs, • turn on the “24. MONO switch” type outputs, • confirm the guard round, • temporary block the partition, •... -
Page 13: Specifications
SATEL INT-SK • the LED goes out after 60 seconds (Grade 3), • quick arming functions are not available, • arming procedure cannot be initiated, if there are violated zones in the partition or there is a trouble in the system, •...
Need help?
Do you have a question about the INT-SK and is the answer not in the manual?
Questions and answers