Table of Contents
Advertisement
Quick Links
Advertisement
Table of Contents

Related Manuals for Pure Clean PUCRC95PLUS


Summary of Contents for Pure Clean PUCRC95PLUS
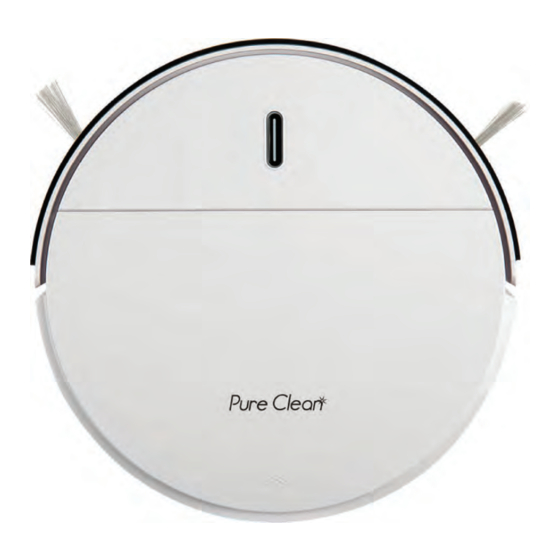
- Page 1 PUCRC95PLUS Pure Clean Smart Vacuum Cleaner Automatic Robot Cleaning Vacuum...
-
Page 2: Table Of Contents
TABLE OF CONTENTS SAFETY INSTRUCTION PRODUCT FEATURES PRODUCT COMPONENTS Main Body and Accessories Remote Control Charging Station/display panel PRODUCT OPERATION Scheduling Battery Charging Battery Removal Starting up/Pause/Sleep mode/Power o Cleaning Modes Water tank & mopping cloth PRODUCT MAINTENANCE Cleaning Side Brushes Cleaning Dust Bin and Filters Cleaning Sensors and Wheels Cleaning Charging Poles... -
Page 3: Safety Instruction
SAFETY INSTRUCTIONS Before using this product, please read the safety instructions and follow all normal safety precautions. 1. Only authorized technicians can disassemble the product. Users are not allowed to disassemble or repair the product. 2. The appliance is only to be used with the power supply unit provided with the appliance. -
Page 4: Product Features
18. Use this product in temperature from 32°F to 104°F or 0°C to 40°C. 19. Do not use this product in high-temperature environment or under intense sunlight for a long time. 20. The battery must be removed from the product before it is disposed of. 21. - Page 5 Washable dust bin • Wash dust bin and lters with water. • Wash dust bin after every empty. Cleaning Modes Four cleaning modes are provided to meet your needs. Auto cleaning mode: The robot will clean a room automatically and adjust its cleaning according to situation.
- Page 6 Edge cleaning mode: In this mode the robot will clean along the wall or obstacles. Zig-zag mode: Robot will automatically goes into Zig-Zag cleaning when it detected it’s in an open area or the environment with less obstacles. Note: After switch on the robot, by press MODE on the remote Controller, user can select di erent cleaning mode: •...
-
Page 7: Product Components
Product Components Main body and accessories Description Quantity Main Body Charging Station Remote Control (battery not included) Cleaning Brush Side Brush User Manual HEPA Filter (one inside the dust bin) Power Adapter Water Tank Mopping Cloth www.PyleUSA.com... - Page 8 Main Body Diagram Press Button Bumper Upper cover Charging pole Universal wheel Right side brush Left side brush Battery cover Suction passage Right wheel Left wheel Bottom cover Power switch Upper cover Dust bin Charging socket Primary lter Dust bin HEPA lter HEPA lter shelf www.PyleUSA.com...
-
Page 9: Remote Control
Remote Control 1. Digital display 2. Auto charging 3. Scheduling button 4. Direction buttons 5. ON/OFF 6. Mode selection 7. Spot cleaning 8. Scheduling button Switch on robot, then point it towards the robot to operate it. 1. ON/OFF button: The robot in standby status, press ON/OFF button, the robot start cleaning. -
Page 10: Charging Station/Display Panel
Charging Station Signal receiver Power light Infrared signal Top cover transmitting widow Power supply socket Charging poles Display Panel Press Button A. Switch on the robot, robot will have 2 beeps, and in standby status the LED indicator will be in gradual blue. B. - Page 11 2. Before scheduling, please set the real time for remote: Press and hold CLK button on remote for 3 seconds to enter hour-setting, icon will ash, and the left two numbers will ash on remote display, press upward/ downward button to increase or decrease hour. Press left button can turn to minute-setting, the right two numbers will ash on remote display, press upward/downward button to increase or decrease minutes.
-
Page 12: Battery Charging
If no operation for 15 minutes, it will turn to deep sleep and power o , scheduling will be canceled.) So, if you want to keep scheduling when you’re not at home, do not switch o power button of robot and charging station, and make sure robot can return back to the charging station when it is low power or completing cleaning. -
Page 13: Battery Removal
e. When rst using, please run out of the power, and charge the robot asap. f. In the working status, the robot will return to charging station automatically when battery power is low. Note: Please keep the charge station in charging, or else the robot can not nd the charge station to charge automatically. -
Page 14: Starting Up/Pause/Sleep Mode/Power O
FOR YOUR OWN SAFETY, DO NOT ATTEMPT TO REMOVE THE BATTERY ON YOUR OWN OR DISPOSE OF IT IN FIRE. DO NOT DISASSEMBLE, CRUSH OR PUNCTURE THE BATTERY. Starting Up/ Pause/ Sleep mode/Power o 1. Starting up: Switch on the robot, robot will have 2 beeps and in standby status, LED indicator will be in gradual blue, press “... - Page 15 2. Spiral Cleaning In mode 1, the robot will clean in a spiral way. In standby mode, press ON/OFF button on remote controller or “ ” button on robot to start auto cleaning and after few seconds, it will start spiral cleaning mode automatically.
-
Page 16: Water Tank & Mopping Cloth
B. Mode1 for spot cleaning, mode 2 for auto cleaning mode 3 for edge cleaning, mode 4 for zig-zag cleaning. The principle of over ow water tank Water ow out from the water tank automatically because of gravity, so please take out the water tank after nishing cleaning. -
Page 17: Product Maintenance
Note: A. Please don’t clean carpet by the cleaner with water tank. B. Mopping cloth must be well located on the water tank, pay attention to avoid friction with robot wheel. Warning: Avoid allowing the robot to clean with water tank on wooden oor or dry area only. -
Page 18: Cleaning Sensors And Wheels
F. Clean dust bin and primary lte G. Install primary lter and HEPA lter under tap water Note: a. Wash HEPA lter after 15~30 days of use. Max life span for HEPA and lter is 24 months. b. Reinstall the HEPA and primary lter after they are fully dry. c. -
Page 19: Cleaning Charging Poles
4. Cleaning Charging Poles Cleaning the charging poles, as marked in the gure below, with soft cleaning cloth or tool. Troubleshooting Problem Possible Cause Solution Robot suddenly stops Re-place the robot on the oor cleaning & indicator Robot was picked up and re-start the robot stays in blue 1. - Page 20 REMOVAL OF APPLIANCES USED Directive 2012/19/EU on waste electrical and electronic Equipment (WEEE) requires that the appliance uses are not disposed of using the normal municipal waste. Old appliances must be collected separately in order to optimize the recovery and recycling of materials they contain and reduce the impact on human health and the environment.
- Page 21 Features: • Keep it Clean: Sweep, Dust & Vacuum • Versatile & Convenient Floor Clean Ability • Smart, Self-Programmed Cleaning Path Navigation • Low-Pro le Design Slides Underneath Furniture • Anti-Fall Stair Sensors & Protective Bumper Housing • Obstacle Detection Cleans Around Household Objects •...
- Page 22 Questions? Issues? We are here to help! Phone: (1) 718-535-1800 Email: support@pyleusa.com...
Need help?
Do you have a question about the PUCRC95PLUS and is the answer not in the manual?
Questions and answers