
Subscribe to Our Youtube Channel
Related Manuals for Pure Clean PUCRC675


Summary of Contents for Pure Clean PUCRC675
- Page 1 PUCRC675 Pure Clean Smart Vacuum Cleaner Automatic Robot Cleaning Vacuum, Auto Charge Docking Station...
- Page 2 All the pictures in the User Manual are for reference only. Please refer to the actual items in the package. MENU 1. Wi-Fi Setup Instructions 2. Safety Instructions 3. Product Components 3. 1 Name of Parts 3.2 Products Speci cations 3.3 Product Characteristics 4.
- Page 3 WI FI SETUP INSTRUCTIONS Scan the QR code in Figure 1 to download and install “WeBack” APP, or download and install from other APP stores. Figure 1 Open App, directly log in if you have a “WeBack” account; if not, you can select “New User”...
- Page 4 When you see the APP enter interface Figure 5, you can start using APP to control your ROBOT. Tap the device to enter the main interface of APP (Figure 5), from this interface you can choose di erent cleaning modes, also to check the cleaning process/status. Tap the “more” Key (Figure 6) to enter the multi-functional panel (Figure 7).
-
Page 5: Safety Instruction
SAFETY INSTRUCTION Before using this product, please read the safety instructions below and follow all the routine safety precautions. Please read the Instructions carefully and keep them for future reference. Any operation that does not conform to the instructions may cause damage to the product. Safety Considerations of Main Body and Accessories WARNING 1. - Page 6 4. Do not use the product in humid environments, such as bath rooms. 5. Do not place the product near cigarette butts, lighters or other open res. 6. Please clean the product after charging. 7. Turn o the power switch on the side of the robot when the product is out of service for a long time.
- Page 7 ATTENTION 1. lf abnormal overheating is discovered during charging, stop using it immediately to avoid leakage, heating or rupture. 2. To prolong the service life of the battery, please remove the battery and place it in a cool, dry environment if it is out of service for a long time;...
-
Page 8: Product Components
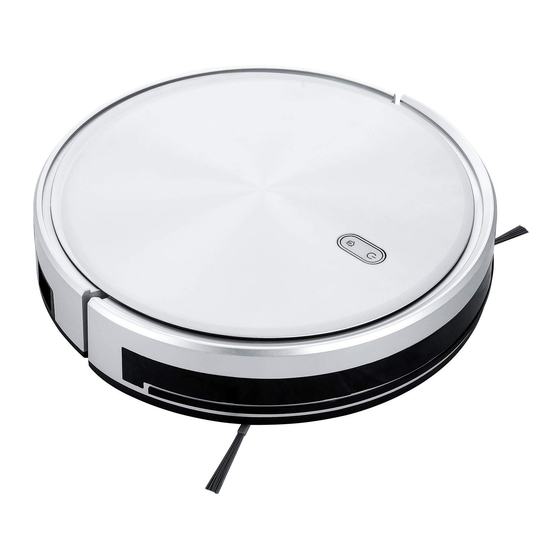
PRODUCT COMPONENTS 3.1 Names of Parts Accessories of some models may be slightly di erent and they are subject to the actual received products. www.PyleUSA.com... - Page 9 Main Body 1. Bumper 2. Power Button 3. Wi-Fi Indicator 4. Control Button Main Body 1. Universal wheel 2. Electrode slice 3. Side brush 4. Battery cover 5. Side wheel 6. Rolling brush components 7. Dust box Main Body 1. DC power jack 2.
-
Page 10: Charging Base
Dust Box 1. Per- lter 2. High-e cient lter 3. Filter sponge 4. Dust box 5. Dust box cover Water Tank Component 1. Tank sealing cap 2. Water tank 3. Mop Charging Base 1. Charging indicator 2. DC power jack 3. - Page 11 3.2 Product Speci cations Features: • Keep it Clean: Sweep, Dust & Vacuum • Versatile & Convenient Floor Clean Ability • Smart, Self-Programmed Cleaning Path Navigation • Low-Pro le Design Slides Underneath Furniture • Anti-Fall Stair Sensors & Protective Bumper Housing •...
-
Page 12: Product Characteristics
3.3 Product Characteristics Multiple smart cleaning modes 4 cleaning modes are designed to suit di erent needs, which can be switched by the remote controller and App, greatly improves the cleaning e ciency and saves 30% of the power. Humanized design It is simple to operate, pressing the Control Button to start cleaning. - Page 13 4.1 Attention When it is working, please help to remove the unfriendly obstacles. Put the furniture and home appliances such as tables and chairs in the house neatly, the robot will clean up smoothly to give you a clean new home. If the robot works at the stairway, the edge of the step, or the entrance to the narrow area among the furnitures, etc.
-
Page 14: Remote Controller Instruction
Please pay attention to remove sundries, such as the power cords, toys, etc, which are scattered on the ground may catch or entangle the Robot. Do not use the mopping function on the carpet! If there is a carpet in the house, please roll up the edge of the carpet in advance. - Page 15 INSTRUCTIONS FOR USE Plan Cleaning button No matter what mode the robot is in, this button will bring it to the plan cleaning mode. Return for Auto Charging Pressing this button to shift the mode as recharging, and the logo will be displayed on the screen of the remote controller.
- Page 16 Clock Setting button Press this button to enter the Clock Setting mode and press the Con rm button to exit. Schedule Setting button At the standby mode, press this button to enter the Schedule Setting mode, and the display ashes icon .
- Page 17 Switch on the robot, which makes the Control button green, and enter the Selected mode. If the robot is not activated within 10 minutes, the robot will enter Sleep mode. Charging modes Please keep the power switch turned on before charging the machine. Charge mode A: Fix the charging pin into the DC power jack of the robot and plug in the power supply.
- Page 18 Automatic charging • Pressing the Return for Auto Charging on the remote controller to make the robot return for charging. • When Cleaning is completed or the battery is too low, the robot will automatically start nding the charging base to charge itself. •...
-
Page 19: Switching Modes
Switching Modes Startup 1. Make sure the power switch on the side of the robot is turned on. 2. Press the Control button or the Cleaning mode on the remote controller to start the robot. Pause The pause function is to switch the robot from the operating mode to the selected mode, and the robot can be paused by the following operations: 1. - Page 20 Use of Water Tank When charging, please remove the water tank to avoid danger. How to add water? Open the tank sealing cap, ll it with enough water and slowly inject water into the water tank. When charging, please remove the water tank to avoid danger. How to x the micro ber mop? Seal the tank sealing cap,then x the micro ber mop to the velcro on the bottom of the water tank.
- Page 21 How to install the water tank? Press the release button on the dust box to remove it then install the water tank. Schedule Setting Cleaning You can set the current local time on your robot by pressing the Clock Setting button on the remote controller, then press Con rm button. •...
- Page 22 At the Schedule Setting mode, follow the voice prompts to con rm all your operations. 1. Press the Schedule Setting button to enter the Schedule Setting mode and set the schedule on the remote controller or APP. 2. If you need cancel the schedule, just press the Schedule Setting button for 3 seconds.
-
Page 23: Product Maintenance
PRODUCT MAINTENANCE 5.1 Side Brush Cleaning and Replacement Check the side brush's condition frequently to see if it has been damaged or entangled with other objects. Clean the side brush with a cleaning tool or cloth. When the side brush is damaged and can not be used, please replace it as soon as possible. - Page 24 Remove the pre- lter. Open the high-e cient lter cover, and remove the high-e cient lter and lter sponge. It is not recommended to wash the high-e cient lter with water. Please pat o the debris carefully. Wash the dust box and pre- lter. www.PyleUSA.com...
- Page 25 1. Dry the dust box and lter components. Keep them dry to ensure a longer service. 2. After the pre- lter is used for 15~30 days, it should be washed once. 3. The maximum service life of the high-e cient lter is 3 months. 1.
- Page 26 5.3 Maintenance of Water Tank Press the release button to take out the water tank. Remove the mop. Wash and dry the mop. www.PyleUSA.com...
- Page 27 Pour out the rest of water from the water tank. Clean the tank and dry it. 5.4 Maintenance of Rolling Brush Components Open the rolling brush components. www.PyleUSA.com...
- Page 28 Remove the rolling brush and clean o all debris and hair. 5.5 Maintenance of Other Components Electrode slice Sensor Use the cleaning tools or a dry soft cloth to periodically clean the electrode slice of robot chassis and the sensor window. Use a cleaning tool or soft cloth to clean the charging terminal.
-
Page 29: Common Faults
COMMON FAULTS 6.1 Faults Description FAULTS POSSIBLE REASONS SOLUTIONS The electrodes between the Make sure that the electrodes main body and the charging between the main body and base are not contacted the charging base are properly properly. contacted. The robot can not be The charging base is switched Keep charging the robot when... - Page 30 FAULTS POSSIBLE REASONS SOLUTIONS The remote controller is short Change the batteries and of or out of power. install the batteries correctly. Remote Make sure that the robot is control The robot is short of or out switched on with enough malfunctions of power.
-
Page 31: Replaceable Modules
6.2 Replaceable Modules Glass Panel Shell Side Brush Components Left Side Wheel Component Right Side Wheel Component Fan Components Left Side Brush Universal Wheel Right Side Brush Components Bottom Shell Dust Box Components Rolling Brush Components Water Tank Battery Battery Cover Application: The product is suitable for cleaning house, hotel rooms, and small o ces and provides good cleaning for various oors, such as... - Page 32 Questions? Issues? We are here to help! Phone: (1) 718-535-1800 Email: support@pyleusa.com...
Need help?
Do you have a question about the PUCRC675 and is the answer not in the manual?
Questions and answers
I need to know what app to download. I have a pure clean smart robot vacuum. Pucrc675.