
Related Manuals for Pure Clean PUCRC95


Summary of Contents for Pure Clean PUCRC95
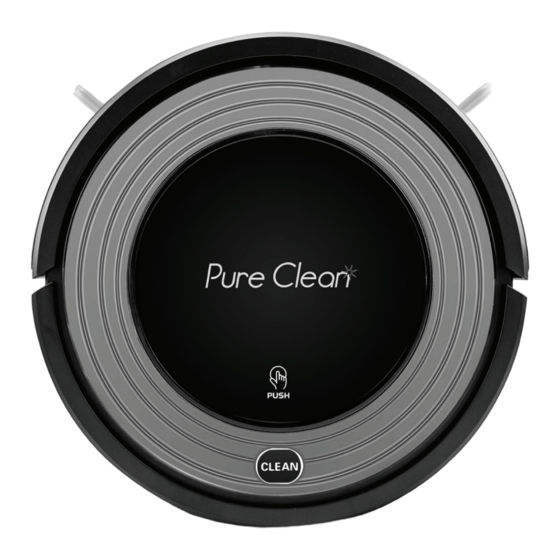
- Page 1 PUCRC95UK PUCRC95/PUCRC96B Smart Robot Vacuum Cleaner Automatic Floor Cleaner with Mop Sweep, Dust & Vacuum Ability...
-
Page 2: Table Of Contents
CONTENTS SAFETY INSTRUCTIONS PRODUCT FEATURES PRODUCT COMPONENT MAIN BODY AND ACCESSORIES MAIN BODY DIAGRAM/DUST BIN CHARGING STATION/REMOTE CONTROLLER DISPLAY PANEL PRODUCT OPERATION BATTERY CHARGING STARTING UP/STANDBY/SLEEP MODE/POWER OFF SCHEDULING CLEANING MODES PRODUCT MAINTENANCE CLEANING SIDE BRUSHES CLEANING DUST BIN AND FILTERS CLEANING SENSORS AND WHEELS CLEANING CHARGING POLES CLEANING SUCTION PASSAGE... -
Page 3: Safety Instructions
SAFETY INSTRUCTIONS Before using this product, please read the safety instructions! • Read this user manual thoroughly and carefully before using this product. • Keep this user manual and save it for future reference. • Any operation that does not comply with this manual may cause damage to the product. -
Page 4: Product Features
WARNING: The appliance is not intended for children under 8 years old, people with reduced physical, sensory or mental capabilities, or lack of experience and knowledge. Proper supervision or instruction should be given to help them understand the hazards involved, and how to use the appliance in a safe way. - Page 5 PRODUCT FEATURES 2. Spot Cleaning Mode The robot will clean intensively in a spiral way with more power, suitable for an open area with much dust. 3. Edge Cleaning Mode In this mode the robot will clean along the wall or obstacles. 4.
-
Page 6: Product Component
PRODUCT COMPONENTS Main Body and Accessories Descrip�on Quan�ty Main Body Charging Sta�on Power Adapter Remote Controller (ba�ery not included) Mopping Cloth*1 and Mopping Plate*1 HEPA Filter Cleaning Brush Side Brushes *2 User Manual www.PyleUSA.com... -
Page 7: Main Body Diagram/Dust Bin
PRODUCT COMPONENTS Main Body Diagram Bumper Upper cover Button Universal wheel Battery cover Left side brush Right side brush Suction passage Right wheel Bottom cover Power switch Bottom cover Upper cover Dust bin Charging socket Dust Bin Primary lter Dust bin HEPA lter HEPA lter shelf www.PyleUSA.com... -
Page 8: Charging Station/Remote Controller
PRODUCT COMPONENTS Charging Station Signal receiver Power light Infrared signal transmitting window Top cover Power supply socket Charging poles Remote Controller 1. Digital display 2. Auto charging 3. Scheduling button 4. Direction buttons 5. ON/OFF 6. Mode selection button 7. Spot cleaning button 8. -
Page 9: Display Panel
PRODUCT COMPONENTS Display Panel A. Switch on robot, press CLEAN button or ON/OFF on remote, robot will beep twice and enter in standby status, the indicator will ash blue. B. Press CLEAN button or ON/OFF on remote again, robot will beep three times and the indicator will ash blue quickly, if its function is normal, robot will start cleaning, and the indicator stay blue during cleaning. -
Page 10: Product Operation
PRODUCT OPERATION Battery Charging 1. Charging station placement Place charging station against the wall and remove obstacles within 1 meter at two sides and 2 meters ahead. As shown in the right gure. 2. If the robot has been shut down, power on it by turning on the power switch at the right side of the robot before charging. -
Page 11: Starting Up/Standby/Sleep Mode/Power Off
PRODUCT OPERATION STARTING UP / STANDBY / SLEEP MODE / POWER OFF 1. STARTING UP A. Power on the robot by turning on the power switch at the right side of machine. Press CLEAN button or ON/OFF on remote, robot will beep twice and enter in standby status, CLEAN indicator light will ash blue gradually. -
Page 12: Scheduling
PRODUCT OPERATION SCHEDULING You can schedule the robot to make it start cleaning automatically at a certain time everyday. 1. The robot can only be set when it’s in standby or charging on the docking station. (If the robot is in cleaning, pause it before scheduling. If the robot is in sleep mode, long press CLEAN button on main body or ON/OFF on remote controller to wake it up. -
Page 13: Cleaning Modes
PRODUCT OPERATION Note: A. The robot will work at the scheduled time everyday if schedule is not canceled. B. All scheduling will be canceled if you switch o / power o the robot (If no operation on robot for 1 minute, it will turn to sleep mode. If no operation for 15 minutes, it will turn to deep sleep and power o , scheduling will be canceled.) So, if you want to keep scheduling when you’re not at home, do not switch o power button of robot and charging station, and make sure... - Page 14 PRODUCT OPERATION 1.4 Edge Cleaning (mode 3) In this mode, robot will clean along the wall or obstacles. Note: A. Switch on the robot, press MODE on the remote controller and select edge mode. B. Under edge cleaning mode, the robot will do cleaning along the obstacle by its side brushes.
-
Page 15: Product Maintenance
PRODUCT MAINTENANCE 1. Cleaning Side Brushes Clean the side brush when it gets dirty and replace it if it's damaged. Maximum life span for side brush is 12 months. Note: Before replacing side brushes, please pay attention to the left mark and the right mark (‘L’/ ‘R’) on side brushes, which match with the ‘L’/ ‘R’... -
Page 16: Cleaning Sensors And Wheels
PRODUCT MAINTENANCE 3. Cleaning Sensors and Wheels Slightly wipe all sensors and wheels, as marked in above gure, with soft cloth or tool. 4. Cleaning Charging Poles Cleaning the charging poles as marked in below gure, with soft cloth or tool. -
Page 17: Cleaning Suction Passage
5. Cleaning Suction Passage Cleaning the suction passage, as marked in below gure, with soft cloth or tool. Note: Pay attention and avoid wetting the sensors. 6. Mopping Cloth Usage A. Stick mopping cloth on mop plate x them at the bottom of the robot, as shown in right gure. -
Page 18: Troubleshooting
TROUBLESHOOTING Problem Possible Cause Solu�on Robot suddenly stops Robot was picked up Put the robot on the cleaning and indicator (sensors detect cliff or solid floor and re-start stays blue. wheel off the ground). the robot. Place the robot on 1. -
Page 19: Product Specification
PUCRC95UK - PUCRC95 - PUCRC96B Smart Robot Vacuum Automatic Floor Cleaner with Dry Mop, Sweep, Dust & Vacuum Ability Features: • Self-Programmed Robot Vacuum & Cleaner • Keep it Clean: Dusts, Sweeps & Vacuums • Includes Dry Mop Accessory Attachment for Floors that Shine •...
Need help?
Do you have a question about the PUCRC95 and is the answer not in the manual?
Questions and answers