
Related Manuals for Pure Clean PUCRC90


Summary of Contents for Pure Clean PUCRC90
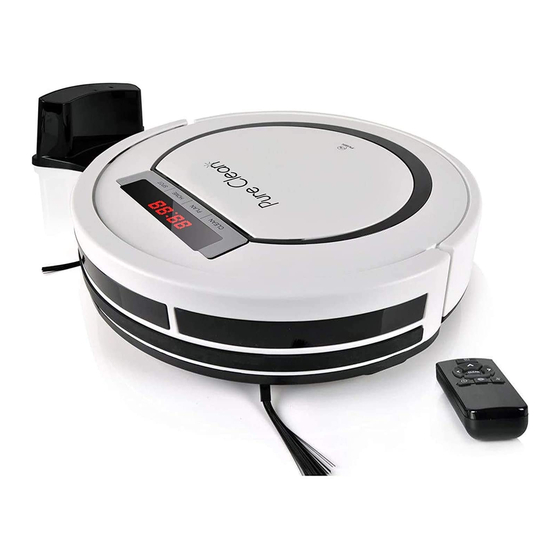
- Page 1 PUCRC90 Smart Robot Vacuum Automatic Floor Cleaner with Sweep, Dust and Vacuum Ability...
-
Page 2: Table Of Contents
TABLE OF CONTENTS SAFETY INSTRUCTIONS PRODUCT PARTS Main Body and Accessories Robot Anatomy Charging Home Base and Remote Control Display Panel Remote Control Operating PRODUCT OPERATING How to Get Started Starting up/Pause/Sleeping Scheduling Cleaning Mode PRODUCT MAINTAINING Cleaning Side Brushes Cleaning Dust Bin and Filters Cleaning Sensors TROUBLESHOOTING... -
Page 3: Safety Instructions
SAFETY INSTRUCTIONS Before using this product, please read the following safety instructions and follow all normal safety precautions. Before using this product, ensure the power switch is ON. • • Turn o the power switch on the right side of the main body when you don't need to use this product for a long time. -
Page 4: Product Parts
Product Parts Main Body and Accessories DESCRIPTION Q'TY Main Body Charging Home Base Remote Control (battery not included) Adapter Cleaning Tool User Manual Extra Side Brushes Extra HEPA Filter www.PyleUSA.com... -
Page 5: Robot Anatomy
Product Parts Robot Anatomy Display Panel Bumper Main Pad Middle Pad Nose Wheel Auto Charging Pin Right Side Brush Left Side Brush Suck Passage Battery Cover Right Wheel Left Wheel Bottom Cover Middle Cover Dust Bin / Water Tank Power Switch Primary Filter Dust Bin HEPA Filter... -
Page 6: Charging Home Base And Remote Control
Product Parts Charging Home Base Signal Light Charge Connecting Points Power Supply Socket Charge Connecting Points Remote Control Home Directional Buttons Clean Plan Edge Spot www.PyleUSA.com... -
Page 7: Display Panel
Product Parts Display Panel When the robot is working or under operation, display panel will show the current status as below: When the display panel flashes like this, it means the robot is in selected mode, other opeation can be performed. Means robot is in edge cleaning mode Means robot is in auto cleaning mode Means robot is in spot cleaning mode... -
Page 8: Remote Control Operating
Product Parts Remote Control 1. “ ” Scheduling Button: A. In selected mode, press to enter scheduling mode. B. In scheduling mode, press to switch between hour and minute. Clean Butoon: A. In selected mode, press to start working. B. In Scheduling mode, press to confirm scheduling. C. -
Page 9: Product Operating
Product Operating 1. HOW TO GET STARTED 1. Place charging home base, plug in adapter, signal light on charging home base will ash. NOTE: Put charging home base against the wall and remove obstacles about 1 meter at both sides and about 2 meters forward. 2. -
Page 10: Starting Up/Pause/Sleeping
2. STARTING UP/PAUSE/SLEEPING Sleeping mode: Robot is not working, no display on display panel and power switch is on; Selected mode: Robot is not working, “88:88” on display panel is ashing; Cleaning mode: Robot is working, display panel will show di erent status. 1. -
Page 11: Cleaning Mode
Product Operating Scheduling on Display Panel: 1. Turn on power switch and press PLAN to enter scheduling mode. 2. In scheduling mode, press PLAN to exchange hour and minute, press HOME toincrease number and press SPOT to decrease number. 3. Press CLEAN to confirm the setting. To cancel, long press PLAN for 5 seconds and then press CLEAN to con rm cancelling. -
Page 12: Product Maintaining
1. Cleaning Side Brushes Clean the side brushes when it gets dirty and replace if it’s damaged. NOTE: Before replacing side brushes, check and match "L” “R” mark on both side brush and bottom of robot. 2. Cleaning dust bin and lter Clean and empty dust bin after each use, steps are as shown in below figures. -
Page 13: Troubleshooting
Troubleshooting 1. ERROR CODE SHEET When the robot meets with some routine troubles, it will remind you by a beep. • Short tone Tone Cause Solution Check the wheels Wheels don’t work or side brushes Clean cli sensor and Cli sensor or bumper shake bumper slightly, check if there’s sensor failure... -
Page 14: Product Specifications
PUCRC90 Smart Robot Vacuum Automatic Floor Cleaner with Sweep, Dust & Vacuum Ability Features: • Self-Programmed Robot Vacuum & Cleaner • Keep it Clean: Sweep, Dust & Vacuum • Take Control: Use the Wireless Remote & Steer the Vacuum •... - Page 15 What’s in the Box: • Smart Robot Vacuum • Charging Station • Remote Control • (2) Detachable Sweep Brushes • Power / Charge Adapter Technical Specs: • Dust Bin Capacity: 0.3L • Average Charge Time: 4 Hours • Vacuum Operation Run-Time: 90 Minutes •...
Need help?
Do you have a question about the PUCRC90 and is the answer not in the manual?
Questions and answers
E 10 message when first charge
@Amrick Sondh did you ever get this sorted. The same is happening to mine
Error code 10
machine wont charge showing code e10