Table of Contents
Advertisement
Quick Links
Advertisement
Table of Contents

Related Manuals for Advantech POC-S155


Summary of Contents for Advantech POC-S155
- Page 1 POC-S155 Slim Point of Care Terminal with 15" TFT LCD User Manual...
- Page 2 No part of this man- ual may be reproduced, copied, translated or transmitted in any form or by any means without the prior written permission of Advantech Co., Ltd. Information provided in this manual is intended to be accurate and reli- able.
- Page 3 Product Warranty (1 year) Advantech warrants to you, the original purchaser, that each of its prod- ucts will be free from defects in materials and workmanship for two years from the date of purchase. This warranty does not apply to any products which have been repaired or...
- Page 4 Caution Danger of explosion if battery is incorrectly replaced. Replace only with the same or equivalent type recom- mended by the manufacturer. Dispose of used batteries according to the manufacturer’s instructions. POC-S155 User Manual...
- Page 5 1.3 Additional Information and Assistance 1. Visit the Advantech websites at www.advantech.com or www.advantech.com.tw where you can find the latest information about the product. 2. Contact your distributor, sales representative, or Advantech's customer service center for technical support if you need additional assistance.
- Page 6 1. Read these safety instructions carefully. 2. Keep this User's Manual for later reference. 3. Disconnect this equipment from any AC outlet before cleaning. Use a damp cloth. Do not use liquid or spray detergents for cleaning. POC-S155 User Manual...
- Page 7 4. For plug-in equipment, the power outlet socket must be located near the equipment and must be easily accessible. 5. Keep this equipment away from humidity. 6. Put this equipment on a reliable surface during installation. Dropping it or letting it fall may cause damage. 7.
- Page 8 21. Maintenance: to properly maintain and clean the surfaces, use only the approved products or clean with a dry applicator. 22. Contact information: No.1, Alley 20, Lane 26, Reuiguang Road Neihu District, Taipei, Taiwan 114, R.O.C. TEL: (02)27927818 POC-S155 User Manual viii...
- Page 9 27. The sound pressure level at the operator's position according to IEC 704-1:1982 is no more than 70dB(A). DISCLAIMER This set of instructions is given according to IEC 704-1. Advantech disclaims all responsibility for the accuracy of any statements contained herein...
- Page 10 POC-S155 User Manual...
-
Page 11: Table Of Contents
1.2.9 Cleaning/Disinfecting ............ 5 LCD Specifications ............5 Dimensions................ 6 Figure 1.1:Dimensions of the POC-S155 ...... 6 Chapter 2 System Setup............ 8 A Quick Tour of the POC-S155........8 Figure 2.1:Front View of the Point of Care Terminal ... 8 Figure 2.2:Rear view of the Point of Care Terminal .. - Page 12 ....32 6.2.2 Installation for Windows XP ........33 Figure 6.2:WinXP Drive Installation ......33 Further information ............34 Appendix A VESA Mounting ..........36 Install VESA Mounting ..........36 Figure A.1:VESA mounting 75x75mm, 100x100mm . 37 POC-S155 User Manual...
- Page 13 General Information This section provides general informa- tion and technical specifications about the POC-S155 Sections include: • Introduction • Specifications • LCD Specifications • Dimentions...
-
Page 14: Chapter 1 General Information
PC-based system with 15" color TFT LCD display, on-board PCI Ether- net controller, dual COM port interfaces and a 16-bit stereo audio control- ler. With a built-in 2.5” HDD drive, and CF card sockets, the POC-S155 is as slim and user-friendly as a notebook computer and low audible noise. -
Page 15: Standard Pc Functions
• Disk drive housing: Space for one 2.5" HDD • Front panel: IP65/NEMA compliant • Whole System: IPX0 compliant 1.2.2 Standard PC functions • CPU: Intel® Embedded Intel® Pentium® M or Celeron® M processor w/64KB primary cache memory • Memory: 1 x 200 pin SO-DIMM sockets, support ECC Double Dat- aRate (DDR)128 MB to 512 MB, accept 128/256/512 MB DDR200/ 266DRAM (855GME could support to DDR333 DRAM) •... -
Page 16: Pci Bus Ethernet Interface
• Shock: 20 G, half sine, 11 msec duration • Vibration: 0.047 double amplitude displacement ( 5~32Hz) 1G Peak (32 -500 Hz ) • Power MTBF: 100,000 hrs • Altitudes: Operational : 6,000 feet ; shipping : 40,000 feet POC-S155 User Manual... -
Page 17: Cleaning/Disinfecting
Agents: Green tinctured soap and Enzy- matic detergents Steps: 1. Wipe the POC-S155 with a clean cloth that has been moistened in the cleaning solution. 2. Prepare agent per manufacturer’s instructions or hospital protocol. 3. Wipe thoroughly with a clean cloth... -
Page 18: Dimensions
• Contrast ratio: 400 : 1 • LCD MTBF: 50,000 hours • Backlight lifetime: 50,000 hours @ Standard current 6.5 mA 1.4 Dimensions Figure 1.1: Dimensions of the POC-S155 POC-S155 User Manual... - Page 19 System Setup This section gives a quick tour of the POC-S155 including installation proce- dures, BIOS Setup, and software and driver installation...
-
Page 20: Chapter 2 System Setup
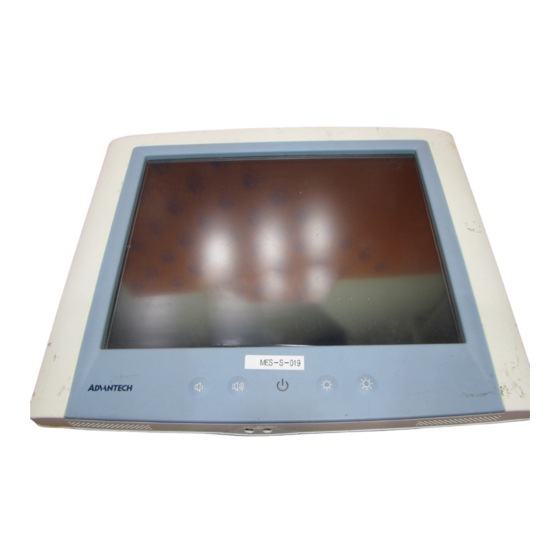
Chapter 2 System Setup 2.1 A Quick Tour of the POC-S155 Before you start to set up the POC-S155, take a moment to become famil- iar with the locations and purposes of the controls, drives, connections and ports, which are illustrated in the figures below. - Page 21 When you turn the Point of Care Terminal around and look at its rear cover, the sunken I/O section is at the bottom of the panel PC, as shown in Figure 2-2. (The I/O section includes various I/O ports, including serial ports, VGA port, the Ethernet port, USB ports, the microphone jack, and so on.) When you turn the Point of Care Terminal around and look at its rear...
-
Page 22: Installation Procedures
2.2 Installation Procedures 2.2.1 Connecting the power cord The POC-S155 could only be powered by a DC power adapter (SINPRO Model no.MPU50-108). Be sure to always handle the power cords by holding the plug ends only. Follow these procedures in order: 1. -
Page 23: Switching On The Power
Figure 2.4: Connecting the mouse and keyboard 2.2.3 Switching on the power Switch on the power switch on the rear cover. (See Figure 2-5.) 2.2.4 Connecting the COM ports (COM 1,2) Figure 2.5: Connecting the device to COM ports Chapter 2... -
Page 24: Running The Bios Setup Program
2.3 Running the BIOS Setup Program Your POC-S155 is likely to have been properly set up and configured by your dealer prior to delivery. You may still find it necessary to use the BIOS (Basic Input-Output System) setup program to change system con- figuration information, such as the current date and time or your type of hard drive. -
Page 25: Installing The Drivers
CD-ROM is: Figure 2.6: File dir on "Drivers and Utilities" CD Note The drivers and utilities used for the POC-S155 panel PCs are subject to change without notice. If in doubt, check Advantech's website or contact our application engineers for the latest information regarding drivers and utilities. - Page 26 POC-S155 User Manual...
- Page 27 PCI Bus Ethernet Inter- face This section includs information about the high-performance Ethernet network chipset...
-
Page 28: Chapter 3 Pci Bus Ethernet Interface
Chapter 3 PCI BUS Ethernet Interface 3.1 Introduction The POC-S155 is equipped with a high-performance 32-bit Ethernet chipset which is fully compliant with IEEE 802.3 100 Mbps CSMA/CD standards. It is supported by major network operating systems. It is also both 100Base-T and 10Base-T compatible. - Page 29 Figure 3.1: Lan Driver installation Chapter 3...
-
Page 30: Further Information
3.3 Further information For further information about the Ethernet installation in your POC- S155, included Driver updates, troubleshooting guides and FAQ lists please visit the following web resources. Realtek website: www.intel.com.tw Advantech websites: www.advantech.com www.advantech.com.tw POC-S155 User Manual... - Page 31 PCI Graphic Setup This section describes the PCI Graphics card setup and driver installation.
-
Page 32: Chapter 4 Pci Graphic Setup
The POC-S155 has an onboard PCI/AGP flat panel/VGA interface. The specifications and features are described as follows:. 4.1.1 Chipset The POC-S155 uses a Intel 855GME/852GM for its graphic controller. It supports LVDS LCD displays, and CRT monitors. 4.1.2 Display memory... - Page 33 Note2 <Enter> means pressing the “Enter” key on the keyboard. Note3 Before you install the graphic driver of POC-S155, please ensure you have installed the INF driver of the Intel 855GME/852GM chipset. You can find this driver in the Utility CD-ROM.
-
Page 34: Installation For Windows 2000/Xp
4.2.1 Installation for Windows 2000/XP Figure 4.1: Graphic Driver Installation POC-S155 User Manual... -
Page 35: Further Information
4.3 Further information For further information about the AGP/SVGA installation in your POC- S155, included Driver updates, troubleshooting guides and FAQ lists please visit the following web resources. Intel website: www.intel.com.tw Advantech websites: www.advantech.com www.advantech.com.tw Chapter 4... - Page 36 POC-S155 User Manual...
- Page 37 Audio Interface This section explains the audio inter- face of the POC-S155 and installation of the Windows 2000/XP drivers...
-
Page 38: Chapter 5 Audio Interface
Before installing the audio driver, please take note of the procedures detailed below. You must know which operating system you are using in your POC-S155, and then refer to the corresponding installation flow chart. Just follow the steps in the flow chart. You can quickly and successfully complete the installation, even though you are not familiar with instructions for Windows. - Page 39 5.2.1 Installation for Windows 2000/XP Figure 5.1: Audio Driver Installation Chapter 5...
-
Page 40: Further Information
5.3 Further information For further information about the Audio interface installation in your POC-S155, included Driver updates, troubleshooting guides and FAQ lists please visit the following web resources. Realtek website: www.realtek.com.tw Advantech websites: www.advantech.com www.advantech.com.tw POC-S155 User Manual... - Page 41 Touchscreen Interface This section explains the Touchscreen Interface including its specifications, operating conditions, and driver instal- lation for Windows 2000/XP...
-
Page 42: Chapter 6 Touchscreen Interface
Chapter 6 Touchscreen Interface 6.1 Introduction 6.1.1 General Information The POC-S155's optional touchscreen incorporates advanced second- generation 5-wire resistive technology. They allow 75% light transmission respectively. The resistive and capacitive models have an antiglare surface. All models provide greatly enhanced visual resolution. -
Page 43: Installation Of Driver For Touchscreen
• Hexane • Ammonia-based glass cleaners • Turpentine • Mineral spirits • Foods and beverages 6.2 Installation of Driver for Touchscreen To facilitate installation of the touchscreen driver, you should read the instructions in this section carefully before you attempt installation. Important The following windows illustrations are examples only. -
Page 44: Installation For Windows 2000
6.2.1 Installation for Windows 2000 Figure 6.1: Win2000 Driver Installation POC-S155 User Manual... -
Page 45: Installation For Windows Xp
6.2.2 Installation for Windows XP Figure 6.2: WinXP Drive Installation Chapter 6... -
Page 46: Further Information
6.3 Further information For further information about the Touchscreen installation in your POC- S155, included Driver updates, troubleshooting guides and FAQ lists please visit the following web resources. Elo website: www.elotouch.com Advantech websites: www.advantech.com POC-S155 User Manual... - Page 47 VESA Mounting The following section explains how to install the VESA mounting system for the POC-S155...
-
Page 48: Appendix A Vesa Mounting
1. The wall-mounting attachment is comprised of two parts: one back bracket, and one mounting bracket. 2. First attach the back bracket to the rear cover of the POC-S155, secur- ing it in place with four of the philips-head screws provided. - Page 49 Figure A.1: VESA mounting 75x75mm, 100x100mm Appendix A...
- Page 50 POC-S155 User’s Manual...
Need help?
Do you have a question about the POC-S155 and is the answer not in the manual?
Questions and answers