Advertisement
Additional Hardware:
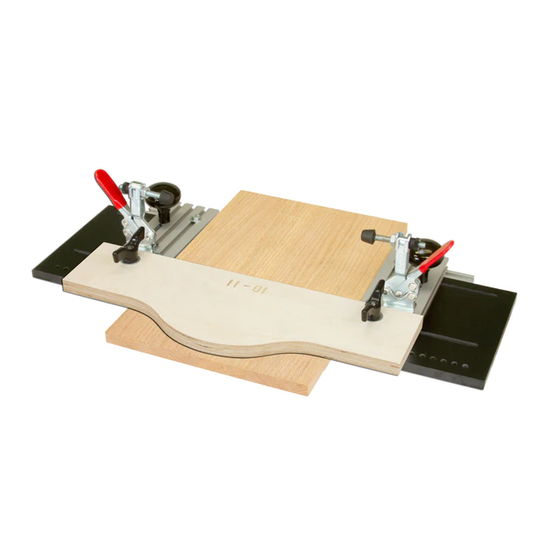
Parts listed below are not shown in the hardware
drawings. Refer to photos in the instructions:
Part
Desc . . . . . . . . . . . . . . . . . . . . . . . . Qty
5432B
Base . . . . . . . . . . . . . . . . . . . . . . . . . . . . . . . . . . . . .1
5432S
5-7/8" One Track . . . . . . . . . . . . . . . . . . . . . . . . .2
5432T
6-3/4" Ultra Track Fence . . . . . . . . . . . . . . . . . .2
6305
Toggle Clamps . . . . . . . . . . . . . . . . . . . . . . . . . . .2
Part#
Description
Qty .
MP375
3/8" Screw
4
Part#
Description
Qty .
HB030
1" Bolt
2
Part#
Description
Qty .
HB040
1-1/4" Bolt
4
Part#
Description
Qty .
HB060
3" Bolt
2
Part#
Description
Qty .
MF006
5/8" screw
4
Part#
Description
Qty .
5765B
Oval Nut
8
Part#
Description
Qty .
5760B
Oval Nut
4
Part#
Description
Qty .
WS002
Washer
4
HD Panel Master
Owners Manual
U.S. Patent #5,960,843
Please Read Carefully!
BEFORE BEGINNING
Identify and verify that you have all the parts listed. The
HD Panel Master was designed to be used with Woodhaven
HD Door Templates with the hardware included. It can also
be used with our Standard Door Templates by purchasing the
5431 Hardware Kit. It can be used on a shaper or a router
table using the HD Door Templates and on a router table
only if using the Standard Door Templates. You'll need a #3
Phillips screwdriver and a 7/16" wrench for assembly. Read
the instructions carefully at least once before beginning.
Part#
Description
BUSH004 5/8" Spacer
Part#
Description
BUSH1125 1/8" Spacer
Part#
Description
BUSH1250 1/4" Spacer
Part#
Description
WFN002 1" Washer
5432
Qty .
Part#
Description
2
5525
Knob
Qty .
8
Part#
Description
5548
2" T-Knob
Qty .
8
Qty .
Part#
Description
4
5590
Knob
Qty .
2
Qty .
2
Qty .
2
Advertisement
Table of Contents

Related Manuals for Woodhaven 5432


Summary of Contents for Woodhaven 5432
- Page 1 5432 HD Panel Master Owners Manual U.S. Patent #5,960,843 Please Read Carefully! Additional Hardware: Parts listed below are not shown in the hardware drawings. Refer to photos in the instructions: Part Desc . . . . . . . . . . . . . . . . . . . . . . . . Qty 5432B Base .
- Page 2 Install a 5/8" screw (MF006) thru the countersunk holes in each of the 5-7/8" One Tracks (5432S) and start an oval nut (5765B - smooth side first) on the end of each screw. There are two holes in each of the 6-3/4" Ultra Track Fences (5432T). One 5765B x2 hole is 3/4" from the end of the Fence and the other hole is 1-1/2" from the opposite end of the Fence. & Place the long edges of the two Fences against each other so the holes are closest to and across from each other to insure you have mirror images of the two Fences after assembly. MF006 x2 At the end of each Fence, where the hole is 1-1/2" from the end, install a One Track. Insert the two oval nuts on the One Track in the T-slots of the Fence, butt the long edge of the One Track against the end of the Fence, check it for square and tighten the screws. Install a washer (WS002) on each of the 1-1/4" bolts (HB040). Place the 6-3/4" Ultra Track Fence (5432T) on the Base HB040 x2 (5432B) with two holes in each Fence WS002 x2 aligned with the two slots in the Base and 5760B x2 the One Tracks butted against the rear edge of the Base. The two holes in the Fences should face towards the center of the Base. Insert the 1-1/4" bolts thru the holes in the Fence/slots in Base and, from the underside of the Base, start an oval...
- Page 3 SETUP THE HD PANEL MASTER Insert the panel between the Fences on the Base of the HD Panel Master. Slide the Fences up against each & c e s a n d side of the panel and F e n a s e t e r center the Fences/panel C e n side-to-side on the Base, b o l t o c e l S t e n keeping the One Track P a n...
- Page 4 RAISED PANEL CUT WITH A SHAPER If possible (depends on raised panel cutter & bearing set up), keep the HD Door Template on the HD Panel Master when machining the raised panel profile. The templates are extra long so the bearing can make contact with the template before the cutter makes contact with the panel. This provides greater control and increases the margin of safety. The height of the spacer stacks under the template should place the template at the optimum height for your shaper cutter bearing to ride firmly on the edge of the template. Adjust the number of 1/4" and 1/8" spacers as necessary to achieve the best template height. Make sure the shaper cutter will not hit the template. Make sure the template is in line with the raised panel cutter bearing. Clamp the panel in the HD Panel Master with the toggle clamps, hold the handles and make incremental ©Copyright WOODHAVEN INC. 5/20/15 passes to machine the raised panel profile on the panel. (800) 344-6657 or WOODHAVEN.COM...
Need help?
Do you have a question about the 5432 and is the answer not in the manual?
Questions and answers