Table of Contents
Advertisement
Quick Links
Advertisement
Table of Contents
Troubleshooting

Subscribe to Our Youtube Channel
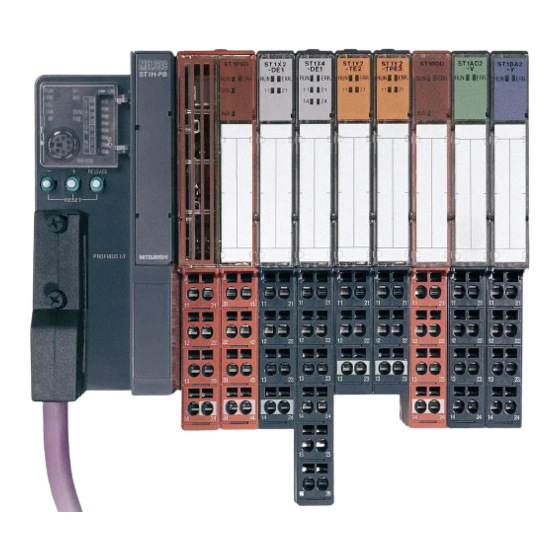
Related Manuals for Mitsubishi MELESEC-ST


Summary of Contents for Mitsubishi MELESEC-ST
-
Page 3: Safety Precautions
SAFETY PRECAUTIONS (Read these precautions before using.) When using Mitsubishi equipment, thoroughly read this manual and the associated manuals introduced in this manual. Also pay careful attention to safety and handle the module properly. The precautions given in this manual are concerned with this product. Refer to the user's manual of the network system to use for a description of the network system safety precautions. - Page 4 [DESIGN PRECAUTIONS] DANGER Create an external fail safe circuit that will ensure the MELSEC-ST system operates safely, even when the external power supply or the system fails. Accident may occur due to output error or malfunctioning. (1) The status of output changes depending on the setting of various functions that control the output.
- Page 5 [INSTALLATION PRECAUTIONS] CAUTION Make sure to externally shut off all phases of the power supply for the whole system before mounting or removing a module. Failure to do so may damage the module. (1) Online replacement of the power distribution module and/or the base module is not available.
- Page 6 [WIRING PRECAUTIONS] CAUTION Prevent foreign matter such as chips or wiring debris from entering the module. Failure to do so may cause fires, damage or erroneous operation. When connecting the communication and power supply cables to the module, always run them in conduits or clamp them.
- Page 7 [STARTUP AND MAINTENANCE PRECAUTIONS] CAUTION Before handling the module, make sure to touch a grounded metal object to discharge the static electricity from the human body. Failure to do say cause a failure or malfunctions of the module. When using any radio communication device such as a cellular phone, keep a distance of at least 25cm (9.85 inch) away from the MELSEC-ST system.
-
Page 8: Revisions
REVISIONS The manual number is given on the bottom left of the back cover. Print Date Manual Number Revision Dec., 2003 SH(NA)-080456ENG-A First edition Aug., 2004 SH(NA)-080456ENG-B Partial addition Contents, Section 3.3, 5.1, 10.2 Apr., 2005 SH(NA)-080456ENG-C Partial addition SAFETY PRECAUTIONS, About Manuals, Section 1, 1.1, 2, 3.1, 3.2, 3.3, 3.4, 5.1, 5.2.1, 8.3, 9.2, 10.1, 10.4.1, 12.2.1, Appendix 1.3, INDEX Nov., 2005... - Page 9 This manual confers no industrial property rights or any rights of any other kind, nor does it confer any patent licenses. Mitsubishi Electric Corporation cannot be held responsible for any problems involving industrial property rights which may occur as a result of using the contents noted in this manual.
-
Page 10: Table Of Contents
INTRODUCTION Thank you for choosing the MELSEC-ST series. Before using the module, please read this manual carefully to fully understand the functions and performance of the MELSEC-ST series and use it correctly. CONTENTS SAFETY PRECAUTIONS..........................A- 1 REVISIONS ..............................A- 6 CONTENTS..............................A- 8 About Manuals ...............................A-11 How to Read Manual (FOR CC-LINK) ......................A-13 How to Read Manual (FOR PROFIBUS-DP)....................A-15... - Page 11 6.3 Part Names .............................. 6- 3 7 I/O MODULES 7- 1 to 7-23 7.1 Input Module Specifications........................7- 1 7.1.1 ST1X2-DE1 DC input module (negative common type) ..............7- 1 7.1.2 ST1X4-DE1 DC input module (negative common type) ..............7- 2 7.1.3 ST1X16-DE1 DC input module (negative common type)..............
- Page 12 11.1.4 External power supply module...................... 11- 5 11.1.5 Others ............................11- 6 11.2 Requirement for Compliance with the Low Voltage Directive ............11- 7 11.2.1 Standard applied for MELSEC-ST series..................11- 7 11.2.2 MELSEC-ST series selection ....................... 11- 7 11.2.3 Power supply..........................11- 8 11.2.4 Control box ............................
-
Page 13: About Manuals
About Manuals The following manuals are related to this product. Referring to this list, please request the necessary manuals. Relevant Manuals For CC-Link Manual Number Manual Name (Model Code) MELSEC-ST CC-Link Head Module User's Manual ST1H-BT SH-080754ENG Describes the specifications, functions, pre-operational procedure and troubleshooting (13JZ11) of the ST1H-BT MELSEC-ST CC-Link head module. - Page 14 Relevant Manuals For PROFIBUS-DP Manual Number Manual Name (Model Code) MELSEC-ST PROFIBUS-DP Head Module User's Manual ST1H-PB SH-080436ENG Describes the specifications, functions, pre-operational procedure and troubleshooting (13JR68) of the ST1H-PB MELSEC-ST PROFIBUS-DP head module. (Sold separately) MELSEC-ST Analog-Digital Converter Module User's Manual SH-080442ENG ST1AD2-V/ST1AD2-I (PROFIBUS-DP) Describes the specifications, handling, programming methods, etc.
-
Page 15: How To Read Manual (For Cc-Link
How to Read Manual (FOR CC-LINK) In this manual, remote I/O, remote registers, and message transmission areas for CC-Link are represented with Br, Wr, Cr, Bw, Ww, Cw. (1) Data symbol <Example: Cr Command result area> Cr. 0 (7-0) Range In the case of 1-word (16 bit) data, this shows the corresponding range. - Page 16 (3) Master station Head module (a) Remote input (RX) Data symbol Area name Unit Detail data No. notation Bit output area 1 bit/symbol Hexadecimal Bw.0 to Bw.n (b) Remote register (RWr) Data symbol Area name Unit Detail data No. notation Word input area 1 word/symbol Hexadecimal...
-
Page 17: How To Read Manual (For Profibus-Dp
How to Read Manual (FOR PROFIBUS-DP) For PROFIBUS-DP, this manual explains each area for input data and output data using the following symbols. (1) Data symbol <Example: Cr Command result area> Cr. 0 (7-0) Range In the case of 1-word (16 bit) data, this shows the corresponding range. - Page 18 (3) Output receive data Data symbol Area name Unit Detail data No. notation Bw.00 to Bw.FF Bit output area 1 bit/symbol Hexadecimal Ew.00 to Ew.FF Error clear area 1 bit/symbol Hexadecimal Sw.0 to Sw.7 System area 1 bit/symbol Decimal Command execution area 1 bit/symbol Decimal Ww.00 to Ww.33...
-
Page 19: Generic Terms And Abbreviations
Generic Terms and Abbreviations Unless otherwise specified, this manual uses the following generic terms and abbreviations to explain the head module. Description Generic Term/Abbreviation ST1H-BT MELSEC-ST CC-Link head module, ST1H-PB MELSEC-ST PROFIBUS-DP Head module Compatible head module. CC-Link Abbreviation for Control & Communication Link system. PROFIBUS-DP PROFIBUS-DP network. -
Page 20: Term Definition For Cc-Link
Term definition for CC-Link The following explains the meanings and definitions of the terms used in this manual when using CC-Link. Term Definition A communication method by which remote I/O data and remote register data are transferred Cyclic transmission periodically. This station controls the entire data link system. - Page 21 Term Definition The number assigned to every 2 occupied I/O points of each module. The numbers are assigned in ascending order, starting from “0” of the head module. (The Slice No. maximum value is 127.) This is used for specifying a command execution target. The number that shows where the slice module is physically installed.
-
Page 22: Term Definition For Profibus-Dp
Term definition for PROFIBUS-DP The following explains the meanings and definitions of the terms used in this manual when using PROFIBUS-DP. Term Definition Master station Class 1 master station that communicates I/O data with slave stations. Slave station Device that communicates I/O data with the master station. Repeater Device that connects PROFIBUS-DP segments. - Page 23 MEMO A - 21 A - 21...
-
Page 24: Overview
1 OVERVIEW MELSEC-ST 1 OVERVIEW This user's manual provides the specifications and handling guidelines of the following MELSEC-ST system devices: power distribution modules, I/O modules, base modules and accessories. For details of the MELSEC-ST system head module and intelligent function modules, please refer to the Head Module User's Manual and the manual of the corresponding intelligent function modules. -
Page 25: Features
1 OVERVIEW MELSEC-ST 1.1 Features (1) Wiring reduction (a) External Power supply wiring By connecting load power supply cables to the power distribution modules (bus refreshing module, power feeding module), load power can be supplied to all I/O modules and intelligent function modules, resulting in wiring reduction, i.e., the power supply wiring is required only for the power distribution modules. - Page 26 1 OVERVIEW MELSEC-ST (2) Flexible system configuration (a) The number of input/output points of each I/O module can be increased in units of minimum two points. Therefore, the efficient system can be configured according to the needs. (b) A single head module accepts up to 63 slice modules (up to 26 intelligent function modules* ).
-
Page 27: How To Identify Module Names
2 HOW TO IDENTIFY MODULE NAMES MELSEC-ST 2 HOW TO IDENTIFY MODULE NAMES The following shows how to identify the model names of the MELSEC-ST series, head modules, I/O modules, intelligent function modules, power distribution modules and base modules. (1) Head modules ST1H- Module type BT: CC-Link compatible... - Page 28 2 HOW TO IDENTIFY MODULE NAMES MELSEC-ST (5) Base modules ST1B Applicable module : For 2-point input module : For 4-point input module : For 16-point input module : For 2-point output module : For 4-point output module : For 16-point output module : For intelligent function module/relay output module : For thermocoulpe input P2-H-SET: For bus refreshing module (for powering head module)
-
Page 29: System Configuration
3 SYSTEM CONFIGURATION MELSEC-ST 3 SYSTEM CONFIGURATION 3.1 System Configuration 3.1.1 CC-Link This section explains a general system configuration when the system is connected to CC-Link. Master Remote Remote station station station Terminal Terminal resistor resistor GX Developer Repeater Terminal Terminal resistor resistor... -
Page 30: Profibus-Dp
3 SYSTEM CONFIGURATION MELSEC-ST 3.1.2 PROFIBUS-DP This section explains a general system configuration when the system is connected to PROFIBUS-DP. Class 1 master station MELSEC-ST Slave station No. 2 Slave station No. 30 Slave station No. 1 Repeater MELSEC-ST Slave station No. 31 Slave station No. -
Page 31: System Configuration Outline
3 SYSTEM CONFIGURATION MELSEC-ST 3.2 System Configuration Outline This section outlines the system configuration when the input modules, output module, intelligent function modules, bus refreshing module and power feeding module are used. Eternal power supply (External SYS. power supply) Eternal power supply Eternal power supply (External AUX. - Page 32 Used to connect the personal computer installed with GX Necessary when GX RS-232 cable Configurator-ST and the head module. Configurator-ST is used. Model: QC30R2 (Mitsubishi Electric product) or SC-Q (Beijers) User-prepared product: Use an external isolated power External power supply supply. Required (External SYS.
-
Page 33: Device Configuration
3 SYSTEM CONFIGURATION MELSEC-ST 3.3 Device Configuration This section explains the device configuration of the MELSEC-ST system. The following lists the devices that can be configured. Product Model Specifications Applicable base module*1 CC-Link compatible ST1H-BT (Communicates with the master station Head as a remote device station) Base module is... - Page 34 3 SYSTEM CONFIGURATION MELSEC-ST Model Description Product ST1A-WMK-BL Terminal mark, blue (-, 0V, N) Wiring marker ST1A-WMK-RD Terminal mark, red (24VDC, 5VDC) ST1A-WMK-GN Terminal mark, green (Shield) ST1A-WMK-BK Terminal mark, black (Signal wire) ST1A-WMK-BR Terminal mark, brown (L1) Terminal mark, red/blue ST1A-WMK-RD/BL (Module driving power supply) ST1A-WMK-GN/YL Terminal mark, green/yellow (FG (PE))
-
Page 35: Precautions For System Configuration
3 SYSTEM CONFIGURATION MELSEC-ST 3.4 Precautions for System Configuration The system configuration changes depending on the following conditions: whether intelligent function modules (shown in section 3.3) are used or not, whether online module change will be executed or not, whether contact output modules are used or not. - Page 36 3 SYSTEM CONFIGURATION MELSEC-ST DIN rail External SYS. power supply 100VAC AC/DC A can be replaced by B, C or D. Fuse 24VDC (AUX. input) AC/DC External AUX. power supply Fig. 3.1 Example of configuration where I/O Modules and intelligent function Modules Are Not Used Together A can be replaced by B.
- Page 37 3 SYSTEM CONFIGURATION MELSEC-ST A can be replaced by B. A can be replaced by B, C or D. DIN rail DIN rail External SYS. External SYS. 24VDC power supply power supply (AUX. input) 24VDC 100VAC (AUX. input) AC/DC 100VAC AC/DC External AUX.
- Page 38 3 SYSTEM CONFIGURATION MELSEC-ST (1) Maximum number of connectable modules The maximum number of slice modules that can be connected to one head module is 63 (except the head module). The number of head modules mountable on a field network changes depending on the total input/output points of slice modules.
- Page 39 3 SYSTEM CONFIGURATION MELSEC-ST In a system configuration using multiple bus refreshing modules, supply 24VDC power from one external SYS. power supply to the multiple bus refreshing modules (SYS. input). 24VDC External SYS. power supply When configuring a system that includes external AUX. power supplies and power distribution modules, make sure to meet the conditions below.
- Page 40 3 SYSTEM CONFIGURATION MELSEC-ST (6) Restrictions on slot width Configure the system so that the total slot width of the MELSEC-ST system (except the head module) is within 85cm. Calculate the total slot width using the maximum input/output points setting sheet given in Appendix 2 and 3.
- Page 41 3 SYSTEM CONFIGURATION MELSEC-ST I/O modules Intelligent function (excluding contact Contact output modules output modules) modules External External External External External device device device device device External device disconnecting means (switch) should be provided. A circuit for A circuit for power-off power-off should be...
- Page 42 3 SYSTEM CONFIGURATION MELSEC-ST Multiple I/O modules and intelligent function modules cannot be replaced at a time. Change the I/O modules and intelligent function modules one by one. POINT Only I/O modules and intelligent function modules can be replaced online. Power distribution modules and base modules cannot be replaced online.
- Page 43 3 SYSTEM CONFIGURATION MELSEC-ST Precautions for use of contact output modules When AC power supply is used as an external power supply connected to the contacts of the contact output modules, the intelligent function modules should be mounted on the left side *1 of the contact output modules. For details, refer to the system configuration example Fig.
-
Page 44: General Specifications
4 GENERAL SPECIFICATIONS MELSEC-ST 4 GENERAL SPECIFICATIONS Performance specification of MELSEC-ST series is as follows: 4.1 General Specifications Item Specifications Operating ambient 0 to 55°C * temperature Storage ambient -25 to 75°C temperature Operating ambient 5 to 95%RH, non-condensing humidity Storage ambient 5 to 95%RH, non-condensing humidity... -
Page 45: Other System Specifications
4 GENERAL SPECIFICATIONS MELSEC-ST 4.2 Other System Specifications Item Specifications Across external SYS. power supply inputs and external AUX. power supply inputs Insulation resistance * or larger by 500VDC insulation resistance tester By noise simulator of 500Vp-p noise voltage, 1 s noise width and 25 to 60Hz noise frequency Noise durability * First transient noise IEC61000-4-4: 2kV : Refer to Chapter 7 for the insulation resistance and noise immunity of the I/O modules. -
Page 46: Power Distribution Modules
5 POWER DISTRIBUTION MODULES MELSEC-ST 5 POWER DISTRIBUTION MODULES 5.1 Specifications (1) Bus refreshing module Type Bus refreshing module Specifications ST1PSD Number of occupied slices CC-Link: 0 point for each of input and output Number of occupied I/O points PROFIBUS-DP: 2 points for each of input and output Rated input voltage 24VDC Rated allowable voltage (24VDC) - Page 47 5 POWER DISTRIBUTION MODULES MELSEC-ST (2) Power feeding module Type Power feeding module Specifications ST1PDD Number of occupied slices CC-Link: 0 point for each of input and output Number of occupied I/O points PROFIBUS-DP: 2 points for each of input and output Rated input voltage 24VDC Rated allowable voltage...
-
Page 48: Selection Of Power Distribution Modules
5 POWER DISTRIBUTION MODULES MELSEC-ST 5.2 Selection of Power Distribution Modules 5.2.1 Current consumption calculation Select the power distribution modules by calculating the total current consumption of the head module, I/O modules, external load devices and intelligent function modules supplied by the power distribution modules. Refer to Chapter 7 for the 5VDC internal current consumption of the I/O modules. - Page 49 5 POWER DISTRIBUTION MODULES MELSEC-ST (2) 5VDC, 24VDC internal wiring 5VDC internal wiring Power feeding Head Bus refreshing Bus refreshing Output module Bus refreshing Output module Input module Input module module module module module module DC5V DC5V DC5V Internal circuit Internal Internal Internal...
- Page 50 5 POWER DISTRIBUTION MODULES MELSEC-ST (3) Example of 5VDC internal current consumption and 24VDC current calculation (a) Example of 5VDC internal current consumption calculation If the total 5VDC internal current consumption exceeds the maximum rated output current 2.0A, mount a new bus refreshing module (ST1PSD). Attach the bus refreshing module onto the base module for extension bus refreshing module (ST1B- 4P2-R-SET).
- Page 51 5 POWER DISTRIBUTION MODULES MELSEC-ST I = 0.41 + (0.095 5) + (0.15 5) + 0.09 + 0.06 + (0.095 4) = 2.165 (A) As the maximum rated output current 2.0A of the bus refreshing module is less than the total 5VDC internal current consumption, the following bus refreshing module must be mounted newly.
- Page 52 5 POWER DISTRIBUTION MODULES MELSEC-ST (b) Example of 24VDC current calculation If the total 24VDC current exceeds the maximum rated current (I/O modules: 8.0A, Intelligent function modules: 3.0A) of the bus refreshing module, mount a new power feeding module (or bus refreshing module).
- Page 53 5 POWER DISTRIBUTION MODULES MELSEC-ST Calculate the total 24VDC current using the maximum I/O point setting sheet given in Appendix 2 and 3. 5VDC internal Slice Start slice No. current 24VDC current Slot width Br.n Bw.n Wr.n Ww.n position (Number of Module name consumption (Total value)
- Page 54 5 POWER DISTRIBUTION MODULES MELSEC-ST Added power feeding modules (or bus refreshing modules) Total 24VDC current Total 24VDC current Total 24VDC current = 6.440(A) Total 24VDC current = 6.775(A) = 0.260(A) = 6.720(A) External devices: External devices: External devices: External devices: External devices: 32 loads (lamps) 32 loads (lamps)
- Page 55 5 POWER DISTRIBUTION MODULES MELSEC-ST (c) Last check of 5VDC internal current consumption and 24VDC current calculation Make a last check of the total 5VDC internal current consumption 24VDC current using the maximum I/O point setting sheet given in Appendix 2 and 3. 5VDC internal Slice Start slice No.
-
Page 56: Part Names
5 POWER DISTRIBUTION MODULES MELSEC-ST 5.3 Part Names Front view Rear view Front view Rear view Bus refreshing module Power feeding module Name Application RUN LED ERR. LED Refer to Section 5.3.1. SYS. LED AUX. LED • Indicates the I/O module status with the above LEDs 1) to 3). •... -
Page 57: Operating Status Leds
5 POWER DISTRIBUTION MODULES MELSEC-ST 5.3.1 Operating status LEDs LED status Operating status indication Normal Flickering Selected as a module to be replaced online.*1 (0.25s intervals) Communication with the master station has stopped.*2 Flickering Parameter setting error *2 (1s intervals) Other slice module fault Internal bus error occurring External power supply off, hardware fault, internal bus error occurring... -
Page 58: Base Module
6 BASE MODULE MELSEC-ST 6 BASE MODULE 6.1 Base Module Specifications The base module specifications are indicated below. Specifications Item Spring clamp type Screw clamp type 1-slot width 8-slot width 1-slot width 8-slot width Solid wire: 0.5 to 2.5mm (AWG 20 to AWG 12) Twisted wire: 0.5 to 1.5mm (AWG 20 to AWG 16) Applicable wire size... -
Page 59: Base Module Selection
6 BASE MODULE MELSEC-ST 6.2 Base module selection (1) Selection of base module corresponding to slice module After selecting the slice module, select the base module that corresponds to that slice module. Refer to Chapter 5 and 7 for the base module applied to each slice module. -
Page 60: Part Names
6 BASE MODULE MELSEC-ST 6.3 Part Names This section explains the part names of the base modules. Side view Front view Front view (8-slot width) (common to 1-slot and 8-slot width) (1-slot width) Name Application Terminal block for connection of external wiring. The terminal block color changes depending on the slice module type. -
Page 61: O Modules
7 I/O MODULES MELSEC-ST 7 I/O MODULES 7.1 Input Module Specifications This section indicates the input module specifications. Refer to Appendix 2 and 3 for I/O data of each module. 7.1.1 ST1X2-DE1 DC input module (negative common type) Type DC Input Module (negative common type) Specifications ST1X2-DE1 Appearance... -
Page 62: St1X4-De1 Dc Input Module (Negative Common Type)
7 I/O MODULES MELSEC-ST 7.1.2 ST1X4-DE1 DC input module (negative common type) Type DC Input Module (negative common type) Specifications ST1X4-DE1 Appearance Number of occupied slice modules CC-Link: 4 points for input, 0 point for output Number of occupied I/O points PROFIBUS-DP: 4 points for each of input and output Number of input points 4 points... -
Page 63: St1X16-De1 Dc Input Module (Negative Common Type)
7 I/O MODULES MELSEC-ST 7.1.3 ST1X16-DE1 DC input module (negative common type) Type DC Input Module (negative common type) Specifications ST1X16-DE1 Number of occupied slice modules CC-Link: 16 points for input, 0 point for output Number of occupied I/O points PROFIBUS-DP: 16 points for each of input and output Number of input points 16 points... - Page 64 7 I/O MODULES MELSEC-ST External Connections Base Module Input Module +24V 3-wire Sensor +24V Shield +24V Shield +24V This FG terminal is not connected. Shield (Grounded at the FG contact of the base module for power distribution module.) +24V *3: Shield is grounded via the base module for the power Shield distribution module.
-
Page 65: Output Module Specifications
7 I/O MODULES MELSEC-ST 7.2 Output Module Specifications This section indicates the output module specifications. Refer to Appendix 2 and 3 for the I/O data of each module. 7.2.1 ST1Y2-TE2 transistor output module (source type) Type Transistor Output Module (source type) Specifications ST1Y2-TE2 Appearance... -
Page 66: St1Y16-Te2 Transistor Output Module (Source Type)
7 I/O MODULES MELSEC-ST 7.2.2 ST1Y16-TE2 transistor output module (source type) Type Transistor Output Module (source type) Specifications ST1Y16-TE2 Number of occupied slice modules CC-Link: 0 point for input, 16 points for output Number of occupied I/O points PROFIBUS-DP: 16 points for each of input and output Number of output points 16 points Isolation method... - Page 67 7 I/O MODULES MELSEC-ST External Connections Base Module Input Module Fuse Constant Voltage +24V Circuit 2-wire external load Shield Shield Shield Shield *3: This FG terminal is not connected. (Grounded at the FG contact of the base module for power distribution module.) *4: Shield is grounded via the base module for the power distribution module.
-
Page 68: St1Y2-Te8 Transistor Output Module (Source Type)
7 I/O MODULES MELSEC-ST 7.2.3 ST1Y2-TE8 transistor output module (source type) Type Transistor Output Module (source type) Specifications ST1Y2-TE8 Appearance Number of occupied slice modules CC-Link: 0 point for input, 2 points for output Number of occupied I/O points PROFIBUS-DP: 2 points for each of input and output Number of output points 2 points Isolation method... -
Page 69: St1Y2-Tpe3 Transistor Output Module (Source Type)
7 I/O MODULES MELSEC-ST 7.2.4 ST1Y2-TPE3 transistor output module (source type) Type Transistor Output Module (source type) Specifications ST1Y2-TPE3 Appearance Number of occupied slice modules CC-Link: 0 point for input, 2 points for output Number of occupied I/O points PROFIBUS-DP: 2 points for each of input and output Number of output points 2 points Isolation method... -
Page 70: St1Y16-Tpe3 Transistor Output Module With Protective Functions (Source Type)
7 I/O MODULES MELSEC-ST 7.2.5 ST1Y16-TPE3 transistor output module with protective functions (source type) Type Transistor Output Module (source type) Specifications ST1Y16-TPE3 Number of occupied slice modules CC-Link: 0 point for input, 16 points for output Number of occupied I/O points PROFIBUS-DP: 16 points for each of input and output Number of output points 16 points... - Page 71 7 I/O MODULES MELSEC-ST External Connections Base Module Output Module Constant Voltage 2-wire Circuit +24V external load Shield Shield 1: This FG terminal is not connected. (Grounded at the FG contact of the base module for power distribution module.) 2: Shield is grounded via the base module for the power distribution module. 3: Connection from power distribution module.
-
Page 72: St1Y2-R2 Contact Output Module
7 I/O MODULES MELSEC-ST 7.2.6 ST1Y2-R2 Contact Output Module Type Contact Output Module Specifications ST1Y2-R2 Appearance Number of occupied slice modules CC-Link: 0 point for input, 2 points for output Number of occupied I/O points PROFIBUS-DP: 2 points for each of input and output Number of output points 2 points Isolation method... -
Page 73: Precautions For Use
7 I/O MODULES MELSEC-ST 7.3 Precautions for Use (1) Do not use I/O modules under pressure higher than the atmospheric pressure of 0m (0ft.) altitude. Doing so can cause a malfunction. When using I/O modules under pressure, please consult your local representative. 7.3.1 Input module (1) Input modules may import noise or similar as an input depending on the pulse width of a signal. - Page 74 7 I/O MODULES MELSEC-ST (4) Connecting transistor output modules in parallel may cause output elements to fail. Set the diodes, as shown below, when connecting transistor output modules in parallel. Load Load OUT1 OUT1 Load Load OUT2 OUT2 OUT1 OUT1 OUT2 OUT2 Sink type...
- Page 75 7 I/O MODULES MELSEC-ST (6) Precautions for the use of contact output module. (a) Relay life of contact output module Relevant module: ST1Y2-R2 POINT The relay life curve shows the value based on actual use, which is not guaranteed. Therefore, make sure to allow for a margin of error. The specifications of the relay life is as follows: Rated switching voltage, current load 100 thousand operations...
- Page 76 7 I/O MODULES MELSEC-ST (b) Measures against inrush current Relay life significantly varies depending on its load type the characteristics of its inrush current. Take following measures since the inrush current may cause contact welding. • In case of an increase in inrush current, select a load so that the inrush current will be within the rated current of the module.
- Page 77 7 I/O MODULES MELSEC-ST 2) Load of a lamp Inrush current 10 times as large as the rated current may flow through the lamp circuit depending on a load. [Load of an incandescent bulb] 3 to 10 times Incandescent bulb i: Inrush current io: Rated current Approx.
- Page 78 7 I/O MODULES MELSEC-ST 3) Capacitive load When a load circuit includes such as a capacitor, inrush current 40 times as large as the rated current may flow through the load circuit depending on a load. Also, pay attention to the wire capacity when the wiring is laid long. [Capacitive load] 20 to 40 times i: Inrush current...
- Page 79 7 I/O MODULES MELSEC-ST (c) Measures against back EMF When inductive load such as a magnetic contactor and solenoid is shut off, high back EMF is generated between the contacts and arc discharge occurs. Especially when the power factor is small, the life shortens due to arc discharge. Therefore, take measures against arc discharge.
- Page 80 7 I/O MODULES MELSEC-ST Circuit example Method for selecting elements Remarks Varistor method Select a cut voltage (Vc) for The recovery time delays the varistor to meet the slightly. following condition. Multiply the value by root two for use of AC power.
-
Page 81: Module With Protection Function
7 I/O MODULES MELSEC-ST 7.3.3 Module with protection function (1) The following restrictions apply when the thermal protection is activated by the output module with protection functions. The thermal protection indicates overload and overheat protection functions. (a) ST1Y2-TPE3, ST1Y16-TPE3 Function Description •... -
Page 82: Part Names
7 I/O MODULES MELSEC-ST 7.4 Part Names This section explains the part names of the I/O modules. ST1Y16 ST1Y2 -TPE3 -TPE3 ERR. ERR. Front view Front view Rear view Rear view 1 slot width 8 slot width Name Application RUN LED Refer to Section 7.4 (1). - Page 83 7 I/O MODULES MELSEC-ST (1) Operating status LEDs Input module LED status Operating status indication Normal Flickering Selected as the target of online module change (0.25s intervals) Communication with the master station has stopped.*1 Flickering Parameter setting error *1 (1s intervals) Other slice module fault Internal bus error has occurred External power-off, internal bus error or hardware fault...
-
Page 84: Accessories
8 ACCESSORIES MELSEC-ST 8 ACCESSORIES 8.1 End Plate, End brackets The end plate and end brackets are included with the head module prior to shipment. They are also available as options. Refer to Section 10.2 for installation and removal. Product name Model Purpose of use Dimensions... -
Page 85: Coding Elements
8 ACCESSORIES MELSEC-ST 8.3 Coding Elements The coding element is fitted to the slice module prior to shipment, and is also available as an option. To ensure safety, make sure to install the coding element to the base module and slice module. -
Page 86: Functions Available By Use Of Software
9 FUNCTIONS AVAILABLE BY USE OF SOFTWARE MELSEC-ST 9 FUNCTIONS AVAILABLE BY USE OF SOFTWARE 9.1 For CC-Link This chapter introduces the functions available by use of the GX Configurator-ST connected to a head module. This manual explains power distribution modules and I/O modules. - Page 87 9 FUNCTIONS AVAILABLE BY USE OF SOFTWARE MELSEC-ST (1) Input response time setting function When the input module is selected, the set value is displayed in Setting Value. Select the input module. Input response time 9 - 2 9 - 2...
- Page 88 9 FUNCTIONS AVAILABLE BY USE OF SOFTWARE MELSEC-ST (2) Setting of output status (CLEAR/HOLD) at module error When the output module is selected, the setting is displayed in Setting Value. Select the output module Output status at module error 9 - 3 9 - 3...
-
Page 89: For Profibus-Dp
I/O modules. For a head module and intelligent function modules, refer to the manuals of the corresponding modules. 9.2.1 Functions Available by Use of Configuration Software Use GX Configurator-DP when the master station is the Mitsubishi PLC. Reference Function... -
Page 90: Functions Available By Use Of Gx Configurator-St
9 FUNCTIONS AVAILABLE BY USE OF SOFTWARE MELSEC-ST 9.2.2 Functions Available by Use of GX Configurator-ST Operation Reference Function Description method section 1) 2) 3) Monitors various information of the head module and slice Information monitor function modules. Monitors the operating status of the slice modules and the error Status monitor function history, etc. - Page 91 9 FUNCTIONS AVAILABLE BY USE OF SOFTWARE MELSEC-ST (1) Input response time setting function When the input module is selected, the set value is displayed in Setting Value. Select the input module. Input response time 9 - 6 9 - 6...
- Page 92 9 FUNCTIONS AVAILABLE BY USE OF SOFTWARE MELSEC-ST (2) Setting of output status (CLEAR/HOLD) at module error When the output module is selected, the setting is displayed in Setting Value. Select the output module Output status at module error 9 - 7 9 - 7...
-
Page 93: Mounting And Installation
10 MOUNTING AND INSTALLATION MELSEC-ST 10 MOUNTING AND INSTALLATION 10.1 Handling Precautions This section explains the precautions for handling the modules (head module, slice modules, base modules, etc.) of the MELSEC-ST system. • Do not touch the terminals or connector while the power is on. DANGER This may cause electric shock or malfunction. - Page 94 10 MOUNTING AND INSTALLATION MELSEC-ST (3) When mounting the base module to the DIN rail, hang the module's bottom groove on the DIN rail's bottom, and then push the module top against the DIN rail with your fingers until it clicks. (4) Note the following points when mounting the DIN rail.
- Page 95 10 MOUNTING AND INSTALLATION MELSEC-ST (6) Module mounting orientation (a) Since the module generates heat, it should be mounted on a well ventilated location in the orientation shown below. (b) Do not mount it in either of the orientations shown below. Vertical Horizontal (7) Installation surface...
-
Page 96: Mounting The Modules
10 MOUNTING AND INSTALLATION MELSEC-ST 10.2 Mounting the Modules This section explains how to mount the head module, slice modules, end bracket, end plate, etc. (1) Mounting the head module Head module Tilt the top of the head module toward you, and hook the groove of the module rear on the DIN rail bottom. - Page 97 10 MOUNTING AND INSTALLATION MELSEC-ST (2) Mounting the base modules Tilt the top of the base module toward you, and hook the groove of the module rear on the DIN rail bottom. DIN rail Push the base module in the direction of arrow until it clicks and is locked by the DIN rail.
- Page 98 10 MOUNTING AND INSTALLATION MELSEC-ST (b) According to the wiring of the slice module, push the wiring markers into the bottom recesses of the terminal block. The following table indicates an example of the color codes corresponding to the wire types. Wiring marker color Wire type Wiring marker...
- Page 99 10 MOUNTING AND INSTALLATION MELSEC-ST (b) End plate (right side: including end bracket) End plate Mount the end bracket into the recess of the end plate. Install the end plate (including the end bracket) on the DIN rail. Recess End bracket Slide the end plate (including the end bracket) to the left side module until it makes...
- Page 100 10 MOUNTING AND INSTALLATION MELSEC-ST (5) Mounting the slice modules Make sure that the head module, base modules, end bracket and end plate are fixed to the DIN rail. Wire the base module terminal Slice module blocks (before mounting the slice Head module modules).
- Page 101 10 MOUNTING AND INSTALLATION MELSEC-ST (a) Precautions for installing slice modules 1) Wire the base module terminal blocks before installing the slice modules. 2) A coding element is mounted to the bottom of each slice module for preventing mis-insertion prior to shipment. Once a slice module is mounted to a base module, the female part of the coding element is attached to the base module and the male part remains the slice module.
- Page 102 10 MOUNTING AND INSTALLATION MELSEC-ST 4) Precautions for mounting slice module when changing module When changing slice module As the base module is already fitted with the female part of the coding element, a new slice module (fitted with the male and female parts of the coding element) cannot be mounted.
-
Page 103: Removing The Modules
10 MOUNTING AND INSTALLATION MELSEC-ST 10.3 Removing the Modules This section explains how to remove the head module, slice modules, end bracket, end plate, etc. (1) Removing the slice modules Push the hooks at both ends of the slice module had with your fingers, and pull the slice module away from the base module in the direction of arrow. - Page 104 10 MOUNTING AND INSTALLATION MELSEC-ST (3) Removing the base modules After powering off, disconnect all Base module wiring of the base modules. The slice modules and end plate (including the end bracket) should have been removed in advance. Insert the screwdriver*1 into the rectangular hole of the base module indicated by the arrow.
- Page 105 10 MOUNTING AND INSTALLATION MELSEC-ST (4) Removing the head module First, disconnect all connections such as the cable from the head module. Then, hold the screwdriver on the lock lever at the head module top, and pull the screwdriver in the direction of arrow to remove the head module from the DIN rail.
-
Page 106: Wiring
10 MOUNTING AND INSTALLATION MELSEC-ST 10.4 Wiring 10.4.1 Wiring precautions Completely shut off the external power supply for the whole system DANGER before installing or placing wiring. Failure to do so may result in electric shock or damage to the product. Make sure to ground the FG and LG terminals to the protective CAUTION ground conductor. - Page 107 10 MOUNTING AND INSTALLATION MELSEC-ST (b) The 24VDC wire should be twisted as dense as possible. Connect the modules with the shortest wire. Also, to reduce the voltage drop to the minimum, use the thickest wires possible. (c) Do not install the 24VDC wire together with main circuit (high voltage, large current) and I/O signal lines or bring them close to each other.
- Page 108 10 MOUNTING AND INSTALLATION MELSEC-ST (2) Wiring of I/O equipment (a) The wires used for connection to the terminal block should be of the applicable wire size indicated in Section 6.1. (b) Run the input and output lines away from each other. (c) When the wiring cannot be run away from the main circuit and power lines, use a batch-shielded cable and ground it on the MELSEC-ST.
- Page 109 10 MOUNTING AND INSTALLATION MELSEC-ST (b) Wiring by screw clamp connection 1) Cable connection Insert the screwdriver into the tool hole, loosen the screw and insert the wire into the wire hole. Then, tighten the screw within the torque 0.27 to 0.80 N m and pull the screwdriver. After the wire has been clamped, gently pull the wire to confirm that it is secure.
-
Page 110: Wiring The Power Distribution Modules
10 MOUNTING AND INSTALLATION MELSEC-ST 10.4.2 Wiring the power distribution modules This section provides the example of connecting the power wires of the power distribution modules to the base modules. Bus refreshing module Bus refreshing module Power feeding module Head module Slice module Slice module Slice module... -
Page 111: Calculating Heat Generation By Unit
10 MOUNTING AND INSTALLATION MELSEC-ST 10.5 Calculating Heat Generation by unit The ambient temperature inside the control panel storing the MELSEC-ST system must be suppressed to the MELSEC-ST system operating ambient temperature of 55°C. When designing control panel to radiate heat, it is required to obtain the average power consumption (heating value) of the devices and instruments to be stored within the control panel. - Page 112 10 MOUNTING AND INSTALLATION MELSEC-ST (6) Power consumption of the power supply section of the intelligent function module 5 + I 24 (W) S24V :Current consumption of 5VDC circuit : Current consumption of 24VDC circuit S24V The total of the power consumption values calculated for each block becomes the power consumption of the overall MELSEC-ST system.
- Page 113 10 MOUNTING AND INSTALLATION MELSEC-ST (e) Total 24VDC average power consumption of the output module = 0 (W) (f) Average power consumption due to voltage drop in the output section of the output module = 0 (W) (g) Average power consumption of the input section of the input module = 0.004 1 = 0.192 (W) (h) Power consumption of the intelligent function module...
- Page 114 10 MOUNTING AND INSTALLATION MELSEC-ST MEMO 10 - 22 10 - 22...
-
Page 115: Emc And Low Voltage Directive
MELSEC-ST series. The description are based on the regulations, the relevant requirements and standards that Mitsubishi has satisfied, however, are not for assuring that the machinery is compliant with the above Directives, even if it is built according to the description. -
Page 116: Emc Directive Standards
11 EMC AND LOW VOLTAGE DIRECTIVE MELSEC-ST 11.1.1 EMC Directive standards The EMC Directive standards are listed below. Specification Test item Test details Standard value 30 to 230 MHz QP: 40 dB (10 m in measurement range) * EN55011 Radio emissions from the product Radiated emissions * are measured. -
Page 117: Instructions For Installing Into Control Panel
11 EMC AND LOW VOLTAGE DIRECTIVE MELSEC-ST 11.1.2 Instructions for installing into control panel The MELSEC-ST series is open equipment and must be installed within a control panel for use. This ensures safety as well as effective shielding of the electromagnetic noise generated by the MELSEC-ST series. -
Page 118: Cables
11 EMC AND LOW VOLTAGE DIRECTIVE MELSEC-ST (d) Ferrite cores should be attached to all power wire at the wire hole of the control box. Bush refreshing module Control box External External SYS. power AUX. power supply supply Ferrite cores 100VAC 100VAC 11.1.3 Cables... - Page 119 11 EMC AND LOW VOLTAGE DIRECTIVE MELSEC-ST Note) The following method, i.e., soldering a vinyl wire for grounding is not recommended, as this will make the high frequency impedance higher and reduce the shielding effect. Shielded cable Vinyl wire Crimp terminal (2) CC-Link dedicated cables (a) When connecting with a master module or each of CC-link stations nearby, always ground the shields of the shielded cables within 30 cm (11.81 inch)
-
Page 120: External Power Supply Module
11 EMC AND LOW VOLTAGE DIRECTIVE MELSEC-ST (4) I/O signal cables and other communication cables For the I/O signal cables and other communication cables, always ground the shields of the shield cables as in (1) if they are pulled out of the control panel (Ground the shields 20 to 30cm away from the module.) Slice module 20 to 30cm... -
Page 121: Others
11 EMC AND LOW VOLTAGE DIRECTIVE MELSEC-ST 11.1.5 Others (1) Ferrite core A ferrite core is effective for reducing radiated noise in the band of 30 to 100MHz. It is not required to attach a ferrite core to a cable. However, this method is recommend when the shield cable pulled out from the control box cannot provide the shielding effect. -
Page 122: Requirement For Compliance With The Low Voltage Directive
MELSEC-ST series in compliance with the Low Voltage Directive. The description are based on the regulations, relevant requirements and standards that Mitsubishi has satisfied, however, are not for assuring that the machinery is compliant with the above Directives, even if it is built according to the description. -
Page 123: Power Supply
11 EMC AND LOW VOLTAGE DIRECTIVE MELSEC-ST 11.2.3 Power supply The isolation specification of the power distribution module is designed assuming installation category II. Make sure to use the installation category II power supply to the MELSEC-ST series. The installation category indicates the durability level against surge voltage generated by a thunderbolt. -
Page 124: Grounding
11 EMC AND LOW VOLTAGE DIRECTIVE MELSEC-ST 11.2.5 Grounding There are the following two different ground terminals. Either of them must be grounded for use. Protective grounding : Maintains the safety of the MELSEC-ST series and improves the noise resistance. Functional grounding : Improves the noise resistance. - Page 125 11 EMC AND LOW VOLTAGE DIRECTIVE MELSEC-ST MEMO 11 - 11 11 - 11...
-
Page 126: Troubleshooting
12 TROUBLESHOOTING MELSEC-ST 12 TROUBLESHOOTING This chapter explains the troubleshooting of the MELSEC-ST system, I/O modules and power distribution modules. Refer to the manuals of the corresponding modules for the troubleshooting of the head module and intelligent function modules. 12.1 MELSEC-ST System Troubleshooting The troubleshooting of the whole MELSEC-ST system is shown below. -
Page 127: Melsec-St System Checkup
12 TROUBLESHOOTING MELSEC-ST 12.1.1 MELSEC-ST system checkup Before starting slice module troubleshooting, check the description below. (1) Check that a proper number of slice modules are mounted. Check whether 63 or less slice modules are used with the head module. When intelligent function modules are mounted, check whether the number of the intelligent function modules is 26 or less. -
Page 128: When Run Led Of Slice Module Is Off
Change the power distribution module. *1 Has the RUN LED turned on? Change the base module. Is the RUN LED on? Please contact your local Mitsubishi service center or representative, explaining a detailed description of the problem. Completed *1 When the RUN LEDs of multiple modules are off, replace them in order starting from the one on the left end. -
Page 129: When Run Led Of Slice Module (Excluding Intelligent Function Module) Is Flickering (1S Interval)
12 TROUBLESHOOTING MELSEC-ST 12.1.3 When RUN LED of slice module (excluding intelligent function module) is flickering (1s interval) When the RUN LED of any slice module (excluding intelligent function module) is flickering (1s interval), troubleshoot according to the following flowchart. (1) When RUN LED of one slice module (excluding intelligent function module) is flickering (1s interval) RUN LED of one... - Page 130 12 TROUBLESHOOTING MELSEC-ST (2) When RUN LEDs of multiple slice modules (excluding intelligent function module) are flickering (1s interval) RUN LEDs of multiple modules flickering (1s interval) RUN LEDs flickering (1s interval) Change the base module of the slice module (shown as 1) on the left side of the left-end slice module (shown as 2) among those whose RUN LEDs are flickering (1s interval).
-
Page 131: Power Distribution Module Troubleshooting
ERR. LED is on. Change the power distribution module whose ERR. LED is Has the ERR. LED turned off? Please contact your local Completed Mitsubishi service center or representative, explaining a detailed description of the problem. 12 - 6 12 - 6... - Page 132 12 TROUBLESHOOTING MELSEC-ST (2) When ERR. LED is flickering When the ERR. LED of the power distribution module is flickering, check the following LEDs and take corrective action. (a) When SYS. LED is off (only the bus refreshing module) Check item Corrective action Check whether the input voltage to the bus Is 24VDC of SYS.
-
Page 133: I/O Module Troubleshooting
ERR. LED is on. Change the I/O module whose ERR. LED is on. Has the ERR. LED turned off? Please contact your local Completed Mitsubishi service center or representative, explaining a detailed description of the problem. 12 - 8 12 - 8... - Page 134 Has the ERR. LED turned off? Please contact your local Completed Mitsubishi service center or representative, explaining a detailed description of the problem. POINT When the ERR. LED of the output module with fuse turned on, the fuse in the module is blown.
- Page 135 Change the output module whose ERR. LED is flickering. Has the ERR. LED turned off? Please contact your local Completed Mitsubishi service center or representative, explaining a detailed description of the problem. 12 - 10 12 - 10...
- Page 136 ERR. LED is on. Change the output module whose ERR. LED is on. Has the ERR. LED turned off? Please contact your local Completed Mitsubishi service center or representative, explaining a detailed description of the problem. 12 - 11 12 - 11...
-
Page 137: Troubleshooting Examples
12 TROUBLESHOOTING MELSEC-ST 12.3.3 Troubleshooting examples This section provides possible problems in the input circuit and output circuit and their corrective actions. (1) Input circuit troubleshooting The following explains possible problems in the input circuit and their corrective actions. Input circuit troubleshooting Condition Cause Corrective action... - Page 138 12 TROUBLESHOOTING MELSEC-ST • Calculate the value of the resistor R as shown below. To make the terminal-to-terminal voltage less than 11[V], the current I should be as indicated below. (24 - 11[V])/2.4[kΩ] = 5.42[mA] Hence, select the resistor R that will give the current I higher than 5.42[mA]. •...
- Page 139 12 TROUBLESHOOTING MELSEC-ST (2) Output circuit troubleshooting The following explains possible problems in the output circuit and their corrective actions. Output circuit troubleshooting Condition Cause Corrective action Erroneous output due to the stray capacitance (C) between When external power supply turns collector and emitter of photocoupler.
-
Page 140: Error Code List
12 TROUBLESHOOTING MELSEC-ST 12.4 Error Code List This section explains the error codes of the I/O modules and power distribution modules. (1) How to confirm error codes The error codes of the I/O modules and power distribution modules can be confirmed by the following method. - Page 141 (a) I/O module error codes Error code Error level Description Corrective action Target module (Hexadecimal) Please contact your local Mitsubishi service 0001 System error Hardware fault center or representative, explaining a detailed All modules description of the problem. After checking the module, whose ERR. LED is...
-
Page 142: Appendices
APPENDICES MELSEC-ST APPENDICES Appendix 1 Outer Dimension Drawings Appendix 1.1 Power distribution modules (1) Bus refreshing module (ST1PSD) ST1PSD ERR. SYS. AUX. 47.3 (1.86) 25.2 55.4 (2.18) (0.99) Unit: mm (inch) (2) Power feeding module (ST1PDD) 47.3 (1.86) 12.6 55.4 (2.18) (0.50) Unit: mm (inch) App - 1... - Page 143 APPENDICES MELSEC-ST REMARK For Power feeding module (ST1PDD) of hardware version C or before, side face diagram of the module is as follows. 47.3 (1.86) 12.6 55.4 (2.18) (0.50) Unit: mm (inch) App - 2 App - 2...
-
Page 144: Appendix 1.2 I/O Modules
APPENDICES MELSEC-ST Appendix 1.2 I/O modules (1) ST1 2-DE1, ST1 4-DE1, ST1 2-TPE3, ST1 2-TE2, ST1Y2-R2, ST1Y2-TE8 47.3 (1.86) 12.6 55.4 (2.18) (0.50) Unit: mm (inch) (2) ST1 16-DE1, ST1 16-TE2, ST1 16-TPE3 47.3 (1.86) 100.8 55.4 (2.18) (3.97) Unit: mm (inch) App - 3 App - 3... - Page 145 APPENDICES MELSEC-ST REMARK For I/O module (ST1X2-DE1, ST1X4-DE1, ST1Y2-TE2, ST1Y2-TPE3, ST1Y2-R2) of hardware version B or before, side face diagram of the module is as follows. 47.3 (1.86) 12.6 55.4 (2.18) (0.50) Unit: mm (inch) App - 4 App - 4...
-
Page 146: Appendix 1.3 Base Modules
APPENDICES MELSEC-ST Appendix 1.3 Base modules The base modules shown below are mounted with slice modules. (1) ST1B- 3 2 73.1 (2.88) 49.9 (1.96) DIN rail center 12.6 67.8 (0.50) (2.67) * Dimension A Spring Clamp Type: 41.6 (1.64) Screw Clamp Type: 48.3 (1.90) Unit: mm (inch) (2) ST1B- 3 16 73.1... - Page 147 APPENDICES MELSEC-ST (3) ST1B- 4 2 , ST1B- 4IR2, ST1B- 4 P 73.1 (2.88) 49.9 (1.96) DIN rail center 12.6 (0.50) 67.8 (2.67) ST1B- 4P2-H-SET or ST1B- 4P2-R-SET has the dimension of two 1-slot width base modules (12.6 2 = 25.2 (0.99)). *2 Dimension A Spring Clamp Type: 41.6 (1.64) Screw Clamp Type: 48.3 (1.90)
- Page 148 APPENDICES MELSEC-ST (5) ST1B- 6 4 73.1 (2.88) 49.9 (1.96) DIN rail center 12.6 67.8 (0.50) (2.67) * Dimension A Spring Clamp Type: 41.6 (1.64) Screw Clamp Type: 48.3 (1.90) Unit: mm (inch) App - 7 App - 7...
-
Page 149: Appendix 1.4 Accessory
APPENDICES MELSEC-ST Appendix 1.4 Accessory (1) End plate (ST1A-EPL) 1 48.5 41.5 Unit: mm(inch) 1. In the above drawing, the end bracket is mounted on the end plate. (2) End bracket (ST1A-EBR) 46.5 Unit: mm(inch) App - 8 App - 8... -
Page 150: Appendix 2 Cc-Link
APPENDICES MELSEC-ST Appendix 2 CC-Link Appendix 2.1 I/O data Appendix 2.1.1 Power distribution modules The power distribution module does not occupy the areas for data transfer to and from the head module. Appendix 2.1.2 Input modules The input module has the following areas for data transfer to and from the head module. -
Page 151: Appendix 2.1.3 Output Modules
APPENDICES MELSEC-ST Appendix 2.1.3 Output modules The output module has the following areas for data transfer to and from the head module. The structure of each area will be explained in this section. Number of Input Data Output Data Module occupied slices 2-point output module ST1Y2-... -
Page 152: Appendix 2.2 I/O Points Sheet
APPENDICES MELSEC-ST Appendix 2.2 I/O points sheet 5VDC internal Slice Start slice No. current 24VDC current Slot width Br.n Bw.n Wr.n Ww.n position (Number of Module name consumption (Total value) (Total value) occupied slices) (Total value) 0(2) ST1H-BT 0.410A(0.410A) 0A(0A) 2(1) ST1PSD 25.2mm(25.2mm) -
Page 153: Appendix 3 Profibus-Dp
APPENDICES MELSEC-ST Appendix 3 PROFIBUS-DP Appendix 3.1 Input/Output Data Appendix 3.1.1 Power distribution modules The power distribution module has the following areas for data transfer to and from the head module. The structure of each area will be explained in this section. Number of Input Data Output Data... - Page 154 APPENDICES MELSEC-ST Er Error Information Area The Er Error Information Areas of the bus refreshing module and power feeding module will be explained. 1) Bus refreshing module Error Information Item Description Er.n+1 Er.n (1) The 24VDC voltages input from the SYS. input and AUX. input to the power distribution module are low.
- Page 155 APPENDICES MELSEC-ST Ew Error Clear Area The Ew Error Clear Area will be explained. Error Clear Item Description (1) Turn Ew.n ON (1) when clearing error information. (2) After confirming that the error information has been cleared, turn OFF (0) the Ew.n Error Clear Request. When the module recovers from the error, the error information is automatically cleared.
-
Page 156: Appendix 3.1.2 Input Modules
APPENDICES MELSEC-ST Appendix 3.1.2 Input modules The input module has the following areas for data transfer to and from the head module. The structure of each area will be explained. Number of Input Data Output Data Module occupied slices 2-point input module ST1X2- 4-point input module ST1X4-... - Page 157 APPENDICES MELSEC-ST Mr Module Status Area The Mr Module Status Area will be explained. Target Module Status Information Description module Mr.n+7 Mr.n+6 Mr.n+5 Mr.n+4 Mr.n+3 Mr.n+2 Mr.n+1 Mr.n ST1X2- Hardware fault Normal Module ST1X4- Hardware fault Status Normal ST1X16- Hardware fault Normal Wr Word Input Area The Word Input Area is not occupied.
-
Page 158: Appendix 3.1.3 Output Modules
APPENDICES MELSEC-ST Appendix 3.1.3 Output modules The output module has the following areas for data transfer to and from the head module. The structure of each area will be explained. Number of Input Data Output Data Module occupied slices 2-point output module ST1Y2- 16-point output module (16) - Page 159 APPENDICES MELSEC-ST (2) Output Data Bw Bit Output Area The Br Bit Output Area will be explained. Target module Bit Output Item Description Stores the output information (ON/OFF) to the output module. Bw.n to Bw.n+1 ST1Y2- Output status 0: Output OFF Bw.n to Bw.n+15 ST1Y16- 1: Output ON...
-
Page 160: Appendix 3.2 Maximum Input/Output Points Setting Sheet
APPENDICES MELSEC-ST Appendix 3.2 Maximum input/output points setting sheet 5VDC Internal Slice Number of Start Slice No. Current 24VDC Current Slot width Occupied (Number of Wr.n Ww.n position Module Name Consumption (Total) (Total value) I/O Points occupied slices) (Total) ST1H-PB 0(2) 0.530A(0.530A) 0A(0A) -
Page 161: Appendix 4 Recommended Screwdriver
APPENDICES MELSEC-ST Appendix 4 Recommended Screwdriver Size (mm) Product name Product No. Maker Specifications Flat-blade screwdriver without 900833 Weidmueller insulating cover 0.6 3.5 100 (Blade edge compliant with DIN5264) Size C Size A Blade edge side view General view Size B Blade edge front view App - 20 App - 20... - Page 162 INDEX Base module marker ........8- 1 Performance specifications ....5- 1,7- 1 Bit Input.........App- 9, App-12 Power supply capacity check function .. 9- 1, 9- 5 Bit Output...........App-18 Precautions for online module change ..3-12 Br ..........App- 9, App-12 Bw ..........App-10, App-18 Relay life............7-14 Response time ..........7-16 Coding Element........8- 2, 10- 9...
- Page 163 MEMO Index - 2 Index - 2...
- Page 164 6. Failure caused by reasons unpredictable by scientific technology standards at time of shipment from Mitsubishi. 7. Any other failure found not to be the responsibility of Mitsubishi or that admitted not to be so by the user. 2. Onerous repair term after discontinuation of production (1) Mitsubishi shall accept onerous product repairs for seven (7) years after production of the product is discontinued.
Need help?
Do you have a question about the MELESEC-ST and is the answer not in the manual?
Questions and answers