
Subscribe to Our Youtube Channel
Related Manuals for Siegenia AERO AEROMAT VT RS2


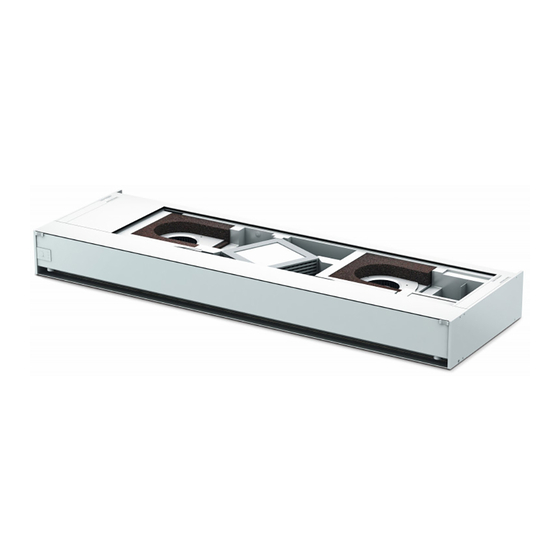
Summary of Contents for Siegenia AERO AEROMAT VT RS2
- Page 1 ORIGINAL OPERATING INSTRUCTIONS AERO AEROMAT VT RS2 Sound absorbing ventilator. Window systems Door systems Comfort systems...
-
Page 3: Table Of Contents
Installation.sequence ........8 (optional) ............ 13 6.5. Extension.parts ..........9 6.6. Z.profile ............9 RECTIFICATION OF MALFUNCTIONS ..15 MAINS SUPPLY.........10 12.1. SIEGENIA.Comfort.app ........ 15 7.1. Socket.connection ........10 TECHNICAL SPECIFICATIONS ....16 7.2. External.switch.connection ......10 7.3. Wiring.diagram.series.switch ...... 10 DIMENSIONS ...........16 UNIT FUNCTION ........10... -
Page 4: Target Group Of This Documentation
• If.the.AEROMAT VT RS2.is.to.be.used.in.a.room.with. a.heating.unit.that.draws.air.from.the.room,.prior. authorisation.must.be.obtained.from.the.proper. authorities,.such.as.the.officially.appointed.district. chimney.sweep. Weather.grille:.911.HW;.installation.position:.horizontal • Only.operate.and/or.store.the.AEROMAT VT RS2 at temperatures.between.‒.15.°C.and.+40.°C. • Use.the.AEROMAT VT RS2.only.with.genuine. Weather.grille:.911.HW-g.(concealed.installation.in.the.wall);. accessories.from.SIEGENIA. installation.position:.horizontal • Use.the.AEROMAT VT RS2.only.when.it.is.in.a. technically.sound.condition. • Do.not.modify.the.unit's.components.in.any.way. Weather.grille:.911.CW;.installation.position:.horizontal • Ensure.that.the.ventilation.openings.are.kept.free. and.are.not.blocked.by.other.equipment,.furniture. or.objects. Weather.grille:.911.HS;.installation.position:.vertical • Please.do.not.put.any.objects.on.top.of.the.unit. Weather.grille:.911.CS;.installation.position:.vertical •... -
Page 5: Safety Notes
• Comply.with.the.safety.regulations.for.operating. electrical.equipment.and,.if.necessary,.for.ladders,. – Should.a.solid.object.or.any.liquid.get.inside.the. steps.and.work.overhead.or.at.certain.heights. unit,.stop.operation.immediately.and.disconnect. the.AEROMAT VT RS2.from.the.electricity. • Electrically.operated.unit..Risk.of.fatal.injury.from. grid..Check.whether.the.AEROMAT VT RS2.has. electric.shock.or.fire.To.prevent.personal.injury. become.damaged..Have.the.unit.repaired.by.a. or.damage.to.property,.always.comply.with.the. specialist,.if.necessary following.instructions: • Danger.due.to.third.party.attacks.on.SIEGENIA.WIFI. – Work.on.a.230.V.AC.mains.power.supply.may. devices!.Please.observe.the.following.notes.to. only.be.performed.by.a.qualified.electrician. protect.your.system.against.attacks.by.third.parties: – If.the.mains.connection.cable.for.the.unit.is. – Every.SIEGENIA.WIFI.device.is.protected.by. damaged,.it.must.be.replaced.by.SIEGENIA,.the. two.passwords.(user.and.administrator)..It.is. company's.customer.service.department,.or. essential.that.you.change.these.passwords.after. similarly.qualified.personnel.in.order.to.prevent. the.initial.setup..Do.not.leave.in.the.default. personal.injury.or.damage.to.property. setting. -
Page 6: General Notes
Scope of Original.operating.instructions.(item.2) delivery Quick.start.instructions.SIEGENIA.Comfort.app.(item. – 2.exhaust.air.fans,.2.supply.air.fans.or. 1.exhaust.air.fan.and.1.supply.air.fan Membrane.key.(optional) Grit.filter.ISO.Coarse.55%.or.fine.dust.filter.ISO. Function ePM10.50%.(optional) Operation.via.SIEGENIA.Comfort.app – Electrical.slider.(optional) *The quick start instructions for the SIEGENIA Comfort App are located behind the front panel (To open the front panel, see page 13). 6/20 03.2021 H47.FENS083EN-02... -
Page 7: Assembly
Original operating instructions AERO AEROMAT VT RS2 Assembly 6.1 Installation options 6.2 Installation requirements Installation.in.the. • AEROMAT VT RS2Install.and.seal.in.accordance.with. wall state-of-the-art.technology. • The.position.from.which.the.outdoor.air.is.drawn. in.must.be.selected.in.such.way.that.any.nearby. AEROMAT VT emission.sources.have.as.little.impact.as.possible.on. the.quality.of.the.air.being.drawn.in. Concealed. • The.maximum.permissible.area.load.is.1,000.kg.per. installation.in.the. wall running.metre.of.ventilator.length. 6.3 Additional requirements for AEROMAT VT AEROMAT VT RS2 smart •... -
Page 8: Installation.sequence
Original operating instructions AERO AEROMAT VT RS2 6.4 Installation sequence 4. Install.the.AEROMAT VT RS2 in its intended installation.position.and.seal.it.in.accordance.with. 1. Remove.the.AEROMAT VT RS2.carefully.from.the. the.installation.directives.applicable.on.site. packaging.and.do.not.place.it.on.the.weather.grille. or.front.panel..We.recommend.storing.the.unit. 5. Check.AEROMAT VT RS2.for.cleanliness.prior.to. on.a.soft.surface.(e.g..cardboard.or.sheet).during. starting.it.up..Clean.if.necessary.(see."maintenance. installation. and.care".on.page.12). Only.drill.in.through-holes.for.wall.plugs.and. 2. Close.the.sliders.on.the.front.to.prevent.dirt.(e.g.. screws.in.the.area.indicated.(see.marker.tape). dust).from.entering.the.unit.during.installation..If. the.AEROMAT VT RS2.does.not.have.sliders,.tape.up. the.recesses.in.the.front.panel.with.film. -
Page 9: Extension.parts
Original operating instructions AERO AEROMAT VT RS2 6.5 Extension parts 6.6 Z profile Screw.on.the.mounting.angle.in.the.area.indicated. First,.fix.the.Z.profile.(optional).to.the.weather.grille. (marker.tape).or.fasten.it.to.the.casing.profiles. using.double-sided.adhesive.tape,.then.drill.and.rivet.it. with.a.rivet..We.recommend.that.you.use.SIEGENIA. aluminium.mounting.angles. AEROMAT VT RS2.with.911.CW.weather.grille AEROMAT VT RS2.with.911.HW.weather.grille Dimension Meaning Assembly.area.for.bracket Screw.and.drilling.area.(e.g..for.wall. plugs.or.mounting.screws) Overall.depth Bracket.20.x.20.x.2.(optional) Z.profile.(optional) Stop.profile.(optional) H47.FENS083EN-02 03.2021 9/20... -
Page 10: Mains Supply
Original operating instructions AERO AEROMAT VT RS2 Mains supply 7.3 Wiring diagram series switch Depending.on.the.design,.the.AEROMAT VT RS2 is connected.to.a.suitable.socket.of.the.230-V.AC.mains. power.supply.using.the.Euro.plug.or.directly.to.the. 230-V.AC.mains.power.supply.using.an.external.switch. 7.1 Socket connection When.installed.in.damp.rooms,.the.socket.for.the. AEROMAT VT RS2 must be installed in at least protection.class.3. Transformer 7.2 External switch connection WARNING Flat.ribbon.cable 20 V DC... -
Page 11: Membrane Key And Led Display
2. Adjust.the.required.blower.level.using.either.the. -to- -Au- membrane.key.or.the.external.switch Following.a.power.failure,.the.AEROMAT.VT.RS2. 10.3 Blower level 3 switches.to.the.last.level.to.be.used. If.you.need.a.3..blower.level,.you.can.enable.this.in.the. 10.1 Adjustment of the blower level using the programming.mode. membrane key For.information.on.the.programming.mode.see: • By.pressing.the.membrane.key.several.times,.you. https://www.siegenia.com/service/doc/H46.FENS003 can.activate.the.required.blower.levels.(relaying). Blower level 0 Blower level 1 Blower level 2 H47.FENS083EN-02 03.2021 11/20... -
Page 12: Operation Via Smartphone Or Tablet (Aeromat Vt Rs2 Smart Only)
• Clean.the.AEROMAT VT RS2.with.a.cloth.moistened. indicator.lights. with.a.mild.soap.solution.or.cleaning.agent. ISO ePM10 50% filters must not be cleaned, they must be replaced. Only use the original filters from SIEGENIA. You can purchase replacement filters from SIEGENIA or from specialist retailers. 12/20 03.2021 H47.FENS083EN-02... -
Page 13: Replacing.the.air.canal.and.the.filter (Optional)
Original operating instructions AERO AEROMAT VT RS2 11.3 Replacing the air canal and the filter (optional) • The.figure.below.shows.the.opening.direction. for a AEROMAT VT RS2.that.has.been.installed. horizontally. • The.number.and.position.of.the.components. can.deviate.from.the.figure..Be.sure.to.note.the. arrangement.of.the.internal.parts.for.special.models. that.do.not.correspond.to.the.figure. 1. Open.the.locking.bolts.on.the.RH.and.LH.(or.in.the. middle.according.to.ventilator.length) 2. Pull.out.the.front.panel 3. Slide.the.membrane.key.out.sideways.(if.present) 4. Remove.the.front.profile.and.place.it.on.a.soft. surface.(cardboard,.sheet) H47.FENS083EN-02 03.2021 13/20... - Page 14 Original operating instructions AERO AEROMAT VT RS2 5. Remove.front.profile.insulation.and.filter 10. If.necessary,.clean.the.blower.using.compressed.air. only 6. Remove.the.foam 11. Insert.blower.in.the.new.air.canal 7. Remove.the.supporting.plate,.to.do.this,.press.the. top.toward.the.interior.of.the.unit.and.pull.out.of. 12. Reassemble.the.AEROMAT VT RS2.in.the.reverse. the.bottom order. 8. Open.the.transformer.compartment.and.release.the. 13. After.filter.replacement,.hold.down.the.membrane. blower.cable.from.the.circuit.board key.for.5.seconds.to.reset.the.LED.indicator.(filter. replacement.indicator). 9. Carefully.take.out.the.air.canal/foam.element.and. remove.the.blower 14/20 03.2021 H47.FENS083EN-02...
-
Page 15: Rectification Of Malfunctions
Restart.WIFI.router.of.the.home.network router.of.the.home.network No.WIFI.connection.to.the. Restart.smartphone/tablet smartphone/tablet AEROMAT VT RS2 smart Reset.on.the.AEROMAT VT RS2 smart: does.not.respond.to. 1..Press.membrane.key.3.times.briefly.in. smartphones/tablets succession No.WIFI.connection.to.the. 2..Then.immediately.press.and.hold.the. AEROMAT VT RS2 smart membrane.key.once.(for.approx..4.seconds) 3..The.AEROMAT VT RS2 smart.has.been.reset.to. the.factory.settings. 12.1 SIEGENIA Comfort app Note:.you.will.find.detailed.information.on.how.to. rectify.malfunctions.on.the.SIEGENIA.Smarthome. Internet.page.. www.siegenia.com/qr/comfort-app/faq H47.FENS083EN-02 03.2021 15/20... -
Page 16: Technical Specifications
Original operating instructions AERO AEROMAT VT RS2 13 Technical specifications AEROMAT VT RS2 (Supply air) Air throughput (with filter) at blower level 1 approx..51.m³/h at blower level 2 approx..79.m³/h Inherent noise 1, 2 at blower level 1 .= 22 dB.(A) at blower level 2 .= 32 dB.(A) .= 50.dB Sound absorption... -
Page 17: Information Requirements
Original operating instructions AERO AEROMAT VT RS2 15 Information requirements according to EU Regulation 1253/2014 Producer SIEGENIA b Model.identifier AEROMAT VT RS2 Energy.consumption.(SEV); . 0.23 kWh/(m².·.a);.G − 7.4 kWh/(m².·.a);.F Energy.efficiency.class.(SEC.class) − 20.8 kWh/(m².·.a);.D (according.to.climatic.zone.warm./.average./.cold) d Type WLA / ELA e Type.of.drive Two-level drive Heat.recovery.system ―... -
Page 18: Eu Declaration Of Conformity With Regard To Ce Marking
2014/35/EC Low voltage directive EN.60335-1:2012+A11:2014 EN.62233:2008 2014/53/EC RED Directive Electromagnetic.compatibility: EN.301489-1,.V.1.9.2 EN.301.489-17,.V.2.2.1 EN.61000-3-2:2014 EN.61000-3-3:2013 Electrical.safety.-.Establishment.of.information.technology EN.60950-1:2006+A11:2009+A12:2011+A1:2010+A2:2013 Safety.of.persons.in.electromagnetic.fields.(10.MHz.to.300.GHz) EN.62479:2010 Radio.spectrum.matters.-.data.transmission.devices.in.the.2.4.GHz.ISM.band EN 300 328 V1.9.1 2006/42/EC Machinery Directive EN.12100:2010.Risk.assessment 2011/65/EU RoHs EN.50581:2012.Technical.documentation.on.the.evaluation.of.electrical.and.electronic.devices.with. reference.to.the.restriction.of.hazardous.substances This.declaration.is.responsible.for.the.producers./.importers.based.in.the.European.Union.submitted.by: SIEGENIA-AUBI KG Hardware.and.ventilation.technology Siegen,.2017-10-10 Duisburger Straße 8 57234.Wilnsdorf,.Germany 18/20 03.2021 H47.FENS083EN-02... - Page 20 www.siegenia.com...
Need help?
Do you have a question about the AERO AEROMAT VT RS2 and is the answer not in the manual?
Questions and answers