Siegenia AEROMAT VT. Installation And Operating Instructions Manual
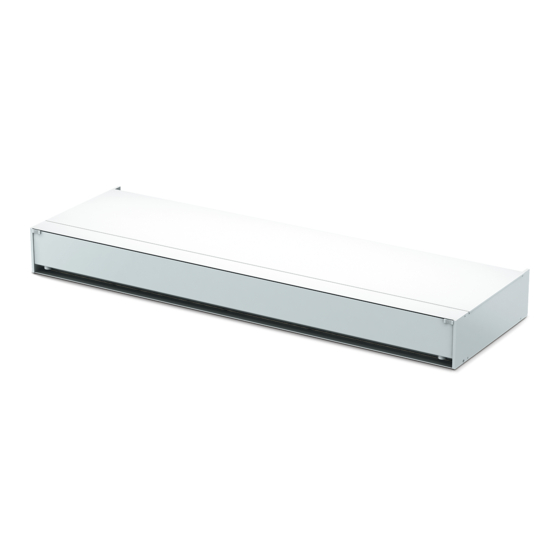
Sound absorbing ventilator
Hide thumbs
Also See for AEROMAT VT.:
- Operating and care instructions (52 pages) ,
- Operating and care instructions (32 pages)
Table of Contents
Advertisement
Quick Links
AEROMAT VT.
Sound absorbing ventilator.
W i n d o W h a r d Wa r e
D o o r h a r D wa r e
S l i d i n g d o o r h a r d wa r e
V e n t i l at i o n t e c h n o lo g y
B u i l d i n g t e c h n o lo g y
I n s ta l l at I o n a n d
o p e r at I n g I n s t r u c t I o n s
V e n t i l at i o n t e c h n o lo g y
Advertisement
Table of Contents

Related Manuals for Siegenia AEROMAT VT.


Summary of Contents for Siegenia AEROMAT VT.
- Page 1 I n s ta l l at I o n a n d o p e r at I n g I n s t r u c t I o n s AEROMAT VT. Sound absorbing ventilator. W i n d o W h a r d Wa r e D o o r h a r D wa r e V e n t i l at i o n t e c h n o lo g y S l i d i n g d o o r h a r d wa r e...
-
Page 3: Table Of Contents
Installation and operating instructions AEROMAT VT Intended use ....................................4 Safety notices ....................................4 Installation ....................................... 5 Power supply ....................................8 Function ......................................9 Operation ......................................9 Care and maintenance .................................11 Technical data ....................................14 Dimensions ....................................14 Liability ......................................15 Last update: 02.2015... -
Page 4: Intended Use
• Insert the Euro plug of the network connection cable into a suitable 230-V AC mains power supply only. • If the network connection cable is damaged, it may only be replaced by SIEGENIA, its customer service department or an electrician. -
Page 5: Installation
Installation and operating instructions AEROMAT VT Installation Prerequisites for installation • The position from which the outdoor air is drawn in must be selected so that any nearby emission sources have as little impact as possible on the quality of the air being drawn in. • The maximum permissible area load is 1,000 kg per running metre of ventilator length. - Page 6 AEROMAT VT Installation and operating instructions Installation sequence 1. Remove the AEROMAT VT carefully from the packaging and do not place it on the weather grille or front panel. We recommend storing the unit on a soft surface (e.g. cardboard or sheet) during installation. 2.
- Page 7 › Screw on the mounting bracket in the area indicated (marker tape) or fasten it to the casing profiles with a rivet. We recommend that you use SIEGENIA aluminium mounting brackets. AEROMAT VT with 911 CW weather grille AEROMAT VT with 911 HW weather grille...
-
Page 8: Power Supply
AEROMAT VT Installation and operating instructions Power supply Depending on the design, the AEROMAT VT is connected to a suitable socket of the 230-V AC mains power supply using the Euro plug or directly to the 230-V AC mains power supply using an external switch. Socket connection Important: When installed in damp locations, the socket for the AEROMAT VT must be installed to at least protection class 3. -
Page 9: Function
Installation and operating instructions AEROMAT VT Function Operation by pressure differential: (DS/DSg Type) • The room is ventilated as the indoor and outdoor air pressures are equalised (pressure differential). As this happens, the air normally flows from outside into the room. • The air flow into the room varies as the pressure created by the wind changes with the weather. - Page 10 AEROMAT VT Installation and operating instructions Setting the blower level • By pressing the membrane key several times, you can activate the required blower levels (relaying). • After a power failure, the AEROMAT VT switches to the last level to be used. Membrane key + LED indicator Function LEDs do not light up...
-
Page 11: Care And Maintenance
Note: The model plate contains information concerning the design versions (e.g. information about the filter) • The model plate is located beside the slider opening in the front profile (see exemplary illustration). SIEGENIA-AUBI KG AEROMAT VT Typ DSG 3 MOD.2292873... - Page 12 Replace the filters* Membrane key flashes blue Only use genuine filters from SIEGENIA. You can purchase replacement filters from SIEGENIA or from specialist retailers. Removing the front panel The figure below shows the opening direction for a AEROMAT VT that has been installed horizontally.
- Page 13 Installation and operating instructions AEROMAT VT AEROMAT VT (DSg Type) Note: The number and position of the components can deviate from the illustration. 1. Remove the front panel (see page 12) 2. Remove air canal/foam elements and clean or replace 3. Reassemble the AEROMAT VT in the reverse order AEROMAT VT (DS and RS Type) Note: The number and position of the components can deviate from the illustration.
-
Page 14: Technical Data
AEROMAT VT Installation and operating instructions Technical data Specifications for a VT unit DSg Type DS Type RS Type Sound absorption = 33 - 49 dB = 50 dB = 50 dB w-1.9 w-1.9 w-1.9 (at 300 mm installation depth) = 40 - 56 dB = 57 dB = 57 dB... -
Page 15: Liability
Environmental protection Although our products do not fall within the scope of the German Electrical and Electronic Equipment Act, SIEGENIA will continue to meet the requirements of this Act and will endeavour to completely eliminate the use of substances that are hazardous to the environment as soon as this becomes technically feasible. - Page 16 Switzerland Phone: +41 33 3461010 Germany Phone: +49 271 39310 Turkey Phone: +90 216 5934151 You can fi nd address details for our Great Britain Phone: +44 2476 622000 Ukraine Phone: +380 44 4637979 international sites at: www.siegenia.com Contact your dealer:...
Need help?
Do you have a question about the AEROMAT VT. and is the answer not in the manual?
Questions and answers