Table of Contents
Advertisement
Quick Links
Operation instruction manual OI/KMICRO-EN Rev. B
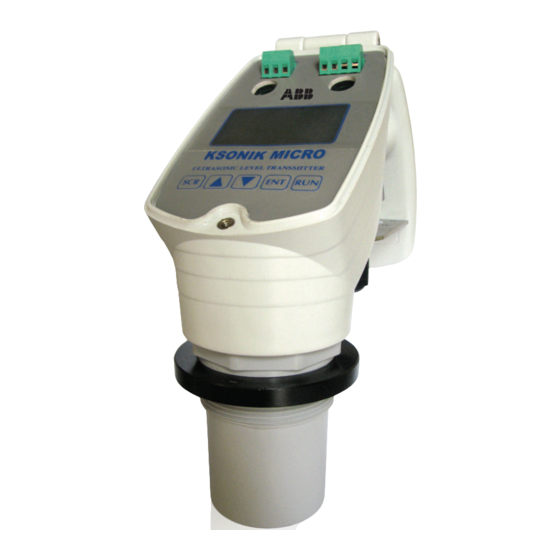
KSONIK MICRO
Ultrasonic Level Transmitter
Ultrasonic level measurement
with GAP technology
K-TEK Products
Introduction
This operation instruction manual provides the following
information:
–
Quick start instructions for distance, level and flow - see
page 3
–
Installation procedures - see page 6
–
Instructions on how to change parameters - see page 8
–
Configuration guidelines for distance/level - see page 9
Advertisement
Table of Contents

Related Manuals for ABB KSONIK MICRO


Summary of Contents for ABB KSONIK MICRO
- Page 1 Operation instruction manual OI/KMICRO-EN Rev. B KSONIK MICRO Ultrasonic Level Transmitter Ultrasonic level measurement with GAP technology K-TEK Products Introduction This operation instruction manual provides the following information: – Quick start instructions for distance, level and flow - see page 3 –...
-
Page 2: Table Of Contents
12.6 Venturi Flume .............................24 12.7 V-Notch ...............................24 12.8 Working with the Simulator .........................25 13.0 Fault Finding .................................26 14.0 Terminal Connections ............................27 15.0 RMA Form ................................28 16.0 Declaration of Conformity .............................29 17.0 Warranty ................................30 2 KSONIK MICRO Ultrasonic Level Transmitter | Operation instruction manual... -
Page 3: Introduction
Quick Start for Distance KSONIK MICRO was designed to be user friendly with a very simple configuration program. This allows the technician to set up KSONIK MICRO without the aid of a complicated source-code book. There are no references to any codes in KSONIK MICRO. -
Page 4: Quick Start For Level
Quick Start for Level Connect up the power to the instrument described on the KSONIK MICRO face label or in the KSONIK MICRO manual under terminal connections on page 51. SCROLL Press ▼ ENTER ENTER to get to the default security Code 5159 and then press ▼... -
Page 5: Changing Parameters
Enter the code 5159 by pressing the keys Enter the Code: 5000 Scroll Down Enter Step 3 To confirm security code press ENTER Enter the Code: 5159 Scroll Down Enter Operation instruction manual | KSONIK MICRO Ultrasonic Level Transmitter 5... -
Page 6: Installation
1. The KSONIK MICRO must be fitted at least 0.50 m / 1.64 ft above the highest point of level. 2. Always use the plastic nut. The KSONIK MICRO must be fitted to a rigid support. Use mild steel or a suitable plastic. - Page 7 The KSONIK MICRO must be perpendicular to the material it is measuring with a clear line of sight and must not be above beams or filling points. INCORRECT CORRECT THIS IS CORRECT AS THE FILL- THIS IS INCORRECT AS THE...
-
Page 8: Key Descriptions
If any large electrical equipment is installed in the vicinity, then earthed steel conduit must be used. KEY DESCRIPTION KSONIK MICRO is “user friendly” having only 5 keys and a menu driven display. The keys are listed below with their appropriate functions. -
Page 9: Configuration Distance / Level
-50 mm TO 50 mm SETUP RELAY NO/YES RELAY OFF/LO/HI SETPOINT SPAN RESET POINT SPAN PUMP CYCLE OFF/FIFO/ROTATE CLEAR RELAY NO/YES SETUP LINEARISER NO/YES ACTIVATE LINEARISER NO/YES SETPOINT 1-21 HEIGHT 0m-SPAN PERCENTAGE 0-100% Operation instruction manual | KSONIK MICRO Ultrasonic Level Transmitter 9... -
Page 10: Distance / Level Mode
This is used to set up the rate of change of the level output. The rate of change governs the rate at which the instrument output change. By increasing the rate of change (4.00 m/min) it will allow the KSONIK MICRO to monitor rapid changes in level. - Page 11 Clears the number of cycles as well as the run hours recorded. DEFAULT No SETUP LINEARISER This prompt will allow you to input a curve to linearise the vessel. The span is divided by 21 and you can input the new Operation instruction manual | KSONIK MICRO Ultrasonic Level Transmitter 11...
- Page 12 KSONIK MICRO prompts you at each point. DEFAULT No ACTIVATE LINEARISER This function activates the lineariser. DEFAULT No SET POINT This is the number at which point the user is inputting a linearised point.
- Page 13 9.50 m Percentage 40.00% Percentage 95.00% Set point 10 Set point 21 Height 4.50 m Height 10.00 m Percentage 45.00% Percentage 100.00% Set point 11 Height 5.00 m Percentage 50.00 Operation instruction manual | KSONIK MICRO Ultrasonic Level Transmitter 13...
-
Page 14: Configuration Flow
NO/YES RELAY OFF/LO/HI/COUNTER SETPOINT SPAN RESET POINT SPAN PUMP CYCLE OFF/FIFO/ROTATE COUNT VALUE 1-1000000 1000 CLEAR RELAY NO/YES SETUP LINEARISER NO/YES ACTIVATE LINEARISER NO/YES SETPOINT 1-21 HEIGHT 0m-SPAN PERCENTAGE 0-100% 14 KSONIK MICRO Ultrasonic Level Transmitter | Operation instruction manual... -
Page 15: Flow Mode
This is used to set up the rate of change of the level output. The rate of change governs the rate at which the instrument outputs changes. By increasing the rate of change (4.0 m/min) it will allow the KSONIK MICRO to monitor rapid changes in flow. - Page 16 Rectangular weir (3/2) Own curve (21 point lineariser) DEFAULT V-Notch SETUP RELAY This prompt will allow a user to enter the menu to set up the relay parameters. DEFAULT No 16 KSONIK MICRO Ultrasonic Level Transmitter | Operation instruction manual...
- Page 17 This prompt will allow you to input a curve to linearise the flume. The span is divided by 21 and you can input the new height for each point as well as the corresponding percentage fill at that point. KSONIK MICRO prompts you at each point.
- Page 18 1.425 m Percentage 92.59% Percentage 25.30% Set point 21 Set point 10 Height 1.500 m Height 0.675 m Percentage 30.19% Percentage 100.00% Set point 11 Height 0.750 m Percentage 35.36% 18 KSONIK MICRO Ultrasonic Level Transmitter | Operation instruction manual...
-
Page 19: Working With Key Pad In Run Mode
3. The temperature, which is being measured at the transducer, if temperature compensation has been enabled. 4. The value of percentage fill of the instrument. 5. The mA output of the instrument. 6. The average Distance/Level value which is calculated. Operation instruction manual | KSONIK MICRO Ultrasonic Level Transmitter 19... -
Page 20: Onscreen Kscope
8. Indication of good echo, noise, or loss of echo. e.g. E for good echo, N for noise or O for loss of echo. 9. The maximum voltage scale of the Onscreen KScope. 10. The echo loss timer started when no signal is present. 20 KSONIK MICRO Ultrasonic Level Transmitter | Operation instruction manual... -
Page 21: Examples
TIP: Set the relay set and reset point further apart to avoid the relays from chattering. Below is what KSONIK MICRO will display on the above application. Relay 1 will switch on (set) when the level rises above 13.2 ft / 4.00 m and reset when the level goes below 11.55 ft / 3.50 m. Relay 2 will switch on (set) when the level drops below 3.28 ft / 1.00 m and reset when the level goes above 4.95 ft / 1.50 m. -
Page 22: Level Measurement And Engineering Units
2.46 ft / 0.75 m Empty distance Span 14.85 ft / 4.50 m 16.5 ft / 5.00 m Below is what KSONIK MICRO will display on the above application. The analogue output should be approximately 19.11 mA. SECURITY CODE 5159... -
Page 23: Level Measurement Using The Lineariser Function With Non-Linear Vessel
K 10 Level 13.94 ft Shown to the left is what KSONIK MICRO will display on the above application. The analogue output should be approxi- mA Output: 18.80mA mately 18.80mA. -
Page 24: Venturi Flume
Please Note! The Empty Distance is to the bottom of the V-Notch and not the bottom of the weir. 24 KSONIK MICRO Ultrasonic Level Transmitter | Operation instruction manual... -
Page 25: Working With The Simulator
MODE FLOW EMPTY DISTANCE 6.56 ft / 2.00 m Below is what KSONIK MICRO will display on the above applica- SPAN 4.92 ft / 1.50 m tion. The relay will drive the counter for every 1000 counts. The BLANKING 1.64 ft / 0.50 m... -
Page 26: Fault Finding
Loss of Echo Check that the KSONIK MICRO is not being used on a solid or agitated surface, as agitated surfaces and solids do not reflect as much signal as flat surfaces. Aim the Transducer straight down. Check if the Transducer face is dirty. -
Page 27: Terminal Connections
14.0 TERMINAL CONNECTIONS Connections: Power Supply Ground + 20/30Vdc Output Relay Output + 4-20mA N/O relay contact - Ground COM relay contact N/C relay contact Operation instruction manual | KSONIK MICRO Ultrasonic Level Transmitter 27... -
Page 28: Rma Form
Has product been in contact with any potentially hazardous chemical? If yes, documentation product and forward MSDS to K-TEK. “ATTN: Customer Service” Return Repaired Product to Address Shipping Address: Billing Address: Ship Via: 28 KSONIK MICRO Ultrasonic Level Transmitter | Operation instruction manual... -
Page 29: Declaration Of Conformity
EN50081-1 EN55022 EN60555-2,3 Safety: BSEN61010-1 CE Conformity Declaration The KMICRO COMPACT is in accordance with EN50081-2 1993 and EN50082-2 1995. Johannesburg, South Africa, 28 December 2005. Eric Fauveau Eric Fauveau Operation instruction manual | KSONIK MICRO Ultrasonic Level Transmitter 29... -
Page 30: Warranty
ABB will repair or replace, at ABB’s election, defective items which are returned to ABB by the original purchaser within the period specified above from the shipment date of the item and which is found, upon examination by ABB, to its satisfaction, to contain de- fects in materials or workmanship which arose only under normal use and service and which were not the result of either alterations, misuse, abuse, improper or inadequate adjustments, applications or servicing of the product. - Page 31 Operation instruction manual | KSONIK MICRO Ultrasonic Level Transmitter 31...
- Page 32 Prairieville, LA 70769 USA notice. With regard to purchase orders, the agreed Phone: +1 225 673 6100 particulars shall prevail. ABB does not accept any Service: +1 225 677 5836 responsibility whatsoever for potential errors or possible lack of information in this document.
Need help?
Do you have a question about the KSONIK MICRO and is the answer not in the manual?
Questions and answers