Table of Contents
Advertisement
Quick Links
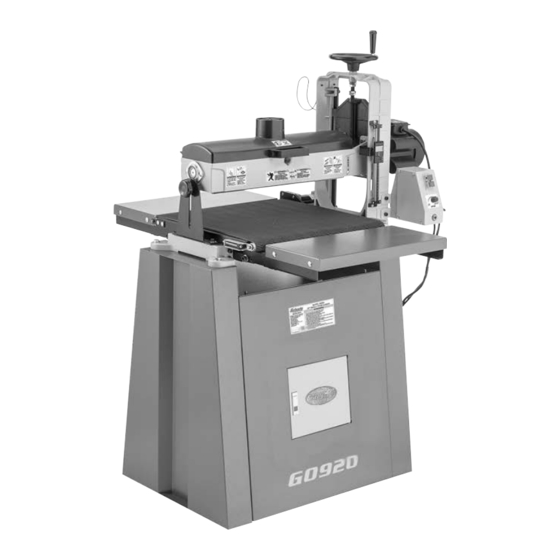
MODEL G0920
22" SINGLE DRUM SANDER
OWNER'S MANUAL
(For models manufactured since 10/20)
COPYRIGHT © DECEMBER, 2020 BY GRIZZLY INDUSTRIAL, INC.
WARNING: NO PORTION OF THIS MANUAL MAY BE REPRODUCED IN ANY SHAPE
OR FORM WITHOUT THE WRITTEN APPROVAL OF GRIZZLY INDUSTRIAL, INC.
#CS21435 PRINTED IN TAIWAN
V1.12.20
Advertisement
Table of Contents

Subscribe to Our Youtube Channel
Related Manuals for Grizzly G0920


Summary of Contents for Grizzly G0920
- Page 1 (For models manufactured since 10/20) COPYRIGHT © DECEMBER, 2020 BY GRIZZLY INDUSTRIAL, INC. WARNING: NO PORTION OF THIS MANUAL MAY BE REPRODUCED IN ANY SHAPE OR FORM WITHOUT THE WRITTEN APPROVAL OF GRIZZLY INDUSTRIAL, INC. #CS21435 PRINTED IN TAIWAN V1.12.20...
- Page 2 This manual provides critical safety instructions on the proper setup, operation, maintenance, and service of this machine/tool. Save this document, refer to it often, and use it to instruct other operators. Failure to read, understand and follow the instructions in this manual may result in fire or serious personal injury—including amputation, electrocution, or death.
-
Page 3: Table Of Contents
Table of Contents INTRODUCTION ..........2 SECTION 5: ACCESSORIES ......32 Contact Info............ 2 SECTION 6: MAINTENANCE ......33 Manual Accuracy ........... 2 Schedule ............33 Identification ........... 3 Cleaning Machine ........33 Machine Data Sheet ........4 Cleaning Sanding Belts ....... 33 SECTION 1: SAFETY ........ -
Page 4: Introduction
ID label (see below). This information is required for us to provide proper tech support, and it helps us determine if updated documenta- tion is available for your machine. Manufacture Date Serial Number Model G0920 (Mfd. Since 10/20) -
Page 5: Identification
Conveyor feed rate ranges from 0–20 FPM. To reduce your risk of serious injury, read this Circuit Breaker Reset Button: Trips during entire manual BEFORE excessive sanding operation when workload using machine. overloads circuit. Press button to reset break- Model G0920 (Mfd. Since 10/20) -
Page 6: Machine Data Sheet
MACHINE DATA SHEET Customer Service #: (570) 546-9663 · To Order Call: (800) 523-4777 · Fax #: (800) 438-5901 MODEL G0920 22" SINGLE DRUM SANDER Product Dimensions: Weight................................307 lbs. Width (side-to-side) x Depth (front-to-back) x Height............... 42-1/2 x 43-1/2 x 61 in. - Page 7 The information contained herein is deemed accurate as of 4/25/2021 and represents our most recent product specifications. Model G0920 PAGE 2 OF 2 Due to our ongoing improvement efforts, this information may not accurately describe items previously purchased. Model G0920 (Mfd. Since 10/20)
-
Page 8: Section 1: Safety
Never operate under the influence of drugs or injury or blindness from flying particles. Everyday alcohol, when tired, or when distracted. eyeglasses are NOT approved safety glasses. Model G0920 (Mfd. Since 10/20) - Page 9 Make sure they are properly installed, you experience difficulties performing the intend- undamaged, and working correctly BEFORE ed operation, stop using the machine! Contact our operating machine. Technical Support at (570) 546-9663. Model G0920 (Mfd. Since 10/20)
-
Page 10: Additional Safety For Drum Sanders
If normal safety pre- respect. Failure to do so could result in cautions are overlooked or ignored, seri- serious personal injury, damage to equip- ous personal injury may occur. ment, or poor work results. Model G0920 (Mfd. Since 10/20) -
Page 11: Section 2: Power Supply
To reduce the risk of these hazards, avoid over- loading the machine during operation and make sure it is connected to a power supply circuit that meets the specified circuit requirements. Model G0920 (Mfd. Since 10/20) - Page 12 Minimum Gauge Size ......12 AWG all local codes and ordinances. Maximum Length (Shorter is Better)..50 ft. -10- Model G0920 (Mfd. Since 10/20)
-
Page 13: Section 3: Setup
IMPORTANT: Save all packaging materials until you are completely satisfied with the machine and have resolved any issues between Grizzly or the shipping agent. You MUST have the original pack- aging to file a freight claim. It is also extremely helpful if you need to return your machine later. -
Page 14: Inventory
R. Lock Washers 5mm........4 lost in packaging materials while unpack- S. Hex Nuts ⁄ "-18 ......... 4 ing or they are pre-installed at the factory. Hex Nuts M8-1.25 ........8 Figure 2. Cabinet inventory. -12- Model G0920 (Mfd. Since 10/20) - Page 15 AZ. Hex Wrench 8mm ........1 BA. Open-End Wrench 10 x 12mm ....1 BB. Open-End Wrench 12 x 14mm ....1 BC. Open-End Wrench 14 x 17mm ....1 Figure 3. Extension tables inventory. Figure 5. Tools inventory. -13- Model G0920 (Mfd. Since 10/20)
-
Page 16: Hardware Recognition Chart
Hardware Recognition Chart USE THIS CHART TO MATCH UP HARDWARE DURING THE INVENTORY AND ASSEMBLY PROCESS. Flat Head Screw -14- Model G0920 (Mfd. Since 10/20) -
Page 17: Site Considerations
Only install in an Shadows, glare, or strobe effects that may distract access restricted location. or impede the operator must be eliminated. Power Connection 42½" Outfeed Clearance Infeed Clearance Dust Port 43½" Figure 6. Minimum working clearances. -15- Model G0920 (Mfd. Since 10/20) -
Page 18: Assembly
Side Panel Left Side Panel Rubber Foot (1 of 2) Bottom Figure 7. Machine feet and fasteners. Panel Repeat Step 1 with right side panel. Figure 9. Bottom panel attached to right side panel. -16- Model G0920 (Mfd. Since 10/20) - Page 19 Front Panel 10. Attach remaining partition panel to left side panel with (2) M5-.8 x 8 Phillips head screws, Figure 11. Front panel attached to side panels. 5mm lock washers, and 5mm flat washers. -17- Model G0920 (Mfd. Since 10/20)
- Page 20 12. Place sander on stand and attach with (4) M8-1.25 x 40 hex bolts and 8mm fender Arch washers (see Figure 15). Mounting Bracket Digital Depth Gauge Figure 17. Digital depth gauge attached to arch bracket. Figure 15. Attaching sander to cabinet. -18- Model G0920 (Mfd. Since 10/20)
- Page 21 5mm flat washers (see Figure 19). Table Drum Case Mounting Bracket Mounting Blocks Arch Mounting Bracket Figure 21. Table mounting blocks attached to bracket. Figure 19. Arch mounting bracket attached to drum case. -19- Model G0920 (Mfd. Since 10/20)
- Page 22 M8-1.25 hex nuts (see Figure 25). Extension Table Conveyor Table (1 of 2) Table Mounting Bracket (1 of 2) Folding Bracket (1 of 4) Figure 23. Table mounting bracket attached to table frame. Figure 25. Extension tables installed. -20- Model G0920 (Mfd. Since 10/20)
- Page 23 — If straightedge is flat against conveyor table and both extension tables, no fur- ther adjustment is required. If anchoring machine to floor, proceed to Anchoring to Floor on Page 22. Otherwise, proceed to Dust Collection on Page 22. -21- Model G0920 (Mfd. Since 10/20)
-
Page 24: Anchoring To Floor
Figure 29. Dust hose attached to dust port. Figure 28. Popular method for anchoring machinery to a concrete floor. Tug hose to make sure it does not come off. Note: A tight fit is necessary for proper performance. -22- Model G0920 (Mfd. Since 10/20) -
Page 25: Test Run
• Tracking & Tensioning Conveyor Belt (Page 38). Figure 30. Feed motor plugged into switch box • Aligning Drum (Page 41). outlet. -23- Model G0920 (Mfd. Since 10/20) -
Page 26: Section 4: Operations
Rotates workpiece 180° horizontally and ects. Regardless of the content in this sec- repeats Steps 6–7. tion, Grizzly Industrial will not be held liable for accidents caused by lack of training. Lowers height of drum a small amount (typi- cally ⁄... -
Page 27: Inspecting Stock
DO NOT use workpieces with these characteristics! Figure 32. Drum height lock knob location. -25- Model G0920 (Mfd. Since 10/20) -
Page 28: Using Digital Depth Gauge
( ⁄ " or 0.4mm) or less; the maximum depth for most sanding conditions. Note: Each full turn of table elevation handwheel raises conveyor table approxi- mately 0.06" ( ⁄ ") or 1.5mm. -26- Model G0920 (Mfd. Since 10/20) -
Page 29: Adjusting Conveyor Feed Rate
Use trial-and-error to determine the best settings for your specific applications. To adjust feed belt speed: Turn machine ON. Rotate conveyor feed rate dial (see Figure 36) clockwise to increase feed speed or counterclockwise to decrease conveyor feed speed. -27- Model G0920 (Mfd. Since 10/20) -
Page 30: Sanding Tips
Reduce snipe when sanding more than one board of the same thickness by feeding them into the sander with the front end of the sec- ond board touching the back end of the first board. -28- Model G0920 (Mfd. Since 10/20) -
Page 31: Choosing Sandpaper
Sandpaper There are many types of sanding belts to choose from. We recommend aluminum oxide for general The Model G0920 is designed for 3" wide sand- workshop environments. Below is a chart that paper rolls. Turn to SECTION 5: ACCESSORIES groups abrasives into different classes, and shows on Page 32 for grit selection and model numbers. - Page 32 After cutting 15" angled sides, mea- sure 1 " along same sides and cut off ends with knife. 3" Figure 41. Wrapping sandpaper around drum. 127" Grit Side Down Figure 39. Sandpaper pattern for drum. -30- Model G0920 (Mfd. Since 10/20)
-
Page 33: Folding Extension Tables
Note: If the extension tables do not fold when the above screws are pressed, the shoulder screw in Figure 43 must be loosened on either side. Shoulder Screw Figure 43. Folding bracket shoulder screws. -31- Model G0920 (Mfd. Since 10/20) -
Page 34: Section 5: Accessories
To reduce this risk, only install accessories for cross cutting or cutting to length using a chop recommended for this machine by Grizzly. saw or metal cutting bandsaw. Simply place a roller table on one or both sides of your saw and... -
Page 35: Section 6: Maintenance
• Lubricate elevation leadscrew and slides. Cleaning Machine Figure 47. D3003 PRO-STIK Cleaning the Model G0920 is relatively easy. Cleaning Pad. ® Vacuum excess wood chips and sawdust, and wipe off the remaining dust with a dry cloth. If any resin has built up, use a resin dissolving cleaner to remove it. -
Page 36: Lubrication
Avoid using excess lubrication. Too much lubricant attracts sawdust and will clog the belt bushings. Bushings The bearings on the Model G0920 have been Lubrication Type .... Model T26685 (ISO 32) lubricated and sealed at the factory. No other care Oil Amount ......... -
Page 37: Section 7: Service
7. Move machine closer to power supply; use shorter extension cord. 8. Centrifugal switch/contact points at fault. 8. Adjust centrifugal switch/clean contact points. Replace either if at fault. 9. Motor or motor bearings at fault. 9. Replace motor. -35- Model G0920 (Mfd. Since 10/20) - Page 38 2. Properly adjust conveyor belt tracking (Page 38). 2. Conveyor belt tracking not properly adjusted. does not track 3. Replace conveyor belt (Page 39). 3. Conveyor belt worn. correctly. 4. Workpiece too heavy. 4. Use lighter workpiece. -36- Model G0920 (Mfd. Since 10/20)
- Page 39 1. Use at least an 8" main line with two 6" branch lines collection. machine. that each Y into 4" at machine. 2. Dust collector underpowered or too far away 2. Upgrade dust collector or decrease distance from dust from machine. collector to machine. -37- Model G0920 (Mfd. Since 10/20)
-
Page 40: Tracking & Tensioning Conveyor Belt
Tracking affects tension, so refer to when machine is running. Roll up sleeves Tensioning Conveyor Belt on next page. and do not wear gloves or other apparel that could become entangled in moving parts. -38- Model G0920 (Mfd. Since 10/20) -
Page 41: Replacing Conveyor Belt
DO NOT over-tension conveyor belt. This may cause premature wearing of belt and Figure 55. Location of table cap screws. bushings, and cause strain on motor. -39- Model G0920 (Mfd. Since 10/20) -
Page 42: Making Blocks
Cut 2x4 into two even pieces to make two 36" long wood gauge blocks. Note: Steps 1-2 can be skipped, but hav- ing gauge blocks of equal height is critical to accuracy of adjustments. -40- Model G0920 (Mfd. Since 10/20) -
Page 43: Adjusting Gibs
Make sure gibs are properly adjusted (refer to Rotate drum height handwheel to test drum Adjusting Gibs). movement. Note: Tighten lock nuts to increase gib pressure. Repeat Step 2–3 until you are satisfied with drum movement. -41- Model G0920 (Mfd. Since 10/20) - Page 44 — If difference between A and B is more than 0.010", then one end must be adjusted to within 0.010" of other. Proceed to Step 8. Figure 62. Adjustment hardware for right side. -42- Model G0920 (Mfd. Since 10/20)
- Page 45 Adding Conveyor Table Shims The conveyor table shims included with the Shim G0920 can be inserted between the conveyor (1 of 2) table and the drum lift adjustment plate to aid in drum alignment. Figure 65. Shim inserted between drum lift adjustment plate and conveyor table.
-
Page 46: Adjusting Pressure Rollers
Remove drum door lock knob shown in Figure 67 to open drum door. Drum Door Lock Knob Figure 66. Example of gauge blocks placed under drums. Figure 67. Location of drum door lock knob. -44- Model G0920 (Mfd. Since 10/20) -
Page 47: Replacing Brushes
Remove brush caps and worn brushes (see Figure 69) from conveyor belt motor. Brush (1 of 2) Brush Caps Figure 69. Location of motor cover cap screws. Replace both motor brushes and install brush caps. -45- Model G0920 (Mfd. Since 10/20) -
Page 48: Section 8: Wiring
Technical Support at (570) 546-9663. The photos and diagrams included in this section are best viewed in color. You can view these pages in color at www.grizzly.com. -46- Model G0920 (Mfd. Since 10/20) -
Page 49: Wiring Diagram
LINE LOAD Ground Ground SWITCH BOX 6-15 Receptacle 230 VAC 6-15 Plug 6-15 Plug DRUM MOTOR Ground CONVEYOR FEED MOTOR Start Capacitor 400MFD 125VAC Run Capacitor 40uF 250VAC READ ELECTRICAL SAFETY -47- Model G0920 (Mfd. Since 10/20) ON PAGE 46! -
Page 50: Electrical Component Photos
Electrical Component Photos Figure 72. Start capacitor. Figure 70. Switch box. Figure 73. Run capacitor. Figure 71. Motor junction box. READ ELECTRICAL SAFETY -48- Model G0920 (Mfd. Since 10/20) ON PAGE 46! -
Page 51: Section 9: Parts
SECTION 9: PARTS We do our best to stock replacement parts when possible, but we cannot guarantee that all parts shown are available for purchase. Call (800) 523-4777 or visit www.grizzly.com/parts to check for availability. Main 20-3 20-1 20-4 20-2... - Page 52 BRUSH CAP P0920061 HEX NUT 5/8-18 THIN P0920174 PHLP HD SCR M5-.8 X 8 P0920062 FLAT WASHER 9.5 X 23 X 2MM BUY PARTS ONLINE AT GRIZZLY.COM! -50- Model G0920 (Mfd. Since 10/20) Scan QR code to visit our Parts Store.
-
Page 53: Drum
Drum BUY PARTS ONLINE AT GRIZZLY.COM! -51- Model G0920 (Mfd. Since 10/20) Scan QR code to visit our Parts Store. - Page 54 SET SCREW M8-1.25 X 45 P0920246 CAP SCREW M8-1.25 X 20 P0920359 FLAT WASHER 8MM P0920247 LOCK NUT M8-1.25 P0920360 KNOB M8-1.25, 7-LOBE, D60 BUY PARTS ONLINE AT GRIZZLY.COM! -52- Model G0920 (Mfd. Since 10/20) Scan QR code to visit our Parts Store.
-
Page 55: Cabinet
P0920481 PHLP HD SCR M5-.8 X 8 P0920465 UPPER PANEL P0920482 FLAT WASHER 5MM P0920466 PARTITION PANEL P0920485 LOCK WASHER 5MM BUY PARTS ONLINE AT GRIZZLY.COM! -53- Model G0920 (Mfd. Since 10/20) Scan QR code to visit our Parts Store. -
Page 56: Extension Tables
TABLE MOUNTING BRACKET P0920531 CAP SCREW M8-1.25 X 16 P0920590 SHOULDER SCREW M8-1.25 X 33, 8 X 22 P0920547 LOCK NUT M8-1.25 BUY PARTS ONLINE AT GRIZZLY.COM! -54- Model G0920 (Mfd. Since 10/20) Scan QR code to visit our Parts Store. -
Page 57: Control Panel
P0920698 SWITCH BOX 610 P0920610 POWER CORD 14G 3W 60" 6-15P P0920699 ON/OFF SWITCH WKJD-17B 632 P0920632 CIRCUIT BREAKER KUOYOH 88 SERIES 9A BUY PARTS ONLINE AT GRIZZLY.COM! -55- Model G0920 (Mfd. Since 10/20) Scan QR code to visit our Parts Store. -
Page 58: Labels & Cosmetics
DO NOT REPRODUCE OR CHANGE THIS ARTWORK WARNING PANTONE 151 C or RAL 2005 WITHOUT WRITTEN APPROVAL! Grizzly will not accept labels changed without approval. PANTONE 711C or RAL 3020 GRIZZLY LOGO RED artwork changes are required, contact us immediately at manuals@grizzly.com. -
Page 59: Warranty & Returns
WARRANTY & RETURNS Grizzly Industrial, Inc. warrants every product it sells for a period of 1 year to the original purchaser from the date of purchase. This warranty does not apply to defects due directly or indirectly to misuse, abuse, negligence, accidents, repairs or alterations or lack of maintenance.
Need help?
Do you have a question about the G0920 and is the answer not in the manual?
Questions and answers