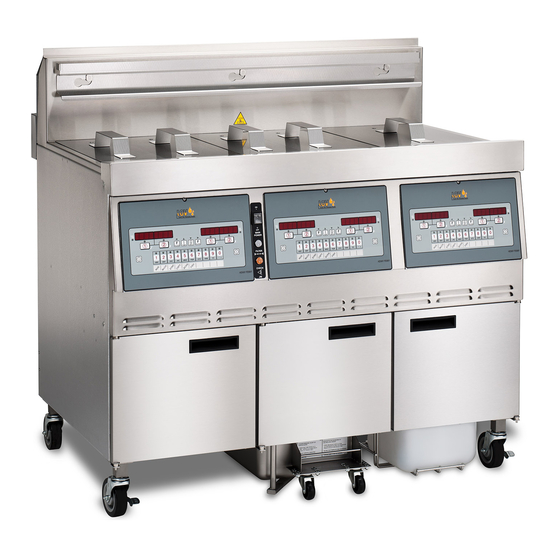
Henny Penny LVE-102 Operator's Manual
Split vat & full vat open fryers – electric
Hide thumbs
Also See for LVE-102:
- Technical manual (115 pages) ,
- Operation manual (59 pages) ,
- Manual (22 pages)

Related Manuals for Henny Penny LVE-102


Summary of Contents for Henny Penny LVE-102
- Page 1 Henny Penny Split Vat & Full Vat Open Fryers – Electric Model LVE-102 Model LVE-103 Model LVE-104 OPERATOR’S MANUAL REGISTER WARRANTY ONLINE AT WWW.HENNYPENNY.COM...
- Page 3 During this time, any frypot that fails due to manufacturing or workmanship issues will be replaced at no charge for parts, labor, or freight. Henny Penny will either install a new frypot at no cost or provide a new or reconditioned replacement fryer at no cost.
-
Page 4: Table Of Contents
TABLE OF CONTENTS Section Page Section 1. INTRODUCTION ..................1-1 Introduction ................... 1-1 Proper Care ..................1-1 Assistance ..................... 1-1 McDonald’s Exclusive Extended Warranty ..........1-1 Safety ....................1-2 Section 2. INSTALLATION ..................... 2-1 Introduction ................... 2-1 Unpacking ..................... 2-1 Selecting the Fryer Location .............. -
Page 5: Section Page
TABLE OF CONTENTS (Continued) Section Page Section 4. LEVEL 1 PROGRAMMING ................4-1 Modifying Product Settings ..............4-1 AIF Clock .................... 4-3 Deep Clean Mode ................. 4-4 Fryer Setup ................... 4-8 Section 5. LEVEL 2 PROGRAMMING ................5-1 Advanced Product Settings ..............5-1 E-Log (error code log) ................ -
Page 7: Introduction
Model LVE-102, 103, 104 SECTION 1. INTRODUCTION The Henny Penny open fryer is a basic unit of food processing 1-1. INTRODUCTION equipment. This unit is used only in institutional and commercial food service operations. As of August 16, 2005, the Waste Electrical and Electronic Equipment directive went into effect for the European Union. -
Page 8: Safety
Model LVE-102, 103, 104 1-5. SAFETY The Henny Penny open fryer has many safety features incorporated. However, the only way to ensure a safe operation is to fully under- stand the proper installation, operation, and maintenance proce- dures. The instructions in this manual have been prepared to aid you in learning the proper procedures. - Page 9 Model LVE-102, 103, 104 1-5. SAFETY (Continued) Equipotential Ground Symbol Waste Electrical and Electronic Equipment (WEEE) Symbol Shock Hazard Symbols Hot Surface Symbols To Check or Confirm...
-
Page 11: Installation
Model LVE-102, 103, 104 SECTION 2. INSTALLATION This section provides the installation and unpacking instructions for 2-1. INTRODUCTION the Henny Penny LVE fryer. Installation of this unit should be performed only by a qualified service technician. Do not puncture the fryer with any objects such as drills or screws as component damage or electrical shock could result. -
Page 12: Selecting The Fryer Location
Model LVE-102, 103, 104 2-3. SELECTING THE FRYER The proper location of the fryer is very important for operation, LOCATION speed, and convenience. The location of the open fryer should allow clearances for servicing and proper operation. Choose a location which will provide easy loading and unloading without interfering with the final assembly of food orders. -
Page 13: Ventilation Of Fryer
Model LVE-102, 103, 104 The fryer should be located with provision for venting into adequate 2-5. VENTILATION OF FRYER exhaust hood or ventilation system. This is essential to permit efficient removal of steam exhaust and frying odors. Special precaution must be taken in designing an exhaust canopy to avoid interference with the operation of the fryer. -
Page 14: Electrical Requirements
Model LVE-102, 103, 104 2-8. ELECTRICAL REQUIREMENTS Check the data plate, mounted on the inside of the left door, to determine the correct power supply. This fryer must be adequately and safely grounded (earthed) or electrical shock could result. Refer to local... - Page 15 Model LVE-102, 103, 104 2-8. ELECTRICAL An all pole, separate disconnect switch, with proper capacity REQUIREMENTS fuses or breakers must be installed at a convenient location (Continued) between the fryer and the power source, and must be installed according to national and local codes. It should be an insulated copper conductor rated for 600 volts and 90 C.
-
Page 16: Dimensions
Model LVE-102, 103, 104 2-9. DIMENSIONS 45-3/4” (1162 mm) 32-1/4” 46-3/4” (819 mm) (1187 mm) Model LVE-103... -
Page 18: Operation
Model LVE-102, 103, 104 SECTION 3. OPERATION 3-1. OPERATING COMPONENTS Refer to explanations on the next pages. Figure 3-1 Figure 3-2... - Page 19 Model LVE-102, 103, 104 3-1. OPERATING COMPONENTS Refer to Figures 3-1 & 3-2 in conjunction with the description of (Continued) the functions below. Fig. Item Description Function This LED lights when the control calls for heat for the left vat(s), and the elements come on and heat the oil During normal operation, press this button to start and stop cook cycles for the left basket;...
- Page 20 Model LVE-102, 103, 104 3-1. OPERATING COMPONENTS (Continued) Fig. Item Description Function 11 & 14 Used in the Programming and Filtering Modes; also used for buttons ; press to view the following filtering stats: a. the number of cook cycles before next filter b.
- Page 21 Model LVE-102, 103, 104 Figure 3-3 Fig. Item Description Function Filter Drain Pan Assy. Oil is drained into this pan and then is pumped through filters to help prolong the use of the oil Basket Rest The baskets hang on this when not in use, or to drain the...
-
Page 22: Set-Up Mode
Model LVE-102, 103, 104 3-2. SET-UP MODE Upon initial start-up, the controls will ask to confirm the settings for the fryer. When the main power switch is turned on, “OFF” shows in both displays. Press on either side and *SETUP* *MODE* shows in the displays, followed by, “LANGUAGE”... -
Page 23: Filling Or Adding Oil
Model LVE-102, 103, 104 3-3. FILLING OR ADDING OIL The oil level must always be above the heating elements when the fryer is heating and at the oil level indicators on the rear of the vat. Failure to follow these instructions could result in a fire and/or damage to the fryer. -
Page 24: Morning Start-Up Procedures
Model LVE-102, 103, 104 3-4. MORNING START-UP 1. Make sure vat is filled with oil to the proper level. PROCEDURES 2. Move power switch to the ON position and then press to turn on heat for the desired vat. If display shows “IS POT FILLED?”... -
Page 25: Cooking With Dedicated Display
Model LVE-102, 103, 104 3-5. COOKING WITH A dedicated display means, one product always shows in the DEDICATED DISPLAY display of a particular vat. 1. Once out of the Melt Cycle, LOW TEMP flashes until the set- point temperature has been reached. No cook cycles can be started while “LOW TEMP”... -
Page 26: Cooking With Multi-Product Display
Model LVE-102, 103, 104 3-6. COOKING WITH A multi-product display means, a product must be selected before MULTI-PRODUCT DISPLAY starting a cook cycle in a particular vat. 1. Once out of the Melt Cycle, LOW TEMP flashes until the set- point temperature has been reached. -
Page 27: Changing From Multi-Product Display To Dedicated Display
Model LVE-102, 103, 104 3-8. CHANGING FROM MULTI- The display shows “---- ----” if in the Multi-Product Display Mode PRODUCT DISPLAY TO A and can be changed to a dedicated display. DEDICATED DISPLAY 1. Press a product button, for ex: 2. -
Page 28: Auto Top-Off
Model LVE-102, 103, 104 3-11. AUTO TOP-OFF During normal operation, the control automatically monitors the oil level in the vat. If the control senses the oil level too low, the unit pumps oil from the JIB into the vat to keep the oil at the proper level. -
Page 29: Automatic Intermittent Filtration (Aif)
Model LVE-102, 103, 104 3-12. AUTOMATIC 1. During normal operation and after a certain number of cook INTERMITTENT cycles, the blue light illuminates on the front of the fryer FILTRATION (AIF) (Figure 1), and the control periodically shows “FLTR NOW?”... - Page 30 Model LVE-102, 103, 104 3-12. AUTOMATIC 10. During the next AIF with a new filter pad, if the vat is not filled INTERMITTENT after 3 tries, the display shows “FILTER SERVICE FILTRATION (AIF) REQUIRED-SEE TROUBLESHOOTING GUIDE”. (Continued) If the “Service Required” message appears, then every 15 minutes the display shows “FILTER PROBLEM FIXED? YES...
-
Page 31: Maintenance Filter
Model LVE-102, 103, 104 3-13. MAINTENANCE FILTER Put on protective gear: Be sure to use all McDonald’s approved safety equipment including, apron, face shield and gloves. Never begin filtering until you’re wearing all safety gear. Hot oil can cause severe burns. - Page 32 Model LVE-102, 103, 104 3-13. MAINTENANCE FILTER 8. Use the scouring tool, a nylon scouring pad, and a small amount of McD Fryer Cleanser to scrub the inside of the vat. Be (Continued) careful not to damage the sensing probes.
-
Page 33: Discarding Oil From Vat Using Rti
Model LVE-102, 103, 104 3-14. DISCARDING OIL FROM VAT USING RTI WITH PROLONGED USE, THE FLASHPOINT OF SHORTENING IS REDUCED. DISCARD SHORT- ENING IF IT SHOWS SIGNS OF EXCESSIVE SMOKING OR FOAMING. SERIOUS BURNS, PERSONAL INJURY, FIRE, AND/OR PROPERTY DAMAGE COULD RESULT. -
Page 34: Discarding Oil From Vat Using Oil Discard Shuttle
Model LVE-102, 103, 104 3-15. DISCARDING OIL 1. Open center door and pull the drain pan assembly from under FROM VAT USING OIL fryer and replace with oil discard shuttle. Figures 2 & 3. DISCARD SHUTTLE 2. Press and hold (on either side) until display shows “*FILTER MENU*”, along with “1.AUTO FILTER?”. -
Page 35: Changing The Filter Pad
Model LVE-102, 103, 104 3-16. CHANGING THE FILTER In order to assure good oil pumping performance, the filter pad (or paper) should be changed at least once per day. If the filter pad has not been changed, a reminder shows on the display, “CHANGE PAD”. - Page 36 Model LVE-102, 103, 104 3-16. CHANGING THE FILTER PAD (Continued) 5. Remove the filter pad retaining ring and clean thoroughly with soap and water. Rinse thoroughly with hot water. Figure 5. Figure 5 6. Pull the filter pad from the pan and discard pad. Figure 6.
-
Page 37: Removing And Cleaning Basket Rest
Model LVE-102, 103, 104 3-16. CHANGING THE FILTER PAD (Continued) Be sure that the drain pan, bottom screen, crumb catcher, and the retaining ring are thoroughly dry before placing filter pad into pan as water will dissolve the filter pad. -
Page 38: Info Button Stats
Model LVE-102, 103, 104 3-18. INFO BUTTON STATS Recovery Information for each Vat 1. Press and release and REC shows in the left display and the recovery time that oil temperature went from 250°F (121°C) to 300°F (149°C) shows in the right display. For... -
Page 39: Level 1 Programming
Model LVE-102, 103, 104 SECTION 4. LEVEL 1 PROGRAMMING Level 1 contains the following: • Modify product settings • Set the AIF clock for products • Perform the Deep Clean procedure • Fryer Setup Mode 1. Press and hold buttons until LEVEL - 1 shows 4-1. - Page 40 Model LVE-102, 103, 104 4-1. MODIFYING PRODUCT 8. Press and release button and “TEMP” shows in the SETTINGS (Continued) display, along with the preset temperature on the right side of the display. Press the product buttons to change the temperature. The temperature range is 190°F (88°C) to 380°F (193°C).
-
Page 41: Aif Clock
Model LVE-102, 103, 104 4-2. AIF CLOCK This feature allows the controls to be set for periods of the day that block the automatic “Filter Now” prompts. For example, the controls could be set not interrupt with “Filter Now” prompts during the lunch rush, and during the supper rush. -
Page 42: Deep Clean Mode
Model LVE-102, 103, 104 4-2. AIF CLOCK In 12-hour clock mode, there are three items on each line: the start time “XX:XX”, the A or P (am/pm) setting, and the “XX” duration. (Continued) Use the buttons to set these items, which flashes when the item is selected. - Page 43 Model LVE-102, 103, 104 4-3. DEEP CLEAN MODE 5. Split vat fryers only! Display shows “LEFT RGHT”, asking you to select which vat will be cleaned. Press √ √ √ √ √ button to select (Continued) left vat, or X button for the right vat.
- Page 44 Model LVE-102, 103, 104 4-3. DEEP CLEAN MODE 10. Follow McDonald’s vat cleaning procedure and at the end of the one hour, display shows “CLEAN DONE” and beeps. Press √ √ √ √ √ (Continued) button and display then shows “REMOVE SOLUTION FROM VAT”.
- Page 45 Model LVE-102, 103, 104 4-3. DEEP CLEAN MODE 15. Pour clean water into vat to rinse vat and allow rinse water to drain into drain pan. Rinse at least 3 times, but be careful not to (Continued) overfill the drain pan. Display now shows “RINSE COMPLETE”...
-
Page 46: Fryer Setup
Model LVE-102, 103, 104 4-4. FRYER SETUP This mode has the same settings as seen upon initial start-up of the fryer. See Setup Mode, Section 3-3. 1. Press and hold buttons until LEVEL - 1 shows in the display, followed by ENTER CODE. -
Page 47: Level 2 Programming
Model LVE-102, 103, 104 SECTION 5. LEVEL 2 PROGRAMMING Used to access the following: • Advanced changes to product settings • Error code log • Password programming • Alert Tone/Volume • No. of cook cycles before filter is suggested • Automatic filter time 5-1. -
Page 48: E-Log (Error Code Log)
Model LVE-102, 103, 104 5-1. ADVANCED PRODUCT 8. Press button until “FULL HT” shows in the display along SETTINGS (Continued) with the full heat value in seconds, which means the heat is on as soon as a timer button is pressed, for the programmed length of time. -
Page 49: Password
Model LVE-102, 103, 104 5-3. PASSWORD The 4-digit passwords can be changed for access to Set-Up, Usage, Level 1, Level 2, & Get Mgr.) 1. Press and hold buttons until LEVEL - 2 shows in the display, followed by ENTER CODE. -
Page 50: Filter Aftr
Model LVE-102, 103, 104 5-5. FILTER AFTER This is the number of cook cycles between filters. 1. Press and hold buttons until LEVEL - 2 shows in the display, followed by ENTER CODE. 2. Enter code 1, 2, 3, 4 (first 4 product buttons). “PROD”... -
Page 51: Troubleshooting
Model LVE-102, 103, 104 SECTION 6. TROUBLESHOOTING 6-1. TROUBLE SHOOTING GUIDE Problem Cause Correction • Plug fryer in POWER switch ON but • Open circuit • Check breaker or fuse at supply box fryer completely inoperative • (Non-US/some Int’l. locations only) Breakers in fryer tripped-open left door and reset breaker on fryer;... - Page 52 Model LVE-102, 103, 104 6-1. TROUBLE SHOOTING GUIDE (Continued) Problem Cause Correction Oil foaming or boiling • Water in oil • Drain and clean oil • Improper or bad oil over top of vat • Use recommended oil • Improper filtering •...
-
Page 53: Error Codes
Model LVE-102, 103, 104 6-2. ERROR CODES In the event of a control system failure, the digital display shows an error message. The message codes are shown in the DISPLAY column below. A constant tone is heard when an error code is displayed, and to silence this tone, press any button. - Page 54 Model LVE-102, 103, 104 6-2. ERROR CODES DISPLAY CAUSE CORRECTION “E-31” Elements are up Lower elements back into the vat “E-41”, “E-46” Programming Turn switch to OFF, then back to ON; if display shows any failure of these error codes, have the controls re-initialized; if error code persists, have the control board replaced “E-47”...
- Page 55 Model LVE-102, 103, 104 G L O S S A R Y HENNY PENNY OPEN FRYERS air valve a valve on the eight head fryer that allows air into the filter lines when the pump is on in the mixing mode on eight head fryers airflow switch a switch that senses the amount of airflow coming from the blower;...
- Page 56 Model LVE-102, 103, 104 data plate a label or plate located on the right side panel of the fryer that indicates the fryer type, serial number, warranty date, and other information drain handle the handle used to open and close the drain valve...
- Page 57 Model LVE-102, 103, 104 gas control valve an automatic dual controller that controls gas to both pilot lights and gas (gas fryers only) pressure to burners on fryers; if either pilot light goes out, the controller shuts off the gas to the other pilot light...
- Page 58 Model LVE-102, 103, 104 power/pump switch a three-way switch located on the front control panel of the fryer that serves as an off/on switch and a filter switch product a food item cooked in the fryer rack the wire grid that slides into the carrier to hold product during the cook cycle setpoint a preset cooking temperature;...
- Page 60 Henny Penny Corporation P.O.Box 60 Eaton,OH 45320 1-937-456-8400 1-937-456-8402 Fax Toll free in USA 1-800-417-8417 1-800-417-8434 Fax *FM05-051-C* www.hennypenny.com Henny Penny Corp., Eaton, Ohio 45320, Revised 2-1-08...
Need help?
Do you have a question about the LVE-102 and is the answer not in the manual?
Questions and answers