
Related Manuals for Omega XW-ED


Summary of Contents for Omega XW-ED
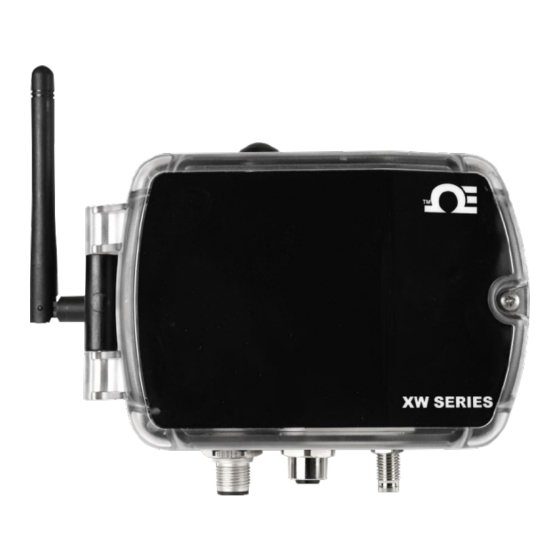
- Page 1 User’s Guide Shop online at omega.com e-mail: info@omega.com For latest product manuals: www.omegamanual.info XW-ED, XW-EDA-PRO, XW-EDA, XW-EDA-PRO Long Range Wireless Transmitter P a g e...
- Page 2 Tel: (203) 359-1660 Fax: (203) 359-7700 e-mail: info@omega.com The information contained in this document is believed to be correct, but OMEGA accepts no liability for any errors it contains and reserves the right to alter specifications without notice. P a g e...
-
Page 3: Table Of Contents
Sensor Setting ............................. 13 XW Transmitter Network Setting ........................ 13 System Functions ............................13 Viewing Data on the ZW-REC Page ....................... 14 XW-ED Wiring .............................. 14 Digital Probes .............................. 14 Digital Input (Timer/Totalizer) ........................15 Process Input ............................... 17 XW-EDA Wiring ............................18 Thermocouple ............................. - Page 4 XW-ED-PRO and XW-EDA-PRO Wiring ......................21 Pro Discrete Input / Output Connector ...................... 21 Input Settings .............................. 21 Output Settings ............................22 Alarms ................................. 23 ON/OFF Control ............................23 Appendix A: Digital Input Diagrams ......................24 Digital Input ..............................24 Pulse Measurements ..........................
-
Page 5: Notes, Warnings, And Cautions
Notes, Warnings, and Cautions The following labels identify information that is especially important to note: Note: Provides you with information that is important to successfully setup and use the XW Transmitter. Caution or Warning: Tells you about the risk of electrical shock. Caution, Warning, or Important: Tells you of circumstances that can affect the instruments functionality and must refer to accompanying documents. -
Page 6: Introduction
AC Adaptor (optional) Manuals / Software The latest User’s Manual, Quick Start Guide, and SYNC software are available to download on the Omega website. Probes may not be NEMA 4 rated. NEMA 4 rating only applies to the XW Transmitter. -
Page 7: Hardware Setup
For a complete list of sensors compatible with the XW Transmitter, please visit the Omega website. Probe Installation 8-pin digital probes, including Omega Smart Probes, can be plugged in at this point. Digital I/O or Analog connections should be made after the XW Transmitter is setup. To install or change a probe, follow these directions: Step 1: Ensure the XW Transmitter is powered OFF. -
Page 8: Powering The Xw Transmitter
Powering the XW Transmitter Once the antenna and probe are installed the XW Transmitter may be powered on. The XW Transmitter can be powered using two alkaline C-Cell batteries, the external M8 connector, or both. The XW Transmitter automatically switches from the internal batteries to the external power if available. If the external power is removed, the XW Transmitter switches back to the internal batteries. -
Page 9: Coin Cell Battery And Replacement
Coin Cell Battery and Replacement The XW Transmitter comes with a pre-installed CR2032 Lithium Coin Cell Battery. Pull the tab to begin powering the real time clock. This battery keeps the real time clock for the XW Transmitter running even when the unit is not powered and has an expected life of more than 10 years under room temperature conditions. -
Page 10: Power Button
Note: For a complete guide on how to setup your ZW-REC, refer to the Quick Start Guide available on the Omega website. Figure 11 Important: The latest version of the ZW-REC firmware is required. Please ensure you are using the latest version by visiting the Omega website. -
Page 11: Connecting To Sync - Auto Detect
Step 3: Assign a unique Device ID to your XW Transmitter. Note: The Device ID is a specific number (between 0 and 127) assigned to your XW-ED that will identify this device to the receiver it was assigned to. Step 4: Assign a device name to your XW Transmitter. -
Page 12: Connecting To Sync - Manual
Connecting to SYNC - Manual Step 1: Power on your XW Transmitter and connect the device to your computer via USB cable. Step 2: Click on the icon located on the top left of the SYNC interface. Step 3: Proceed through the Add Device Wizard. Step 4: Click End Device / Probe. -
Page 13: Customize Device Settings
Customize Device Settings To customize the device settings of your transmitter, click the Device Settings Configuration Tab. Sensor Setting Transmission Interval must be set by the ZW-REC and controls the frequency that readings are sent from the transmitter to the receiver. -
Page 14: Viewing Data On The Zw-Rec Page
Figure 20 Figure 21 XW-ED Wiring The XW-ED is a versatile transmitter that can accept a wide variety of digital probes, function as a rate/timer/totalizer, or as an mA/mV meter. Digital Probes The XW-ED is configured to use digital probes by default. Simply attach your probe to the 8-Pin M12 connector and the XW-ED will automatically connect it. -
Page 15: Digital Input (Timer/Totalizer)
Digital Input (Timer/Totalizer) The XW-ED also functions as a flexible Digital Input with Timer and Totalizer functions. To use these features, change the input type to Digital on SYNC. Figure 22 Select the type of digital input is selected in the Device Range/Type pull-down in the side bar. The following types are... - Page 16 Each of the three input pins can be independently set to either have an internal 1.5k Pull Up or Pull Down and can be set to be either Active High or Active Low. Internally supplied 3.3 power is available for biasing Some typical Circuits are show below: Relay or Switch Pulse / TTL Input...
-
Page 17: Process Input
Process Input The XW-ED can also accept up to two 0-24 mA or 0-1.0 V process inputs. Select either Single Process or Dual Process from the Type selection and then choose the Device Range/Type option in the side bar. Figure 28 Note: When using Dual Process, the Device Range/Type section is only available for Input 0. -
Page 18: Xw-Eda Wiring
XW-EDA Wiring The XW-EDA model supports thermocouples, RTD’s, and precision process inputs. The sensor inputs signals are provided on an M12, 4-pin female connector and are logically broken into 2 unique channels. Thermocouple The Thermocouple Input interface provides interfaces to type J, K, T, E, N, R, S, B and C thermocouples with the capability of enabling or disabling the open detect feature. -
Page 19: Process
Process Input The Process Input (Single & Dual) accept up to two 0-24 mA, 0-0.1 V , 0-1.0 V , or 0-10 V process inputs. To use these features, change the Input Type selection to Single Process or Dual Process and then choose the Device Range/Type option in the side bar. - Page 20 Wiring diagrams are displayed below. 2 Wire RTD Connections: Most useful with high-resistance sensors or in applications where a great deal of • accuracy is not required. • 3 Wire RTD Connections: This connection is best suited for devices like strain gauges and is most often seen in industrial process and monitoring applications.
-
Page 21: Xw-Ed-Pro And Xw-Eda-Pro Wiring
XW-ED-PRO and XW-EDA-PRO Wiring The XW-ED and XW-EDA Pro versions support 2 Discrete Open Drain Digital Inputs / Outputs on the 4 Pin M12 Male connectors. To connect an input or output a standard M12 4pin cable can be used. Omega also offers an optional field installable M12 connector. -
Page 22: Output Settings
Figure 37 Output options are set in the Output Tab of Omega Sync. Each output can be configured as either Active High or Active Low. When configured as Active High the output conducts normally and becomes high impedance when activated. When configured as Active Low the Open Drain output is high impedance normally and will conduct when activated. -
Page 23: Alarms
Alarms icon on the desired input signal found in the Input Configuration Tab. Setup the Alarms are set by clicking the threshold and alarm type in the Condition section and then select which output to turn on in the Action section. The alarm can be set to be latching or non-latching in the Recovery section. -
Page 24: Appendix A: Digital Input Diagrams
Appendix A: Digital Input Diagrams The following information provides descriptions and diagrams of the available I/O capabilities of the XW-ED and XW-ED- PRO. Digital Input • DIN: The Digital I/O functions present a bit mapped image of the signals present on the corresponding channel signal lines. -
Page 25: Counter Measurements
• DUTY: The Duty Cycle function measures the percentage of time the CLK (clock) is high as a percentage of the total time of the signal. The Duty Cycle function may be used to measure the percent ‘power’ or servo control position being controlled by a PWM (pulse width modulation signal. -
Page 26: Appendix B: Specifications
Enclosure Dimensions: 135.9 L x 82 W x 39 mm D (5.35 x 3.23 x 1.56”) General Agency Approvals: ECCN, EAR99, EMC 2014/30/EU, LVD 2014/35/EU, RED 2014/53/EU Software: Compatible with OMEGA Sync and OEG Compatible Probes: Smart Probes, zSeries**** ****when using zSeries Probes with the Pro version, the Discrete I/O will be disabled... -
Page 27: Xw-Ed And Xw-Ed-Pro Inputs
XW-ED and XW-ED-PRO Inputs Digital Inputs Type Range Accuracy Frequency 0.01Hz to 100Hz ±0.5% Frequency 100Hz to 1000Hz ±1Hz averaged over 1s Counter 0 to +8388608 ±1 count max Up / Down Counter -8388608 to +8388608 ±1 count max Pulse Width (T 0.2ms min... -
Page 28: Appendix C: Troubleshooting And Help
Symptom: Blue Light blinks on and off rapidly. XW-ED does not show up on the ZW-REC webpage. Solution: Use Omega Sync to check that NID is the same as the ZW-REC and that the DID is not used by another device. -
Page 29: Appendix D: Mounting Your Xw Transmitter
Appendix D: Mounting your XW Transmitter Step 1: Position the unit where you would like to mount it. Mark the location of the top center of the unit. Step 2: Unscrew the lid screw using a Philips head screwdriver to open the XW Transmitter and access the mounting points. -
Page 30: Appendix E: Safety And Regulatory Compliance
Appendix E: Safety and Regulatory Compliance Safety: EN 61010-1 3rd Edition EMC: EN 61326-1:2013 Radio: EN 300 328 V1.8.1: 2012-04 The product herewith complies with the essential requirements and other relevant provisions of the Radio Equipment Directive 2014/53/EU, the EMC Directive 2014/30/EU, and the Low Voltage Directive 2014/35/EU, and carries the CE-marking accordingly. - Page 31 Department will issue an Authorized Return (AR) number immediately upon phone or written request. Upon examination by OMEGA, if the unit is found to be defective, it will be repaired or replaced at no charge. OMEGA’s WARRANTY does not apply to defects resulting from any action of the purchaser, including but not limited to mishandling, improper interfacing, operation outside of design limits, improper repair, or unauthorized modification.
- Page 32 Where Do I Find Everything I Need for Process Measurement and Control? OMEGA…Of Course! Shop online at omega.com TEMPERATURE M U Thermocouple, RTD & Thermistor Probes, Connectors, Panels & Assemblies M U Wire: Thermocouple, RTD & Thermistor M U Calibrators & Ice Point References M U Recorders, Controllers &...
Need help?
Do you have a question about the XW-ED and is the answer not in the manual?
Questions and answers