
Related Manuals for Ingenico iWL250B


Summary of Contents for Ingenico iWL250B
- Page 1 Payments Global Payments Short-Range Wireless – iWL250B Quick Reference Guide July 2019...
-
Page 2: Table Of Contents
Table of Contents 1 – Introduction ............................. 4 2 – General Tips ............................4 3 – Basic Terminal Operations ........................4 Before You Begin..........................4 How to Use This Guide ........................4 Unpacking the Box .......................... 4 Terminal ON/OFF ..........................5 Terminal Keyboard .......................... - Page 3 Cable and Power Connection on the Receiving Base..............22 Power Connection on the Charging Base ..................23 21 – Base Configuration ..........................23 22 – Replacing the Paper Roll ........................23 23 – Troubleshooting ..........................24 Receipt Paper is Jammed ......................24 Card Reader Does Not Work Properly (Cards are Not Read) ............
-
Page 4: Introduction
This guide is your primary source of information for operating, setting up and installing the Global Payments Short-Range- Wireless – iWL250B terminal. For terminal-related questions or support, please contact Global Payments Customer Care. 2 – General Tips... -
Page 5: Terminal On/Off
Roll of thermal printer paper • Quick Reference Guide • Telephone cable and/or Ethernet cable • Terminal ON/OFF Press and hold the green [Enter] key to power on the device; the terminal will initiate an application check and then enter the idle screen. - Page 6 Card number is a numeric data item. To enter the value “544619999,” press [5], [4], [4], [6], [1], [9], [9], [9] and [9] on the keypad. TRANSACTION NAME Card Number [544619999] Then press [Enter] to confirm the data entered. The terminal then starts validation. For amount entries, the terminal initially displays $0.00.
- Page 7 Enter Footer 1 Press [F] two times. [Open 24HR] Press [Enter] to confirm data entry. The following are data entry keys: iWL250B Characters Accessed 1,Q, Z,q,z 2, A, B, C, a, b, c 3, D, E, F, d, e, f...
-
Page 8: Access Administrator Menu
Password Management The Global Payments Short-Range Wireless – iWL250B offers multi-level passwords that can be used for different purposes. You can set up a maximum of four levels of passwords. These passwords – from the highest level to the lowest level – are: administrator password, manager password, supervisor password and clerk password. -
Page 9: Changing The Terminal Language
To set up or change the manager password, supervisor password or clerk password: At the idle menu, press the administrator [.,#*] key for the administrator menu. Key in the administrator name and press [Enter]. Enter the administrator password and press [Enter]. Press [▼] button to scroll down until Security is highlighted and press [Enter]. -
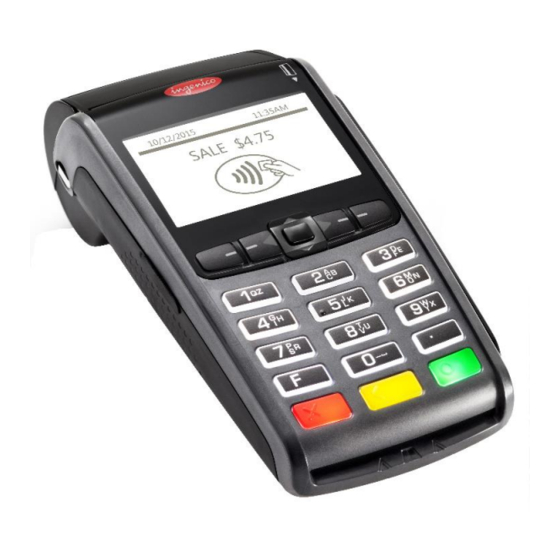
Page 10: To Conduct A Contactless Transaction
To Conduct a Contactless Transaction Press the [Enter] key to enter the main menu. Select a transaction type and follow the prompts accordingly. Bring the card firmly up to the active zone above the display (at about 1 cm). Keep the card close to the display during the transaction. - Page 11 The cardholder presses [F1] for Yes to confirm the total amount. Terminal displays “Swipe/Insert/Tap Card” and the cardholder inserts the card. Select language (if enabled). 10. The cardholder processes customer EMV prompts. 11. For debit transactions, enter the cashback amount (if enabled). 12.
-
Page 12: Auth Only (Credit)
17. Press [Enter] to print the customer copy of the receipt. For contactless sale transactions: At the idle screen, press [Enter] to enter the main menu, and then press [1] to select Sale. Enter the clerk ID (if enabled) and press [Enter]. Enter the invoice # (if enabled) and press [Enter]. -
Page 13: Pre-Auth And Completion (Optional)
Terminal prompts Void Pre-Auth; press [F1] for Yes and proceed to step 5, or [F4] for Non Pre-Auth void and proceed to Step 7. If Pre-Auth Void is selected in step 4, merchant then selects [F1] for All or [F4] for One. If All is chosen, a report will print for all open Pre-Auth in the batch. -
Page 14: Return
NOTE: HCP is not supported in pre-auth transactions if the merchant is in restaurant profile. HCP is only enabled in pre-auth transactions for retail merchants. Completion – Complete the transaction for the final amount including tip: At the idle screen, press [Enter] to access the main menu. Use [▼] button to highlight Pre Auth Completion. -
Page 15: Performing A Settlement (Closing The Terminal)
NOTE: Transaction password protection is highly recommended for return transactions. Please refer to Section 17 for password setup. The cardholder must be present for a debit return. 11 – Performing a Settlement (Closing the Terminal) You should perform a terminal settlement at least once per day. This ensures prompt payment and reduces the chance of chargebacks. -
Page 16: Demo Mode
13 – Demo Mode The demo mode on the terminal helps you to become familiar with the terminal and to train new staff. All transactions in demo mode are simulated and are not processed. Remember to exit demo mode before processing real transactions. NOTE: You must perform a settlement before you can enter demo mode. -
Page 17: Batch Menu
At idle menu press [.,#*] for the administrator menu. Key in the administrator name and administrator password, and then press [Enter]. Select [1] to highlight Clerk Menu. Select [3] to highlight Print ID List. Clerk Prompt This section is used to enable clerk prompting. If clerk prompting is enabled, you will be prompted for either the ID or ID plus Name. -
Page 18: Reports
At idle menu press [.,#*] for the administrator menu. Select [2] to highlight Batch Menu. Select [3] to highlight Delete Batch. Enter administrator name and press [Enter]. Enter administrator password and press [Enter]. Terminal prints Batch Delete report and prompts “Confirm Deletion?” Select Yes or No. - Page 19 Setup Menu PWSetup At idle menu press [.,#*] for the administrator menu. Key in the administrator name and administrator password, and then press [Enter]. Press [6] or use [▼] button to scroll down until Security is highlighted. Press [4] or use [▼] button to scroll down to highlight Administrator Menu PWs and press [Enter]. Press [▼] button to scroll down to highlight the associated parameter and press [Enter].
-
Page 20: Terminal Security
Return PWReturn Void PWVoid Force PWForce Settlement PWSettle Reprint PWReprint The password protection screen will be presented to the user upon initiating a transaction At idle menu press [.,#*] for the administrator menu. Key in the administrator name and administrator password, and then press [Enter]. Press [6] or use [▼] button to scroll down until Security is highlighted. -
Page 21: Locating Communication And Charging Bases
Press [Cancel] to return to the idle menu. 19 – Locating Communication and Charging Bases NOTE: The Global Payments Short-Range Wireless – iWL250B base is available in two (2) models: receiving base and charging base. The Global Payments Short-Range Wireless – iWL250B device comes with either a receiving base or charging base, depending on the model ordered. -
Page 22: Connecting The Terminal On The Base
Connecting the Terminal on the Base Place the Global Payments Short-Range Wireless – iWL250B between the flanges on its base so that the contacts on the Global Payments Short-Range Wireless – iWL250B engage with the contacts provided on the base. -
Page 23: Power Connection On The Charging Base
RS232 Port Modem Port Power Connection on the Charging Base Power Jack 21 – Base Configuration This function allows users to register a terminal to the receiving base. Dock the terminal on the receiving base. At idle menu, press [.,#*] for the admin menu. Key in the admin name and admin password, and then press [Enter]. -
Page 24: Troubleshooting
Pull up the flap at the top of Global Payments Short-Range Wireless – iWL250B. Pull the flap backwards to open the paper compartment. Place the paper roll into the paper compartment. Make sure the end of the paper is inserted as shown below. Pull a little bit of paper out towards the top of the terminal. -
Page 25: Terminal Does Not Work Properly
Swipe the card at a faster or slower steady speed. Swipe the card in the other direction. Inspect the magnetic stripe on the card to make sure it is not scratched or badly worn. To determine if the problem is with the card, ask the customer for another card or try swiping the card on another terminal. -
Page 26: Cleaning
Cleaning liquid that is applied to the terminal must dry within one minute. If it does not, dry the terminal with a soft cloth. 26 – Terminal Specifications This section discusses power requirements, dimensions and other specifications of the Global Payments Short-Range Wireless – iWL250B. Technical Specifications & Standard Features QVGA 320 x 240 pixel TFT-LCD •... -
Page 27: Service And Support
Security PCI PTS V3.x Certified, online and offline 27 – Service and Support For Global Payments Short-Range Wireless – iWL250B product service and repair information, contact Global Payments Customer Care at 1-800-263-2970. Returning a Terminal for Service When you receive a replacement terminal, always return the defective devices back promptly; failure to do so may result in charges applied to your account. - Page 28 © 2019 Global Payments Inc. All rights reserved. SM-191974-v1.0EN...
Need help?
Do you have a question about the iWL250B and is the answer not in the manual?
Questions and answers