Ingenico iWL250B Manual
Emv certified pin pad
Hide thumbs
Also See for iWL250B:
- User manual (48 pages) ,
- Quick reference manual (28 pages) ,
- User manual (53 pages)
Table of Contents
Advertisement
Quick Links
th
One Blue Hill Plaza, 16
Floor, PO Box 1546
Pearl River, NY 10965
1-800-PC-AMERICA, 1-800-722-6374
(Voice) 845-920-0800 (Fax) 845-920-0880
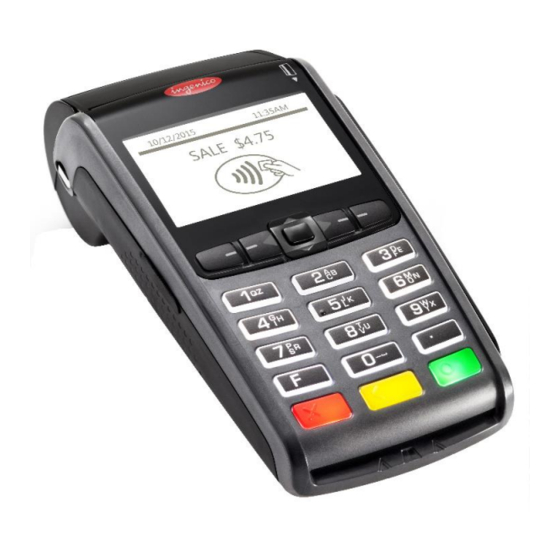
iWL250B EMV Certified PIN pad with
Global Payments Canada
Cash Register Express now supports payment processing with EMV chip enabled cards through
the Ingenico iWL250B EMV PIN pad device. This document provides step-by-step instructions on
installation and usage of the iWL250B with Cash Register Express.
Note: To use Global Payments EMV as a payment processor you must be using version 12.8019
or above.
1 |
P a g e
Advertisement
Table of Contents

Subscribe to Our Youtube Channel
Related Manuals for Ingenico iWL250B


Summary of Contents for Ingenico iWL250B
- Page 1 Global Payments Canada Cash Register Express now supports payment processing with EMV chip enabled cards through the Ingenico iWL250B EMV PIN pad device. This document provides step-by-step instructions on installation and usage of the iWL250B with Cash Register Express. Note: To use Global Payments EMV as a payment processor you must be using version 12.8019 or above.
-
Page 2: Table Of Contents
Each register running card transactions must have its own iWL250B device; iWL250B devices may not be shared among registers. Credit card settlements must be done in CRE on every station where an iWL250B device is connected and you must enter a password on the PIN pad to begin the settlement. ... - Page 3 Document Version Date Author Description of Changes July 21, 2017 Matthew Piccinich 1st Release November 6, 2017 Matthew Piccinich Replaced model all mentions # iWL252 with the Canada model branding iWL250B. P a g e...
-
Page 4: Installing The Hardware For Serial
Installing the Hardware for Serial Important: Every register processing card transactions MUST have its own iWL250B unit. Also, settlements need to be run through CRE on each register that has an iWL250B unit connected and processing card transactions. Hardware Connections - Power 1. - Page 5 Hardware Connections – Ethernet 1. Locate an Ethernet Cable and connect 1 end to the same router or switch that the computer running CRE is connected too. 2. Connect the other end of the Ethernet cable to the port on the PIN pad dock. P a g e...
- Page 6 Hardware Connections – Serial If your computer has a serial port then follow the steps below for a direct serial connection, if you are using a USB to serial adapter, go to the next page to learn how to setup the PIN pad & computer with the adapter. 3.
- Page 7 Hardware Connections – Serial to USB Adapter The iWL250B PIN pad is certified to work with the Cables to Go Serial to USB cable adapter Model: 26886. To download the driver for the adapter click here. Extract all of the files from the PL2303_Prolific_DriverInstaller_v1_8_0.zip folder and run the PL2303_Prolific_DriverInstaller_v1_8_0.exe file as administrator to install the driver for the adapter.
- Page 8 7. Connect End 1 of the USB to Serial adapter to the computer. 8. In Windows, open the Control Panel 9. In the search bar in the top right hand corner of the Control Panel window, type “Device Manager” 10. Click on Device Manager P a g e...
- Page 9 11. Double Click Ports (COM & LPT) to expand the list of ports. 12. Record the COM port Number in Prolific USB-to-Serial Comm Port(COM#) 13. Right Click Prolific USB-to-Serial Comm Port(COM#) 14. Select Properties 15. Select the Port Settings tab 16.
-
Page 10: Configuring The Serial Connection Settings On The Pin Pad
Configuring the Serial Connection Settings on the PIN pad 1. With the pin pad Powered on, Press the ADMIN key labeled “.,#*”. It can be found below the 9 key and above the green enter key. 2. Enter the Admin name and press the green enter key 3. - Page 11 4. Select Misc. Options (9) 5. Select Semi Integrated (1) 6. Select Communication Type (2) 11 | P a g e...
- Page 12 7. Select RS 232 (1) 8. Select COM 1 Selection (2) **NOTE: This COM Selection is referring to the port # on the PIN pad dock, click here to see the connection. 9. Select Baud Rate 19200(3) 10. When it returns to the SEMI-INTEGRATED Menu, press the Red Cancel button until you return to the welcome screen.
-
Page 13: Configuring The Receipt Options On The Pin Pad
Configuring the Receipt Options on the PIN pad 1. With the pin pad Powered on, Press the ADMIN key labeled “.,#*”. It can be found below the 9 key and above the green enter key. 2. Enter the Admin name and press the green enter key 3. - Page 14 4. Select Setup Menu (3) 5. Select Receipts (3) 6. Select Receipts Options (3) 14 | P a g e...
- Page 15 7. Select RcptCopies (1) 8. Select One Copy (2) 9. When it returns to the Receipt Options Menu, press the Red Cancel button until you return to the welcome screen. 15 | P a g e...
-
Page 16: Configuring Debit Cashback Settings On The Pin Pad
Configuring Debit Cashback Settings on the PIN pad 1. With the pin pad Powered on, Press the ADMIN key labeled “.,#*”. It can be found below the 9 key and above the green enter key. 2. Enter the Admin name and press the green enter key 3. - Page 17 4. Select Setup Menu (3) 5. Select Trans Options (4) 6. Select Debit (2) 17 | P a g e...
- Page 18 7. Select CashBackLmt (2) 8. User the number pad to enter the maximum cashback amount the customer can request with the debit sale 9. Press the green Enter key to confirm the amount. 10. Select CashBackAmt1 (3) 18 | P a g e...
- Page 19 11. User the number pad to enter the first cashback amount selection the customer can request with the debit sale 12. Press the Green Enter key to confirm the amount. 13. Repeat steps 10 through 12 for CashBackAmt2 & CashBackAmt3. 14.
-
Page 20: Configuring Cre/Rpe For Use With Global Payments Emv
Payment Processor from the dropdown menu 8. Select Serial under the Communication Type section 9. Enter the COM port # being used by the iWL250B PIN pad in the previous section. 10. Press Update 20 | P a g e... -
Page 21: Performing A Credit Card Sale
Performing a Credit Card sale 1. After you’ve added the items to an invoice and selected Credit in CRE the PIN pad will prompt to “pass the terminal to the customer” followed by “Swipe/Insert/Tab” 2. Swipe the credit card through magnetic stripe reader on the side of the pin pad. -
Page 22: Performing A Credit Card Sale Using An Emv Card
Performing a Credit Card sale using an EMV card To complete a credit card sale with an EMV card follow the steps below. 1. After you’ve added the items to an invoice and selected Credit in CRE the PIN pad will prompt to “pass the terminal to the customer”... -
Page 23: Performing A Credit Card Sale Using A Contactless Enabled Card
Performing a Credit Card sale using a Contactless enabled card To complete a credit card sale with a contactless card follow the steps below 1. After you’ve added the items to an invoice and selected Credit in CRE, the PIN pad will prompt “pass the terminal to the customer”... -
Page 24: Performing A Debit Card Sale
Performing a Debit Card sale To complete a debit card sale follow the steps below. 1. After you’ve added the items to an invoice and selected Credit in CRE the PIN pad will prompt to “pass the terminal to the customer”... - Page 25 4. Use the number pad to select the configured cashback amounts or select other to enter your own amount. 5. Select Accept with the F1 key. 6. When the sale is complete the PIN pad will display “Approved” 7. Select the type of account you want to use to pay for the sale.
- Page 26 8. When prompted swipe the card on the PIN pad+ 10. Wait for the PIN pad to display approved. 26 | P a g e...
-
Page 27: Performing A Manual Entry Sale
Performing a Manual Entry Sale In the event that the PIN pad is unable to read a credit/debit card, you can manually enter the card information by following the steps below. 1. After you’ve added the items to an invoice and selected Credit in CRE the PIN pad will prompt to “Swipe/Insert/Tap Card”... - Page 28 5. Enter the CVV Code and press the green enter key 6. When Prompted if the card is present, use the Function keys to select Yes or No 7. When the PIN pad displays “Imprint Credit Card” press the green enter key to continue 28 | P a g e...
- Page 29 8. Wait for the PIN pad to display approved and the sale will be completed. 29 | P a g e...
-
Page 30: Performing A Return
Performing a Return In the event that a customer wants to return their items for a refund, they must swipe the card they want the refund to be processed on and the employee must enter the last 4 digits of the card #. See below for more details. 1. - Page 31 4. An approval message will appear when the refund is complete 31 | P a g e...
-
Page 32: Performing A Void
Performing a Void In the event that you have to void a sale, the reference # of that sale must be entered in the PIN pad. You can find the reference number on the receipt of the invoice. See below for more details. 1. -
Page 33: Performing A Settlement/Batch Close
Performing a Settlement/Batch Close To batch out at the end of the day you must initiate the settlement in CRE but the PIN pad’s admin password must be entered on the PIN pad to settle. 1. Select the Manager or Options button. 2. - Page 34 6. Press yes to start the settlement 7. Wait for the settlement to complete 8. When the settlement is finished a settlement report will automatically print showing the totals in the settled batch. 9. You will then be prompted to print a detailed report of each individual transaction, press yes to print the report or no the finish the settlement.
Need help?
Do you have a question about the iWL250B and is the answer not in the manual?
Questions and answers