Table of Contents
Advertisement
Quick Links
Advertisement
Table of Contents

Related Manuals for Winmate W07FA3S-PCO1AC-POE


Summary of Contents for Winmate W07FA3S-PCO1AC-POE
- Page 1 7” S-Series HMI Ubuntu 16.04 W07FA3S-PCO1AC-POE W07FA3S-PCO1-POE Quick Start Guide V1.1 For more information on this and other Winmate products, please visit our website at: www.winmate.com Please read these instructions carefully before using this product, and save this manual for future use.
-
Page 2: Table Of Contents
VESA Mounting - 28 - SPECIFICATIONS - 32 - APPENDIX - 35 - Appendix A: Cleaning the Monitor - 35 - Appendix B: Winmate Software Development Kit - 36 - Appendix C: Ubuntu Command Code - 37 - - 2 -... - Page 3 FCC Statement This device complies with part 15 FCC rules. Operation is subject to the following two conditions: This device may not cause harmful interference. This device must accept any interference received including interference that may cause undesired operation. This equipment has been tested and found to comply with the limits for a class "B"...
- Page 4 European Union Electromagnetic Compatibility Directive (2014/30/EU) EN55024: 2010/ A1: 2015 o IEC61000-4-2: 2009 o IEC61000-4-3: 2006+A1: 2007+A2: 2010 o IEC61000-4-4: 2012 o IEC61000-4-5: 2014 o IEC61000-4-6: 2014 o IEC61000-4-8: 2010 o IEC61000-4-11: 2004 EN55032: 2012/AC:2013 EN61000-3-2:2014 EN61000-3-3:2013 Low Voltage Directive (2014/35/EU) ...
- Page 5 Brand and product names are trademarks or registered trademarks of their respective owners. Disclaimer Winmate Inc. reserve the right to make changes, without notice, to any product, including circuits and/or software described or contained in this manual in order to improve design and/or performance. We...
- Page 6 Customer Service We provide a service guide for any problem by the following steps: First, visit the website of our distributor to find the update information about the product. Second, contact with your distributor, sales representative, or our customer service center for technical support if you need additional assistance.
- Page 7 Safety Information WARNING! / AVERTISSEMENT! Always completely disconnect the power cord from your chassis whenever you work with the hardware. Do not make connections while the power is on. Sensitive electronic components can be damaged by sudden power surges. Only experienced electronics personnel should open the PC chassis.
-
Page 8: Introduction
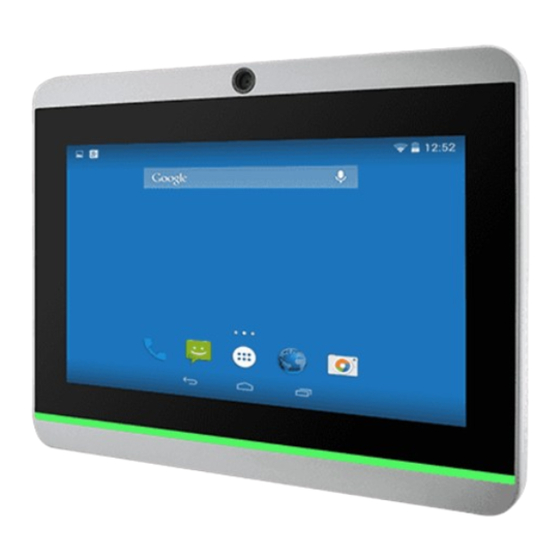
Congratulations on purchasing Winmate® 7” S-Series HMI. Interactive and smart automation systems of intelligent buildings are in a fast growing phase. Winmate® multi-touch S-Series HMI is suitable for home automation and room management systems. Flat surface is easy-to-clean and delivers aesthetically pleasing look for any interior. -
Page 9: Package Contents
Package Contents Carefully remove the box and unpack your device. Please check if all the items listed below are inside your package. If any of these items are missing or damaged contact us immediately. Standard factory shipment list: Quick Start Guide Driver CD &... - Page 10 Package may include optional accessories based on your order: VESA Wall Mount VESA Desk Stand VESA Desk Stand Bracket PCVS-V1 LA-100 LA-106 99KK00A0000E 9B0000000128 9B0000000412 - 10 -...
-
Page 11: Product Overview
Product Overview Unit: mm № Description № Description ① Micro SD Card Slot ⑦ 9-24V DC 2MP Front Camera ② LAN/ PoE* ⑧ (Optional) ③ USB OTG ⑨ 1W Speaker ④ CANBus ⑩ LED Status Light Bar** ⑤ RS-232/422/485 ⑪ HF RFID Reader (Optional) ⑥... -
Page 12: Installation
INSTALLATION Wiring Requirements The following common safety precautions should be observed before installing any electronic device: Strive to use separate, non-intersecting paths to route power and networking wires. If power wiring and device wiring paths must cross make sure the wires are perpendicular at the intersection point. -
Page 13: Connecting To Other Devices
Connecting to Other Devices Power Input Connector The DC power source input of the 7” S-Series HMI is a 2 pin terminal block connector that supports 9-24V DC power input. Minimum Voltage 9V Maximum Voltage 24V Voltage Serial Port Connector The 7”... - Page 14 Ethernet Connector The 7” S-Series HMI supports one RJ45 10/100/1000 Mbps Ethernet interface for connecting to the internet. Signal Signal № № Name Name TX1+ TX1- TX2+ TX2- TX3+ TX3- TX4+ TX4- IMPORTANT: Power Device (PD): IEEE 802.3at (25 W), IEEE 802.3af (15 W) USB OTG Connector Use USB OTG connector to connect the HMI device to other USB On-The-Go compliant devices such as flash drives, digital cameras,...
- Page 15 CANBus Connector The connector secured to the motherboard with two screws. Signal Signal Pin № № Name Name CAN_L CAN_H +5V/NC - 15 -...
-
Page 16: Getting Started
GETTING STARTED Turning On Your Device Follow the following steps to turn on your device: 1. Connect the HMI device to a thermal block (2-pin). 2. Connect the other side of the thermal block to the AC adapter. 3. Connect the AC adapter to the power cord. 4. -
Page 17: Turning Off Your Device
Turning Off Your Device To turn off the HMI device: 1. Click the lower right Logout button on the desktop 2. Choose Shut Down option to shut down the HMI device. 3. Disconnect the HMI device from the power source (if necessary). -
Page 18: Operating The Device
Ubuntu 16.04 and basic settings. For more advanced Ubuntu settings, please click here to download SDK from Winmate Download Center. Start Menu 1. Click the lower left Start button on the desktop to expand Start Menu. -
Page 19: Linux Terminal
Linux Terminal 1. Click on the Start button at the bottom left side of the desktop, in drop-down menu choose System Tools > LXTerminal. 2. You are in Linux Ubuntu terminal. - 19 -... -
Page 20: System Information
System Information 1. Open Linux Terminal, enter command code to check OS and CPU information. To find System Information command code, please refer to Appendix of this manual. - 20 -... -
Page 21: Brightness Adjustment
Brightness Adjustment 1. Open Linux Terminal, enter command code to change brightness settings. 2. brightness.png -> Use “echo” and “cat” command to control the backlight of the LCD panel. The range is 0 (lowest brightness) to 7 (highest brightness). To find Brightness adjustment command code, please refer to Appendix C of this manual. -
Page 22: Ethernet Settings
Ethernet Settings To configure Ethernet Settings, follow the instruction below: 1. Connect Ethernet Cable to the HMI device. 2. Click on the Ethernet connection icon located at the bottom right side of the desktop. Icon Description Ethernet is not connected to the HMI device. Ethernet is connected to the HMI device. - Page 23 5. In General menu select “Automatically connect to this network when it is available” and “All users may connect to this network”. 6. Go to Ethernet menu, confirm that MTU is set as automatic and Wake on LAN is chalk marked as Default. - 23 -...
- Page 24 7. Go to IPv4 Settings menu, tap on Method. If you want to use DHCP, in the Method drop-down menu select Automatic (DHCP). 8. If you want to use Static IP, in the Method drop-down menu select Manual. Then configure your Static IP settings. 9.
-
Page 25: Changing Serial Port Settings
Changing Serial Port Settings Serial port can be configured for RS-232, RS-422 or RS-485. Please click here to download Winmate® SDK for Ubuntu 16.04. Get Mode Use the Linux command cat to read the value in console. There is no "new line" character after the string "RS-232", so we append ";echo"... -
Page 26: Exit The System
Exit the System Click the lower right Logout button on the desktop to logout Linux session. For a more detailed Ubuntu 16.04 user guide, follow the download path below: http://files.ubuntu-manual.org/manuals/getting-started-with- ubuntu/16.04/en_US/screen/Getting%20Started%20with%20Ubuntu%2016.04. - 26 -... -
Page 27: Mounting
MOUNTING S-series HMI devices come with different mounting options suitable for most of the industrial and commercial applications. Panel Mounting Panel / Flush Mounting solution allows installing the HMI device onto the wall. Wall Cutout Screw Hole Diameter 131.4 x 175.4 mm M3x4 mm Mounting Instruction 1. -
Page 28: Vesa Mounting
VESA Mounting VESA Desk Stand PCVS-V1 The HMI device can be installed on a desk with the stand. You can purchase desk stand as an optional accessory. Model Name: PCVS-V1 Part Number: 99KK00A0000E Mounting Instruction Use provided Philips M4x5 screws to fix the desk stand to VESA holes on the back cover of the device. - Page 29 VESA Desk Stand LA-100 The HMI device can be installed on a desk with the stand. You can purchase desk stand as an optional accessory. Model Name: LA-100 Part Number: 9B0000000128 Mounting Instruction Use provided Philips M4x5 screws to fix the desk stand to VESA holes on the back cover of the device.
- Page 30 VESA Wall Mount Bracket LA-106 The HMI device can be installed on a desk with the stand. You can purchase desk stand as an optional accessory. Model Name: LA-106 Part Number: 9B0000000412 Mounting Instruction - 30 -...
- Page 31 Accessories Dimensions - 31 -...
-
Page 32: Specifications
SPECIFICATIONS HMI Device Specifications Model Name W07FA3S-PCO1AC-PoE W07FA3S-PCO1-PoE 7” TFT (Widescreen) Size Resolution 1024 x 600 Brightness 1000 (typ.) Contrast 700 : 1 (typ.) Display Ratio Specifications Viewing -75~75 (H);-75~70(V) Angle Max Colors 16.7M PCAP Multi-Touch support 5 Touch points Freescale®... - Page 33 Optional HF RFID Reader RFID 13.56 MHz Power 9-24V DC Input Power Device (PD): Power over Power IEEE 802.3at (25 W) Ethernet Management IEEE 802.3af (15 W) Power Consumpti Dimensions 189.4 x 145.4 x 37.7 mm (W x L x H) VESA Mount (75 x 75 mm), Panel Mounting Mechanical...
- Page 34 Supported HF RFID Tag The HF RFID Reader of this device supports the following card type. HF RFID Standard Purpose Standard for MIFARE technology, which used ISO-14443 A in smart cards and proximity cards ISO-15693 Standard for tracking items Standard for Near Field Communication (NFC), ISO-18092 a short range technology that is commonly used for data exchange between devices...
-
Page 35: Appendix
APPENDIX Appendix A: Cleaning the Monitor Before cleaning: Make sure the device is turned off. Disconnect the power cable from any AC outlet. When cleaning: Never spray or pour any liquid directly on the screen or case. ... -
Page 36: Appendix B: Winmate Software Development Kit
Appendix B: Winmate Software Development Kit Winmate® provides Software Development Kit (SDK). The table below lists SDK provided by Winmate for E-Series HMI with Freescale® Cortex® A9 i.MX6 Dual Core processor: Item Driver Description Ubuntu SDK Ubuntu SDK To find the Drivers and SDK, please refer to the Driver CD that comes in the package or contact us. -
Page 37: Appendix C: Ubuntu Command Code
Appendix C: Ubuntu Command Code This section contains the code for main commands for Ubuntu. Brightness The source code is located in /sys/class/backlight/backlight.25/brightness We use “sudo sh -c "echo 3 > /sys/class/backlight/backlight.25/brightness”” to set the brightness. The range is between 0 to 7. Use the command “cat /sys/class/backlight/backlight.25/brightness”... - Page 38 Serial Port a. Open COM Port // *************************************************************************** Parameter: // static char *portname = "/dev/ttyUSB0"; // static int COMPort_fd; // Baud rate: 115200 // bits per second: 8 // parity: none // stop bits: 1 // *************************************************************************** static void cmd_open(void) COMPort_fd = open (portname, O_RDWR | O_NOCTTY | O_SYNC);...
- Page 39 c. Read/ Write Command // *************************************************************************** // Parameter: // write_data static char write_data[] = "Hello World!!"; // *************************************************************************** static void cmd_write(void) write(COMPort_fd, &write_data[0], sizeof(write_data)); // send character greeting usleep((sizeof(write_data) + 25) * 100); char buf[200]; n = read(COMPort_fd, buf, sizeof(buf)); // read up to 100 characters if ready to read printf("Read Data =...
- Page 40 Winmate Inc. 9F, No.111-6, Shing-De Rd., San-Chung District, New Taipei City 24158, Taiwan, R.O.C Tel: 886-2-8511-0288 Fax: 886-2-8511-0211 Email: sales@winmate.com.tw Official website: www.winmate.com...
Need help?
Do you have a question about the W07FA3S-PCO1AC-POE and is the answer not in the manual?
Questions and answers