Winmate W04FA3S-EHT1 User Manual
E-series hmi freescale cortex a9 i.mx6 dual core 1 ghz
Hide thumbs
Also See for W04FA3S-EHT1:
- Quick start manual (40 pages) ,
- Quick start manual (36 pages) ,
- User manual (72 pages)
Table of Contents
Advertisement
Quick Links
Download this manual
See also:
User Manual
Advertisement
Table of Contents

Related Manuals for Winmate W04FA3S-EHT1


Summary of Contents for Winmate W04FA3S-EHT1
- Page 1 E-Series HMI Ubuntu 16.04 Freescale® Cortex® A9 i.MX6 Dual Core 1 GHz Elegant Design W04FA3S-EHT1 W07FA3S-EHT1 W10FA3S-EHH2 W15FA3S-EHA2 User Manual Version 1.0...
-
Page 2: Table Of Contents
USER MANUAL CONTENTS CONTENTS PREFACE ........................iv ABOUT THIS USER MANUAL ..................i CHAPTER 1: INTRODUCTION ..................2 1.1 Product Features ....................2 1.2 Package Contents ..................... 3 1.3 Description of Parts..................4 1.3.1 E-Series HMI 4.3” ................... 4 1.3.2 E-Series HMI 7” ..................5 1.3.3 E-Series HMI 10.1”... - Page 3 USER MANUAL CONTENTS 3.2.5 Ethernet Settings ................. 23 3.2.6 Changing Serial Port Settings .............. 26 3.3 Exit the System ....................27 CHAPTER 4: SOFTWARE INSTALLATION ..............29 CHAPTER 5: MOUNTING ................... 31 5.1 Cable Mounting Considerations ..............31 5.2 Safety Precautions ..................31 5.3 Mounting Guide .....................
-
Page 4: Preface
USER MANUAL PREFACE PREFACE Copyright Notice No part of this document may be reproduced, copied, translated, or transmitted in any form or by any means, electronic or mechanical, for any purpose, without the prior written permission of the original manufacturer. Trademark Acknowledgement Brand and product names are trademarks or registered trademarks of their respective owners. - Page 5 USER MANUAL PREFACE Customer Service We provide a service guide for any problem by the following steps: First, visit the website of our distributor to find the update information about the product. Second, contact with your distributor, sales representative, or our customer service center for technical support if you need additional assistance.
- Page 6 USER MANUAL PREFACE Advisory Conventions Four types of advisories are used throughout the user manual to provide helpful information or to alert you to the potential for hardware damage or personal injury. These are Notes, Important, Cautions, and Warnings. The following is an example of each type of advisory.
-
Page 7: Safety Information
USER MANUAL PREFACE Safety Information WARNING! / AVERTISSEMENT! Always completely disconnect the power cord from your chassis whenever you work with the hardware. Do not make connections while the power is on. Sensitive electronic components can be damaged by sudden power surges. Only experienced electronics personnel should open the PC chassis. - Page 8 USER MANUAL PREFACE Safety Precautions For your safety carefully read all the safety instructions before using the device. Keep this user manual for future reference. Always disconnect this equipment from any AC outlet before cleaning. Do not use liquid or spray detergents for cleaning. Use a damp cloth. ...
- Page 9 USER MANUAL PREFACE *Let service personnel to check the equipment in case any of the following problems appear: o The power cord or plug is damaged. o Liquid has penetrated into the equipment. o The equipment has been exposed to moisture. o The equipment does not work well or you cannot get it to work according to the user manual.
-
Page 10: Important Information
USER MANUAL PREFACE Important Information Countries/ This equipment complies with essential Symbol Area requirements of: FCC Part 15 Subpart B Regulations Class B Electromagnetic Compatibility European Directive(2014/30/EU) Union Low Voltage Directive (2014/35/EU) Restrictions of the use of certain hazardous substances (RoHS) Directive (2011/65/EU) Federal Communications Commission Radio Frequency Interface Statement This device complies with part 15 FCC rules. -
Page 11: Ec Declaration Of Conformity
USER MANUAL PREFACE EC Declaration of Conformity This equipment is in conformity with the requirement of the following EU legislations and harmonized standards. Product also complies with the Council directions. Electromagnetic Compatibility Directive (2014/30/EU) EN55024: 2010 EN 55022: 2010 Class B o IEC61000-4-2: 2009 o IEC61000-4-3: 2006+A1: 2007+A2: 2010 o IEC61000-4-4: 2012... -
Page 13: About This User Manual
USER MANUAL ABOUT THIS USER MANUAL ABOUT THIS USER MANUAL This User Manual provides information about using the Winmate® E-Series HMI. This User Manual applies to the E-Series HMI – W04FA3S-EHT1, W07FA3S-EHT1, W10FA3S-EHH2 and W15FA3S-EHA2. The documentation set for the E-Series HMI with Freescale® Cortex® A9 i.MX6 Dual Core provides information for specific user needs, and includes: ... -
Page 15: Chapter 1: Introduction
USER MANUAL CHAPTER 1 INTRODUCTION INTRODUCTION This chapter gives you product overview, describes features and hardware specification. You will find all accessories that come with the HMI in the packing list. Mechanical dimensions and drawings included in this chapter. E-SERIES HMI... -
Page 16: Product Features
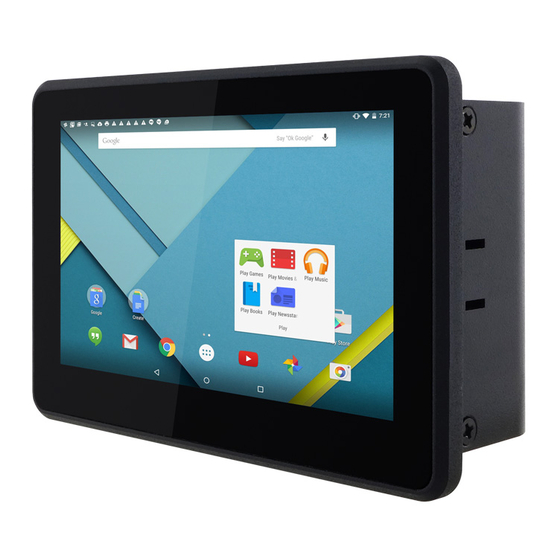
INTRODUCTION CHAPTER 1: INTRODUCTION Congratulations on purchasing Winmate® E-Series HMI. Winmate® continues developing new generation of Human Machine Interfaces for Industry 4.0 and Internet of Things (IoT). Our E-Series HMI runs on Ubuntu operating system that allows installing the latest applications (APPs). -
Page 17: Package Contents
USER MANUAL CHAPTER 1 INTRODUCTION 1.2 Package Contents Carefully remove the box and unpack your device. Please check if all the items listed below are inside your package. If any of these items are missing or damaged contact us immediately. Standard factory shipment list: Quick Start Guide User Manual... -
Page 18: Description Of Parts
USER MANUAL CHAPTER 1 INTRODUCTION 1.3 Description of Parts This section describes appearance, connectors’ layout and mechanical dimensions of E- Series HMI. Notice that this is a simplified drawing and some components are not marked in detail. Please contact our sales representative if you need further product information. -
Page 19: E-Series Hmi 10.1
USER MANUAL CHAPTER 1 INTRODUCTION 1.3.2 E-Series HMI 7” Unit: mm № Description № Description Mini USB Console ① ⑥ CANBUS (Linux use) ② Micro SD ⑦ Micro HDMI ③ LAN/ Optional PoE ⑧ USB 2.0 ④ USB OTG ⑨ 12V DC in (Phoenix type) ⑤... -
Page 20: E-Series Hmi 15.6
USER MANUAL CHAPTER 1 INTRODUCTION 1.3.3 E-Series HMI 10.1” Unit: mm № Description № Description Mini USB Console ① ⑥ CANBUS (Linux use) ② Micro SD ⑦ Micro HDMI ③ LAN/ Optional PoE ⑧ USB 2.0 ④ USB OTG ⑨ 12V DC in (Phoenix type) ⑤... - Page 21 USER MANUAL CHAPTER 1 INTRODUCTION 1.3.4 E-Series HMI 15.6” Unit: mm № Description № Description Mini USB Console ① ⑥ CANBUS (Linux use) ② Micro SD ⑦ Micro HDMI ③ LAN/ Optional PoE ⑧ USB 2.0 ④ USB OTG ⑨ 12V DC in (Phoenix type) ⑤...
-
Page 22: Chapter 2: Getting Started
USER MANUAL CHAPTER 2 GETTING STARTED GETTING STARTED This chapter tells you important information on power supply, adapter and precautions tips. Pay attention to power considerations. E-SERIES HMI... -
Page 23: Powering On
USER MANUAL CHAPTER 2 GETTING STARTED CHAPTER 2: GETTING STARTED This chapter provides information on how to connect the HMI device to the source of power, connector pinouts and the guideline to turn on/off the HMI device. 2.1 Powering On 2.1.1 AC Adapter Components 2 Pin Terminal Block to Power Cord... -
Page 24: Power Considerations
USER MANUAL CHAPTER 2 GETTING STARTED ALTERNATING CURRENT / MISE À LE TERRE! This product must be grounded. Use only a grounded AC outlet. Install the additional PE ground wire if the local installation regulations require it. *If you do not use a grounded outlet while using the device, you may notice an electrical tingling sensation when the palms of your hands touch the device. -
Page 25: Connecting The Power
USER MANUAL CHAPTER 2 GETTING STARTED 2.1.3 Connecting the Power Installation Instruction: Connect a 2-pin terminal block to the HMI connector. Connect the other side of the terminal block to the AC adapter. Connect the AC adapter to the power cord. Plug in the power cord to a working AC wall outlet. -
Page 26: Connector Pinouts
USER MANUAL CHAPTER 2 GETTING STARTED 2.2 Connector Pinouts 2.2.1 DC Input Connector Power Jack DC power source input for 4.3” HMI is power jack. Pin № Name Terminal Block DC power source input is a 2 pin terminal block connector. Power Input is 12V DC in. Minimum Voltage 11.4V Maximum Voltage 12.6V Maximum Current 4.2A... -
Page 27: Usb 2.0 Connector
USER MANUAL CHAPTER 2 GETTING STARTED RS-485 Pin № RS-485 2.2.3 USB 2.0 Connector Use USB A Type (USB2.0) connector to connect your HMI device to other USB2.0 compatible devices. Pin № Signal Name Pin № Signal Name Data- Data+ 2.2.4 USB OTG Connector Use USB OTG connector to connect the HMI device to other external devices. -
Page 28: Canbus Connector
USER MANUAL CHAPTER 2 GETTING STARTED 2.2.5 CANBUS Connector Use CAN BUS connector for the HMI machine-to-machine communication. Pin № Signal Name Pin № Signal Name CAN_L CAN_H +5V/NC *PIN9 default is NC 2.2.6 LAN (RJ45) Connector The E-Series HMI supports one 10/100/1000 Mbps Ethernet interface for connecting to the internet. -
Page 29: Micro Hdmi Connector
USER MANUAL CHAPTER 2 GETTING STARTED 2.2.7 Micro HDMI Connector The E-Series HMI has one Micro HDMI connector. Pin № Signal Name Pin № Signal Name HP_DET_OUT HDMI_D2P HDMI_D2M HDMI_D1P HDMI_D1M HDMI_D0P HDMI_D0M HDMI_CLKP HDMI_CLKM HDMI_CEC_OUT H_CLK_OUT H_DAT_OUT HDMI_5V E-SERIES HMI... -
Page 30: Turning On And Off The Hmi Device
USER MANUAL CHAPTER 2 GETTING STARTED 2.3 Turning On and Off the HMI Device This section describes how to turn on and off the HMI device. To turn on the HMI device: 1. Connect the HMI device to the source of power. 2. -
Page 31: Chapter 3: Operating The Device
USER MANUAL CHAPTER 3 OPERATING THE DEVICE OPERATING THE DEVICE This chapter provides detailed information on how to operate the device. If you have been using Android touch-screen Panel PCs before, the interface may look familiar. Sections include system settings parameters. E-SERIES HMI... -
Page 32: Operating System
Your HMI supports Linux Ubuntu 16.04 operating system. This section describes how to get started with Ubuntu 16.04 and basic settings. For more advanced Ubuntu settings, please click here to download SDK from Winmate Download Center. E-series HMI supports Ubuntu 16.04 OS. IMPORTANT: The device is shipped with the OS System according to your order. -
Page 33: System Settings
USER MANUAL CHAPTER 3 OPERATING THE DEVICE 3.2 System Settings 3.2.1 Start Menu To open the start menu: 1. Click the lower left Start button on the desktop to expand Start Menu. 2. Click Preferences and select required program. E-SERIES HMI... -
Page 34: Linux Terminal
USER MANUAL CHAPTER 3 OPERATING THE DEVICE 3.2.2 Linux Terminal To open Linux terminal: 1. Click on the Start button at the bottom left side of the desktop, in drop- down menu choose System Tools > LXTerminal. 2. You are in Linux Ubuntu terminal. E-SERIES HMI... -
Page 35: System Information
USER MANUAL CHAPTER 3 OPERATING THE DEVICE 3.2.3 System Information To check system information: 1. Open Linux Terminal, enter command code to check OS and CPU information. To find System Information command code, please refer to Appendix B of this manual. E-SERIES HMI... -
Page 36: Brightness Adjustment
USER MANUAL CHAPTER 3 OPERATING THE DEVICE 3.2.4 Brightness Adjustment 1. Open Linux Terminal, enter command code to change brightness settings. 2. brightness.png -> Use “echo” and “cat” command to control the backlight of the LCD panel. The range is 0 (lowest brightness) to 7 (highest brightness). To find Brightness adjustment command code, please refer to Appendix B of this manual. -
Page 37: Ethernet Settings
USER MANUAL CHAPTER 3 OPERATING THE DEVICE 3.2.5 Ethernet Settings To configure Ethernet Settings, follow the instruction below: 1. Connect Ethernet Cable to the HMI device. 2. Click on the Ethernet connection icon located at the bottom right side of the desktop. - Page 38 USER MANUAL CHAPTER 3 OPERATING THE DEVICE 5. In General menu select “Automatically connect to this network when it is available” and “All users may connect to this network”. 6. Go to Ethernet menu, confirm that MTU is set as automatic and Wake on LAN is chalk marked as Default.
- Page 39 USER MANUAL CHAPTER 3 OPERATING THE DEVICE 7. Go to IPv4 Settings menu, tap on Method. If you want to use DHCP, in the Method drop-down menu select Automatic (DHCP). 8. If you want to use Static IP, in the Method drop-down menu select Manual. Then configure your Static IP settings.
-
Page 40: Changing Serial Port Settings
3.2.6 Changing Serial Port Settings Serial port can be configured for RS-232, RS-422 or RS-485. Please click here download Winmate® SDK for Ubuntu 16.04. Get Mode Use the Linux command cat to read the value in console. There is no "new line" character after the string "RS-232", so we append ";echo" to show you the real string. -
Page 41: Exit The System
USER MANUAL CHAPTER 3 OPERATING THE DEVICE 3.3 Exit the System Click the lower right Logout button on the desktop to logout Linux session. For a more detailed Ubuntu 16.04 user guide, follow the download path below: http://files.ubuntu-manual.org/manuals/getting-started-with- ubuntu/16.04/en_US/screen/Getting%20Started%20with%20Ubuntu%2016.04.pdf E-SERIES HMI... -
Page 42: Chapter 4: Software Installation
USER MANUAL CHAPTER 4 SOFTWARE INSTALLATION SOFTWARE INSTALLATION This chapter contains software installation and update guides. E-SERIES HMI... - Page 43 USER MANUAL CHAPTER 4 SOFTWARE INSTALLATION CHAPTER 4: SOFTWARE INSTALLATION This chapter contains software installation and updates guide. All the programming guides can be found in the driver CD included in the package. E-SERIES HMI...
-
Page 44: Chapter 5: Mounting
USER MANUAL CHAPTER 5 MOUNTING MOUNTING This chapter provides step-by-step mounting guide for all available mounting options. E-SERIES HMI... -
Page 45: Cable Mounting Considerations
USER MANUAL CHAPTER 5 MOUNTING CHAPTER 5: MOUNTING This chapter provides mounting guide for all available mounting options. Pay attention to cautions and warning to avoid any damages. 5.1 Cable Mounting Considerations For a nice look and safe installation, make sure cables are neatly hidden behind the HMI device. -
Page 46: Mounting Guide
USER MANUAL CHAPTER 5 MOUNTING 5.3 Mounting Guide E-series HMI devices come with different mounting options suitable for most of the industrial and commercial applications. The main mounting approach is rear mount - very user-friendly in terms of installation. Refer to sub-sections below for more details. CAUTION/ ATTENTION Follow mounting instructions and use recommended mounting hardware to avoid the risk of injury. -
Page 47: Panel Mounting
USER MANUAL CHAPTER 5 MOUNTING 5.3.2 Panel Mounting Panel Mount mounting solutions is suitable for many applications where HMI should be embedded in the machine. With this mounting solution flat surface leave no bezel in the front. In addition to elegant design, rear mount solution is making the HMI unit easy to clean and maintain. -
Page 48: Chapter 6: Technical Support
USER MANUAL CHAPTER 6 TECHNICAL SUPPORT TECHNICAL SUPPORT This chapter includes the directory for technical support. E-SERIES HMI... -
Page 49: Introduction
If any problem occurs fill in problem report form enclosed and immediately contact us. 6.1 Introduction Winmate provides the following SDK for E-Series HMI with Freescale® Cortex® A9 i.MX6 Dual Core processor: Item File Type Description Linux SDK To find the Drivers and SDK, please refer to the Driver CD that comes in the package or contact us. -
Page 50: Problem Report Form
USER MANUAL CHAPTER 6 TECHNICAL SUPPORT 6.2 Problem Report Form E-Series HMI (Elegant Design) Customer name: Company: Tel.: Fax: E-mail: Date: Product Serial Number: ____________________________________________________ Problem Description: Please describe the problem as clearly as possible. Detailed description of the occurred problem will allow us to find the best solution to solve the problem as soon as possible. -
Page 51: Appendix A: Product Specifications
USER MANUAL APPENDIX A PRODUCT SPECIFICATIONS PRODUCT SPECIFICATIONS This section includes product specifications. Appendix E-SERIES HMI... - Page 52 USER MANUAL APPENDIX A PRODUCT SPECIFICATIONS APPENDIX A: PRODUCT SPECIFICATIONS Hardware Specifications Model Name W04FA3S- W07FA3S- W10FA3S- W15FA3S- EHT1 EHT1 EHH2 EHA2 Display 4.3” TFT 7” TFT 10.1” TFT 15.6" TFT Size/ Type (Widescreen) (Widescreen) (Widescreen) (Widescreen) Resolution 480 x 272 1024x600 1280 x 800 1366 x 768...
- Page 53 USER MANUAL APPENDIX A PRODUCT SPECIFICATIONS Slot Console 1 x Mini USB Console (for Linux use) HMDI 1 x Micro HDMi 1 x Micro HDMi Power Specifications Power Input 12V DC in 9-24V DC in 12V DC in 12V DC in Supports PoE (Optional), Power Device (PD) follows IEEE 802.3at Power Over (25W)
-
Page 54: Appendix B: Ubuntu Command Code
USER MANUAL APPENDIX B UBUNTU COMMAND CODE UBUNTU COMMAND CODE This section includes Ubuntu command code. Appendix E-SERIES HMI... - Page 55 USER MANUAL APPENDIX B UBUNTU COMMAND CODE APPENDIX B: UBUNTU COMMAND CODE This section includes Ubuntu command code. Brightness The source code is located in /sys/class/backlight/backlight.25/brightness We use “sudo sh -c "echo 3 > /sys/class/backlight/backlight.25/brightness”” to set the brightness. The range is between 0 to 7. Use the command “cat /sys/class/backlight/backlight.25/brightness”...
- Page 56 USER MANUAL APPENDIX B UBUNTU COMMAND CODE Serial Port a. Open COM Port // *************************************************************************** // Parameter: // static char *portname = "/dev/ttyUSB0"; // static int COMPort_fd; // Baud rate: 115200 // bits per second: 8 // parity: none // stop bits: 1 // *************************************************************************** static void cmd_open(void) COMPort_fd = open (portname, O_RDWR | O_NOCTTY | O_SYNC);...
- Page 57 USER MANUAL APPENDIX B UBUNTU COMMAND CODE c. Read/ Write Command // *************************************************************************** // Parameter: // write_data static char write_data[] = "Hello World!!"; // *************************************************************************** static void cmd_write(void) write(COMPort_fd, &write_data[0], sizeof(write_data)); // send character greeting usleep((sizeof(write_data) + 25) * 100); char buf[200];...
- Page 58 NOTES _______________________________________________________ _______________________________________________________ _______________________________________________________ _______________________________________________________ _______________________________________________________ _______________________________________________________ _______________________________________________________ _______________________________________________________ _______________________________________________________ _______________________________________________________ _______________________________________________________ _______________________________________________________ _______________________________________________________ _______________________________________________________ _______________________________________________________ _______________________________________________________...
- Page 59 NOTES _______________________________________________________ _______________________________________________________ _______________________________________________________ _______________________________________________________ _______________________________________________________ _______________________________________________________ _______________________________________________________ _______________________________________________________ _______________________________________________________ _______________________________________________________ _______________________________________________________ _______________________________________________________ _______________________________________________________ _______________________________________________________ _______________________________________________________ _______________________________________________________...
- Page 60 Winmate Inc. 9F, No.111-6, Shing-De Rd., San-Chung District, New Taipei City 24158, Taiwan, R.O.C Tel: 886-2-8511-0288 Fax: 886-2-8511-0211 Email: sales@winmate.com.tw Official website: www.winmate.com...
Need help?
Do you have a question about the W04FA3S-EHT1 and is the answer not in the manual?
Questions and answers