Table of Contents
Advertisement
Quick Links
Advertisement
Table of Contents

Related Manuals for Casio KL-7000


Summary of Contents for Casio KL-7000
- Page 1 KL-7000 Owner’s manual...
- Page 2 • Quick formats and preset layouts You can even store data in memory for instant recall when you need it. All of this makes the CASIO Label Printer the perfect tool for just about all of your labeling needs! Important! •...
-
Page 3: Table Of Contents
Contents Part 1 Getting Acquainted ... 4 Important Precautions ... 4 General Guide ... 6 Label Printer Menus ... 8 Part 2 Getting Ready ... 9 Power Supply ... 9 Replacing Batteries ... 9 To replace the memoryback-up battery ... 10 To replace the main batteries ... - Page 4 To delete text from memory ... 64 Part 11 Reference ... 65 Cleaning the Printer Head and Roller ... 65 To clean the printer head and roller ... 65 Resetting ... 66 About the Label Printer’s Keys ... 67 Troubleshooting ... 69 Messages ...
-
Page 5: Part 1 Getting Acquainted
This part of the manual provides you with important information you need to know in order to use the Label Printer to its full potential. Be sure to read it carefully before using the Label Printer for the first time. - Page 6 Printer. • Do not use benzine, thinner, or other volatile chemicals to clean the exterior of the Label Printer. Use a soft dry cloth or a cloth dampened with a weak solution of a mild neutral detergent and water. Wring the cloth out until all excess moisture is removed.
-
Page 7: General Guide
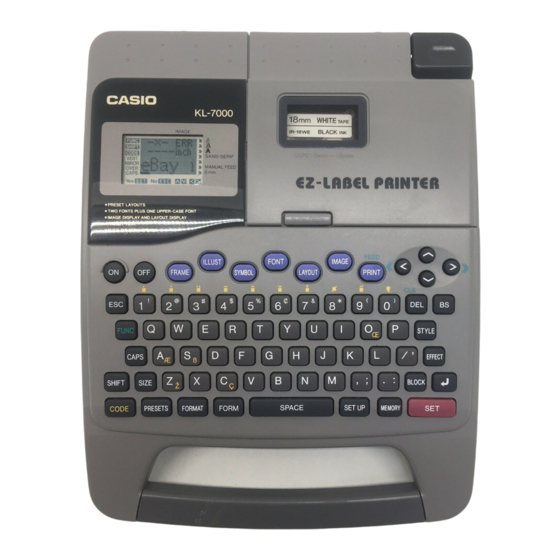
General Guide Front Power keys Switch power on and off Carrying handle Loquid crystal display (LCD) Function keys Letter keys Tape cartridge compartment Tape cutter Press to cut tape. Tape outlet Contrast dial Adjusts the darkness of the characters on the LCD. - Page 8 Back/Left Side Bottom Main battery compartment AC adaptor plug For connection of the optionally available AC adaptor. Back-up batterry compartment...
-
Page 9: Label Printer Menus
• When you press SET to execute a menu item, the Label Printer either moves on to the next menu, or it executes the selected function and returns to the text input screen that you started from. -
Page 10: Part 2 Getting Ready
Be sure to read this section before attempting to use the Label Printer. Power Supply The Label Printer can be powered by eight AA-size batteries or an optional AC adaptor (AD-A95100). A CR2032 battery is also used as a memory back-up power supply. -
Page 11: To Replace The Memoryback-Up Battery
To replace the memory back-up battery Before using the Label Printer for the first time, be sure that you first use the following procedure to install the memory back-up battery that comes with it. Data stored in memory will be lost if you do not load this battery. -
Page 12: Ac Adaptor
Note the following important precautions when using an AC adaptor to power your Label Printer. • Use only a genuine CASIO AD-A95100 AC adaptor with the same voltage rating as the household current in your area. Using a wrong adaptor can damage your Label Printer. -
Page 13: Power On Recall Function
• See “Initial Settings” for the initial default settings of the Label Printer following the reset operation. Power On Recall Function Whenever you switch your Label Printer off, it stores the text that is currently on the display. Immediately after you switch power on, you can recall the last text displayed by pressing SET. - Page 14 Note that the tape does not move at this time. • If the ink ribbon is slack when you load it into the Label Printer, it can break or cause some other problem. Tape guide...
-
Page 15: To Specify The Tape Width
This indicates there is no slack in the rib- bon. 5. Load the tape cartridge into the Label Printer, making sure that the tape and ink ribbon pass between the head and roller. -
Page 16: Display Contrast
Rotate the dial on the side of the Label Printer to adjust display contrast. Sound Effects The Label Printer is equipped with sound effects that sound when you switch power on and when an illegal operation is attempted. Normally, sound effects are switched on whenever you switch power on, but you can use the following procedure to cancel the sound effects. -
Page 17: Setting The Message Language
4. Use K and L to select OFF (to switch the beep tone off) or ON (to switch the beep tone on), and then press SET. Setting the message language The Label Printer lets you specify English, German, French, Italian, or Spanish as the language to use for display messages. To set the message language 1. -
Page 18: Demo Print
Demo Print Use one of the following procedures to produce a print that demostrates some of the fea- tures of the Label Printer. The procedure you should use depends on the size of the tape you are using. To produce a demo print using tape other than 6mm 1. -
Page 19: Part 3 Inputting Characters, Symbols, And Illustrations
• You can input up to 127 characters. Further input becomes impossible after you input the 127th character. Display Symbols and Indicators Before getting into actual input, you should first become acquainted with the symbols and indicators used on the Label Printer display. Tape length Character size indicator Function indicator... - Page 20 • Mirror image printing indicator This indicator appears when the Label Printer is set up for mirror image printing. Normal (non mirror image) printing is performed when this indicator is not shown.
-
Page 21: Basic Alpha-Numeric Input
Important! • After you finish printing when using manual feed, be sure to always press FUNC and then FEED to feed the tape before cutting it. If you don’t, you will cut off part of the printed text. • 6mm tape indicator This indicator appears when you use the procedure described under “To specify the tape width”... -
Page 22: About The Code Key
• A newline operation is indicated on the display by the you changed lines. • When you insert , the Label Printer automatically makes adjustments in the size of the characters if the size you are currently using cannot fit. With a 9mm tape for example, you start out with 2×2 size characters, but this automatically changes to... -
Page 23: To Input Illustrations
3. After you highlight the symbol list you want, press SET. 4. Use the K and L cursor keys to scroll the list line- by-line, or the H and J cursor keys to move the highlighting left and right. • In this example, highlight 5. -
Page 24: Part 4 Deleting And Inserting Characters
Part 4 Deleting and Inserting Characters This section describes everything you need to know about deleting and editing characters you have already input. Moving the Cursor The following points describe how to move the cursor around the display to position it for deleting and editing characters. -
Page 25: To Delete Characters Using The Del Key
To delete characters using the DEL key Example: To change the word “commmputer” to “computer”. 1. Use H and J to move the cursor under the first (far left) “m”. 2. Press DEL twice to delete the two m’s at the cursor’s position, shifting “mputer” to the left as you do. -
Page 26: To Clear Specific Text
6. Press SET to clear the text you selected. Overwrite and Insert You can set up the Label Printer for either overwrite or insert of characters at the cursor position. The following describes the difference between these two options. Overwrite With overwrite, characters you input replace the characters at the cursor location. -
Page 27: Insert
Insert With insert, characters you input are inserted between the characters at the cursor loca- tion. The Label Printer is in the insert mode when the overwrite mode indicator is not on the display. Note that insert is the default whenever you switch Label Printer power on. -
Page 28: Part 5 Character Attributes And Text Effects
Part 5 Character Attributes and Text Effects The operations in this part of the manual explain how to change the fonts, style, and size of characters. These characteristics are called character attributes. It also tells you how to assign such text effects as underlining, shading, and box printing to text after you finish inputting it. -
Page 29: To Change Attributes In The Middle Of Text
To change attributes in the middle of text 1. Input text using the initial attributes. 2. Perform one of the character attribute change operations. • See the following pages of this manual for details on specifying attributes. Font – page 29 Style –... -
Page 30: Changing Fonts
5. Press SET to make the change • If you change the character size, a symbol appears to show where the size change takes place. Important! • All of the following examples show how to make changes in existing text. Changing Fonts There are two fonts that you can select: serif and sans-serif. -
Page 31: Changing Character Styles
3. Use L to highlight SANS, and then press SET. 4. Use H and J to move the cursor to the point where you want the font change to start. • In our example, you would move to either “A” or “Z”. •... -
Page 32: To Change The Style Setting
To change the style setting Example: To change “ABXYZ” in the following text to shadow. ABXYZ Computer Company 1. Input the text. 2. Press STYLE to display a menu of styles. 3. Use L to highlight SHADOW, and then press SET. 4. -
Page 33: Changing Character Size
1×1 so both lines of text can fit on the tape. About the FIT mark Whenever you change the size of some of the characters on the display, the Label Printer recalculates the optimum size of all the remaining characters. It also recalculates when you input a newline mark ( ). -
Page 34: How To Tell The Current Size Settings
How to tell the current size settings Size marks on the display show where characters sizes change. To change the characters size Example: To change “ABXYZ” in the following text to 1 × 1, leaving the remaining charac- ters at 2 × 2. ABXYZ Computer Company 1. -
Page 35: Assigning Text Effects
Assigning Text Effects You can assign text effects only to text that has already been input. If you later input text in between existing text that is already assigned a text effect, the inserted text is also as- signed the effect assigned to the text on the left and right. Important! •... -
Page 36: To Remove Text Effects
5. Press SET and the letter at the cursor location be- comes highlighted. 6. Use H and J to move the cursor to the other end of the range to which you want to assign the effect. • The text that will be assigned the effect is highlighted as you move the cursor. •... - Page 37 5. Use H and J to move the cursor to the other end of the range from which you want to remove the effects. 6. When all the characters from which you want to remove effects are highlighted, press SET to remove the effects and return to the text input screen.
-
Page 38: Part 6 Form Menu Functions
• Side Spaces The side spaces are blank areas that the Label Printer automatically adds on either end of the print area. Note that side spaces are only added when you are using auto feed, and they are not added when using manual feed (see “Auto Feed”). -
Page 39: Creating And Deleting Blocks
To delete a block mark, use the procedures for BS and DEL as described under “Deleting Individual Characters”. Character Pitch The term character pitch refers to the relative spacing between characters. The Label Printer provides three character pitches from which to choose: NONE (0mm), NARROW (0.5mm), and WIDE (1mm). -
Page 40: Block Length
1. Input the text and define the two blocks. 2. Use H and J to move the cursor so it is inside the block whose character pitch you want to change. 3. Press FORM to display the FORM menu. 4. Use L to highlight PITCH, and press SET. 5. -
Page 41: To Cancel Block Length Settings
3. Press FORM to display the FORM menu. 4. Use K and L to highlight LENGTH, and press SET. 5. Use K and L to highlight FREE, and press SET. • Since there are six options on this menu, they do not all fit on a single screen. -
Page 42: Tape Length
Use this setting to set the tape to any length that you want. • CANCEL This setting cancels any of the above settings and instructs the Label Printer to automati- cally set the tape length. To select a preset tape length Example: Layout an audio cassette tape case label with the text “MY FAVORITE SONGS”. -
Page 43: To Specify Your Own Tape Length
1. Input the text. 2. Press FORM to display the FORM menu. 3. Use K and L to highlight LENGTH, and press SET. 4. Use K and L the highlight CASSETTE. 5. Press SET to apply the setting and return to the text input screen. •... -
Page 44: To Cancel A Tape Length Setting
4. Press SET to cancel the tape length setting and return to the text input screen. Auto Feed You can switch the Label Printer’s auto feed feature on and off. You can also specify one of two different feed settings that provides either large or small side spaces (“Fundamentals of Label Layout”). -
Page 45: To Select A Feed Option
To select a feed option 1. Press FORM to display the FORM menu. 2. Use K and L to highlight FEED, and press SET. 3. Use K and L to highlight the option that you want (LONG, SHORT, M-FEED). 4. Press SET to set the option and return to the text input screen. Block Spacing You can specify the amount of space to be inserted between each block. -
Page 46: Mirror Image
3. Use L to highlight DIRECTON, and press SET. • Since there are eight options on this menu, they do not all fit on a single screen. To view the four options at the bottom of the menu, press L four times. 4. -
Page 47: To Specify Text Alignment
• One Block Left Center Right • Multiple Blocks Left Center Right To specify text alignment 1. Input the text you want to print. 2. Use the procedure under “Tape Length” to specify the length of the tape. 3. Press FORM to display the FORM menu. 4. -
Page 48: Justification
4. Use L to highlight the selection that you want. • Highlight JUSTIFY to switch justification on, and RAGGED to switch it off. 5. Press SET to return to the text input screen. ABXYZ Computer Company Label Printer KL-7000 ABXYZ Computer Company Label Printer... -
Page 49: Part 7 Quick Formats
Part 7 Quick Formats The quick formats in the Label Printer’s memory let you make character size settings with the touch of a key. Then you simply input your text, which is automatically assigned the character sizes according to the quick format you selected. -
Page 50: To Select A Built-In Format
• You can assign different quick format settings for each block. This means you can have a 4-line block, followed by a 2-line block, etc. • If you insert a block mark ( ) inside formatted text, the text to the left of the block mark retains the formatting but the text to the right of the block mark is not affected by the formatting. -
Page 51: To Cancel A Built-In Format
To cancel a quick format 1. Use H and J to move the cursor to the block whose quick format you want to cancel. 2. Press FORMAT. 3. Highlight CANCEL. 4. Press SET. FUNC SHIFT CODE VERT MIROR OVER CAPS... -
Page 52: Part 8 Presets
Part 8 Presets This part of the manual tells you how to use the presets menu to select from among a variety of built-in auto layouts, preset expressions, and numbering styles that help you to create instant labels. Using the presets menu 1. - Page 53 2. Use K and L to highlight LAYOUT, and then press SET. • If the message “CLEARS INPUT TEXT!” appears on the display, press SET to clear previously input text or ESC to abort the operation without clearing input text. 3.
-
Page 54: To Print A Label Made With A Preset Layout
To print a label made with a preset layout 1. Create a label or recall the label you want from memory. 2. Use the procedures under “To use a preset layout to create a label” to edit the label. • You can start with either a preset layout using the procedure described under “To use a preset layout to create a label”. -
Page 55: To Recall A Preset Layout Label From Memory
3. Input a name for your layout. • A layout name can be up to six characters long. • For this example, input the name “TENNIS”. 4. Press SET to store the label under the name you specified. • Some symbols cannot be used in names. To recall a preset layout label from memory Example: To recall the label named “TENNIS”. -
Page 56: To Delete A Preset Layout Label From Memory
• Now you can print the label using the procedures under “Part 9 Printing”. • You can edit a label recalled from memory. Use the same procedures as those described under “To use a preset layout to create a label”. To delete a preset layout label from memory Example: To delete the label named “TENNIS”. -
Page 57: Preset Phrases
Preset Phrases Label Printer memory contains a number of commonly used expressions that are attrac- tively laid out. You simply select the phrases you want to use and print it. Important! • Be sure to read “Part 9 Printing” before trying to perform a printing operation. - Page 58 2. Press PRESETS. 3. Use K and L to move the highlighting to NUMBER, and then press SET. 4. Use H and J to move the cursor to the start point, and then press SET. • After you highlight the number, you can increase it by pressing K or decrease it by pressing L.
-
Page 59: Part 9 Printing
• During printing at very high density, printing of very long text, or repeat printing of the same text a number of times, the Label Printer may stop printing for about five seconds. This is not a malfunction, and normal printing should resume shortly. -
Page 60: To Show The Image Display
To show the image display Press IMAGE, and the display shows what your text will look like when it is printed. The text automatically scrolls from right to left while you have this key pressed. To show the layout display 1. -
Page 61: To Adjust The Print Density
• The higher the number you select, the darker the characters that are printed. Frame Printing The frame printing feature of the Label Printer makes it easy to add attractive ornamental frames to your text. You can specify frames around the outside of the printing area. - Page 62 • You could press PRINT instead of SET in step 4 above. In either case, printing starts immediately without a confirmation message. • Use layout display to check framed text before printing.
-
Page 63: Part 10 Memory
Part 10 Memory This part of the manual tells you how to store text and layout data in memory for instant recall when you want it. You can store approximately 326 characters of text in memory. Storing Data You cannot store two copies of identical data in memory at the same time. If you try to, one of the copies will be discarded automatically. -
Page 64: To Recall Data From Memory
To recall data from memory 1. Press MEMORY. 2. Use K and L to highlight RECALL, and press SET. 3. Use K and L to scroll through the text stored in memory. Use H and J to scroll the text left and right. 4. -
Page 65: To Delete Text From Memory
To delete text from memory 1. Press MEMORY. 2. Use K and L to move the highlighting to DELETE, and press SET. 3. Use K and L to scroll through the text stored in memory. Use H and J to scroll the text left and right. -
Page 66: Part 11 Reference
Cleaning the Printer Head and Roller A dirty printer head and roller can result in poor printing quality. If you have problems with print quality, use the following procedure to clean the printer head and roller. -
Page 67: Resetting
1. Switch power off. 2. Open the tape cartridge compartment cover and remove the tape cartridge. 3. Press the RESET switch inside the tape cartridge compartment to reset the Label Printer. Press with a thin, pointed object. -
Page 68: About The Label Printer's Keys
About the Label Printer’s Keys Name BLOCK Block Backspace CAPS Caps CODE Code Delete Down EFFECT Effect Escape FONT Font FORM Form FORMAT Format FRAME Frame FUNC Function ILLUST Illustration • Inputs a block mark. • Deletes the character to the left of the cursor and shifts characters to the left. - Page 69 Name IMAGE IMAGE LAYOUT Layout Left MEMORY Memory PRESETS Presets PRINT Print Return Right SET UP Set up SHIFT Shift SIZE Size SPACE Space STYLE Style SYMBOL Symbol • Displays text as it will appear on the printed tape. • Displays a rough layout of the tape. •...
-
Page 70: Troubleshooting
• Low battery power • Printing density is not set correctly. • The tape cartridge is not loaded correctly. • Printer head or roller is dirty. • The tape cartridge was loaded with too much slack in the ink ribbon. Action •... - Page 71 • End of tape • Paper backing is still in place. • Bad surface Action • Take your Label Printer to an authorized CASIO service provider to have the cutter replaced. • Press FUNC FEED to feed tape before cutting it.
-
Page 72: Messages
• There is no data stored in memory. NO DATA! • There is not enough unused NOT ENOUGH MEMORY! • Printer is performing printing NOW PRINTING • Printing is paused for a tape cut NOW PRINTING CUT THEN [SET]! • The name you are using when... -
Page 73: Initial Settings
Initial Settings There are two types of initial settings: those that are set automatically each time you switch power on, and those that are set whenever you reset Label Printer memory. The following table shows the initial settings in each case. -
Page 74: Symbols, Illustrations And Frames
Symbols, Illustrations and Frames • Symbols • Illustrations • Letters • Old English • Frames... -
Page 75: Preset (Auto) Layouts
Preset (Auto) Layouts Settings Menu Indicator Element Dimension Tape Length Block Spacing VHS (1) Side Spaces – Tape Length Block VHS (2) Spacing Side Spaces Tape Length Block VHS-C (1) Spacing Side Spaces Tape Length Block Spacing VHS-C (2) Side Spaces Tape Length... - Page 76 Settings Menu Indicator Element Dimension Tape 9.7 cm Length Block NONE 8mm (2) Spacing Side Spaces Tape 13.9 cm Length Block NONE Spacing BETA (1) Side Spaces – Tape 13.9 cm Length Block BETA (2) NONE Spacing Side Spaces Tape 9.8 cm Length Block...
- Page 77 Settings Menu Indicator Element Dimension Tape Length Block MD (1) Spacing Side Spaces Tape Length Block MD (2) Spacing Side Spaces Tape Undefined Length Block NAME (1) Spacing Side Spaces Tape Undefined Length Block NAME (2) Spacing Side Spaces Tape Undefined Length ADDRESS (1)
- Page 78 Settings Menu Indicator Element Dimension Tape Length Block ADDRESS (2) Spacing Side Spaces Tape Length SPINE (1) Block Spacing Side Spaces – Tape Length Block SPINE (2) Spacing Side Spaces Tape Length Block FLOPPY 1 Spacing Side Spaces Tape Length Block FLOPPY 2 Spacing...
-
Page 79: Application Examples
Application Examples The following are a number of sample label layouts, along with information about how you can produce them. 1. ILLUST H J (Select < 2. BLOCK (block) 3. CAPS (CAPS Mode) SIZE K L (select “1 × 2”) SET SET SET 4. -
Page 80: Specifications
Specifications Model: KL-7000 Input Keyboard Layout: Typewriter (QWERTY) Character Types Alpha (English and other languages): 151 Numbers: 10 Symbols: 153 Illustrations: 50 Display Type: 48 × 32-dot liquid crystal display Number of columns: 6 Character matrix: 16 × 8-dot Printing Type: 64-dot thermal transfer Speed: Approximately 6.76mm/second... - Page 81 CASIO COMPUTER CO., LTD. 6-2, Hon-machi 1-chome Shibuya-ku, Tokyo 151-8543, Japan...
Need help?
Do you have a question about the KL-7000 and is the answer not in the manual?
Questions and answers