
Related Manuals for Casio KL-7400


Summary of Contents for Casio KL-7400
- Page 1 KL-7400 User’s Guide Be sure to read the Safety Precautions contained in this manual before trying to use the printer for the first time, and always keep this manual on hand for future reference. RJA520036-001V01...
- Page 2 • Connect the equipment into an outlet on a circuit different from that to which the receiver is connected. • Consult the dealer or an experienced radio/TV technician for help. Caution: Changes or modification to the product not expressly approved by CASIO could void the user’s authority to operate the product.
- Page 3 6-2, Hon-machi 1-chome, Shibuya-ku, Tokyo 151-8543, Japan Responsible within the European Union: CASIO EUROPE GmbH Casio-Platz 1, 22848 Norderstedt, Germany This mark applies in EU countries only. Diese Markierung trifft nur auf EU-Länder Zu. Cette marque ne s’applique qu’aux pays de I’UE.
-
Page 4: Read This First
Read This First! • CASIO COMPUTER CO., LTD. shall not be held liable for any loss or claims by you or any other person or entity that may arise through the use of this printer. • Reproduction of this manual in any form, either in part or its entirety, is forbidden without the express permission of CASIO COMPUTER CO.,... - Page 5 Danger Alkaline Batteries Perform the following steps immediately if fluid leaking from alkaline batteries ever gets into your eyes. 1. Do not rub your eyes! Rinse them with water. 2. Contact your physician immediately. Leaving alkaline battery fluid in your eyes can lead to loss of sight.
- Page 6 Warning Dropping and rough treatment Continued use of the product after it has been damaged due to dropping or other rough treatment creates the risk of fire and electric shock. Immediately perform the following steps if the product should ever become damaged. 1.
- Page 7 Caution Keep backup copies of all important data Be sure that you keep separate copies of important data in a notebook or some other location. Malfunction of the product, repairs, and dead batteries can cause data stored memory to be lost. Keep heavy objects off.
-
Page 8: Table Of Contents
Operating Precautions Observe the following precautions to ensure that the printer provides you with the years of trouble-free operation for which it is designed. • Avoid use in areas subjected to direct sunlight, high humidity, and temperature extremes. Operating Temperature Range: 10°C to 35°C (50°F to 95°F) •... - Page 9 Part 3 - Creating a Tape Label ... 23 Creating and Printing a Label Using a Preset Layout ... 23 Creating and Printing a Sequentially Numbered Tape Label ... 24 Numbering Formats ... 24 Creating and Printing a Tape Label with a Logo ... 26 Creating and Printing an Original (Free Design) Tape Label ...
-
Page 10: Unpacking
Specifications ... 64 Unpacking Part 1 - DISC Check to make sure all of the following items are included. Mode KL-7400 Printer *The AC adaptor is shipped from the factory with one of the AC plugs shown below installed. AC plug** **Depending on the geographic area, your printer may come with a second AC plug. -
Page 11: Part 1 - Getting Ready
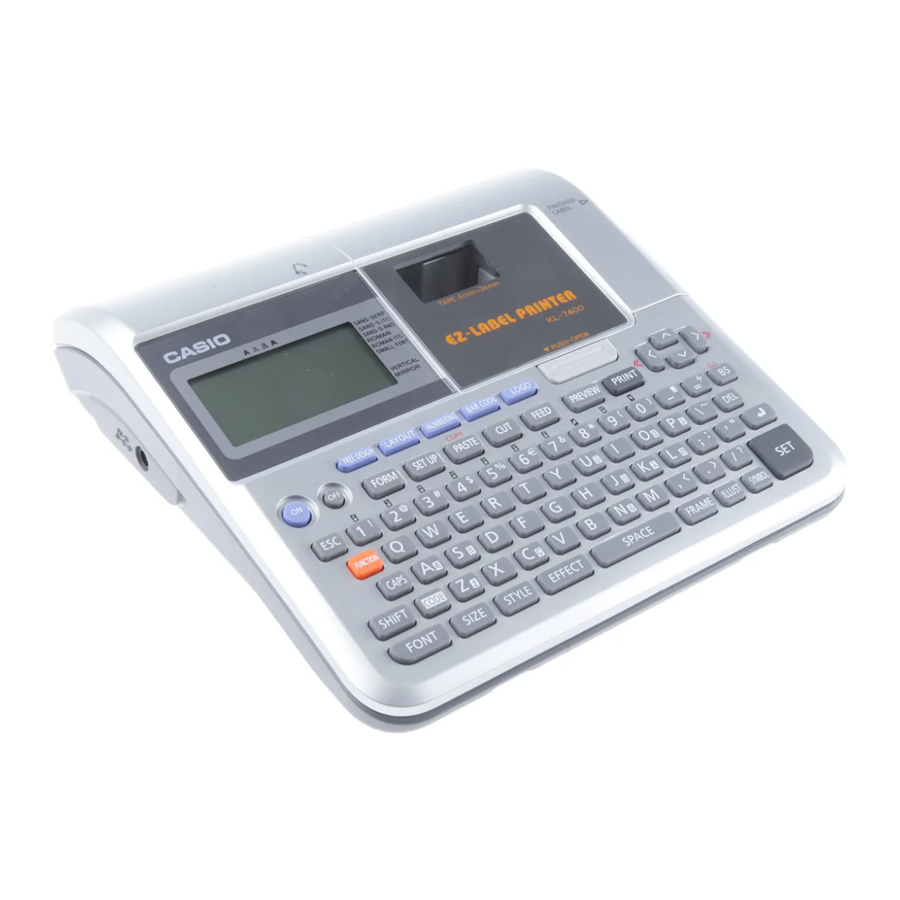
Part 1 - Getting Ready General Guide Press to turn Press to turn off power. Display on power. Keyboard Cassette cover AC adaptor terminal Connect the bundled AC adaptor here. I Carrying the Printer Pull out the handle as shown in the illustration. Tape outlet Cassette cover... -
Page 12: Printer Operation Flow
I Replacing the Cassette Cover Should the cassette cover become detached from the printer, replace it as shown in the illustration below. Take care to avoid applying excessive force to the hinges on the cassette cover. Excessive force can cause hinges and tabs to break off, and damage the tab holes. -
Page 13: Power Requirements
Power Requirements You can run the printer by using its bundled AC adaptor to plug it into a power outlet. It can also run on commercially available alkaline batteries. • For information about loading alkaline batteries, see page 47. Using the AC Adaptor Use AC adaptor (AD-A12150L) that comes bundled with the printer when you want to plug into a household power outlet. -
Page 14: Initializing Printer Memory
Initializing Printer Memory You should initialize the memory of the printer before using it for the first time, or if it fails to operate normally when you turn power on. Important! Initializing printer memory clears its memory of all input data. To initialize printer memory Make sure that the printer is turned off. -
Page 15: Mode Selection Basics
Mode Selection Basics The illustration below shows the basic flow for mode selection after turning on the printer. For details about each mode, refer to the pages noted below. To display text that was on the display when you last turned off the printer (LAST DATA) Data that was displayed when printer was turned off Important •... -
Page 16: Loading And Removing A Tape Cartridge
Loading and Removing a Tape Cartridge A tape cartridge is required when printing tape labels. You should use only the special tape cartridges that are specified for this printer. To load a tape cartridge Press to turn off the printer. Press the cassette cover release and open the cover. -
Page 17: To Remove The Tape Cartridge From The Printer
Load the tape cartridge into the printer. • Make sure that the tape and ink ribbon pass between the print head and the rubber roller as shown in the illustration below. Press down on the tape cartridge until you hear it click securely into place. Important! •... -
Page 18: Using The Printer's Keys
Using the Printer’s Keys 1 2 3 4 5 7 8 9 0 q Press to create a tape label using your own original length, number of line, font, effect, and other settings. Press to create a tape label using a preset layout. Press to create tape labels with sequential numbers. -
Page 19: Display Symbols And Indicators
Display Symbols and Indicators Before actually using the printer, you should first take some time to become acquainted with the symbols and indicators used on the label printer display. I Free Design Mode Symbols and Indicators cursor 1 Function/Shift/Code indicator appears when you press the FUNCTION key. -
Page 20: Part 2 - Label Printing Basics
I Layout Mode Symbols and Indicators cursor 1 Text area This is where text appears during input and editing. 2 Tape length This value shows the length that the tape will be printed. 3 Label format Shows the format of the label being created. 4 Character count These values indicate the character count as shown below 13/24 CHR... - Page 21 I To create a tape label Example Press to turn on the printer. to select NEW, and then press SET. Use the cursor keys to select the tape label mode you want, and then press SET. • Here we will select FREE DESIGN. Type in the text you want.
- Page 22 I To affix a tape label to a surface If necessary, use a pair of scissor to trim the tape to the size and shape you want. Peel off the backing of the label and affix it to the surface you want. I When using the CONT HALF CUT or FULL+HALF CUT tape cut mode Carefully twist the tape at the position where the tape is half cut, and peel off...
-
Page 23: Tape Cut Modes
Tape Cut Modes When you are printing a series of tape labels, the tape cut mode controls whether or not a cut operation is performed for each label. You can also specify the type of cut operation that should be performed. Note that cutting certain types of tape can damage the cutter blade. - Page 24 I FULL+HALF CUT • FULL+HALF CUT perform a full cut at the end of each label, and a half cut near the beginning of each label to make the backing paper easier to remove. I FULL CUT • FULL CUT performs a full cut at the end of each label. •...
-
Page 25: Cut Modes And Margins
Cut Modes and Margins The following shows how the tape cut type (full or half) and margin length are affected by the tape cut mode and margin settings. -
Page 26: Part 3 - Creating A Tape Label
Part 3 - Creating a Tape Label Creating and Printing a Label Using a Preset Layout Your printer comes with a large selection of preset label formats for easy label printing for specific purposes. Important! • You must have a tape cartridge that is 9mm wide or wider loaded in the printer to perform this operation. -
Page 27: Creating And Printing A Sequentially Numbered Tape Label
Creating and Printing a Sequentially Numbered Tape Label This label printer gives you a choice of six different numbering formats that you can use to print sequentially numbered labels from 0 to 99999. Numbering Formats • Format 1 • Format 2 Number Up to 50 characters of text •... - Page 28 Input the text for the COMMENT 1 box, and then press SET. Here we will input “File”. Change the starting number, if you want, and then press SET. Here we want to number the labels from 15 through 17, so we would input 15 here.
-
Page 29: Creating And Printing A Tape Label With A Logo
Creating and Printing a Tape Label with a Logo Your printer comes with 60 built-in logos that you can incorporate into your tape labels quickly and easily. Important! • You can incorporate built-in logos into tape labels that are printed using 12mm, 18mm or 24mm tape only. -
Page 30: Creating And Printing An Original (Free Design) Tape Label
Use the number keys (or ) to specify the number of copies, and then press • You can specify a value from 1 to 100 for the number of copies. to select the tape cut mode (page 20), and then press SET. -
Page 31: Free Design: Using Multiple Lines In A Tape Label
FREE DESIGN: Using Multiple Lines in a Tape Label This section explains how to use multiple lines in a label in the Free Design Mode. Note that the maximum number of lines depends on the width of the tape you are using. Important! Tape Width 24/18mm... -
Page 32: Free Design: Configuring Label Form Settings
FREE DESIGN: Configuring Label Form Settings You can use the procedure in this section to configure label form settings. I To configure label form settings In the Free Design Mode, input the text you want. Press FORM. to select the setting you want to change, and to change the currently selected setting. -
Page 33: Free Design: Controlling The Length Of A Tape Label
Margins You can select from among the following four margin settings. Note • All of the margin measurements mentioned below are approximate. NARROW 3.0mm (1/8") MEDIUM 10mm (3/8") WIDE Important! • Margins are not cut in the case of short tape lengths (28mm (1 1/8") for NARROW, 35mm (1 3/8") for MEDIUM, 44mm (1 3/4") for WIDE). -
Page 34: Free Design: Aligning Tape Label Text
FREE DESIGN: Aligning Tape Label Text This section explains how to align tape label text. LEFT EQUAL CENTER RIGHT I To align tape label text In the Free Design Mode, input the text you want. Press FORM. to scroll to the ALIGN setting screen. to select the alignment setting you want. -
Page 35: Free Design: Changing The Size Of Tape Label Text
FREE DESIGN: Changing the Size of Tape Label Text Normally when you print, the printer automatically selects the optimum char- acter size in accordance with the tape width and the number of text lines (Auto Fit). You can also use the procedures in this section to override the Auto Fit feature and specify the character sizes you want to use. - Page 36 Character Size: This indicates the character size at the current cur- sor position. Character Size Mark: This mark indicates the point from which a charac- ter size specification is applied. Auto Fit Mark: This mark is inserted automatically by the printer to indicate that the text to the right of it will be adjusted automatically.
-
Page 37: Free Design: Using Frames
FREE DESIGN: Using Frames The printer comes with a selection of built-in frames that you can use in your tape labels. See page 58 for a list of frames that are available. Example I To add a frame to a tape label In the Free Design Mode, input the text you want. -
Page 38: Barcode Specifications
Example I To create a barcode tape label Press to turn on the printer. to select NEW, and then press SET. Use the cursor keys to select , and then press SET. • You also could press BARCODE in step 2 or 3 to enter the Barcode Mode. -
Page 39: Part 4 - Inputting And Editing Label Text
Part 4 - Inputting and Editing Label Text This section describes everything you need to know about deleting and editing text you have already input. Moving the Cursor Use the cursor keys to move the cursor around the display and position it for deleting and editing characters. -
Page 40: About The Code Key
About the CODE key The CODE key makes it possible to input punctuation needed for a number of different languages. The following shows the key operations you should use for each of the characters formed using the CODE key. I CAPS on Key Operation Input Key Operation... -
Page 41: Inputting Illustrations
Inputting Illustrations Your printer gives you a choice of 124 illustrations that you can use in your labels. To input illustrations With the cursor at the location where you want to input an illustration, press ILLUST to display the ILLUST menu. Use the cursor keys to select the illustration you want to input, and then press SET. -
Page 42: Clearing Input Text
Clearing Input Text Use the following steps to clear text on the input screen. To clear all text Press FUNCTION and then BS (CLS). • If you are deleting all text in the Free Design label mode, a screen will appear to offer you a choice between ALL or PART. -
Page 43: Using Copy And Paste
Using Copy and Paste You can copy text data you have input in one location, and paste it into an- other location. I To copy text Input the text you want to copy. Press FUNCTION and then PASTE (COPY). • The message ”COPY OPERATION COMPLETE” appears and the input screen appears when the copy operation is complete. -
Page 44: Part 5 - Controlling The Appearance Of Text
Part 5 - Controlling the Appearance of Text The operations in this section explain how to select fonts, and how to use font attributes (styles and effects) to make text more attractive and eye- catching. Selecting a Font Your printer gives you a choice of the following five fonts. •... -
Page 45: To Change The Default Font Setting
To change the default font setting Press SET UP to display the SET UP menu. to select DEFAULT FONT and then press SET. to select the font you want to use as the default, and then press SET. • The default font you specified will be used first for all new labels. To change the font of text you have just input After inputting the text you want, press FONT. -
Page 46: Using Style Menu Attributes
Using STYLE Menu Attributes The STYLE menu lets you apply the following attributes to your text. NORMAL OUTLINE RAISED • Note that STYLE menu text attributes cannot be applied to illustrations. I To apply STYLE menu text attributes Input the text whose attributes you want to change. Press STYLE. -
Page 47: Using Effect Menu Attributes
Using EFFECT Menu Attributes The EFFECT menu lets you apply the text attributes shown below to label text in the Free Design Mode. Examples SHADING UNDERLINE I To apply EFFECT menu text attributes Input the text whose attributes you want to change. Press EFFECT. -
Page 48: Part 6 - Saving, Recalling And Deleting Labels
Part 6 - Saving, Recalling and Deleting Labels To save a label Create the label you want to save. After you finish inputting text, the following screen will appear on the printer display. to select STORE. Press SET. Input up to seven characters for the label name, and then press SET. to select the location (1 to 10) where you want to save the label. -
Page 49: Part 7 - Configuring The Printer Setup
Part 7 - Configuring the Printer Setup The printer has a SET UP screen that you can use to configure a variety of basic settings. I To configure the printer setup Press to turn on the printer. Press SET UP. to select the SET UP item whose setting you want to change, and then press SET. -
Page 50: Reference
Reference Power Requirements You can run the printer by using its bundled AC adaptor to plug it into a power outlet. It can also run on commercially available alkaline batteries. I Using Batteries Note • The printer can run on eight AA-size alkaline batteries. Be sure to use alkaline batteries only. - Page 51 Battery Life • Printing of approximately two 18mm tape cartridges under standard printing conditions* * Printing text or graphics that contain large areas of black, and printing under cold temperatures can shorten battery life. • Be sure to replace batteries at least once every two years, even if you do not use the printer during that period.
-
Page 52: Caring For The Printer
Caring for the Printer Tape label printing can become unclear if the printer's print head and rubber roller become dirty. Perform the following steps to clean the print head and rubber roller. I To use a cotton swab for cleaning Important! •... -
Page 53: Troubleshooting
(page 11). Note initialization will cause all data stored in printer memory to be lost. Always keep separate written copies of important information. If memory initialization does not solve the problem, contact your original retailer or nearest authorized CASIO service center. Symptom Possible Cause... - Page 54 The tape cutter is dull. Have the tape cutter replaced by your retailer or your local CASIO service center. Tape is jammed in the Turn off the printer, remove the tape outlet. tape cartridge, and remove the jammed label.
- Page 55 The tape cutter is dull. Have the tape cutter replaced will not half by your retailer or your local cut. CASIO service center. FULL CUT or UNCUT Change the tape cut mode is selected for the tape setting to CONT HALF CUT cut mode.
-
Page 56: Error Messages
Error Messages Message Cause and Action • The last time the printer was PRINTER NOT SHUT DOWN PROPERLY used, the AC adaptor was LAST TIME disconnected or the batteries were removed while the printer was turned on or while PLEASE WAIT was displayed, so the printer could not power down properly. - Page 57 Message Cause and Action • You are trying to recall or NO DATA! delete memory data when there is no data in memory. ➜ Store data in memory before performing the current operation. • You are attempting to perform a paste operation when there is no text copied.
- Page 58 UNCUT before printing. * If the steps described above do not clear the error message, contact your retailer or your nearest CASIO service center. • The cassette cover is not THIS IS THE WRONG TYPE OF TAPE closed completely. ➜ Close the cassette cover.
- Page 59 Message Cause and Action TOO SHORT TO CUT! The unused tape at the SET/ESC beginning of a numbering label cannot be cut or cutting between labels is not possible. • To print without cutting, press SET. After printing is complete, use scissors to cut the labels.
-
Page 60: Illustrations
Illustrations Symbols, Dingbats, and Special Characters G SYMBOL G DINGBAT G NUMBER G GREEK, RUSSIAN... -
Page 61: Frames
Frames... -
Page 62: Built-In Logos
Built-in Logos • You can change the language of the logos by changing the language setting (page 26). G PRICE G SIGN... - Page 63 G WORK G ATTENTION...
-
Page 64: Layout Formats
Layout Formats Type Number Format CD/DVD Maximum Input Item Type Number TITLE mini DV TITLE COMMENT TITLE COMMENT1 COMMENT2 TITLE 1 TITLE 2 TITLE 3 TITLE MD/FD/MO TITLE COMMENT TITLE COMMENT1 COMMENT2 TITLE 1 TITLE 2 TITLE 3 Number Format Input Item TITLE TITLE... -
Page 65: Numbering Formats
Type Number Format CASSETTE FILE Numbering Formats Maximum Number Input Item Number TITLE TITLE COMMENT TITLE COMMENT1 COMMENT2 TITLE 1 TITLE 2 TITLE 3 TITLE TITLE COMMENT TITLE COMMENT1 COMMENT2 TITLE 1 TITLE 2 TITLE 3 Format Input Item NUMBER COMMENT, NUMBER NUMBER,... -
Page 66: Tape Width And The Number Of Lines And Character Sizes
Tape Width and the Number of Lines and Character Sizes The number of print lines and the vertical character size depends on the tape width and format being used. Tape Width (mm) Normal Maximum 1 line 1 line 2 lines Font Number of Print... -
Page 67: Specifications
Specifications Model : KL-7400 Input Keyboard Layout : Typewriter (QWERTY) Character Types Alpha : 52 (A to Z, a to z); 99 (Á, ß, Ç, etc.) Numbers : 10 Greek : 48 Russian : 66 Symbols : 281 Illustrations: 124 Display : Liquid crystal display (128 ×... - Page 68 CASIO COMPUTER CO., LTD. 6-2, Hon-machi 1-chome Shibuya-ku, Tokyo 151-8543, Japan MO0811-A Printed in China...
Need help?
Do you have a question about the KL-7400 and is the answer not in the manual?
Questions and answers