Table of Contents
Advertisement
Quick Links
Advertisement
Table of Contents

Related Manuals for thomann Stairville LED-Commander 16/2


Summary of Contents for thomann Stairville LED-Commander 16/2
- Page 1 LED-Commander 16/2 DMX controller user manual...
- Page 2 Musikhaus Thomann Thomann GmbH Hans-Thomann-Straße 1 96138 Burgebrach Germany Telephone: +49 (0) 9546 9223-0 E-mail: info@thomann.de Internet: www.thomann.de 03.08.2021, ID: 251852 | SW V1.5 (V6)
-
Page 3: Table Of Contents
Table of contents Table of contents General notes..........................4 Safety instructions......................... 5 Features............................6 Installation..........................7 Starting up..........................8 Connections and operating elements................9 Operating..........................13 Technical specifications....................22 Protecting the environment................... 23 LED-Commander 16/2... -
Page 4: General Notes
General notes General notes This user manual contains important information on safe operation of the device. Read and follow all safety notes and all instructions. Save this manual for future refer‐ ence. Make sure that it is available to all persons using this device. If you sell the device, include the manual for the next owner. -
Page 5: Safety Instructions
Safety instructions Safety instructions Intended use This device is intended to be used to control spot lights, dimmers, light effects, moving heads or other DMX-controlled devices. Use the device only as described in this user manual. Any other use or use under other operating conditions is consid‐ ered to be improper and may result in personal injury or property damage. -
Page 6: Features
Features Features 16 devices controllable via DMX-512 2 × 8 memory slots each for scenes and chases Faders for fade and scene time and speed, dimmer etc. Operation modes: automatic, sound controlled and manual Blackout and Full-on-function Separate channel assignment Backup and firmware update via USB USB port for desk light 19"... -
Page 7: Installation
Installation Installation Unpack and check carefully there is no transportation damage before using the unit. Keep the equipment packaging. To fully protect the product against vibration, dust and moisture during transportation or storage use the original packaging or your own packaging material suitable for transport or storage, respectively. Rack mounting The unit has been designed for rack mounting in a standard 19-inch rack. -
Page 8: Starting Up
Starting up Starting up Create all connections while the device is off. Use the shortest possible high-quality cables for all connections. Take care when running the cables to prevent tripping hazards. Connecting the power adapter Connect the included power adapter to the 9V connector of the unit and then plug the power adapter into a wall outlet. -
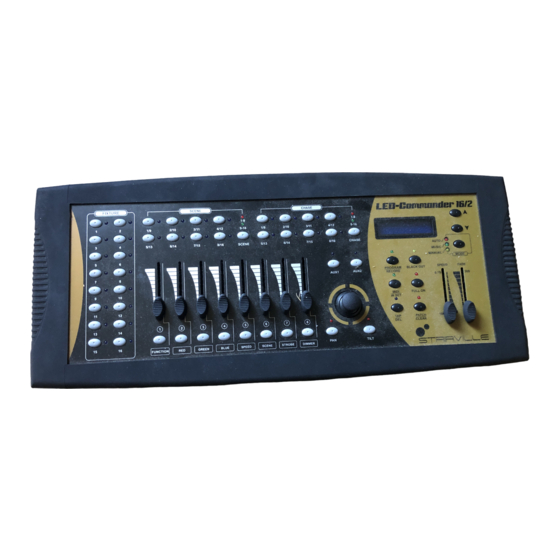
Page 9: Connections And Operating Elements
Connections and operating elements Connections and operating elements Front panel ö % & FIXTURE SCENE CHASE LED-Commander 16/2 2/10 3/11 4/12 2/10 3/11 4/12 9-16 9-16 5/13 6/14 7/15 8/16 SCENE 5/13 6/14 7/15 8/16 CHASE AUTO MUSIC MANUAL MODE PROGRAM BLACK OUT SPEED... - Page 10 Connections and operating elements 8 [MODE] Button to switch the operating mode. The associated LED indicates the active operating mode: Auto, music or manual. 9 [SPEED] Slider to manually adjust the chase speed during playback. 10 [FADE] Slider to manually adjust the fade speed during playback. 11 [BLACKOUT] Button to turn the BLACKOUT function on and off.
- Page 11 Connections and operating elements 22 [STROBE] Slider with associated flash or selection button for manual setting of the STROBE function (if assigned), or channel control for the assigned DMX channel. 23 [SCENE] Slider with associated flash or selection button for manual setting of the SCENE function (if assigned), or channel control for the assigned DMX channel.
- Page 12 Connections and operating elements 29 Lockable DMX output socket 30 DMX polarity switch 31 USB connection 32 Audio input (line level, 100 mV to 1 Vpp) 33 Output socket MIDI OUT 34 Through socket MIDI THRU 35 Input socket MIDI IN 36 Connection socket for the 9 V power supply unit.
-
Page 13: Operating
Operating Operating After switching on, the device performs a short self test. The device then automati‐ cally switches to ‘Manual’ operating mode and is ready for use. Operating mode selection The LED Commander 16/2 works in three different operating modes. Press [MODE] until the required operating mode appears in the display and the associated display LED lights up. - Page 14 Operating Setting the dimmer channel ½ CLEAR] down for three seconds. Hold [PATCH Press [FIXTURE] (1 to 16) to select the required FIXTURE channel on which you wish to change the assignment of the virtual dimmer. Hold the button of the required channel controller down for 3 seconds to assign it to the virtual dimmer of the selected [FIXTURES] (display: ‘Set dimmer ok’...
- Page 15 Operating Playing scenes De-select all active FIXTURE channels. ½ CLEAR] briefly to delete the starting values of the fader function. Press [PATCH Use [SCENE] to select the required scene. To do this, switch between the two memory banks using the toggle button if need be. You can link multiple scenes so that they run in parallel.
- Page 16 Operating Programming chaser sequences ½ RECORD] down for three seconds to switch to Program/ Hold [PROGRAM Record mode. Use [CHASE] to select the required sequence. To do this, switch between the two memory banks using the toggle button if need be. ð...
- Page 17 Operating Deleting a program step ½ RECORD] down for three seconds to switch to Program/ Hold [PROGRAM Record mode. Use [CHASE] to select the sequence you wish to delete a program step from. To do this, switch between the two memory banks using the toggle button if need be.
- Page 18 Operating Renaming Flash functions Switch off the device. ½ RECORD], [DIMMER] and [PATCH ½ CLEAR] down simultane‐ Hold [PROGRAM ously and switch the device back on. ð After two seconds, the following message appears on the display: Press the Flash button of the function you wish to rename. On the display, the name can now be changed using the joystick (move to the right/left moves the cursor, move up/down changes the relevant letters of the alphabet).
- Page 19 Operating MIDI value Function Explanation … … … BLACK OUT BLACK OUT function active Saving settings externally You can save various device settings to a USB drive. Connect your USB drive to the device's USB port. Hold [MODE] and down for two seconds until the display shows ‘Press fixture ½...
- Page 20 Operating Reset to factory defaults Turn the device off using the main switch. ½ RECORD], [TAP ½ DEL] and [PATCH ½ CLEAR] down simultane‐ Hold [PROGRAM ously and switch the device back on. ð After two seconds, the following message appears on the display: After resetting to the factory defaults, the FIXTURE channels are set up as follows: FIXTURE 1 FIXTURE 2...
- Page 21 Proceed as follows, to bring the firmware of the device up to date. To update the firmware, the latest firmware version can be downloaded from our homepage (www.thomann.de). Therefore you need a completely empty FAT32 formatted USB drive. Create a folder in the root directory of the USB drive named ‘led-commander16-2’.
-
Page 22: Technical Specifications
Technical specifications Technical specifications Control protocols DMX 512 Input connections MIDI IN 1 × DIN socket, 5-pin Audio signal RCA socket, 100 mV, 1 Vpp Power supply Socket for connecting the power adapter Data transfer USB 2.0 Output connections MIDI OUT 1 ×... -
Page 23: Protecting The Environment
Protecting the environment Protecting the environment Disposal of the packaging material For the transport and protective packaging, environmentally friendly materials have been chosen that can be supplied to normal recycling. Ensure that plastic bags, packaging, etc. are properly disposed of. Do not just dispose of these materials with your normal household waste, but make sure that they are collected for recycling. - Page 24 Notes DMX controller...
- Page 25 Notes LED-Commander 16/2...
- Page 26 Notes DMX controller...
- Page 28 Musikhaus Thomann · Hans-Thomann-Straße 1 · 96138 Burgebrach · Germany · www.thomann.de...
Need help?
Do you have a question about the Stairville LED-Commander 16/2 and is the answer not in the manual?
Questions and answers