Table of Contents
Advertisement
Advertisement
Table of Contents

Related Manuals for thomann BOTEX Rainbow Rider DMX


Summary of Contents for thomann BOTEX Rainbow Rider DMX
- Page 1 Rainbow Rider DMX DMX controller...
- Page 2 Thomann GmbH Hans-Thomann-Straße 1 96138 Burgebrach Germany Telephone: +49 (0) 9546 9223-0 Internet: www.thomann.de 03.06.2022, ID: 534780...
-
Page 3: Table Of Contents
Table of contents Table of contents General information..........................4 1.1 Further information........................... 5 1.2 Notational conventions........................5 1.3 Symbols and signal words....................... 6 Safety instructions............................. 8 Features............................... 10 Installation..............................11 Starting up..............................12 Connections and controls........................13 DMX basics and addressing........................ 16 Operating.............................. -
Page 4: General Information
Our products and user manuals are subject to a process of continuous development. We there‐ fore reserve the right to make changes without notice. Please refer to the latest version of the user manual which is ready for download under www.thomann.de. Rainbow Rider DMX... -
Page 5: Further Information
General information 1.1 Further information On our website (www.thomann.de) you will find lots of further information and details on the following points: Download This manual is also available as PDF file for you to download. Use the search function in the electronic version to find the topics of Keyword search interest for you quickly. -
Page 6: Symbols And Signal Words
General information Letterings The letterings for connectors and controls are marked by square brackets and italics. Examples: [VOLUME] control, [Mono] button. Displays Texts and values displayed on the device are marked by quotation marks and italics. Examples: ‘24ch’ , ‘OFF’ . Instructions The individual steps of an instruction are numbered consecutively. - Page 7 General information Signal word Meaning DANGER! This combination of symbol and signal word indicates an immediate dangerous situation that will result in death or serious injury if it is not avoided. NOTICE! This combination of symbol and signal word indicates a pos‐ sible dangerous situation that can result in material and environmental damage if it is not avoided.
-
Page 8: Safety Instructions
Safety instructions Safety instructions Intended use This device is used to control spotlights, dimmers, lighting effects equipment, Moving Heads or other DMX-controlled devices. The device is designed for professional use and is not suit‐ able for use in households. Use the device only as described in this user manual. Any other use or use under other operating conditions is considered to be improper and may result in per‐... - Page 9 Safety instructions NOTICE! Operating conditions This device has been designed for indoor use only. To prevent damage, never expose the device to any liquid or moisture. Avoid direct sunlight, heavy dirt, and strong vibrations. Only operate the device within the ambient conditions specified in the chapter ‘Technical specifications’...
-
Page 10: Features
Features Features The Rainbow Rider DMX is the perfect light console for beginners and for anyone wishing to conjure up an individual light show quickly and easily. Easy handling and adaptability make it perfect for fixed installations in restaurants and schools. With its wireless power supply via a power bank, the Rainbow Rider DMX is the perfect companion for mobile DJs. -
Page 11: Installation
Installation Installation Unpack and check carefully there is no transportation damage before using the unit. Keep the equipment packaging. To fully protect the product against vibration, dust and moisture during transportation or storage use the original packaging or your own packaging material suitable for transport or storage, respectively. -
Page 12: Starting Up
Starting up Starting up Create all connections while the device is off. Use the shortest possible high-quality cables for all connections. Take care when running the cables to prevent tripping hazards. Connecting the power supply Connect the USB-C port to a suitable power source, i.e. a power bank or an external power adapter (not supplied). -
Page 13: Connections And Controls
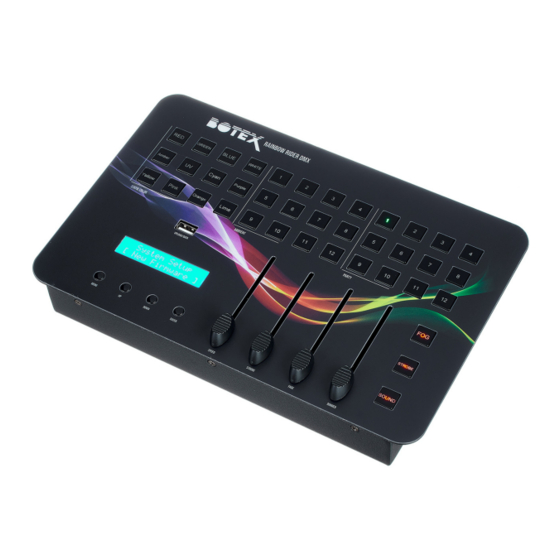
Connections and controls Connections and controls Control panel ö GREEN BLUE WHITE Amber Cyan Purple Yellow Pink Orange Lime & STROBE S OUND 1 [STATIC COLOR] 12 buttons for selecting a colour macro 2 [AMBIENT] 12 buttons for selecting a slow programme Rainbow Rider DMX DMX controller... - Page 14 Connections and controls 3 [PARTY] 12 buttons for selecting a fast programme 4 [FOG] Function button for enabling the fog machine 5 [STROBE] Function button for enabling the stroboscope 6 [SOUND] Function button for enabling the sound control 7 Fader for adjusting the programme [SPEED] Controls the programme speed [STROBE]...
- Page 15 Connections and controls Rear panel DMX IN DMX IN DMX OUT DMX OUT 11 [DMX OUT] DMX output, designed as XLR chassis socket, 3-pin, for connecting spotlights, a fog machine and an additional stroboscope 12 [DMX IN] DMX input, designed as XLR chassis plug, 3-pin, for feeding DMX values and programmes from other DMX contollers 13 5V USB-C port for connecting a power supply...
-
Page 16: Dmx Basics And Addressing
DMX basics and addressing DMX basics and addressing This chapter contains basic information about data transmission via DMX protocol and data for addressing the spotlights. Signal transmission DMX signals are generated by a DMX controller and transmitted to the connected devices using a DMX cable. - Page 17 DMX basics and addressing From a cable length of more than 300 m or after 32 connected DMX devices, the signal must be strengthened by a DMX booster. Rainbow Rider DMX DMX controller...
- Page 18 DMX basics and addressing Signal conversion Every DMX device operates with a certain vendor specific number of channels through which the incoming control signals are converted into movements, brightness or colour changes, etc.. Since all receivers in a DMX chain always receive all signals, a starting address must be assigned to each DMX device.
- Page 19 DMX basics and addressing Addressing The Rainbow Rider DMX is already preprogrammed. To use all colour macros and programmes, assign the corresponding start addresses to your devices. Five start addresses are assigned to each colour mixture. Make sure that your spotlight supports the corresponding DMX assignment. For corre‐ sponding information refer to the user manual of the respective device.
- Page 20 DMX basics and addressing Item Light set Channel Start mode address 349574 Stairville CLB2.4 Compact LED Par System 14-channel 298052 Stairville CLB4 RGB Compact LED Bar 4 14-channel 238663 Stairville Stage TRI LED Bundle Complete 14-channel 448711 Stairville CLB5 2P RGB WW Compact LED Bar 8-channel 419587 Stairville CLB5 RGB WW Compact LED Bar 5 16-channel...
-
Page 21: Operating
We recommend saving the original data of the USB stick to another storage medium so that it is not accidentally overwritten or lost due to a defect. The original programming is available for download on our homepage www.thomann.de. 8.1 Lighting control Colour macros For selecting a colour macro, press one of the 12 buttons in the [STATIC COLOR] area. - Page 22 Operating If a device cannot reproduce a basic colour, it is not supported by the spotlight. The colours of the second group can be reproduced by each device. If a device does not reproduce the desired colour, check the addressing. Colour change programmes For selecting an automatic colour change, press one of the 12 buttons in the [AMBIENT] area or one of the 12 buttons in the [PARTY] area.
-
Page 23: Function As Dmx Recorder
Operating Setting the fading speed For individual programmes recorded with the function ‘step-by-step’ , set the fading time between two steps with the [FADE] fader. This function is not available for programmes recorded with the function ‘REC over time’ ) and for the preprogrammed shows. 8.2 Function as DMX recorder The programming of the Rainbow Rider DMX can be completely changed. -
Page 24: System Menu
Display Function ‘New Firmware’ Function to install new firmware versions, password: 1234, download under www.thomann.de ‘Sound Sens’ Setting the microphone sensitivity from 0 (low) to 100 (high) ‘Channel Config’ Setting the 512 DMX channels as dimmer channel or function channel. - Page 25 Operating Display Function ‘FOG Merge’ The [FOG] button can be individually assigned to an address. Under ‘ADDR’ you can set the DMX channel and under ‘VALUE’ the DMX value. ‘DMX in Merge’ Setting the start and the LED address of the Merge function ‘Memory Type’...
- Page 26 Operating 8.3.1 Memory type ‘step-by-step’ For enabling the record function, select in the ‘Enable Record’ menu with [UP] | [DOWN] the ‘YES’ option and return with [MENU] to the main level. Select in the ‘Memory Type’ menu with [UP] | [DOWN] the desired memory type ‘step-by- step’...
- Page 27 Operating Records cannot be altered or extended afterwards. 8.3.2 Memory type ‘REC over time’ For enabling the record function, select in the ‘Enable Record’ menu with [UP] | [DOWN] the ‘YES’ option and return with [MENU] to the main level. Select in the ‘Memory Type’...
- Page 28 Operating Records cannot be altered or extended afterwards. Rainbow Rider DMX DMX controller...
-
Page 29: Technical Specifications
Technical specifications Technical specifications Control protocols Number of DMX channels Input connections DMX input XLR chassis plug, 3-pin Power supply USB-C port Output connections DMX output XLR chassis socket, 3-pin Data backup USB-A port Power supply USB-C port, 5 V , 1 A Dimensions (W ×... - Page 30 Technical specifications Further information Preset function External storage option DMX - universes Ethernet Rainbow Rider DMX DMX controller...
-
Page 31: Plug And Connection Assignments
Plug and connection assignments Plug and connection assignments Introduction This chapter will help you select the right cables and plugs to connect your valuable equip‐ ment so that a perfect light experience is guaranteed. Please take our tips, because especially in ‘Sound & Light’ caution is indicated: Even if a plug fits into a socket, the result of an incorrect connection may be a destroyed DMX controller, a short circuit or ‘just’... -
Page 32: Protecting The Environment
Protecting the environment Protecting the environment Disposal of the packaging mate‐ rial For the transport and protective packaging, environmentally friendly materials have been chosen that can be supplied to normal recycling. Ensure that plastic bags, packaging, etc. are properly disposed of. Do not just dispose of these materials with your normal household waste, but make sure that they are collected for recycling. - Page 33 Notes Rainbow Rider DMX DMX controller...
- Page 34 Notes Rainbow Rider DMX DMX controller...
- Page 36 Musikhaus Thomann · Hans-Thomann-Straße 1 · 96138 Burgebrach · Germany · www.thomann.de...
Need help?
Do you have a question about the BOTEX Rainbow Rider DMX and is the answer not in the manual?
Questions and answers