Table of Contents
Advertisement
Quick Links
Advertisement
Table of Contents

Related Manuals for Vidicode V-Mic


Summary of Contents for Vidicode V-Mic
- Page 1 V-Mic Manual v1.5 V-Mic Manual EN v1.5 Juli 2020 © 2020 Vidicode...
-
Page 2: Table Of Contents
Access Settings with Wi-Fi ..........18 Factory Settings .............. 20 Firmware Update ............21 Technical Specifications ..........22 Revision History ............24 Acknowledgements ............. 25 Privacy ................25 Liability ................25 V-Mic Manual EN v1.5 Juli 2020 © 2020 Vidicode... -
Page 3: Introduction
All of these products will communicate with the Apresa Corporate or Apresa Cloud-based recording solutions. The V-Mic needs to be powered through a 12V DC plug, or a USB cable or a LAN cable with PoE. A FAT32 formatted SD card must be inserted to store the recordings. -
Page 4: Getting Started
Connect a 12V DC plug, USB or a LAN cable with PoE for power. • Wait for the red light to go off. (By default, the V-Mic records from its internal microphone.) • Press the button to start recording; the green light goes on. -
Page 5: Software Installation
In that case, the recordings of different locations are centrally stored in one database. To setup the Apresa to act as a Tunnel server for a V-Mic (or V-Tap), go to System settings, Network tab and enable ‘V-Tap’ as is shown below: NOTE: The IP address of Apresa is the “External Storage... -
Page 6: V-Archive Software On A Pc
V-Archive software for the PC can, just as the Apresa, receive audio files via a Tunnel from the V-Mic unit, and store these files into its own database. The V-Archive software can also receive multiple data streams from different V-Mic and V-Tap units simultaneously. -
Page 7: Checklist For Tunnel Connection
During installation of V-Archive this port is automatically opened, when this is allowed by the PC. 6) To see if the PC receives something from the V-Mic, it is possible to make a network trace for test purposes. In V-Archive, go to menu Actions and select ‘Network trace’, press Start, make a short recording by pressing the button twice, wait 20 seconds, press Stop and then Save. -
Page 8: Web Interface And Settings
2) With Wi-Fi, after putting the V-Mic in a special ‘config-mode’, Access Settings with Wi-Fi. 3.1 Access with a network cable In the case of using a cable, DHCP is default enabled and the V-Mic can be accessed with a browser by entering the address: http://vmicXXXXXX.local XXXXXX is the serial number, as it is found on the bottom of the device. - Page 9 V-Mic Manual EN v1.5 Juli 2020 © 2020 Vidicode...
-
Page 10: Settings
The field is blank when the V-Mic has no Ethernet IP address. Wi-Fi IP Address The IP address when the V-Mic is connected with Wi-Fi to a router or other access point. Fill in the Wi-Fi settings below. Ethernet MAC Address... - Page 11 Firmware Version The version of the software running on this V-Mic. The button behind is used to update the software; see Firmware Update. Current Clock The current value of the internal clock. This date and time will be used as a timestamp on all recordings. The clock is automatically synchronized with your computer after pressing the "Submit and...
-
Page 12: Network Settings
3.3.2 Network Settings Ethernet IP Mode When on DHCP, the V-Mic will try to get an IP address automatically from the DHCP server. When on Static, the next three fields must be filled in manually. Static Ethernet IP Address When the IP mode is on Static, the IP address must be filled in manually. -
Page 13: External Storage Settings
Then a TCP tunnel connection will be used to send files over. When both Ethernet and Wi-Fi are enabled, the V-Mic will only use Wi-Fi when there is no cable connected. External Storage IP Address The IP address of the external storage server (a PC running V-Archive or a Call Recorder Apresa). -
Page 14: Recording Settings
PCM 16 bit , 16kHz, Mono 32k bytes/sec PCM 16 bit , 16kHz, Stereo 64k bytes/sec PCM 16 bit , 48kHz, Mono 96k bytes/sec PCM 16 bit , 48kHz, Stereo 192k bytes/sec V-Mic Manual EN v1.5 Juli 2020 © 2020 Vidicode... - Page 15 Maximum File Size Split the recording into shorter WAV files. This prevents loss of data when the power or SD card is suddenly removed. The time per file (recording-part) can be selected here. V-Mic Manual EN v1.5 Juli 2020 © 2020 Vidicode...
- Page 16 When the time is too short a lot of environmental noises will cause a recording to start. Automatic Recording Stop Time The minimum time the audio needs to be below the sensitivity level in order to stop the recording. V-Mic Manual EN v1.5 Juli 2020 © 2020 Vidicode...
-
Page 17: Led's
To indicate that the device is on and powered. Orange LED flashing: To indicate that the device is in ‘config-mode’ and can be accessed with Wi-Fi. All LED’s are flashing: The V-Mic is in Firmware Update mode. V-Mic Manual EN v1.5 Juli 2020... -
Page 18: Special Functions
The various special functions are described in the following paragraphs. 5.1 Access Settings with Wi-Fi When a network cable is not available, you can access the web interface using Wi-Fi. To put the V-Mic in this special ‘config-mode’, follow the steps below: •... - Page 19 Open a browser on the phone or laptop and enter in the search bar the IP address 192.168.1.1 • You have now access to the web settings page of the V-Mic. V-Mic Manual EN v1.5 Juli 2020 © 2020 Vidicode...
-
Page 20: Factory Settings
5.2 Factory Settings If you want to reset the V-Mic to factory default settings, you can follow (this will not delete recordings from the SD card) the following steps: • Remove all power from the device • Press and hold the button on the device. -
Page 21: Firmware Update
5.3 Firmware Update To update the firmware of a V-Mic, the “V-Mic Update Tool” must be installed on the PC, together with the new firmware files that are provided by the manufacturer. After that, open the web settings page on the V-Mic and press the button “Enable Update Mode”. -
Page 22: Technical Specifications
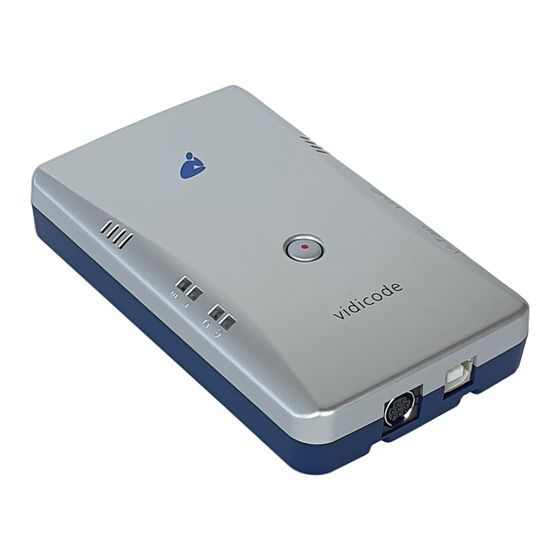
- Connector Female 3.5mm TRS (T=SIG , R=POW, S=Ground ) - Input Sensitivity 5-50mV (depends on setting) - Impedance 2K2 - Bandwidth 4/8/16 KHz - Max cable length <2m - Phantom Power 3V via ring V-Mic Manual EN v1.5 Juli 2020 © 2020 Vidicode... - Page 23 - Size: 137 x 81 x 30 mm - Weight: 150 gram - Color Bottom: Blue (PANTONE 8483C METALLIC) - Color Top: Silver Grey (PANTONE 877C METALLIC) Approvals - CE EN55022/EN55024 class-B - safety EN60950 - RoHS V-Mic Manual EN v1.5 Juli 2020 © 2020 Vidicode...
-
Page 24: Revision History
7 Revision History V1.5 Juli 2020 • Recording Boost added. V1.4 March 2020 • Front picture replaced and minor changes in text. V1.0 - V1.3 February 2020 • First release. V-Mic Manual EN v1.5 Juli 2020 © 2020 Vidicode... -
Page 25: Acknowledgements
Vidicode is not a source of official interpretation of laws of any country or state, and shall not be construed as a source for making decisions whether to provide notification or not.
Need help?
Do you have a question about the V-Mic and is the answer not in the manual?
Questions and answers