Advertisement
Quick Guide for the V-Tap ISDN PRI
The V-Tap ISDN PRI is a device that can record the calls from an ISDN-30 E1 line.
The captured data is stored onto an SD card and can optionally be sent to an
external server (an Apresa recorder or the Call Recorder VoIP software on a PC).
NOTE:
The SD card must be formatted with the FAT32 file system. Cards above 32 GB (up to 2 TB)
are not tested and must be formatted as FAT32 first, before inserting them into the V-Tap.
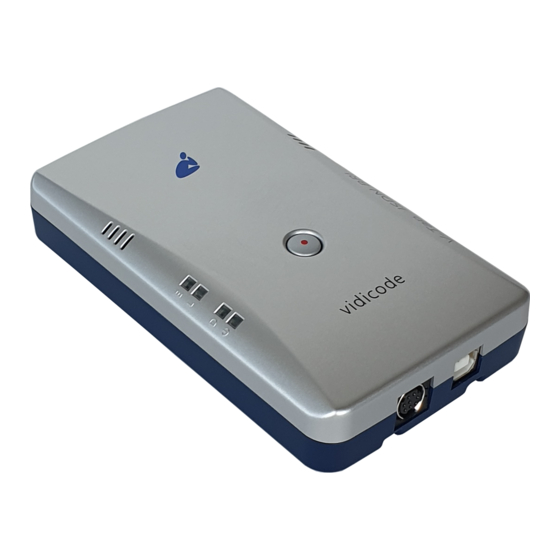
• V-Tap ISDN PRI unit
• USB adapter
• USB cable
• ISDN cable with two RJ45 connectors
• SD card
• CD with manual and Call Recorder VoIP software for the PC
• 1 year Support & Update license
• This Quick Guide
V1.1
BOX CONTENT
© 2018 Vidicode
1
Advertisement
Table of Contents

Related Manuals for Vidicode V-Tap ISDN PRI


Summary of Contents for Vidicode V-Tap ISDN PRI
- Page 1 Quick Guide for the V-Tap ISDN PRI The V-Tap ISDN PRI is a device that can record the calls from an ISDN-30 E1 line. The captured data is stored onto an SD card and can optionally be sent to an external server (an Apresa recorder or the Call Recorder VoIP software on a PC).
- Page 2 • Connect the ISDN-30 Trunk-side to the IN/TRUNK port. • Connect the ISDN-30 PBX-side to the OUT/PBX port. • NOTE: Another way of connecting (parallel) is described in the V-Tap ISDN PRI manual. • Optionally connect the network to the LAN port for web access and/or Tunnel function.
- Page 3 Windows Vista/7/8/10 , Intel Pentium >2GHz , 4GByte RAM , >100 MB free disk space. CALL RECORDER VOIP SOFTWARE INSTALLATION 1. Connect the V-Tap ISDN PRI to a free USB port on your PC. NOTE: The V-Tap unit must be connected to the same PC, otherwise the installer will not continue.
- Page 4 Quick Guide for the V-Tap ISDN PRI CHECKLIST FOR TUNNEL CONNECTION A connection between the V-Tap and PC software (or Apresa) is needed to get the recorded data automatically into a user accessible database. The following checklist can be used to setup this Tunnel connection: 1) Install the Hardware (see page 2).
Need help?
Do you have a question about the V-Tap ISDN PRI and is the answer not in the manual?
Questions and answers