Image Access WideTEK 36CL Setup Instructions
Hide thumbs
Also See for WideTEK 36CL:
- Setup instructions (68 pages) ,
- Setup instructions (46 pages) ,
- Setup instructions (72 pages)
Table of Contents
Advertisement
Advertisement
Table of Contents

Related Manuals for Image Access WideTEK 36CL


Summary of Contents for Image Access WideTEK 36CL
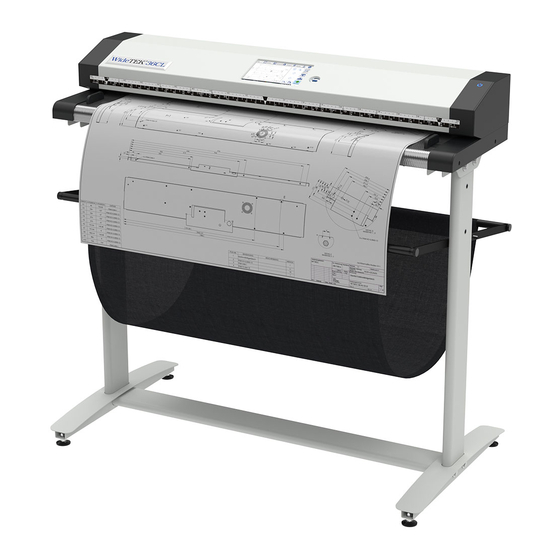
- Page 1 WideTEK® 36CL/48CL/60CL Setup Instructions English 03/2021...
-
Page 2: Table Of Contents
Table of Contents Revision overview ..................4 Notes on the instructions and the manufacturer ........5 Keep instructions available ..............5 Design features in the text ..............6 Design features in illustrations ..............7 Associated documents ................7 Copyright ....................8 Contact details of the manufacturer in Germany ........ - Page 3 Connecting the optional monitor ............19 Connect optional touch screen ............. 21 Switch on scanner ................. 22 Switch off scanner ................. 24 Perform setup ..................26 Change menu language ................. 26 Activate setup menu ................28 Performing White Balance - 36CL/48CL ..........32 Perform white balance - 60CL ...............
-
Page 4: Revision Overview
Revision overview Revision overview Date Rev. Name Description of Reason for change change 16.11.2018 First draft First published version 30.03.2021 Second draft Updated version... -
Page 5: Notes On The Instructions And The Manufacturer
Notes on the instructions and the manufacturer Notes on the instructions and the manufacturer This manual will help you to safely prepare and perform the setup for the WideTEK® 36CL/48CL/60CL large format scanners. The wide format scanners WideTEK® 36CL/48CL/60CL are called "scanners" in the following. The start button is called "power button"... -
Page 6: Design Features In The Text
Notes on the instructions and the manufacturer Design features in the text Various elements of this guide have specified design features. This allows you to easily distinguish the following elements: normal text BUTTONS OF THE SCREEN "menu labels" ➢ Action steps •... -
Page 7: Design Features In Illustrations
Notes on the instructions and the manufacturer Design features in illustrations When elements are referred to in a legend or in the running text, they are given a number (1). Associated documents The accompanying documents include: • Unpacking and packing instructions •... -
Page 8: Copyright
Tel.: +49-202-27058-0 E-Mail: dokumentation@imageaccess.de Internet address: www.imageaccess.de Technical support You can reach Image Access GmbH technical support at the following e- mail address: support@imageaccess.de. Contact details of the manufacturer in the USA Image Access LP 2511 Technology Drive, Suite 109 Elgin... -
Page 9: Device Safety
Device safety Device safety Intended use The scanner is used to scan images and documents of all types. The documents must comply with the characteristics according to the technical specifications. The scanner is intended for use in closed rooms in the commercial sector. -
Page 10: Basic Safety Instructions
AC adapter with an AC adapter of the same type. ➢ Do not use the scanner if it is visibly damaged. In this case, unplug the power cord from the power outlet. Contact Image Access technical support, see section Technical Support from page 8. -
Page 11: Responsibility Of The Operator
Device safety ➢ Do not lean on the scanner. ➢ Make sure that the thickness of the original to be scanned does not exceed 3 mm. ➢ Do not use cleaning agents containing abrasive additives, solvents or acids. Use a damp microfiber cloth. ➢... -
Page 12: Design Features Of Warnings
Device safety Design features of warnings This manual contains the following warnings: WARNING Notes with the word WARNING warn of a dangerous situation that can possibly lead to death or serious injury. CAUTION Notes with the word CAUTION warn of a situation that may result in minor or moderate injury. -
Page 13: Description
Description Description Task and function The scanner is used to scan images and documents of all types. The documents must comply with the characteristics according to the technical data. The scanner is intended for use in closed rooms in the commercial sector. -
Page 14: Overview Back Side
Description Overview back side Designation USB connection socket HDMI connection socket Network connection socket Connection socket for Recovery Key1 Main switch Connection socket 19 V DC for external power supply unit (for example WideTEK 36CL/48CL) -
Page 15: Overview Screen Page For The Setup Menu
Description Overview screen page for the setup menu Designation Buttons and parameters Display of the menu designation Display of online help Button for exiting the setup menu to the start screen Button to drive the document forward in the scanner Button to drive the document backward in the scanner (rewind) Display of firmware version Display of IP address... -
Page 16: Rating Plate
Description Rating plate The rating plate is located on the back of the scanner. The following figure shows the nameplate of the model WideTEK® 36CL-600. The following figure shows the nameplate of the model WideTEK® 48CL-600. - Page 17 Description The following figure shows the nameplate of the model WideTEK® 60CL-600.
-
Page 18: Prepare Setup
Prepare setup Prepare setup Connecting the power supply WARNING Risk of electric shock due to incorrect connection. ➢ Ensure that the mains socket is earthed in accordance with local regulations. CAUTION Incorrect routing of the connection cables can cause tripping, broken bones, bruises and crushing. ➢... -
Page 19: Establish Network Connection
Prepare setup Establish network connection CAUTION Incorrect routing of the connection cables can cause tripping, broken bones, bruises and crushing. ➢ Lay the connection cables so that no one can trip over them. To establish the network connection, follow the steps below: ➢... - Page 20 Prepare setup To connect an optional monitor, follow the steps below: ➢ Connect the DisplayPort connector of the monitor to the DisplayPort connector on the back of the scanner.
-
Page 21: Connect Optional Touch Screen
Prepare setup Connect optional touch screen CAUTION Incorrect routing of the connection cables can cause tripping, broken bones, bruises and crushing. ➢ Lay the connection cables so that no one can trip over them. To connect an optional touch screen, follow these steps: ➢... -
Page 22: Switch On Scanner
Prepare setup Switch on scanner To switch on the scanner, proceed as follows: ➢ Press the MAIN switch (1) on the rear panel to the "I" position. The scanner is in stand-by mode. - Page 23 Prepare setup To start the scanner from stand-by mode, proceed as follows: ➢ Press the Power button. The Power button lights up blue. The scanner performs a system test. After a short waiting period, the "Startup Screen" screen will be displayed in English.
-
Page 24: Switch Off Scanner
Prepare setup Switch off scanner To switch the scanner to stand-by mode after performing the setup, proceed as follows: ➢ On the Select Application screen, tap POWER OFF (1). You can also press the POWER button briefly to access this menu. Do not press the POWER button for longer than 5 seconds, otherwise the scanner will switch off hard. - Page 25 Prepare setup To turn off the scanner for an extended period of time, do the following: ➢ Make sure the scanner is in stand-by mode. ➢ Press the MAIN switch (1) to the "0" position. To hard power off the scanner, do the following: ➢...
-
Page 26: Perform Setup
Perform setup Perform setup Change menu language To change the menu language, proceed as follows: ➢ Tap the LANGUAGE button (1) to see all available languages. - Page 27 Perform setup A window for selecting the language is displayed. ➢ To display more languages, slide the scroll bar (1) downwards. ➢ Tap the desired language. The language selection screen closes. The "Home Screen" screen is displayed.
-
Page 28: Activate Setup Menu
Perform setup Activate setup menu To activate the setup menu, you must log in. To do this, proceed as follows: ➢ Tap on the OPERATION SYMBOL (1). - Page 29 Perform setup The login screen is displayed. ➢ Enter the login data in the login window. ➢ To do so, tap the corresponding input field with your finger. ➢ The on-screen keyboard is displayed. ➢ Enter "Poweruser" in both input fields. ➢...
- Page 30 Perform setup ➢ To complete the registration, tap OK.
- Page 31 Perform setup The S2N Setup Menu screen appears. White balance: White balance submenu display. Test Suite: Display the "Test Suite" submenu IP Address: Displays the IP Address submenu. User Settings: Display of the "User settings" submenu Time and Date: Display of the "Time and Date" submenu ➢...
-
Page 32: Performing White Balance - 36Cl/48Cl
Perform setup Performing White Balance - 36CL/48CL ➢ On the S2N Setup Menu screen, tap WHITE (1). - Page 33 Perform setup The White Balance screen appears. Calibration: Start white balance Delete white Delete existing white balance data balance data: White balance is used to ensure the quality of the scan results. A test template can be used to perform the white balance. The test templates are marked as follows: •...
- Page 34 Perform setup Before you start white balance, remove the transport aids. To remove the transport aids, proceed as follows: ➢ Lift the transport aids (1) by about 5 mm (1.). ➢ Pull the transport aids (1) inwards (2.).
- Page 35 Perform setup CAUTION! Scan quality may be compromised by using an improper white balance test pattern. ➢ Make sure that the test pattern is free of bends, discoloration, tears, or other damage. ➢ Store the white balance test pattern in a place protected from daylight.
- Page 36 Perform setup To start white balance, do the following: ➢ Tap CALIBRATION (1).
- Page 37 Perform setup ➢ Tap NEXT STEP (1).
- Page 38 Perform setup White balance starts and calibration is performed. A rotating icon is displayed during white balance. The test pattern is transported back and forth in the document transport. The entire white balance process takes approximately 18 seconds. Afterwards, the white balance result is displayed as shown below as an example.
- Page 39 Perform setup ➢ To perform white balance again, tap NEW VALUES (2).
- Page 40 ➢ After deleting the stored data, perform white balance again as described. ➢ If you encounter any problems while performing white balance, contact Image Access Technical Support immediately, see the Technical Support section beginning on page 8. ➢ To return to the previous submenu, tap BACK (1).
-
Page 41: Perform White Balance - 60Cl
Perform setup Perform white balance - 60CL ➢ On the S2N Setup Menu screen, tap WHITE (1). - Page 42 Perform setup The White Balance screen appears. Calibration: Start white balance Delete white Delete existing white balance data balance data: White balance is used to ensure the quality of the scan results. A test template can be used to perform the white balance. The test template is marked as follows: •...
- Page 43 Perform setup Before you start white balance, remove the transport aids. To remove the transport aids, proceed as follows: ➢ Lift the transport aids (1) by about 5 mm (1.). ➢ Pull the transport aids (1) inwards (2.). CAUTION! Scan quality may be compromised by using an improper white balance test pattern.
- Page 44 Perform setup...
- Page 45 Perform setup To start white balance, do the following: ➢ Tap CALIBRATION (1). ➢ Tap NEXT STEP (1).
- Page 46 Perform setup White balance starts and calibration is performed. A rotating icon is displayed during white balance. The test pattern is transported back and forth in the document transport. The entire white balance process takes approximately 18 seconds.
- Page 47 Perform setup The white balance result is then displayed as shown below as an example. If the white balance is correct, the result is displayed in green. An incorrect result is displayed in red. In this case, perform the white balance again by clicking the NEW VALUES button (2).
- Page 48 Perform setup To start the second white balance, proceed as follows: ➢ Position the supplied test template (1) in the document transport (2) as shown below. The test template (1) retracts. ➢ Tap NEXT STEP (1).
- Page 49 Perform setup White balance starts and calibration is performed. A rotating icon is displayed during white balance. The test pattern is transported back and forth in the document transport. The entire white balance process takes approximately 18 seconds.
- Page 50 Perform setup The white balance result is then displayed as shown below as an example. ➢ To return to the previous submenu, tap BACK (1). ➢ To return to the Home Screen, tap EXIT (3).
- Page 51 ➢ After deleting the stored data, perform white balance again as described. ➢ If you encounter any problems while performing white balance, contact Image Access Technical Support immediately, see the Technical Support section beginning on page 8. ➢ To return to the previous submenu, tap BACK (1).
-
Page 52: Assign Ip Addresses
Perform setup Assign IP addresses Assign IP address manually To assign an IP address manually, proceed as follows: ➢ On the S2N Setup Menu screen, tap IP ADDRESS (1). - Page 53 Perform setup The "IP Address" screen is displayed. Set network Apply the network settings you have made settings: Reset to factory Restore the factory settings settings: IP address: Input field for the IP address Gateway: Input field for the gateway data Subnet mask: Entry field for the subnet mask data IP Configuration...
- Page 54 Perform setup ➢ Tap on the "IP address" field (1).
- Page 55 Perform setup The "IP Address" window is displayed. ➢ Enter the IP address (1).
- Page 56 Perform setup ➢ To delete a digit, position the cursor to the right after the digit and tap DEL (1).
- Page 57 Perform setup The arrow keys to the left (1) and right (2) next to the digit "0" move the cursor within the selected line. ➢ To complete the entry, tap OK (3). ➢ Make the settings for gateway and subnet mask in the same way.
- Page 58 Perform setup ➢ To save the network settings you have made, tap SET NETWORK SETTINGS (2). ➢ To return to the previous submenu, tap BACK (1). ➢ To return to the "Home Screen" screen, tap EXIT (3).
- Page 59 Perform setup IP address assigned automatically To assign an IP address automatically, proceed as follows: ➢ On the Setup Menu screen, tap IP ADDRESS (1).
- Page 60 Perform setup ➢ In the "IP Configuration Method" selection menu, select the "DHCP" entry (3). ➢ To return to the previous submenu, tap BACK (1). ➢ To return to the "Startup Screen" screen, tap EXIT (2).
-
Page 61: Set User Preferences
Perform setup set user preferences ➢ On the S2N Setup Menu screen, tap USER SETTINGS (1). - Page 62 Perform setup The "User Settings" screen is displayed. Configure GUI Access the submenu for setting the applications in selection: the startup screen. Default: restore the default settings of the scanner Language: Select language Display Standby define the time of inactivity until an optional After: external monitor and the touch screen go into standby mode...
- Page 63 Perform setup...
- Page 64 Perform setup Set stand-by times To set the display stand-by, proceed as follows: ➢ Tap on the selection arrow of the selection menu. ➢ Tap on the desired entry (2). ➢ Make the settings for the screen saver and the device stand-by in the same way.
- Page 65 Perform setup Configure GUI selection ➢ On the User Settings screen, tap GUI SELECTION CONFIGURATION (1).
- Page 66 Perform setup The "Configure GUI Selection" screen appears. This submenu displays the "EasyScan" and "ScanWizard" applications that are available for selection by default. If you want only one of the applications to be displayed after the system starts, do the following: ➢...
- Page 67 Perform setup Single mode is defined as the default (Allow single mode checkbox activated). ➢ To start the application in job mode, deactivate the checkbox "Allow single mode" (2). ➢ To return to the previous submenu, tap BACK (1). ➢ To return to the "Start screen" screen, tap EXIT (3).
-
Page 68: Set Time And Date
Perform setup Set time and date ➢ On the S2N Setup Menu screen, tap TIME and DATE (1). - Page 69 Perform setup The Time and Date screen appears. Enter time: Enter hours and minutes with arrow keys Enter date: call up a calendar to set the date Set time and date: accept the set values Time zone: select a time zone...
- Page 70 Perform setup To set the time, proceed as follows: ➢ Tap on the "Enter time" field. ➢ To set the time later, tap the up arrow (2). ➢ To set the time earlier, tap the down arrow (2). ➢ To save the changed time, click on SET TIME AND DATE (3). ➢...
- Page 71 Perform setup To set the date, proceed as follows: ➢ Tap the "Enter date" field. A calendar (3) is displayed. ➢ Select the corresponding date in the calendar (3). ➢ To set the month and year, tap the arrow buttons (2, 4) at the top of the calendar.
- Page 72 Perform setup ➢ To select the time zone, tap the selection arrow (4). A selection list with available time zones is displayed. ➢ Select the appropriate time zone. ➢ To save the time zone, tap SET TIME AND DATE (2). ➢...
-
Page 73: Run Test Suite
Perform setup Run Test Suite ➢ On the S2N Setup Menu screen, tap TEST SUITE (1). - Page 74 Perform setup The "Test Suite" screen is displayed. Mainboard Display of current values for: information: temperatures of board and CPU cores, fan speed, board voltages Information about Off/On the electromagnetic compatibility test:...
- Page 75 Perform setup Perform electromagnetic compatibility test (EMC test) The EMC test may only be carried out by certified service personnel. ➢ To perform the electromagnetic compatibility test, select the entry "on" (3) in the "EMC test" selection menu. ➢ To return to the previous submenu, tap BACK (1). ➢...
-
Page 76: Run Touchscreen Test
Perform setup Run Touchscreen Test To test the touch screen page for proper operation when touched, do the following: ➢ On the Setup Menu screen, tap TOUCHSCREEN TEST (1). - Page 77 Perform setup The "Touchscreen test" screen page is displayed. ➢ To perform the touchscreen test, tap your finger on the screen page (3). The crosshairs must be in the same position as the finger. ➢ To end the "Touchscreen Test", tap on STOP TOUCHSCREEN TEST (1). ➢...
- Page 78 Perform setup ➢ Hold the top left flashing green rectangle (1) with your finger. ➢ Swipe your finger across the touchscreen from top left to top right.
-
Page 79: Height Adjustment - Changing The Height Adjustment (Wt60Cl)
Perform setup Green rectangles are drawn step by step. These rectangles mark the area where the Touch Screen Test has detected the motion events. ➢ As soon as you reach the top right, move down one line and then back to the left. - Page 80 Perform setup Loosening the height adjustment Stand sideways, to the right, next to the device. ➢ Press down the upper unit from above, at the right outer edge, with one hand (1) and hold the pressure. ➢ Please make sure that the upper unit is not tilted in the front or rear transport direction.
-
Page 81: Recovery
Perform setup Checking height adjustment and document transport ➢ Place the object in the center and check the transport by pressing the two buttons for document transport on the operating screen. The object should move backwards and forwards evenly and without resistance. - Page 82 Perform setup interruption of a firmware update procedure or other functions that involve writing to main storage (SSD) poses a potential risk to the integrity of the firmware on the SSD. The Scan2Net operating system of any WideTEK® or Bookeye® scanner is Linux based and although it is very rare, Linux can be corrupted like any other operating system.
- Page 83 Perform setup The following process cannot be influenced by the user.
- Page 84 Perform setup Recovery procedure 1 Most scanners come with a recovery key, some newer scanners (like WideTEK 36CL-MF or WideTEK 60CL) have a STOP button that can be used to replace the recovery key. Recovery key STOP key The recovery key shown is an...
- Page 85 Perform setup The recovery procedure is a simple, multi-step process. Step Action 2.1 - Scanner with Recovery Key Wait for the scanner to shut down, then connect the Recovery Key to the DB9 connector, on the back of the scanner. 2.2 - Scanner with STOP button Wait for the scanner to shut down.
- Page 86 Perform setup Step Action 5 - All scanners Recovery starts immediately, replacing the damaged contents of the Scan2Net Linux partition with the contents of the recovery partition. This process takes about 10 - 15 minutes. At the end, the scanner automatically shuts down to standby mode.
- Page 87 Perform setup Recovery Procedure 2 - Update Scanner Firmware Step Action If the scanner's currently installed firmware is not the latest version, connect to the scanner using a web browser. Select "Device Setup". Log in to "Poweruser" using "Poweruser" for username and password.
-
Page 88: Technical Data
Technical data Technical data Scanner specification Optical System WideTEK® 36CL-600 Maximum document size 965 mm (38 inches) Scan width 915 mm (36 inches) Scan position Document side up Scanner resolution 1200 × 1200 dpi (optional 9600 × 9600 dpi interpolated) Pixel size 42 x 42µm Sensor type... - Page 89 Technical data Optical System WideTEK® 48CL-600 Maximum document width 1270 mm (50 inch) Scan width 1220 mm (48 inch) Orientation of the document Face-up Scanner resolution 1200 × 1200dpi (optional 9600 × 9600 dpi interpolated) Pixel size 42 x 42µm Sensor type Three CIS modules Color depth...
-
Page 90: Environmental Conditions
Technical data Optical System WideTEK® 60CL-600 Maximum document width 1524 mm (60 inches) Scan width 1570 mm (61.85 inches) Orientation of the document Face-up Scanner resolution 1200 × 1200dpi (optional 9600 × 9600 dpi interpolated) Pixel size 42 x 42µm Sensor type Five CIS modules Color depth... -
Page 91: Electrical Specification
Technical data Electrical specification External power supply Voltage 100-240 V AC Frequency 47-63 Hz ECO Standard CEC Level VI Scanner Voltage 19 V DC Current Power consumption Sleep ≤ 0.5 W Stand-by approx. 5 W Ready to scan < 25 W Scanning <... -
Page 92: Dimensions And Weight Widetek® 36Cl-600
Technical data Dimensions and weight WideTEK® 36CL-600 Scanner Outer Dimensions 170 x 1088 x 358 mm (H × W × D) (7 x 43 x 14 inch) Weight of Scanner 21 kg (46 lbs.) Weight of Floor Stand 10 kg (22 lbs.) Transport Box Dimensions 260 x 1160 x 440 mm (Scanner) (H ×... -
Page 93: Dimensions And Weight Widetek® 60Cl-600
Technical data Dimensions and weight WideTEK® 60CL-600 Scanner outer dimensions 170 x 1697 x 358 mm (H × W × D) (7 x 67 x 14 inches) Weight of scanner 34 kg (77 lbs.) Weight of floor stand 21 kg (46 lbs.) Transport box dimensions 250 x 1780 x 440 mm (scanner) (H ×...
Need help?
Do you have a question about the WideTEK 36CL and is the answer not in the manual?
Questions and answers