Table of Contents
Advertisement
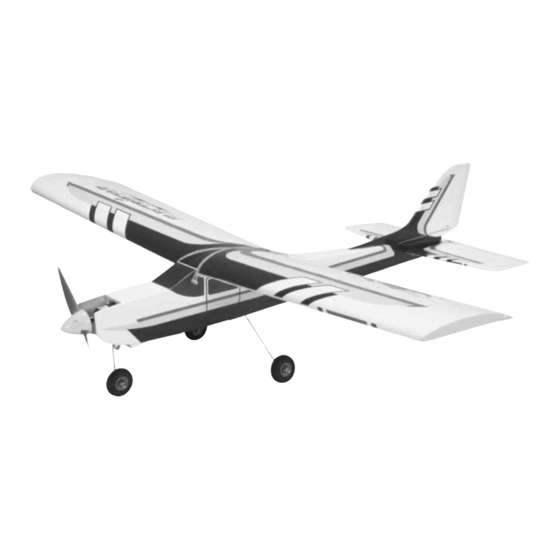
READY-TO-FLY RADIO CONTROLLED MODEL AIRPLANE
Wingspan: 63 in [1600mm]
Wing Area: 709 sq in [45.7dm
Weight: 6 lb [2722g]
Wing Loading: 19.2 oz/sq ft [59g/dm
Length: 53 in [1346mm]
Radio: Included
Motor: Included
Electronic Speed Control: Included
Motor Battery: Not Included
Charger: Not Included
Hobbico
®
guarantees this kit to be free from defects in both material or workmanship at the date of purchase. This warranty
does not cover any components or parts damaged by use or modification. In no case shall Hobbico's liability exceed the
original cost of the purchased kit. Further, Hobbico reserves the right to change or modify this warranty without notice.
In that Hobbico has no control over the final assembly or the material used for final assembly, no liability shall be assumed
nor accepted for any damage resulting from the use of the final user-assembled product. By the act of using the user-
assembled product, the user accepts all resulting liability.
If for any reason you think that this model is not for you, return it to your local dealer immediately. PLEASE NOTE:
Your hobby dealer cannot accept a return on any model after assembly has begun.
READ THROUGH THIS MANUAL BEFORE STARTING
CONSTRUCTION. IT CONTAINS IMPORTANT WARNINGS
AND INSTRUCTIONS CONCERNING THE ASSEMBLY
AND USE OF THIS MODEL.
Entire Contents © Copyright 2006
INSTRUCTION MANUAL
2
]
2
]
WARRANTY
™
Champaign, Illinois
(217) 398-8970, Ext 5
airsupport@hobbico.com
HCAZ1205 for HCAA12xx V1.0
Advertisement
Table of Contents

Related Manuals for Hobbico ElectriStar EP Select


Summary of Contents for Hobbico ElectriStar EP Select
- Page 1 Further, Hobbico reserves the right to change or modify this warranty without notice. In that Hobbico has no control over the final assembly or the material used for final assembly, no liability shall be assumed nor accepted for any damage resulting from the use of the final user-assembled product.
-
Page 2: Table Of Contents
IMPORTANT!!! Two of the most important things that you to fly. After you’ve mastered the ElectriStar EP Select, the can do to preserve the radio controlled aircraft hobby are to... -
Page 3: Specification & Description Changes
For the latest technical updates or manual corrections for end up with a well-built model that is straight and true. the ElectriStar EP Select, visit the Hobbico web site listed below and select the Hobbico ElectriStar EP Select. A “Tech If the buyer is not prepared to accept the liability associated Notice”... -
Page 4: Ordering Replacement Parts
Warning: The motor, ESC, and propeller supplied with the of the menu on the left side of the page. Follow the ElectriStar EP Select are a matched set and must be used instructions provided on the page to locate a U.S., Canadian together. -
Page 5: Kit Contents
If any parts are missing or are not of acceptable quality, or if you need assistance with assembly, contact Hobbico Product Support. When reporting defective or missing parts, use the part names exactly as they are written in the Kit Contents list on this page. -
Page 6: Building Equipment
BUILDING EQUIPMENT The following items are required to complete assembly: • #2 Phillips screwdriver (HCAR1024) • Long-nose pliers (HCAR0625) • Hobby knife (HCAR0109) • 3mm Hex wrench (for prop) ❏ 1. Insert the main landing gear wires into the holes in the landing gear blocks in the bottom of the fuse as shown. -
Page 7: Install The Propeller
❏ 2. Remove the 4mm x 12mm socket head cap screw and propeller washer from the shaft of the motor. ❏ 4. Insert the stabilizer and center it in the stabilizer slot as shown. Use a Phillips screwdriver to install the two ❏... -
Page 8: Assemble The Wing
Warning: Never transport the ElectriStar EP Select with the batteries connected. The only time the batteries should be connected is when you are preparing the model for flight. -
Page 9: Install The Wing
❏ 2. Slide two 7-cell motor battery packs into the battery ❏ saddles and secure them with the hook & loop material 2. Center the wing atop the “wing saddle” and secure it in as shown. place with the included rubber bands. Twelve rubber bands are suggested. - Page 10 The ESC will remain armed until you disconnect the motor battery packs. The ESC provided with the ElectriStar EP Select features a brake function that is useful for some aircraft, but is ❏...
-
Page 11: Set The Control Throws
If, after you have become accustomed to the way the ElectriStar EP Select flies and would like to change the throws to suit your taste, that is fine. However, too much ❏... -
Page 12: Balance The Model Laterally
on the line on the bottom of the wing. You may also use a 3) Where established, I will abide by the safety rules for the Great Planes C.G. Machine (GPMR2400). flying site I use, and I will not willfully and deliberately fly my models in a careless, reckless, and/or dangerous manner. -
Page 13: Check List
…And If You Really Want to Go Nuts feet away from the model and still have control. While you • Cooler filled with ice and soda work the controls, have your assistant tell you what the • Folding table control surfaces are doing. Repeat this test with the motor •... -
Page 14: Takeoff
When at a comfortable, safe altitude, throttle back to slow the model. This will give you more time to think and react. The ElectriStar EP Select should fly Make a copy of this identification tag and put it on or well at half or slightly less than half-throttle. - Page 15 Hobbico DC QuickPeak ™ Great Planes C.G. Precision Peak Charger Aircraft Balancer ™ Accurate balancing makes With QuickPeak, you can peak a trainers more stable, low-wings radio pack in as little as 25 more agile, and pylon planes minutes! Just set the switch for a move at maximum speed.
- Page 16 BUILDING NOTES Kit Purchased Date: _______________________ Date Construction Finished: _________________ Where Purchased:_________________________ Finished Weight: __________________________ Date Construction Started: __________________ Date of First Flight: ________________________ FLIGHT LOG...
Need help?
Do you have a question about the ElectriStar EP Select and is the answer not in the manual?
Questions and answers