Table of Contents
Advertisement
Quick Links
Download this manual
See also:
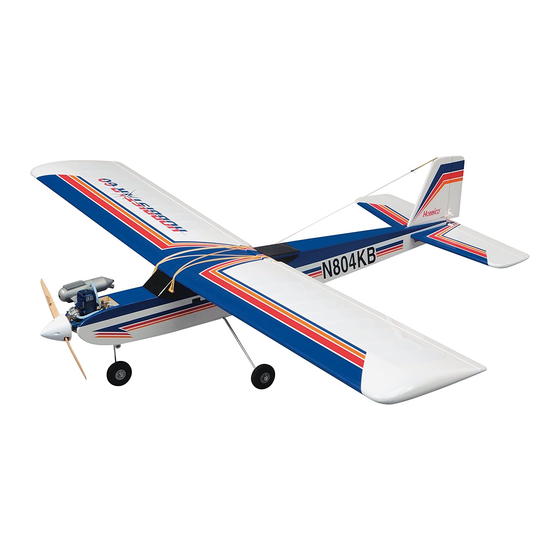
Instruction Manual
Wingspan: 71 in [1805mm]
Weight: 7–8 lb [3180–3630 g]
Length: 55 in [1400mm]
Wing Area: 888 sq in [57 dm 2 ]
Radio: Futaba
Skysport 6
®
Engine: O.S.
65LA
®
Wing Loading: 18–21 oz/sq ft [55–64 g/dm 2 ]
Hobbico
®
guarantees this kit to be free from defects in
both material and workmanship at the date of purchase.
This warranty does not cover any component parts
damaged by use or modification. In no case shall
Hobbico's liability exceed the original cost of the
purchased kit. Further, Hobbico reserves the right to
change or modify this warranty without notice.
In that Hobbico has no control over the final assembly or
material used for final assembly, no liability shall be
assumed nor accepted for any damage resulting from the
use by the user of the final user-assembled product. By
the act of using the user-assembled product, the user
accepts all resulting liability.
READ THIS MANUAL BEFORE
STARTING CONSTRUCTION.
IT CONTAINS IMPORTANT
INSTRUCTIONS AND WARNINGS
CONCERNING THE ASSEMBLY
AND USE OF THIS MODEL.
Entire Contents © Copyright 2004
ASSEMBLY INSTRUCTIONS
WARRANTY
If the buyer is not prepared to accept the liability
associated with the use of this product, the buyer is
advised to return this kit immediately in new and unused
condition to the place of purchase.
To
make
a
warranty
claim, send the defective
part or item to Hobby
Services at this address.
Include a letter stating your name, return shipping address, as
much contact information as possible (daytime telephone
number, fax number, e-mail address), a detailed description
of the problem and a photocopy of the purchase receipt.
Upon receipt of the package the problem will be evaluated
as quickly as possible.
™
Hobby Services
3002 N. Apollo Dr. Suite 1
Champaign IL 61822
USA
1610 Interstate Drive
Champaign, Illinois
(217) 398-8970 ext. 2
airsupport@hobbico.com
HCAZ3065 for HCAA2101 V1.0
Advertisement
Table of Contents

Related Manuals for Hobbico Hobbistar 60 Select


Summary of Contents for Hobbico Hobbistar 60 Select
-
Page 1: Assembly Instructions
3002 N. Apollo Dr. Suite 1 part or item to Hobby Champaign IL 61822 In that Hobbico has no control over the final assembly or Services at this address. material used for final assembly, no liability shall be Include a letter stating your name, return shipping address, as... -
Page 2: Table Of Contents
Table of Contents We urge you to join the AMA (Academy of Model INTRODUCTION ..... .2 Aeronautics) and a local R/C club. The AMA is the SAFETY PRECAUTIONS . -
Page 3: Kit Contents
Product Support. When reporting defective or missing parts, use the part names exactly as they are written in the Kit Contents list. Hobbico Product Support • 3002 N Apollo Drive, Suite 1 • Champaign, IL 61822 Telephone: (217) 398-8970, ext. 2 • Fax: (217) 398-7721 E-mail: airsupport@hobbico.com... -
Page 4: Ordering Replacement Parts
HCAA3122 ..Tail Set ..Hobby Supplier HCAA3123 . .Landing Gear . . .Hobby Supplier To locate a hobby dealer, visit the Hobbico web site at HCAA3124 ..Decal Set ..Hobby Supplier www.hobbico.com. -
Page 5: Preparations
Preparations 3. Insert the 7 x 120mm hardwood dowels into the holes at the front and rear of the fuselage center. Upon inspection of your airplane you may find that the covering has a few wrinkles. These can be easily removed with a modeling iron. - Page 6 6. Insert the vertical fin into the slot in the back of the fuselage. The metal rods should pass through the holes in the stab and fuselage. 8. Install the nylon clevis into the outer hole of the control horn and secure it by sliding the silicone clevis keeper over the clevis.
-
Page 7: Assemble The Wing
Assemble the Wing Here are two things you might consider to make a stronger, longer-lasting wing assembly. Both are very easy but do require the use of glue. 1. Apply epoxy glue to the root rib of each wing half before sliding the wings together. Once the wings are pushed tightly against each other, install the metal wing joiner straps and 2.5 x 8mm screws. -
Page 8: Prepare The Model For Flying
“cycled” to get full capacity from the 2. Center the rudder and both ailerons the same way. batteries before using them. There are several good electronic cyclers available. The Hobbico Accu-Cycle ™ 3. Now that the rudder is centered, center the... -
Page 9: Check The Control Directions
CHECK THE CONTROL DIRECTIONS SET THE CONTROL THROWS The control throws are a measure of how far the flight controls (elevator, ailerons, rudder) move up Pull Stick Back (Down) and down (or from side to side). If the controls move too much, the plane will respond too quickly and be difficult to control. -
Page 10: Adjust The Throttle
More Movement Less Movement Moving the pushrod outward on the servo Carburetor Partially Open Carburetor Fully Closed arm results in more pushrod movement. 2. Observe the opening in the carburetor. If the To get more control surface movement, move the carburetor is fully closed, proceed to step 3. -
Page 11: Balance The Model
BALANCE THE MODEL More than any other factor, the C.G. (center of gravity, also referred to as the balance point) can have the greatest effect on how a model flies and may determine whether or not the first flight will be successful. -
Page 12: Identify Your Model
IDENTIFY YOUR MODEL Whether you fly at an R/C club or somewhere on your own, you should have your name, telephone number and address in or on your model so it can be identified and returned in case it lands somewhere away from the flying site. -
Page 13: Charge The Batteries
Flight Preparation CHECKLIST Flight preparation is to be done at the flying field. Now it's time to do a final check before taking the model to the field. Take the time to do these checks to make certain your model is ready to fly. IMPORTANT: Your radio control system transmits a signal on a certain frequency. -
Page 14: Range Check The Radio
RANGE CHECK THE RADIO Get help from an experienced pilot when learning to operate engines. A range check must be performed before the first Use safety glasses when starting or running engines. flight of a new model. It is not necessary to do a range check before every flight (but is not a bad idea Do not run the engine in an area of loose gravel or to perform a range check before the first flight of... -
Page 15: Flying
3. Where established, I will abide by the safety CAUTION (THIS APPLIES TO ALL R/C AIRPLANES): rules for the flying site I use and I will not willfully If, while flying, you notice an alarming or unusual and deliberately fly my models in a careless, reckless sound such as a low-pitched “buzz,”... -
Page 16: Flight
while simultaneously using the left stick (rudder/nose Maintenance Tips wheel) to steer the model. Gain as much speed as the runway and flying site will practically allow before gently applying up elevator, lifting the model into the air. 1. After flying for the day, don't forget to use your fuel Be ready to make immediate corrections with the pump to drain excess fuel from the tank.
Need help?
Do you have a question about the Hobbistar 60 Select and is the answer not in the manual?
Questions and answers