Table of Contents
Advertisement
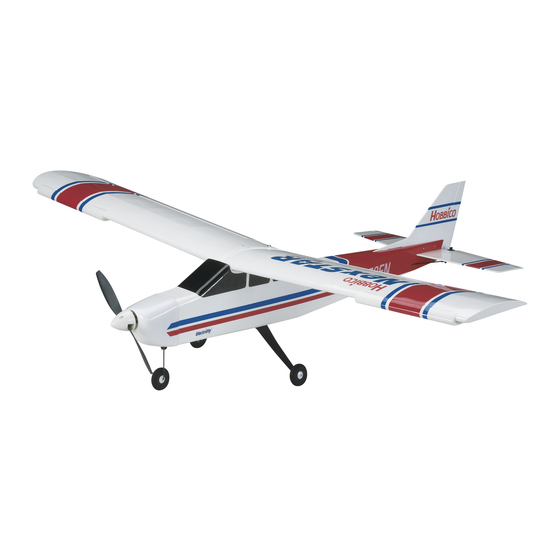
Wingspan: 68.5 in [1740mm]
Wing Area: 722 sq in [46.6dm
RTF Weight: 7.0 – 8.5 lb [3175 – 3855g]
Wing Loading: 22 – 27 oz/sq ft [68 – 83g/dm
Length: 56 in [1410mm]
Motor: RimFire 42-50-800
®
Hobbico
Model Manufacturing Co. guarantees this kit to be
free from defects in both material and workmanship at the date
of purchase. This warranty does not cover any component parts
damaged by use or modifi cation. In no case shall Hobbico's
liability exceed the original cost of the purchased kit. Further,
Hobbico reserves the right to change or modify this warranty
without notice.
In that Hobbico has no control over the fi nal assembly or material
used for fi nal assembly, no liability shall be assumed nor accepted
for any damage resulting from the use by the user of the fi nal
user-assembled product. By the act of using the user-assembled
product, the user accepts all resulting liability.
READ THROUGH THIS MANUAL BEFORE
STARTING CONSTRUCTION. IT CONTAINS
IMPORTANT INSTRUCTIONS AND WARNINGS
CONCERNING THE ASSEMBLY AND USE OF
THIS MODEL.
Entire Contents © Copyright 2007
INSTRUCTION MANUAL
2
]
2
]
WARRANTY
If the buyer is not prepared to accept the liability associated
with the use of this product, the buyer is advised to return
this kit immediately in new and unused condition to the place
of purchase.
To make a warranty claim send the defective part or item to Hobby
Services at the address below:
Include a letter stating your name, return shipping address, as
much contact information as possible (daytime telephone number,
fax number, e-mail address), a detailed description of the problem
and a photocopy of the purchase receipt. Upon receipt of the
package, the problem will be evaluated as quickly as possible.
Hobby Services
3002 N. Apollo Dr., Suite 1
Champaign, IL 61822 USA
Champaign, Illinois
(217) 398-8970, Ext 5
E-mail: airsupport@hobbico.com
HCAA0935 for HCAA09** V1.0
Advertisement
Table of Contents

Subscribe to Our Youtube Channel
Related Manuals for Hobbico NexSTAR EP


Summary of Contents for Hobbico NexSTAR EP
-
Page 1: Instruction Manual
Services at the address below: without notice. Hobby Services In that Hobbico has no control over the fi nal assembly or material 3002 N. Apollo Dr., Suite 1 used for fi nal assembly, no liability shall be assumed nor accepted Champaign, IL 61822 USA for any damage resulting from the use by the user of the fi... -
Page 2: Table Of Contents
™ Training Flaps ........6 PivotFlex ™ Wing Mounting System ......7 on learning to fl y. And after you’ve mastered the NexSTAR EP EasyAlign ™ Tail Mounting System ......7 Select, the motor, ESC (electronic speed control), and radio ™... -
Page 3: Specification & Description Changes
❏ IMPORTANT SAFETY PRECAUTIONS Hobbico Dual Peak NiMH Charger (HCAP0255) The NexSTAR EP Select can also be fl own with a 5-cell Lithium-Polymer (LiPo) set up. If you decide to go with LiPo • Your NexSTAR EP Select should not be considered a toy,... -
Page 4: Optional Supplies & Tools
Robart Super Stand II (ROBP1402) WARNING: The motor, ESC, and propeller supplied with the NexSTAR EP Select are a matched set and must be used together. ORDERING REPLACEMENT PARTS Should you choose to change one or more of the supplied components, you will void your warranty on this product. -
Page 5: Kit Inspection
Before starting to build, inspect the parts in this kit to make sure that they are of acceptable quality. If any parts are not of acceptable quality, or if you need assistance with assembly, contact: Hobbico Product Support Telephone: (217) 398-8970, ext. 5 Fax: (217) 398-7721 E-mail: airsupport@hobbico.com... -
Page 6: A Guide To The Nexstar Ep Select Features
The SpeedBrakes Training Flaps were designed to allow and aligns the wing bolt to the PivotFlex Wing Mounting your NexSTAR EP Select to fl y slower, reduce top speed and System. Joining the wing halves and wing installation on the shorten the landing approach. -
Page 7: Pivotflex Wing Mounting System
Landing Gear The wings of most trainers are mounted with rubber bands. To speed and simplify assembly, the NexSTAR EP Select This allows for some fl exibility in case of a hard landing. comes equipped with the SnapGear Landing Gear. This new... -
Page 8: Realflight Nexstar Edition
Once installed in your computer, RealFlight will allow you to use your own NexSTAR EP Select Radio Transmitter to fl y your NexSTAR EP Select on your computer. Simulators are great learning tools because they allow you to learn about airplane orientation, fl... -
Page 9: Assemble The Wing
Assemble the Wing For this section you will need: 1-Left Wing 2-4 x 25mm Screws 1-Right Wing 6-4 x 8mm Screws 1-360mm [14-1/8"] Steel 2-Fixed Flaps Wing Rod 1-Phillips Screwdriver 1-25mm [1"] Steel Alignment Pin ❏ 3. Use two 4 x 25mm screws to hold the two wing halves together. -
Page 10: Install The Landing Gear
until they are secured properly. Note: The legs may fi t a little loose inside the pocket. This is normal as long as you are not able to pull the landing gear legs out. Landing gear installation is complete. ❏ 6. -
Page 11: Install The Motor Batteries
fi n rod in front of the wood block in the fuselage slot. Warning: Never transport the NexSTAR EP Select with the batteries connected to the ESC. The only time the batteries should be connected is when you are preparing the model for fl... -
Page 12: Set-Up
SET-UP Now the plane is assembled, but there are a few things that must be done before it will be ready to fl y. You must carefully perform all of the following set-up procedures. If possible, have your fl ight instructor assist. If you have not yet charged the batteries, you may still proceed. - Page 13 steering should be in the third hole out on the servo arm, and to be aligned with the centerline of the stabilizer. If they are the aileron pushrods should be in the third hole out on the servo not aligned, disconnect the clevis from the elevator control arm.
-
Page 14: Check Control Surface Directions
Check Control Surface Directions The second thing that has to be done is to make sure all the control surfaces move in the correct direction. If any of the controls respond in the wrong direction, use the servo reversing function of the transmitter (consult the radio system instructions included with this kit), to reverse the servos connected to those controls. -
Page 15: Arming The Motor
fl ies, the control throws motor battery packs. must be checked. The ESC provided with the NexSTAR EP Select features a brake function that is useful for some aircraft, but is unnecessary for this Use a Great Planes AccuThrow ™... -
Page 16: Balance The Model (C.g. - Center Of Gravity)
Those mark the forward and aft C.G. limit for the that side is heavy. Balance the airplane by adding weight to the NexSTAR EP Select. The forward C.G. limit is 3-1/4" [83mm] other wing tip. An airplane that has been laterally balanced from the LE. - Page 17 fl ight they bank or pitch their airplanes to different attitudes and then they release stick pressure for the airplane to remain in the attitude they put it into. Your NexSTAR EP Select with PA-2 wants to fl y straight and level so in order to keep the airplane in a bank or in a pitch attitude, the stick needs to be held in a given position.
- Page 18 ❏ 3. Point the fl ashlight beam toward the back side of the PA-2 sensor. The elevator should move up. ❏ 5. Point the fl ashlight beam toward the left side of the PA-2 sensor. The left aileron should move up. Outdoor Test: ❏...
-
Page 19: Adjusting The Pa-2 From Your Transmitter
If any of the corrections made by the PA-2 are in the wrong ❏ 3. Point the nose of the airplane down. The elevator should direction, you will need to reverse the correction direction using move up. the corresponding reversing switches on the PA-2 module. Note: While the airplane is on the ground, the shadows underneath it will cause the PA-2 to add corrections to the control surfaces. -
Page 20: Final Preparations
Visit your local FLIGHT PREPARATIONS hobby dealer or see the Hobbico web site for a full selection, descriptions and pricing. Flight preparation is to be done at the fl ying fi eld. -
Page 21: Check The Controls
Check the Controls FLYING 1. Get the frequency clip from the frequency control board at Do not attempt to fl y by yourself. The Hobbico NexSTAR EP your fl ying site. Select has many features that make fl ying R/C an easier experience, but the help from an instructor is invaluable. -
Page 22: Flight
The NexSTAR EP MAINTENANCE TIPS Select includes a powerful brushless motor that will safely pull your airplane up at a 45° angle. If you have the PA-2 Pilot Assist Link on,... -
Page 23: After You Master The Nexstar Ep Select In Its Original Form
❏ 1. Disconnect the aileron servo pushrods from the aileron page 13). Without fl aps, the NexSTAR EP Select will try to pitch horns and remove the original aileron servo. down (nose down) until you re-trim it. Without the SpeedBrakes Training Flaps, the airplane will fl... -
Page 24: Flaperons
❏ 4. Connect both servos to the “Y” harness. Make sure the “Y” harness exits through the hole in the center of the wing. Use the strings pre-installed inside the wings to pull the servo leads. Install the aileron servos into the trays. ❏... -
Page 25: Dual Aileron Servos & Flaps
fl ap servo to another channel. Follow your radio manufacturer’s instructions to set-up the aileron mixing and fl aps in your NexSTAR EP Select. Follow these steps to activate your fl aps: 1. Plug the wire from the center servo that controls your fl aps to channel 6 of your receiver. -
Page 26: Ama Safety Code (Excerpts)
letters “INH” which tells you that the channel is “Inhibited” or 5) I will not knowingly operate my model within three miles “Inactive”, push the DATA INPUT lever forward and the “INH” of any pre-existing fl ying site except in accordance with the will turn to “ON”. -
Page 27: Nexstar Ep Select Success Guarantee
If for some reason, you fi nd the design and/or workmanship rate to get you started – and use light and sound cues to tell of the NexSTAR EP Select is not conducive to learning to fl y you when your pack is done. GPMM3015... - Page 28 BUILDING NOTES Kit Purchased Date: ___________________________ Date Construction Finished: _______________________ Where Purchased: ____________________________ Finished Weight: _______________________________ Date Construction Started: _____________________ Date of First Flight: ______________________________ FLIGHT LOG...
Need help?
Do you have a question about the NexSTAR EP and is the answer not in the manual?
Questions and answers