Table of Contents
Advertisement
Quick Links
Advertisement
Table of Contents

Related Manuals for Bay Tek Games Prize Hub Modular


Summary of Contents for Bay Tek Games Prize Hub Modular
-
Page 2: Factory Contact Information
FACTORY CONTACT INFORMATION BAY TEK GAMES INC. Pulaski Industrial Park 1077 East. Glenbrook Drive Pulaski, WI 54162 USA JOIN OUR SERVICE FIRST NETWORK! This free service is intended to keep you up to date on the latest game information, early notification of parts specials, pertinent technical bulletins, updates on retro fit parts, software upgrades, and much more. -
Page 3: Table Of Contents
CONTENTS FACTORY CONTACT INFORMATION ..................2 GAME SPECIFICATIONS ......................... 4 SAFETY PRECAUTIONS ........................4 WELCOME TO: PRIZE HUB ......................5 HOW TO USE PRIZE HUB ....................... 6 DISPENSING PRIZES ........................7 QUICK SET UP GUIDE ......................8-11 MAIN MENU .............................12 LOCATION SETUP .........................13 HONEYWELL BARCODE SCANNER REGISTRATION ..........14 EVOLVE SYSTEM REGISTRATION ..................15 CARD SYSTEM SETUP ......................16... -
Page 4: Game Specifications
GAME SPECIFICATIONS WEIGHT POWER REQUIREMENTS 100 to 120 220 to 240 NET WEIGHT 550 LBS. INPUT VOLTAGE RANGE SHIP WEIGHT 700 LBS. INPUT FREQUENCY 50 HZ 60 HZ RANGE DIMENSIONS MAX START UP OPERATING MODULE CURRENT CURRENT WIDTH 94.5” (4 modules) 0.9 AMPS @ 115 VAC 1.0 AMPS @115 VAC DEPTH... -
Page 5: Welcome To: Prize Hub
Your Friends at Bay Tek Games GAME INSPECTION Inspect the game for any damaged, loose, or missing parts. If damage is found, please contact your freight carrier first. Then, contact Bay Tek Games’ Service Department at 920.822.3951 or e-mail them at service@baytekgames.com for further assistance. -
Page 6: How To Use Prize Hub
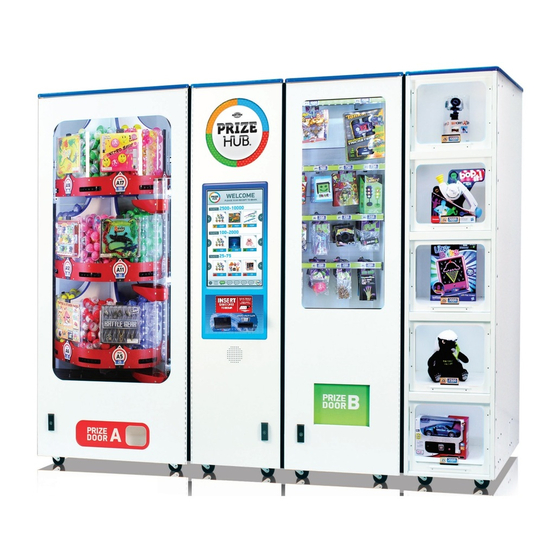
HOW TO USE PRIZE HUB Prize Hub’s versatile interface allows it to be placed in game rooms with Bay Tek’s Evolve coupon system, E-ticket cardswipe systems and classic ticket re- demption game rooms with Deltronic Ticket Eaters. Evolve System: Bay Tek’s Evolve System modifies the games in a fun center to print a single coupon with a QR code worth the amount of tickets won. -
Page 7: Dispensing Prizes
DISPENSING PRIZES After adding your tickets, shop through the touch- screen prize marketplace and select your prize. Capsules will dispense from the carousel in the Cap- sule Hub, into Prize Door A. Hanging prizes will vend from the Spindle Hub, into Prize Door B. -
Page 8: Quick Set Up Guide
QUICK SET UP GUIDE Locate the four bolt holes on each side of each hub. Some hubs may have spacer boards mounted to the sides; these prevent gaps between cabinets. Open all front doors and remove back doors to access the inside of the cabinets. - Page 9 QUICK SET UP GUIDE Feed the loose connector ends of the red, black and white power cables (connected to the control board of each hub) through the large holes near the floor of the cabinets. Link to the adjoining hubs, going from the outside hubs toward the Main hub.
- Page 10 QUICK SET UP GUIDE Feed the loose connector ends of the thin grey phone cable in each hub through the holes in all adjoining cabinets and into the Main hub. The phone cables are numbered as follows: Spindle Hub: CE1816 Capsule Hub: CE1811 Locker Hub: CE1811 Plug the phone cable ends into the appropriate...
- Page 11 QUICK SET UP GUIDE Replace the back doors of the cabinets. Plug the power cord into the socket in the back of the Main hub, and into a standard 110v electrical outlet. Switch the power strip inside the left door to ON. Continue on to page 12 to explore the Operator Menus...
-
Page 12: Main Menu
MAIN MENU Press the red menu button inside the front door of the cabinet and hold for 2 seconds. The Main Menu will come up on the monitor. Touch your selections to enter sub-menus. MENU QUICK ENTRY: Tap the upper corners of the monitor in the following order: L-R-L-R-L-R-L-R to enter the menu without opening the door. -
Page 13: Location Setup
LOCATION SETUP Touch Location Name to open the keypad. Enter your location name. Touch Location Phone to open the keypad. Enter your location phone number. Number of modules: should correspond with the number of prize-dispensing modules in your setup (do not count the control hub) Kiosk Interface should be set to how your Prize Hub accepts tickets;... -
Page 14: Honeywell Barcode Scanner Registration
BARCODE SCANNER PROGRAMMING If a failure were to occur that caused the scanner to become inoperable, follow these steps to re-register the scanner. Identify the brand of scanner included in your Prize Hub, then use the appropriate instruc- tions for that model. Honeywell Scanner Programming Tear out page 71 of this manual and cut on the dotted lines. -
Page 15: Evolve System Registration
® EVOLVE SYSTEM REGISTRATION Attach the Evolve box to your game following the directions included with the system. Open the Evolve box and locate the dip switches. Switch Dip 2 to on, and press the print button to create a registration code. Don’t forget to switch Dip 2 back to off after it prints. -
Page 16: Card System Setup
CARD SYSTEM SETUP Plug in an Ethernet cable to the port shown on the main board (inside the Main Hub), and out through the hole in the bottom of the cabinet. Mount your card reader according to manufactuer instructions, and plug the Ethernet cable into your card reader server. -
Page 17: Statistics
STATISTICS MENU The statistics menu will help you to determine how many tickets and prizes have been exchanged and their total value, as well as which prizes are popular. Reset Statistics: Clears all stats in this menu to 0, with the exception of the NR (non-resettable) page (3/3) Tickets Total: Total number of incoming tickets... -
Page 18: History
HISTORY MENU The history menu is a complete record of the unit’s transactions. View earlier history reports by touching Next Page. -
Page 19: Diagnostics
DIAGNOSTICS MENU The Diagnostics Menu allows testing of capule and spindle dispensers and prize lockers, as well as the prize chute sensors. Touch “Test Dispense” to open the key pad to test individual prize mechanisms by entering their locations. -
Page 20: Prize Menu
PRIZE MENU The Prize Menu allows you to look through the im- ages of the prizes loaded in your machine. Touching “Select NEXT Location” will bring you through the capusules first, then the spindles, then lockers. Touching Restore All Default Pictures twice will set the prize images back to the generic letter-number location designations. -
Page 21: Loading Prize Images
LOADING PRIZE IMAGES Insert a USB stick with prize images (.jpg files) into the USB port shown, inside the front door of the Prize Hub. Prize image files should be no larger than 600 KB, with an ideal size of 590 x 590 pix- els square. -
Page 22: Advertising Menu
ADVERTISING MENU The Prize Hub allows for several full-screen ads to be displayed at set intervals while the machine is in attract mode. To load advertisments, go into the advertising menu and touch the icon to upload a new ad from a USB stick. -
Page 23: Ticket Menu
TICKET MENU The ticket menu allows the adding of tickets without scanning or swiping them onto the machine. This comes in handy if coupons get too crumpled to scan or something else prevents the user from adding their tickets. Any “comped” tickets will appear in both the statistics and the history menus to track their use. -
Page 24: Backup & Restore Menu
BACKUP AND RESTORE MENU This menu allows users to save Prize Hub data onto a USB stick. The information is placed into a text file, which can then be printed from any computer. The data of up to 25 different Prize Hubs can be downloaded to a single USB, assuming each unit is named uniquely in the Location Setup menu. -
Page 25: Loading Capsule Prizes
LOADING CAPSULE PRIZES Open the capsule cabinet door. Rotate the capsule tree to the desired position by turning it slowly. The bins are identified by the stickers on the plexiglass; the location is always to the right side of the location markers. Dump capsules into the hoppers with the shovel provided. -
Page 26: Loading Spindle Prizes
LOADING SPINDLE PRIZES Open the front door of the display case and slide the ticket value bars up and out of their rests. Set aside. Remove the safety rods by turning CLOCKWISE. Hang prizes on spindles. To avoid time-out dispense failures, try to place the prizes no more than 3-4 turns apart. -
Page 27: Loading Locker Prizes
LOADING LOCKER PRIZES Open the main hub door and enter the menu. Enter the Diagnostics menu and touch Test Dispense to bring up the keypad. Key in the locations of the prize doors to unlock them. Lift up on the doors and place prizes inside. The sole- noids will automatically lock after 30 seconds. -
Page 28: Prize Specifications
PRIZE SPECIFICATIONS Prize Hub Factory Default Prize Specs FULL MODULAR UNIT CAPSULES 1980 2" CAPSULES* SPINDLES ROWS 1-3: 36~168 8" 5" TOP ROW 6~28 11" 10" LOCKERS 10.5" 14" 13.5" TOTAL UNIT CAPACITY: 2027 (MIN) - 2181 (MAX) * THE CAPSULE MECHANISM IS COMPATIBLE WITH 2" ACORN CAPSULES, ROUND CAPSULES, EGG CAPSULES, FOAM BALLS, SUPER BALLS AND CAPSULES FILLED WITH CANDY ** SPINDLE CAPACITY VARIES BY PRIZE DEPTH *** PRIZE COST IS BASED ON A 50% TO 0%... -
Page 29: How To: Load Printer Paper
HOW TO: LOAD PRINTER PAPER Remove the plastic disk and the empty paper core from the spool holder. Slide a new roll of paper onto the spool and replace the plastic disk. Feed the end of the paper into the opening until it grabs and begins to feed through the printer. -
Page 30: Marquee Installation
MARQUEE INSTALLATION GUIDE Tools Needed: Extra person Drill with #2 square bit Unpackage the marquee and locate the hardware packet; set aside. Team-lift the marquee onto the top of the Prize Hub. One person will have to hold the marquee up while the other directs them to center it. -
Page 31: Side Decal Placement
SIDE DECAL PLACEMENT 8.0” 20.75”... -
Page 32: Circuit Board Pinouts & Guides
CIRCUIT BOARD PINOUTS SPINDLE HUB BOARD (AACB1803) CAPSULE HUB BOARD (AACB1803) AACB1803 AACB1803 MAIN HUB BOARD (AACB1800) LOCKER HUB BOARD (AACB1803) AACB1800 AACB1803... - Page 33 CIRCUIT BOARD PINOUT GUIDES MAIN HUB MARQUEE LIGHT 1 MARQUEE LIGHT 2 MARQUEE LIGHT 3 MARQUEE LIGHT 4 +12v +12v PX13 MENU BUTTON PX14 +12V CAPSULE HUB A5CB1803 PINOUT +12V +12V +12V +12V +12V +12V TIER 1 CAPSULE BIN MOTOR TIER 2 CAPSULE BIN MOTOR TIER 3 CAPSULE BIN MOTOR ENGAGE MOTOR...
- Page 34 CIRCUIT BOARD PINOUT GUIDES SPINDLE HUB +12V +12V +12V +12V +12V +12V +12V +12V +12V +12V +12V +12V SPINDLE 1 Q16-B SPINDLE 13 SPINDLE 2 Q16-A SPINDLE 14 SPINDLE 3 Q15-B SPINDLE 4 Q15-A Q14-B Q14-A +12V +12V +12V PRIZE CHUTE MOTOR SENSOR +12V +12V PRIZE CHUTE MOTOR ENABLE...
-
Page 35: Wiriing Diagrams
MAIN HUB WIRING DIAGRAM A5CE1800 Power IN from Communication to Power Supply Motherboard Optional Locker Unit # 2 To Locker Unit AACE1800 AACE1811 Optional Capsule Unit # 2 AACB1800 To Capsule Unit AACE1801 AACE1811 Optional Spindle Unit # 2 To Spindle Unit Menu Button AACE1816 AAPB2700... - Page 36 CAPSULE HUB WIRING DIAGRAM Carousal Engage Pivot Home Sensor Sensor AACB4401 AACB4401 A5SW7000 AAMO1800 AACE1812 Top Capsule AACE1814 Motor LED lights on front door AACE1812 AAMO1800 AACE1812 Middle Capsule Motor Capsule Drop Sensor AACB4401 AACE1812 AACE1812 AACE1814 AAMO1800 Bottom Capsule Motor Stepper Power In...
- Page 37 SPINDLE HUB WIRING DIAGRAM Top Row 1 Spindles AACE1822 To AACB1800 Board Communication to Controller Board Row 2 Note: All Spindles are Spindles Part # AADSPZ010 AACE1816 AACE1822 Row 3 All Dips Off Spindles LED Blinks 1 Time AACB1803 AACE1821 Bottom Row 4 Spindles AACE1823...
- Page 38 LOCKER HUB WIRING DIAGRAM AACE1806 LED Lights AACE1809 A5SW3000 Locker Door Switch A5SO5050 AACE1807 Locker Solenoid Locker Door # 5 AACE1806 LED Lights A5SW3000 Locker Door Switch A5SO5050 AACE1807 Locker Solenoid AACE1809 Locker Door # 4 AACE1809 AACE1806 LED Lights A5SW3000 Locker Door Switch AACE1809...
- Page 39 AC/ POWER SUPPLY WIRING DIAGRAM Power Out to each Module AACE1805 Power Supply Cable Power Out to each Module Power Supply AACE1805 A5PS1008 Power Supply Cable Hard Drive A5HD1800 Power Supply Hard Drive Cable Com Cable 12 VDC Power to Printer AACE1824 Touchscreen Monitor...
- Page 40 MOTHERBOARD WIRING DIAGRAM A5CE1801 USB Access Point Connects to Motherboard AAMB7 to load pictures USB Scanner Connects to Motherboard for communication. A5SC1800 Scanner USB Cable to Printer A5CORD14 A5PRTH002 USB Printer A5MO1800 Touchscreen Monitor VGA Cable to Monitor USB Com Cable for Touchscreen Note: Make sure paper is loaded with...
-
Page 41: Troubleshooting Guide
TROUBLESHOOTING GUIDE CAUTION Be aware of the possibility for electrostatic discharge (ESD) when working inside the Prize Hub. Ground yourself or keep clear of the main boards to avoid shock and/or damage to the electronics. Troubleshooting Strategy Use common sense and a systematic method of troubleshooting to determine the exact problem, probable cause and remedy. - Page 42 MAIN HUB TROUBLESHOOTING GUIDE Troubleshooting Chart Problem Probable Cause Remedy Check wall outlet Unplugged No power to the game. Reset power strip breaker switch or building Circuit breaker tripped No lights on at all. circuit breaker Power strip faulty (Power Supply not ON) Change plug position, replace if needed (AACE1817) Power supply unplugged...
- Page 43 MAIN HUB TROUBLESHOOTING GUIDE Troubleshooting Chart Problem Probable Cause Remedy Monitor shows “No Boot Device” on screen. Re-Boot game to see if AAMB7 problem still exists. Power game down, wait 10 seconds, then power Check power supply connection to hard drive game ON to reset.
- Page 44 MAIN HUB TROUBLESHOOTING GUIDE Troubleshooting Chart Problem Probable Cause Remedy USB Connector unplugged Verify connector at monitor and motherboard Touchscreen does not work. Problem can be monitor or Re-Boot game to see if prob- motherboard. lem still exists. Replace A5MO1800 & AAMB7 Power game down, wait 10 AAMB7...
- Page 45 MAIN HUB TROUBLESHOOTING GUIDE Troubleshooting Chart Problem Probable Cause Remedy Prize Unavailable on screen There are many reasons this Please refer to “Prize Unavailable Message” may show up on monitor. in troubleshooting section. Either .jpg or .bmp format File name is not recognized. Does not load picture files Use all small lower case letters in file name.
- Page 46 MAIN HUB TROUBLESHOOTING GUIDE PRIZE UNAVAILABLE MESSAGE Prize Unavailable will show for a number of reasons: A.) Location is actually empty of prizes. B.) Prize dispensing malfunction. C.) Prize jam. D.) Stock Quantity is set too low. E.) Motor/Sensor self test failed at power on. F.) Entire row of prizes unavailable.
- Page 47 MAIN HUB TROUBLESHOOTING GUIDE PRIZE UNAVAILABLE MESSAGE Spindle Capsule Main Locker Unit Unit Unit Unit D.) Stock Quantity is set too low. Enter Owner Menu and go to Prize Menu. There is a selection for “Stock Quantity” - If this is left at zero, the game will operate fine. It will dispense prizes until empty, but not know it’s empty until the prize is selected, and it times out.
- Page 48 MAIN HUB TROUBLESHOOTING GUIDE HUB NOT RECOGNIZED If Entire unit is not recognized by main hub, an entire row of prizes will show unavailable. Step # 1 - Ensure individual Unit is communicating to Main Hub Step # 2 - Refer to troubleshooting topics specific to a unit. Step # 1 Verify 12 volt DC power to unit.
- Page 49 MAIN HUB TROUBLESHOOTING GUIDE HUB NOT RECOGNIZED Step # 2 Troubleshooting topics specific to a unit. Spindle Unit Only: If the Prize Chute Sensors are blocked, dirty, or faulty - the Prize Hub will not allow any spindle prizes to be selected and will show the entire row of prizes as “Unavailable”.
- Page 50 MAIN HUB TROUBLESHOOTING GUIDE MONITOR/ MOTHERBOARD POWER SUPPLY DIAGNOSTICS 1.) Verify AC power to game. Check power strip in bottom front. The rocker switch should be illuminated. 2.) Power supply is mounted to wood platform under motherboard. Lift wood platform to access power supply. 3.) Check connection to power supply.
- Page 51 SPINDLE HUB TROUBLESHOOTING GUIDE Troubleshooting Chart Problem Probable Cause Remedy 12 Volt power comes from Verify main unit has 12 Volt lights. Verify 12 No lights on at all in Main Unit’s power supply. Volt jumper cables that feed 12 volts are Spindle Unit connected to Spindle Unit Disconnected, loose or...
- Page 52 SPINDLE HUB TROUBLESHOOTING GUIDE Troubleshooting Chart Problem Probable Cause Remedy The spindle will turn for 35 Screen stays locked on Refer to “Prize does not Drop” seconds while showing this troubleshooting section. “Dispensing Spindle” message. Check cables from spindle to Control Board If this shows longer, a spindle Replace if needed.
- Page 53 CAPSULE HUB TROUBLESHOOTING GUIDE Troubleshooting Chart Problem Probable Cause Remedy 12 Volt power comes from Verify main unit has 12 Volt lights. Verify 12 No lights on at all in Main Unit’s power supply. Volt jumper cables that feed 12 volts are Capsule Unit connected to Capsule Unit Disconnected, loose or...
- Page 54 CAPSULE HUB TROUBLESHOOTING GUIDE Troubleshooting Chart Problem Probable Cause Remedy Door Switch is Open Check switch operation, inspect connections on AACE1812 cable. Go to Diagnostics in Menu to “Module Status Information” - If it shows “Capsule Tree Door Carousel Opened” then replace AACB1803 board in unit. Motor is not turning At power ON, pivot motor will cycle to test home...
- Page 55 CAPSULE HUB TROUBLESHOOTING GUIDE Troubleshooting Chart Problem Probable Cause Remedy Screen stays locked on Carousel keeps turning until 2 Carousel Home sensor faulty. Refer to “Carousel Motor Always Turning or does not minute time out and then “Dispensing Capsule” slow down” troubleshooting section. gives Prize Dispense Failure Capsule motor is turning, but Refer to “Capsule does not drop”...
- Page 56 CAPSULE HUB TROUBLESHOOTING GUIDE Troubleshooting Chart Problem Probable Cause Remedy Capsules will hold 120 of the 2” capsules per capsule pie slice. Location is actually Once the pie slice is empty, it will show that prize unavailable. empty of prizes. Capsule carousel will slow down, stop, pivot motor moves dispens- Prize dispensing malfunction.
- Page 57 LOCKER HUB TROUBLESHOOTING GUIDE Troubleshooting Chart Problem Probable Cause Remedy 12 Volt power comes from Verify main unit has 12 Volt lights. Verify 12 Volt jumper ca- No lights on at Main Unit’s power supply. bles that feed 12 volts are connected to Locker Unit all in Locker Unit Disconnected, loose or...
- Page 58 LOCKER HUB TROUBLESHOOTING GUIDE Troubleshooting Chart Problem Probable Cause Remedy 12 Volt power comes from Verify main unit has 12 Volt lights. Verify 12 Volt jumper ca- No lights on at Main Unit’s power supply. bles that feed 12 volts are connected to Locker Unit all in Locker Unit Disconnected, loose or...
-
Page 59: Parts Lists
PARTS LIST PART # DESCRIPTION PART # DESCRIPTION MAIN HUB PARTS SPINDLE HUB PARTS A5BK6035 Light Bracket A5BK6035 Light Brackets A5CE1800 2' USB Cable A5HA1001 T-Handle A5FI9010 In Line Filter A5LK1001 Lock for T-Handle A5HA1001 T-Handle A5LK6000 Lock for Back Door A5LK1001 Lock for T-Handle A5ME1806... - Page 60 PARTS LIST PART # DESCRIPTION PART # DESCRIPTION CAPSULE HUB PARTS A5BK6035 Light Bracket, 3 per AACE1811 Capsule Unit Com Cable A5BKSW001 Switch Bracket, 1 per AACE1813 Capsule Unit Stepper Motor Cable A5BR1001 Bearing, 2 per AACE1814 Capsule Unit LED Light Cable A5CH1800 Chain, 88 Links Long AAMO1800...
- Page 61 MAIN HUB PARTS PICTURES AACE1800 AACE1801 AACE1802 AACE1803 AACE1804 AACE1805 AACE1817 AACE1824 A5CORD5 A5CORD12 A5CEAU010 A5FI9010 A5PYTH0010 A5HLPR001 A5LK6000 A5HA1001 A5LK1001 AAPB2700 W5TM1117 1 2 3 4 A5PRTH002 A5PS1008 AACE8811 AAMB7 AACB1800 A5MO1800 A5SC1800 A5HD1800...
- Page 62 SPINDLE HUB PARTS PICTURES AACE1816 AACE1818 AACE1819 AACE1820 AACE1821 AACE1822 AACE1823 AADSPZ010 A5DSPN010 AACB4402 A5LK6000 A5HA1001 A5LK1001 AACB1803 W5TM1117 A5ME4407-WHITE...
- Page 63 CAPSULE HUB PARTS PICTURES AACE1811 AACE1812 AACB4401 AAMO6901 AASW7000 A5LK6000 A5HA1001 A5LK1001 AACB1803 W5TM1117 LOCKER HUB PARTS PICTURES AACE1806 AACE1807 AACE1808 AACE1809 AACE1810 AACE1811 A5SO5050 A5SP9107 A5LK6000 A5HA1001 A5LK1001 AACB1803 W5TM1117...
-
Page 64: Security Package
SECURITY PACKAGE Bay Tek offers a security hasp package for Prize Hub’s back doors. The hasps are mounted on each door with 1/4” bolts, washers and lock nuts. The holes must be drilled out; there are markers to assist with placement. A padlock (not included) can then be inserted into the holes, securing the back doors more forcibly than with basic locks alone. -
Page 65: Statistics Records
WEEKLY STATISTICS RECORDS DATE: ITEM COST FAILS 2" Capsules: Spindles: 1000 1500 Large Prize Locker : 2000 2500 3000 5000 10000 Download a statistics spreadsheet @ baytekgames.com... -
Page 66: Maintenance Log
MAINTENANCE LOG If repairs are necessary, it is good practice to keep a log of repairs done and parts ordered. The chart below will assist you in tracking your game’s maintenance. DATE MAINTENANCE PERFORMED PARTS ORDERED INITIALS... -
Page 67: Technical Support
Bay Tek games. Many of our games share the same main-board electronics. This means you can buy one set of spare electronics to support many of your Bay Tek games. Spare boards allow you to get your game up and running the quickest and provide you a valuable troubleshooting option. Call our... -
Page 68: Warranty
WARRANTY Bay Tek Games warrants to the original purchaser that all game components will be free of defects in workmanship and materials for a period of 6 months from the date of purchase. If you fill out the registration card in the cashbox of the game, Bay Tek will add another 3 months to your warranty, free of charge. -
Page 69: Certificate Of Compliance
CERTIFICATE OF COMPLIANCE... -
Page 71: Honeywell Scanner Registration Codes
HONEYWELL SCANNER CODES Follow the directions on page 14 to reconfigure your scanner. CODE 1 / 5 CODE 2 CODE 3 CODE 4... -
Page 73: Zebex Scanner Registration Codes
ZEBEX SCANNER CODES Follow the directions on page 14 to reconfigure your scanner. CODE 1 CODE 2 CODE 3 CODE 4 NUMBER CODES...
Need help?
Do you have a question about the Prize Hub Modular and is the answer not in the manual?
Questions and answers