Table of Contents
Advertisement
Advertisement
Table of Contents

Subscribe to Our Youtube Channel
Related Manuals for Bay Tek Games TICKET MONSTER


Summary of Contents for Bay Tek Games TICKET MONSTER
-
Page 2: Factory Contact Information
FACTORY CONTACT INFORMATION BAY TEK GAMES INC. Pulaski Industrial Park 1077 East. Glenbrook Drive Pulaski, WI 54162 USA JOIN OUR SERVICE FIRST NETWORK! This free service is intended to keep you up to date on the latest game information, early notification of parts specials, pertinent technical bulletins, updates on retro fit parts, software upgrades, and much more. -
Page 3: Table Of Contents
FACTORY CONTACT INFORMATION ......2 WELCOME TO: TICKET MONSTER ....... 4 HOW TO PLAY . -
Page 4: Welcome To: Ticket Monster
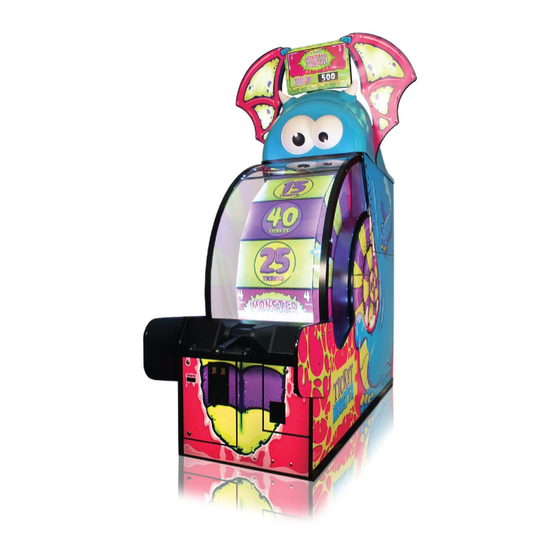
WELCOME TO: TICKET MONSTER Congratulations on your Ticket Monster purchase! Larger than life and not-so-creepy, Ticket Monster is sure to roll in scary big revenues! With a progressive jackpot, fresh theme and brightly colored cabinet, Ticket Monster will lure in players from across the room. -
Page 5: How To Play
HOW TO PLAY Lift up on the handle and push it down hard. Roll the monster’s tongue around. Win tickets where the arrow points. Land on the Jackpot space to win scary big tickets! -
Page 6: Specifications
GAME SPECIFICATIONS POWER REQUIREMENTS WEIGHT INPUT VOLTAGE 100 to 120 220 to 240 NET WEIGHT 1000 LBS RANGE INPUT FREQUENCY SHIP WEIGHT 1200 LBS 50 HZ 60 HZ RANGE DIMENSIONS MAX START UP OPERATING WIDTH 32” CURRENT CURRENT 3 AMPS @ 115 VAC 0.7 AMPS @ 115 VAC DEPTH 90”... -
Page 7: Setup Guide
SET UP GUIDE Place the wood “sled” on top of the cabinet, lining up the holes and making sure the black power cable, monitor VGA cable, and grey phone cable with splitter jumper feed through to the top without getting pinched. Secure the monitor mount sled to the cabinet with the included hex bolts, split washers and washers into the 4 holes shown using a 7/16”... - Page 8 SET UP GUIDE, CONT. Attach the wings with bolts, washers, and nylon nuts and a 9/16” ratchet socket and wrench. The wings should pivot at the bolts, opening wide enough to fit the blue plastic head in between. Plug in the wing cables to the jumper on the grey phone cable.
- Page 9 SET UP GUIDE, CONT. Push the wings inward, sliding in front of the brackets on the monitor. Secure the brackets to the wings with included silver screws. Plug the power and VGA cables into the monitor. Plug the power cable from the cashbox into the line filter on the back of the game and into a standard electrical outlet.
-
Page 10: Opening The Wheel Window
SET UP GUIDE, CONT. Attach the side guards with the included bolts, washers, split washers and lock nuts; 4 bolts in each side. OPENING THE WHEEL WINDOW On occasion, it will be neccessary to clean the in- sides of the windows, which requires access to the inner wheel area of the game. -
Page 11: Main Menu Functions
MAIN MENU The menu buttons are located inside the left front door. Press MENU BUTTON to access the main menu. Scroll through the menu with the MENU BUTTON. Make selections with the MENU SELECT button. The main menu will appear on the monitor. If the angle of view makes menu options slightly hard to see, we recommend dimming the ambient lighting to better see the monitor. - Page 12 MAIN MENU GAME SETTINGS Reset Tickets Clears all tickets waiting to be paid out Reset Credits Clears all credits on the game Credits per Game $5 bill bonus: 6 plays for $5 3 plays for $5 Game Volume Adjusts the volume of the game while coined up and playing Attract Volume Adjusts the volume of the game while in attract mode Ticket Pattern...
-
Page 13: Ticket Patterns
TICKET PATTERNS PATTERN 1 PATTERN 2 PATTERN 3 PATTERN 4 PATTERN 5 DEFAULT MONSTER MONSTER MONSTER MONSTER MONSTER JACKPOT JACKPOT JACKPOT JACKPOT JACKPOT 32-35 50-53 60-63 14-17 74-77 TICKETS/GAME TICKETS/GAME TICKETS/GAME TICKETS/GAME TICKETS/GAME... - Page 14 MAIN MENU, CONT. DIAGNOSTICS Door Open Warning Indicates when any of the 5 access doors is open Software Version Indicates which version of software is installed on the game Total Credits Indicates how many credits are available on the game Tickets Left to Dispense Indicates number of tickets waiting to pay out Wheel Position...
-
Page 15: Key Components
KEY COMPONENTS Wheel Encoder Sensor (AACB1901) Located inside left side access door. I/O Board (AACB1900) Located inside left front door. Motherboard (AAMB8) Located inside right front door. Includes software hard drive (A5HD1800) and RAM (A5CB1904). Software Hard Drive (A5HD1800) Located in a SATA port on the Motherboard. -
Page 16: Motherboard Pinout
MAINBOARD PINOUT (MB8) SOFTWARE HARD DRIVE FROM FROM POWER POWER SUPPLY SUPPLY RAM (A5CB1904) VGA TO MONITOR AUDIO... -
Page 17: Aux Board Pinout
AUX BOARD PINOUT (A5CB1900) TO DOOR AUDIO SAFETY SWITCHES FROM TO SPEAKERS POWER SUPPLY TO MENU/ SELECT BUTTONS TO LOW TIX SWITCH TO COIN DOOR TO DBA TO ENCODER TO MOTOR TO SOLENOID TO COUNTERS TO WING LIGHTS LEFT TICKET TRAY RIGHT TICKET TRAY... -
Page 18: How To: Calibrate Encoder Sensor
HOW TO: CALIBRATE ENCODER SENSOR The Encoder Sensor communicates the position of the wheel in comparison to the orange arrow, telling the game how many tickets the player has won. There is a small margin between scoring spaces that allows for slight miscalibration of the encoder sensor. If the arrow lands between spaces, the game will always award the player with the higher ticket value. -
Page 19: How To: Adjust Brake
HOW TO: ADJUST BRAKE Wheel Coast Time is determined by how long the wheel spins before it comes to a complete stop. Long coast time increases the time per game, while a short coast time makes the game quicker. The higher the number, the longer the wheel coasts; the ideal coast time is between 30 and 40. Adjusting this number periodically will prevent skilled players from sharking the game. -
Page 20: How To: Remove Handle
HOW TO: REMOVE HANDLE Tools Needed: 1/2” Socket & rachet 1/2” Wrench Located on the underside of the metal front panel, there is a bolt, split washer, and locknut holding the handle into the square pipe attached to the linkage. Remove the bolt by turning the rachet on the locknut and holding the bolt still with the wrench. -
Page 21: Door Open Error
DOOR OPEN ERROR Ticket Monster is equipped with safety switches inside every door. If a door is open, the wheel will not engage and the motor will not spin the wheel. An error will appear on the monitor if the game reads that a door is open. -
Page 22: Puppy Video Wizard Error
PUPPY VIDEO WIZARD ERROR If the monitor has been replaced or reset, a Puppy Video Wizard will appear on the screen at power up. The settings will have to be reset and saved before the game can be played. Puppy Video Wizard screen will appear. Open the front door of the cabinet and plug a PS/2 keyboard into the purple port on the motherboard. -
Page 23: Power Supply Diagnostics
POWER SUPPLY DIAGNOSTICS 1.) Verify AC power to front of game. Check power strip in bottom front of game for light ON inside rocker switch. If light is not ON, remove back panel of cabinet and check AC power in and Power Strip in that location. -
Page 24: Troubleshooting Guide
TROUBLESHOOTING GUIDE Troubleshooting Strategy Use a systematic method of troubleshooting to determine the exact problem, probable cause and remedy to your specific problem. Use the process of elimination to identify the faulty component. Always check for the simple and obvious solutions first, such as unplugged cables, loose or broken wires, bad sensors, and components that are bent, stuck, pinched or jammed. - Page 25 TROUBLESHOOTING GUIDE PROBLEM PROBABLE CAUSE REMEDY Check the connections from the Cable problem jumper cable (AACE1620) to the power supply Both Large POWER IN cable connection sides are Reseat connector with motherboard is loose See “power supply diagnostics” on Faulty power supply page 21 Wheel lights Check the cables from the light strip...
- Page 26 TROUBLESHOOTING GUIDE PROBLEM PROBABLE CAUSE REMEDY 12 volt power connector unplugged Reseat connector on motherboard (A) Monitor VGA cable unplugged (B) Reseat connector Large power connector unplugged Reseat connector on motherboard (C) Faulty/loose RAM (D) Reinsert RAM stick See “power supply diagnostics” on Faulty power supply (E) page 21 Shows...
- Page 27 TROUBLESHOOTING GUIDE PROBLEM PROBABLE CAUSE REMEDY Remove fish head Remove wood blocks holding monitor Monitor issues; in place Too bright, too dim, Monitor settings out of adjustment Take the monitor out of the wood blurry, etc. frame Use buttons to adjust settings Inputs not working;...
- Page 28 TROUBLESHOOTING GUIDE PROBLEM PROBABLE CAUSE REMEDY Game set to “abondon game” under the player timeout option in the Change setting to “motor assist” game menu Change setting to “motor assist”, Game displaying “motor watchdog power down for 10 seconds and error”...
- Page 29 TROUBLESHOOTING GUIDE PROBLEM PROBABLE CAUSE REMEDY Brake assembly is loose or broken Adjust the brake or replace it Solenoid assembly is faulty or broken, causing the wheel to spin Replace the wheel engaging solenoid Wheel spins at any time continuously Spin motor reads 12 volts at all Faulty I/O board, replace if needed times;...
- Page 30 TROUBLESHOOTING GUIDE PROBLEM PROBABLE CAUSE REMEDY Inspect solenoid to make sure it’s Solenoid is always on, Jammed solenoid working properly allowing the wheel to Look for missing springs; replace spin at any time. Missing or broken springs assembly if needed (AASO1450) During attract mode, Inspect phone cables;...
- Page 31 TROUBLESHOOTING GUIDE PROBABLE CAUSE REMEDY Game scores while wheel Weak encoder sensor Replace encoder sensor (AACB1901) is still spinning Brake too loose; game sees wheel Game dispenses tickets spinning after coinup and scores as Tighten the brake. See page 17 upon coin up if it were played Make sure player assist is not set to...
- Page 32 TROUBLESHOOTING GUIDE PROBLEM PROBABLE CAUSE REMEDY Winning value should be displayed on Game is not registering a win the monitor; see page 32 for encoder sensor troubleshooting Make sure the game is not reading Close all doors; inspect and replace Tickets not dispensing an open door door switches if necessary...
-
Page 33: Maintenance Log
MAINTENANCE LOG If repairs are necessary, it is good practice to keep a log of repairs done and parts ordered. The chart below will assist you in tracking your game’s maintenance. DATE MAINTENANCE PERFORMED PARTS ORDERED INITIALS... -
Page 34: Technical Support
Bay Tek games. Many of our games share the same main-board electronics. This means you can buy one set of spare electronics to support many of your Bay Tek games. Spare boards allow you to get your game up and running the quickest and provide you a valuable troubleshooting option. Call our... -
Page 35: Warranty
WARRANTY Bay Tek Games warrants to the original purchaser that all game components will be free of defects in workmanship and materials for a period of 6 months from the date of purchase. If you fill out the registration card in the cashbox of the game, Bay Tek will add another 3 months to your warranty, free of charge. -
Page 36: Compliance Certificate
CERTIFICATE OF COMPLIANCE COMPLIANCE CERTIFICATION TESTING IN PROGRESS...
Need help?
Do you have a question about the TICKET MONSTER and is the answer not in the manual?
Questions and answers