Table of Contents
Advertisement
Quick Links
Advertisement
Table of Contents

Related Manuals for tayco Halifax


Summary of Contents for tayco Halifax
- Page 1 Halifax installation guide January 2021...
- Page 2 for more information, contact Installation Service toll free I 1.800.675.4092 Mon - Fri I 8:30 am – 5:00 pm EST...
-
Page 3: Table Of Contents
Table of Contents General Instructions 1|03 Installation Checklist ........................ 1 Care and Maintenance ......................2 Application Guide ........................3 Desking 4|32 AV Unit Mounted Video Table w/ V-Leg ................... 4 Low Credenza Mounted Desk, A-Leg ..................7 Low Credenza Mounted Desk, A-Leg w/ Short Gable ............. 13 A-leg Cover with Wire/Cable Pass Through ................ -
Page 4: Installation Checklist
This information is necessary when requesting for product replacement and shipping claims. 2. Unpack products in the general order of installation (refer to Installation Sequence). WASTE MANAGEMENT 1. Establish a trash removal area separate from the product staging area. January 2021 Halifax Page 1... -
Page 5: Care And Maintenance
Magic®, both manufactured by Magic American Corporation. Painted Metals Tayco’s painted metal products are powder-paint-coated. To clean these products, use a damp cloth, using only a small amount of lukewarm water if necessary. Dry with a clean a dry cloth. To avoid scratching and damaging the painted surface, do not use hard bristled brushes or abrasive. -
Page 6: Application Guide
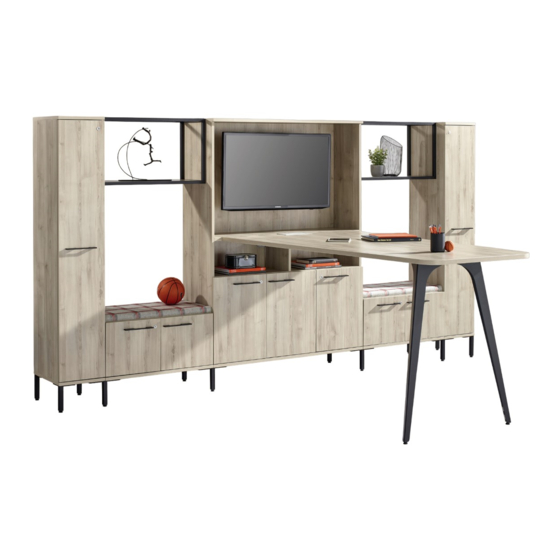
SINGLE STORAGE UNIT 4 STORAGE UNITS 2 STORAGE UNITS 5 STORAGE UNITS 3 STORAGE UNITS LEGEND: SINGLE STORAGE LEG SHARED STORAGE LEG STORAGE UNITS W/ INTEGRATION BOX January 2021 Halifax Page 3... -
Page 7: Av Unit Mounted Video Table W/ V-Leg
#10 x 1" Pan Pre-drilled holes Head Screws, (Figure 2). Figure 1 Continued on the next page >> Pilot Hole WORKSURFACE V-LEG TABLE SUPPORT BEAM Figure 2 8540-0789_SCREW Drill Robertson # 2 #10 X 1" Pan Head Screw January 2021 Halifax Page 4... - Page 8 Continued on the next page >> WORKSURFACE FLUSH PLATE Figure 4 AV UNIT MOUNTED VIDEO TABLE AV STORAGE UNIT Tools & Hardware Needed 8540-0789_SCREW Drill Robertson # 2 Tape Measure Torpedo Level #10 X 1" Pan Head Screw January 2021 Halifax Page 5...
- Page 9 Figure 5 POWER GROMMET Figure 6 WIRE GUIDE PLASTIC COVER W/ MAGNETS Tools & Hardware Needed 8540-0789_SCREW Drill Robertson # 2 Tape Measure Torpedo Level #10 X 1" Pan Head Screw January 2021 Halifax Page 6...
-
Page 10: Low Credenza Mounted Desk, A-Leg
(Figure 2). Continued on the next page >> Figure 1 WORKSURFACE A-LEG Figure 2 #10 X 1” PAN HEAD SCREW TABLE SUPPORT BEAM 8540-0789_SCREW Drill Robertson # 2 #10 X 1" Pan Head Screw January 2021 Halifax Page 7... - Page 11 TABLE SUPPORT BEAM 1/4-20 x 5/8", TRUSS QUAD SCREW Figure 4 Tools & Hardware Needed 8540-0535 8540-0789_SCREW Drill Robertson # 2 Tape Measure 1/4-20 x 5/8", Truss #10 x 1" Pan Head Quad Screw Screw January 2021 Halifax Page 8...
- Page 12 Continued on the next page >> WORKSURFACE CANTILEVER BRACKET Figure 6 #8 x 5/8, PAN QUADREX DRIVE SCREW MODESTY Tools & Hardware Needed 8540-0528 Drill Robertson # 2 Tape Measure #8 x 5/8" Pan Head Screw January 2021 Halifax Page 9...
- Page 13 HUTCH BACK BOARD LOW CREDENZA GROMMET DESK SUPPORT BOX GALLERY WALL LOW CREDENZA STORAGE Figure 8 Tools & Hardware Needed 8540-0528 Drill Robertson # 2 Tape Measure Torpedo Level #8 x 5/8" Pan Head Screw January 2021 Halifax Page 10...
- Page 14 #8 x 5/8” PAN QUADREX DRIVE SCREW DESK SUPPORT BOX LOW CREDENZA STORAGE WIRES/CABLES Figure 10 Tools & Hardware Needed 8540-0528 Drill Robertson # 2 Tape Measure Torpedo Level #8 x 5/8" Pan Head Screw January 2021 Halifax Page 11...
- Page 15 A-leg Cover Installation. Set the grommet into the grommet hole, (Figure 11). Figure 11 A-LEG COVER GROMMET Tools & Hardware Needed 8540-0789_SCREW Drill Robertson # 2 Tape Measure Torpedo Level #10 X 1" Pan Head Screw January 2021 Halifax Page 12...
-
Page 16: Low Credenza Mounted Desk, A-Leg W/ Short Gable
(Figure 2). Continued on the next page >> Figure 1 WORKSURFACE A-LEG Figure 2 #10 X 1” PAN HEAD SCREW TABLE SUPPORT BEAM 8540-0789_SCREW Drill Robertson # 2 #10 X 1" Pan Head Screw January 2021 Halifax Page 13... - Page 17 TABLE SUPPORT BEAM 1/4-20 x 5/8", TRUSS QUAD SCREW Figure 4 Tools & Hardware Needed 8540-0535 8540-0789_SCREW Drill Robertson # 2 Tape Measure 1/4-20 x 5/8", Truss #10 x 1" Pan Head Quad Screw Screw January 2021 Halifax Page 14...
- Page 18 Continued on the next page >> WORKSURFACE CANTILEVER BRACKET Figure 6 #8 x 5/8, PAN QUADREX DRIVE SCREW MODESTY Tools & Hardware Needed 8540-0528 Drill Robertson # 2 Tape Measure #8 x 5/8" Quadrex Drive Screw January 2021 Halifax Page 15...
- Page 19 #8 x 5/8, PAN QUADREX DRIVE SCREW TOP VIEW WOODEN DOWEL Figure 8 SHORT GABLE LOW CREDENZA GROMMET Figure 9 CREDENZA GROMMET DESK SUPPORT BOX 8540-0528 8540-0770_Dowel Drill Robertson # 2 Torpedo Level #8 x 5/8” Pan QD Wooden Dowel Screw January 2021 Halifax Page 16...
- Page 20 DESK SUPPORT BOX Figure 11 WIRES/CABLES MENDING PLATE #10 X 11/16" OVAL HEAD SCREW Tools & Hardware Needed 8540-0545 MENDPLATE-BLK Drill Robertson # 2 Tape Measure Torpedo Level #10 x 11/16", Oval Mending Plate Head Screw January 2021 Halifax Page 17...
- Page 21 #8 X 5/8, PAN QUADREX DRIVE SCREW LOW CREDENZA STORAGE DESK SUPPORT BOX Figure 13 CREDENZA GROMMET A-LEG COVER Tools & Hardware Needed 8540-0528 Drill Robertson # 2 Tape Measure Torpedo Level #8 x 5/8" Quadrex Drive Screw January 2021 Halifax Page 18...
-
Page 22: A-Leg Cover With Wire/Cable Pass Through
Insert the A-leg guide into the slotted hole of A-leg cover, (Figure 2). Continued on the next page >> Figure 1 TABLE SUPPORT BEAM A-LEG A-LEG COVER A-LEG GUIDE Figure 2 Tools & Hardware Needed January 2021 Halifax Page 19... - Page 23 Attach the A-leg cover using #10 x 1” Pan Head Screw, (Figure 3). Figure 3 A-LEG COVER #10 X 1” PAN HEAD SCREW Tools & Hardware Needed 8540-0789 Drill Robertson # 2 #10 X 1" Pan Head Screw January 2021 Halifax Page 20...
-
Page 24: V-Leg Cover & Wire Guide
Stick and peel the cable clamp in underside of surface, (Figure 2). Continued on the next page >> Figure 1 SURFACE V-LEG WIRE/CABLE CABLE CLAMP, R STYLE Figure 2 8540-1350 Drill Robertson # 2 Cable Clamp, R- Style January 2021 Halifax Page 21... - Page 25 Position the wire guide and stick it to V- leg, (Figure 4). Figure 3 V-LEG PLASTICE COVER WIRE GUIDE, V-LEG SEATED TABLE Figure 4 8540-1299 8485-0036 Plastic Cover for V- Wire Guide, V-leg Seated Table January 2021 Halifax Page 22...
- Page 26 #10 x 1” Pan Head Screw, (Figure 5). Figure 5 SURFACE WIRE GUIDE, V-LEG SEATED TABLE #10 X 1” PAN HEAD SCREW, SQ 8540-0789 8540-1350 Drill Robertson # 2 #10 X 1" Pan Head Cable Clamp, R- Screw Style January 2021 Halifax Page 23...
-
Page 27: Integration Box Height Adjustable Table (Hat)
Continued on the next page >> STORAGE UNIT 1 HAT INTEGRATION BOX #10 X 3/4” PAN HEAD SCREW Figure 2 Tools & Hardware Needed 8540-1013 Right Angle Drill Philips Bit Torpedo Level #10-3/4" Pan Head Screw January 2021 Halifax Page 24... - Page 28 #10 X 11/16” OVAL HEAD, SQ DRIVE SIDE END BOX Tools & Hardware Needed MENDPLATE-BLK 8540-0545 Right Angle Drill Robertson # 2 Torpedo Level 5/8 X 1-3/4” #10 x 11/16", Oval Mending Plate Head Screw January 2021 Halifax Page 25...
- Page 29 Figure 7 #8 X 5/8", FLAT HEAD SCREW, QUADREX HAT SKIRT Tools & Hardware Needed 8540-1347 8540-0605 Drill Robertson # 2 Phillips Bit 3/8-16 x 3/4”, Flat #10 x 5/8", Flat Head Hex Screw Head Screw January 2021 Halifax Page 26...
- Page 30 #10 X 11/16” OVAL HEAD, SQ DRIVE Figure 9 HAT LEG “U” MOUNTING BRACKET TOP COVER, HAT INTEGRATION BOX Tools & Hardware Needed 8485-0029 8540-0545 Drill Robertson # 2 HAT Leg U Mounting #10 x 11/16", Oval Bracket Head Screw January 2021 Halifax Page 27...
- Page 31 Continued on the next page >> Figure 10 E-CHAIN CARRIER ASSEMBLY BRACKET Figure 11 #10 X 1” PAN HEAD SCREWS, SQ E-CHAIN CABLE CARRIER Tools & Hardware Needed 8540-0789 Drill Robertson # 2 #10 X 1" Pan Head Screw January 2021 Halifax Page 28...
- Page 32 HAT integration box, (Figure 13). Continued on the next page >> Figure 12 HAT LEG “U” MOUNTING BRACKET E-CHAIN CABLE CARRIER DOUBLE SIDED GLUE WHITE FOAM TAPE CABLE/WIRE Figure 13 Tools & Hardware Needed January 2021 Halifax Page 29...
- Page 33 Install top cover with the dowels by inserting the dowels into the holes of HAT integration box, (Figure 15). Figure 14 TOP COVER, HAT INTEGRATION BOX WOODEN DOWEL Figure 15 Tools & Hardware Needed 8540-0770_Dowel Wooden Dowel Rubber Mallet January 2021 Halifax Page 30...
- Page 34 Place the 3/4” Square Tubing on top backside of HAT integration box, (Figure 16). Note: Tube required if no gallery wall. HAT INTEGRATION BOX TOP COVER, HAT INTEGRATION BOX 3/4” SQUARE TUBING Figure 16 Tools & Hardware Needed January 2021 Halifax Page 31...
-
Page 35: Height Adjustable Table (Hat) Skirt
(Figure 2). Continued on the next page >> Figure 1 HAT – SKIRT CAMFIX COMBI DOWEL Figure 2 SURFACE Tools & Hardware Needed 8540-1278 Philips Screw Driver CamFix Combi Dowel January 2021 Halifax Page 32... - Page 36 HAT skirt, (Figure 4). Continued on the next page >> Figure 3 HAT – SKIRT COMBI DOWEL Figure 4 DRIVE-N-LOCK PLASTIC EXPANSION DOWEL SURFACE Tools & Hardware Needed 8540-1344 Rubber Mallet Plastic Expansion Dowel January 2021 Halifax Page 33...
- Page 37 Turn the CamFix to smoothly lock the gable and surface together, (Figure 5). Stick fast caps to the exposed CamFix, (Figure 6). Figure 5 FAST CAP Figure 6 SURFACE Tools & Hardware Needed Fast Cap January 2021 Halifax Page 34...
-
Page 38: Gallery Wall And Accent Shelf
(Figure 2). Continued on the next page >> Figure 2 6” X 6” GALLERY WALL FIXTURE GALLERY WALL BACKER BOTTOM Tools & Hardware Needed Drill 3/16” Diam. Drill Bit Carpenter’s Level Tape Measure January 2021 Halifax Page 35... - Page 39 Figure 5 GALLERY WALL BACKER BOTTOM TOGGLE BOLT #8 X 2" FLAT HEAD SCREWS Tools & Hardware Needed Drill Tape Measure Robertson # 2 1/2” Ø Drill Bit Toggle Bolt #8 X 2” Flat Head Screw January 2021 Halifax Page 36...
- Page 40 Figure 7 GALLERY WALL BACKER BOTTOM WOODEN DOWEL GALLERY WALL BACKER TOP Tools & Hardware Needed 8540-0631 8540-0770_Dowel Drill Robertson # 2 Tape Measure 3/16” Diam. Drill Bit 1/2” Diam. Drill Bit Toggle Bolt Wooden Dowel January 2021 Halifax Page 37...
- Page 41 #8 X 2” FLAT HEAD SCREWS GALLERY WALL BACKER TOP GALLERY WALL FRONT STRIPLOX CLIP 50 PANEL CONNECTOR Figure 9 Tools & Hardware Needed 8540-1004 Drill Tape Measure Robertson # 2 #8 x 2” Flat Head Screw January 2021 Halifax Page 38...
- Page 42 GALLERY WALL FRONT JRN NUT ACCENT SHELF, GALLERY WALL MOUNTED JCB BOLT, 1/4-20 X 50MM Figure 11 Wooden Dowel Tools & Hardware Needed 8540-1273 8540-0991_JCB 8540-0770_Dowel Allen Key JRN Nut JCB Bolt, 1/4-20 X Wooden Dowel 50MM January 2021 Halifax Page 39...
-
Page 43: Metal Storage, For Under Hutch
METAL STORAGE 1 METAL STORAGE 2 #10 x 11/16” OVAL HEAD SCREW Figure 2 OVERHEAD STORAGE/HUTCH Tools & Hardware Needed 8540-0545 Drill Robertson # 2 Tape Measure #10 X 11/16" Oval Head Screw (5X) January 2021 Halifax Page 40... -
Page 44: Multi-Storage Unit
Continued on the next page >> STORAGE UNIT 1 SINGLE STORAGE LEG SHARED STORAGE LEG Figure 2 ADJUSTABLE GLIDE Tools & Hardware Needed 8540-0599 Drill Right Angle Drill Philips Bit Tape Measure Torpedo Level #10-3/4" Pan Head Screw January 2021 Halifax Page 41... - Page 45 STORAGE UNIT 1 SINGLE STORAGE LEG SHARED STORAGE LEG Figure 4 STORAGE UNIT 2 STORAGE UNIT 3 Tools & Hardware Needed 8540-0599 Drill Right Angle Drill Philips Bit Tape Measure Torpedo Level #10-3/4" Pan Head Screw January 2021 Halifax Page 42...
- Page 46 (Figure 5). Note: The storage unit should be precisely level prior to joining other storage unit. Figure 5 STORAGE UNIT 1 STORAGE UNIT 2 STORAGE UNIT 3 Tools & Hardware Needed Torpedo Level January 2021 Halifax Page 43...
-
Page 47: Pet Side Access Locker
(Figure 1). 0.72" SCREW LOCATION 1.50" SCREW LOCATION Continued on the next page >> 1.50" SCREW LOCATION CENTER LINE 0.72" SCREW LOCATION SCREW LOCATION 1.50" SCREW LOCATION 0.72" Figure 1 Tools & Hardware Needed Tape Measure January 2021 Halifax Page 44... - Page 48 Figure 2 PET SIDE ACCESS LOCKER PET TACKBOARD #8 X 1-1/8” FLAT HEAD SCREW Figure 3 Tools & Hardware Needed 8540-1351 8545-XXXX Drill Phillips Bit #8X 1-1/8" Flat Dome Screw Cap Parallel Jaw Clamp Head Screw January 2021 Halifax Page 45...
- Page 49 PET Side Access Locker Attach the Fast Caps provided, (Figure 4). Figure 4 FAST CAP Tools & Hardware Needed 8544-_-XXXX Fast Cap January 2021 Halifax Page 46...
- Page 50 01/21...
Need help?
Do you have a question about the Halifax and is the answer not in the manual?
Questions and answers