Subscribe to Our Youtube Channel
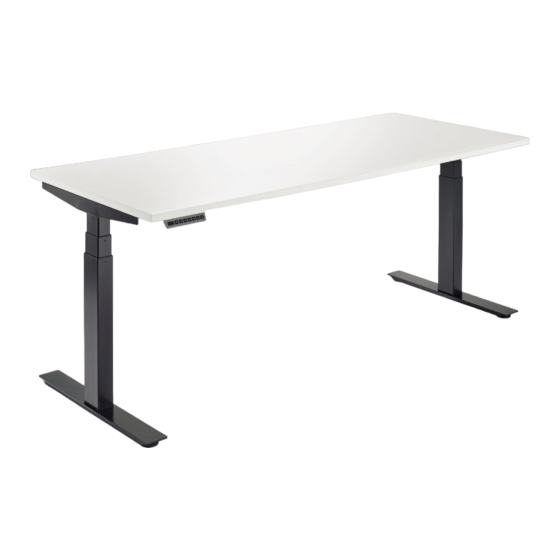
Summary of Contents for tayco Height Adjustable Tables
- Page 1 Height Adjustable Tables installation guide F O R M O R E I N F O R M A T I O N , C O N T A C T I N S T A L L A T I O N S E R V I C E Mon-Fri •...
- Page 2 Table of Contents General Instructions 1|03 Table of Contents ........................1 Installation Checklist ........................ 2 Care and Maintenance ......................3 Height Adjustable Table Base Installation 4|17 2-Legged Height Adjustable Base Installation ................4 3-Legged Height Adjustable Base Installation ................. 11 1 Height adjustable table APRIL 2019...
-
Page 3: Installation Checklist
Installation Checklist Perform a site inspection prior to the installation date to check existing site conditions and identify constraints and limitations that could possibly cause delays or problems during the actual installation. SITE ACCESSIBILITY 1. Verify existing loading facilities and proximity of loading dock to staging area. 2. -
Page 4: Care And Maintenance
Magic®, both manufactured by Magic American Corporation. Painted Metals Tayco’s painted metal products are powder-paint-coated. To clean these products, use a damp cloth, using only a small amount of lukewarm water if necessary. Dry with a clean a dry cloth. To avoid scratching and damaging the painted surface, do not use hard bristled brushes or abrasive. - Page 5 2- legged height adjustable table base installation 1. Take the main frame out of the box and place it on a clean, solid surface or floor (Figure 1). For worksurface, 46 inches in length, go to step 2 and for worksurface 48 to 72 inches in length, proceed to step 6.
- Page 6 2- legged height adjustable table base installation (cont'd) Remove the channels by sliding them out (Figure 3). Insert the other channels provided by sliding them into the main frame (Figure 4) . FIGURE 3 FIGURE 4 5 Height adjustable table APRIL 2019...
- Page 7 2- legged height adjustable table base installation (cont'd) Put back the half of the main frame by sliding it into the channels (Figure 5). Put the main frame on the back side of the worksurface (Figure 6). FIGURE 5 FIGURE 6 6 Height adjustable table APRIL 2019...
- Page 8 2- legged height adjustable table base installation(cont'd) Install the top side frame to the main frame by inserting it into the main frame (Figure 7). Set the column straight, then tie up the screws inside the main frame (Figure 8). FIGURE 7 FIGURE 8 tools &...
- Page 9 2- legged height adjustable table base installation (cont'd) Install M6 x 15 machine screws using 5 mm allen wrench (Figure 9). 10. Adjust the width by aligning the holes of the side frame and pre-drilled holes of the worksurface with #10-24 x "...
- Page 10 2- legged height adjustable table base installation (cont'd) 11. Install the handset with 4 x 25 cross-head, then secure the worksurface with 5 x 20 cross-head screw (Figure 11). 12. Tie up the tailstock screws at the inner side of the main frame (Figure 12).
- Page 11 2- legged height adjustable table base installation (cont'd) 13. Install the foot with M10 x 35 machine screws using 5 mm allen screw wrench, then install the glides (Figure 14). 14. Flip over the table (Figure 15). FIGURE 14 CAUTION RESET THE DESK BEFORE Press the buttons at...
- Page 12 3-legged height adjustable table base installation Take the main frame out of the box and place it on a clean, solid surface or floor (Figure 1). Remove half of the main frame by sliding it out. Set it aside (Figure 2). FIGURE 1 FIGURE 2 11 Height adjustable table...
- Page 13 3-legged height adjustable table base installation (cont'd) Remove the existing channels by sliding them out (Figure 3). Identify and match the channel length with the worksurface width (Figure 4) . FIGURE 3 20.7 39.0 51.6 FIGURE 4 12 Height adjustable table APRIL 2019...
- Page 14 3-legged height adjustable table base installation (cont'd) Slide the channels inside, with the screw mount into the corner leg (Figure 5). Put the main frame on the back side of the worksurface (Figure 6). FIGURE 5 FIGURE 6 13 Height adjustable table APRIL 2019...
- Page 15 3-legged height adjustable table base installation (cont'd) Install the top side frame to the main frame by inserting it into the main frame (Figure 7). Set the column straight, then tie up the screws inside the main frame (Figure 8). FIGURE 7 FIGURE 8 tools &...
- Page 16 3-legged height adjustable table base installation (cont'd) Install M6 x 15 machine screw using 5 mm allen wrench (Figure 9). 10. Adjust the width by aligning the holes of the side frame and pre-drilled holes of the worksurface with #10-24 x "...
- Page 17 height adjustable corner table base installation (cont'd) 11. Install the handset with 4 x 25 cross-head, then secure the worksurface with 5 x 20 cross-head screw (Figure 12). 12. Tie up the tailstock screws at the inner side of the main frame (Figure 13).
- Page 18 height adjustable corner table base installation (cont'd) 13. Install the foot with M10 x 35 machine screws using 5 mm allen screw wrench, then install the glides (Figure 14). 14. Flip over the table (Figure 15). FIGURE 14 CAUTION RESET THE DESK BEFORE Press the buttons at the same time for 3 seconds.


Need help?
Do you have a question about the Height Adjustable Tables and is the answer not in the manual?
Questions and answers