Table of Contents
Advertisement
Quick Links
Advertisement
Table of Contents

Related Manuals for Moneris Moneris Go


Summary of Contents for Moneris Moneris Go
- Page 1 Moneris Go® Setting up Your Terminal (September 2020)
-
Page 2: Table Of Contents
Set up an Admin user ............................6 Review common settings............................ 7 Sign in ................................. 9 Wireless Communication: 4G and Wi-Fi ...................... 10 Enroll in Merchant Direct® .......................... 11 Troubleshooting ............................12 Merchant support ............................13 Moneris Go®: Setting up Your Terminal... -
Page 3: What's In The Box
What’s in the box 1. Confirm you have received the required hardware. If not, contact Moneris. Moneris Go terminal Optional charging base USB Charging cable Receipt paper 2. Go to Hardware setup on page 3. Moneris Go®: Setting up Your Terminal... -
Page 4: Hardware Setup
5. Close the printer cover, and press down to snap it back into place so that the extended paper is held securely. 6. Turn the terminal over so that the screen is once again facing up. You are ready to print receipts and reports. Moneris Go®: Setting up Your Terminal... -
Page 5: Charge The Battery
Recommendations: You must use the exact power adaptor and cables provided by Moneris to work with the Moneris Go terminal and base. Failure to do so may affect the operability of, or cause damage to, the equipment. Always plug the charging cable into the power source last to avoid power surges. Use a power bar equipped with surge protection where possible. -
Page 6: Use The Charging Cable
2. Press and hold the power button for about 2 seconds until the screen illuminates. The terminal powers on. The hardware setup is complete. Continue to the next section Application setup. Moneris Go®: Setting up Your Terminal... -
Page 7: Application Setup
Application setup To set up Moneris Go quickly, simply respond to the prompts on screen. If you need help, follow the step-by- step instructions in each section below. 1. Tap Go. 2. Wait while the terminal connects to Moneris to obtain your account settings. -
Page 8: Review Common Settings
5. Tap Go to begin configuring your Moneris Go application. Note: If you make any changes to these settings, those changes will be reflected on your other Moneris Go terminals. The settings for all of your Moneris Go terminals will be kept in sync. - Page 9 10 p.m. set it for 12 a.m., if you close at 2 a.m. set it for 4 a.m. If you are open 24 hours, choose a logical break point like a shift change. When finished, tap Next. Moneris Go®: Setting up Your Terminal...
-
Page 10: Sign In
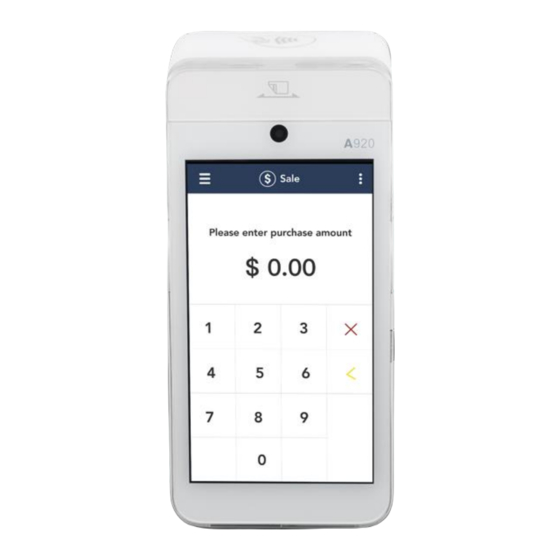
11. The application displays the Sale screen. This is the default screen. You are ready to process your first sale. For instructions on using your terminal, visit moneris.com/en/support/devices/monerisgo to download the Using your terminal guide. Moneris Go®: Setting up Your Terminal... -
Page 11: Wireless Communication: 4G And Wi-Fi
The terminal uses long-range cellular communication (4G or 3G) to send and receive information to and from the Moneris host. The terminal communicates via 4G by default for faster communication, and uses 3G as a fallback where 4G is not available. -
Page 12: Enroll In Merchant Direct
Enroll in Merchant Direct® Merchant Direct is the Moneris online tool for accessing all of your merchant reports, including end-of-day reports. To sign up for Merchant Direct, follow these steps. Note: If you have already enrolled in Merchant Direct, you do not have to enroll again. -
Page 13: Troubleshooting
“4G” or “3G” in the status bar. 4. Check the signal strength (number of bars) of the connection. It is best to have at least 2 bars to communicate with Moneris. 5. Restart terminal. Press and hold the power button for about 2 seconds until a menu appears. -
Page 14: Merchant Support
Field Services provide assistance with your payment terminals. Can’t find what you are looking for? Call Moneris Customer Care (available 24/7) toll-free at 1-866-319-7450. We’ll be happy to help. You can also send us a secure message 24/7 by logging in to Merchant Direct® at moneris.com/mymerchantdirect. - Page 15 © 2020 Moneris Solutions Corporation, 3300 Bloor Street West, Toronto, Ontario, M8X 2X2. All Rights Reserved. This document shall not wholly or in part, in any form or by any means, electronic, mechanical, including photocopying, be reproduced or transmitted without the authorized consent of Moneris Solutions Corporation.
Need help?
Do you have a question about the Moneris Go and is the answer not in the manual?
Questions and answers