Table of Contents
Advertisement
Advertisement
Table of Contents

Related Manuals for Moneris Go Plus


Summary of Contents for Moneris Go Plus
- Page 1 Moneris® Go Plus Using Your Terminal (October 2022)
-
Page 2: Table Of Contents
Independent refund – card not present ......................39 Void ...................................40 Balance inquiry ..............................44 Receipts ..............................45 Customer copy ................................45 Merchant copy ................................45 Reprinting receipts ............................... 46 Purchase receipt example ............................47 Partial approval receipt ..............................47 Moneris® Go Plus: Using Your Terminal... -
Page 3: Setting Up Your Terminal
Merchant support ............................ 66 Setting up your terminal If you have not already set up your terminal hardware and software, refer to the Moneris® Go Plus Setting up Your Terminal guide at moneris.com/en/support/moneris-go/monerisgoplus. Note: No setup is required for cellular (4G) communication. It is enabled by default. -
Page 4: Moneris Go Plus
Label Hardware Function element Scans QR codes on a receipt to help you find a transaction to refund, void, or reprint receipts. Rear camera Connect the terminal with the optional charging base Metal contacts Moneris® Go Plus: Using Your Terminal... -
Page 5: On-Screen Buttons
Additional options icon Navigating the terminal Touch screen interaction Your Moneris Go Plus features a large color touch screen. To access a function displayed on screen (for example, a button, a menu, a field), simply use your finger to ... -
Page 6: The Main Menu
Manage users (page 56) Change General application settings (page 62) Sync terminal settings with Moneris (page 52) Sign out Sign out (page 7) of the terminal. Sign out at the end of the day and whenever your terminal is left unattended. -
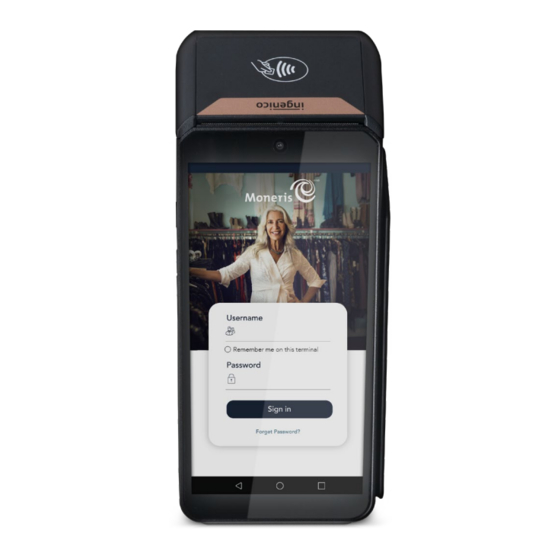
Page 7: Signing In
To ensure the security and integrity of your terminal, you must sign in before performing any transactions or other functions. 1. To sign in to Moneris Go Plus: a. Tap the Username field and enter your username. b. Tap Remember me on this terminal. The application will remember your username so that you don’t have to enter it the next time you sign in. -
Page 8: Signing Out
Signing out Sign out at the end of the day or whenever the terminal will be left unattended to prevent unauthorized transactions. 1. To sign out of Moneris Go Plus: a. Tap the Main menu ≡ icon. b. At the bottom of the menu, tap Sign out. -
Page 9: Wireless Communication: 4G And Wi-Fi
Wireless communication: 4G and Wi-Fi The Moneris Go Plus uses long-range cellular communication (4G or 3G) to send and receive information to and from the Moneris host. The terminal communicates via 4G by default for faster communication and uses 3G as a fallback where 4G is not available. -
Page 10: Battery Use
Optional communication base: Dock the terminal on the optional communication base. If needed, refer to the Moneris® Go Plus Setting up Your Terminal guide at moneris.com/en/support/moneris-go/monerisgoplus. Helpful hints Check the battery charge level (see icons below) before use. -
Page 11: Restart
2. Locate the power button on the left side of the terminal. Press the button until you see the menu on the right side of the screen. A screen appears with five options: Power off, Restart, Screenshot, Services and Base. 3. Tap Power off. The screen displays “Shutting down…” 4. The terminal powers off. Moneris® Go Plus: Using Your Terminal... -
Page 12: Card Entry Options
Scan The Moneris Gift Card program allows you to scan the bar code of a gift card as a method of entering the card information. Merchants who are not subscribed to the gift card program will not see the option to scan a card. -
Page 13: Transactions
To process financial transactions, follow these general guidelines. 1. Make sure you are connected to Moneris. Look for the presence of the Wi-Fi icons and check the signal strength indicator in the status bar at the top of the screen. If the Wi-Fi icons is not present, the terminal will not be able to process the transaction. -
Page 14: Purchase
Transaction settings (page 55). The label “Custom ID” will be replaced by your customized label (for example, Customer number). Tap the field, enter a value using the on-screen keyboard, then tap Go. To bypass the prompt, tap Go without entering a value. Moneris® Go Plus: Using Your Terminal... - Page 15 For more information on card entry options (page 11). Additional prompts may appear such as cashback and surcharge if these options are enabled under Transaction settings (page 55). Moneris® Go Plus: Using Your Terminal...
- Page 16 Receipt settings (page 53). 11. The customer selects a receipt format (or no receipt) by tapping one of the options on screen. If the customer chooses Text or Email, they are prompted to enter the appropriate information. Moneris® Go Plus: Using Your Terminal...
- Page 17 your records. 14. When the “Transaction Complete” prompt appears, tap OK to return to the default Purchase screen. 15. The default transaction screen appears. The application is ready to process your next transaction. Moneris® Go Plus: Using Your Terminal...
-
Page 18: Purchase - Card Not Present
4. Enter the purchase amount, then tap the OK key. Note: The order of these initial steps is flexible. You can enter the purchase amount first, or you can choose the method of card entry first. Both will work. Moneris® Go Plus: Using Your Terminal... - Page 19 6. Tap one of the available choices to indicate why you did not enter the CVV. 7. If tip entry is turned on, you can enter a tip amount as specified by the customer. To enable tip entry, refer to Tip settings (page 54). Moneris® Go Plus: Using Your Terminal...
- Page 20 If you selected Text or Email, enter the appropriate information. 10. The application prints receipts if requested. If you enabled merchant receipt printing, keep the merchant copy for your records. Moneris® Go Plus: Using Your Terminal...
- Page 21 11. The “Transaction Complete” prompt appears. Tap OK to return to the default Purchase screen. 12. The default transaction screen appears. The application is ready to process your next transaction. Moneris® Go Plus: Using Your Terminal...
-
Page 22: Purchase - Partial Approval
At the “Partial approval cancelled” message, tap OK to return to the default transaction screen. Moneris® Go Plus: Using Your Terminal... - Page 23 The customer enters their card (if applicable). b. If the tip prompt appears, the customer enters a tip or no tip. c. The customer selects a receipt format or no receipt. d. The customer passes the terminal back to you. Moneris® Go Plus: Using Your Terminal...
-
Page 24: Purchase - Cash
12. When the “Transaction Complete” screen appears, tap OK to return to the default transaction screen. To process a cash refund, refer to Refund (page 32). To process an independent cash refund, refer to Independent Refund (page 36). Moneris® Go Plus: Using Your Terminal... -
Page 25: Pre-Authorization
2. Tap the additional options The title of the screen changes from Purchase to Pre-authorization. 3. Use the on-screen numeric keypad to enter the amount you want to pre- authorize, then tap the OK Moneris® Go Plus: Using Your Terminal... - Page 26 For more information on Card entry options (page 11). 7. The “Processing, please wait” message appears. If the customer inserted a chip card, the message “Do not remove your card” also appears. Moneris® Go Plus: Using Your Terminal...
- Page 27 If the customer requested a printed receipt, give them the cardholder copy. If you enabled merchant receipt printing, keep the merchant copy for your records. 12. When the “Transaction Complete” prompt appears, tap OK to return to the default screen. Moneris® Go Plus: Using Your Terminal...
-
Page 28: Pre-Authorization - Card Not Present
4. When prompted, enter the credit card information using the on-screen keypad, then tap Confirm. 5. Follow the prompts on screen to process the pre-authorization. For a full set of instructions, refer to the Online User Manual for your Moneris Go Plus available at moneris.com/support. Moneris® Go Plus: Using Your Terminal... -
Page 29: Pre-Authorization - Completion Or Void
To complete the pre-auth, tap Complete, and proceed to step 4. To void the pre-auth, tap Void, then tap OK on the confirmation screen. Proceed to step 8 (Processing, please wait). Moneris® Go Plus: Using Your Terminal... - Page 30 6. Pass the terminal to your customer so they can respond to the customer prompts. 7. If tip entry is turned on, the customer enters a tip (or no tip). To enable tip entry, refer to Tip settings (page 54). Moneris® Go Plus: Using Your Terminal...
- Page 31 11. The application prints receipts if requested. If the customer requested a printed receipt, give them the cardholder copy. If you enabled merchant receipt printing, keep the merchant copy for your records. Moneris® Go Plus: Using Your Terminal...
- Page 32 12. When the “Transaction Complete” prompt appears, tap OK to return to the default transaction screen. 13. The default transaction screen appears. The application is ready to process the next transaction. Moneris® Go Plus: Using Your Terminal...
-
Page 33: Refund
Scan or Search (page 51). 3. The transaction details appear. Verify this is the right transaction, then tap Refund. < Otherwise, tap the Back icon in the title bar to go back to the previous screen. Moneris® Go Plus: Using Your Terminal... - Page 34 7. The refund total screen appears, prompting the customer to “Tap, insert, or swipe.” 8. The customer enters their card on the terminal. Depending on the type of card, they can tap, insert, or swipe it. For more information on Card entry options (page 11). Moneris® Go Plus: Using Your Terminal...
- Page 35 13. The application prints receipts if requested. If the customer requested a printed receipt, give them the cardholder copy. If you enabled merchant receipt printing, keep the merchant copy for your records. Moneris® Go Plus: Using Your Terminal...
- Page 36 14. When the “Transaction Complete” prompt appears, tap OK to return to the default transaction screen. 15. The default transaction screen appears. The application is ready to process your next transaction. Moneris® Go Plus: Using Your Terminal...
-
Page 37: Independent Refund
Refund. The title of the screen changes from Purchase to Refund. 3. If this is a cash independent refund, tap the card entry field (Tap, insert or swipe), tap Cash, and then tap Ok. Moneris® Go Plus: Using Your Terminal... - Page 38 7. The refund total screen appears, prompting the customer to “Tap, insert, or swipe.” 8. The customer enters their card on the terminal. Depending on the type of card, they can tap, insert, or swipe it. For more information on Card entry options (page 11). Moneris® Go Plus: Using Your Terminal...
- Page 39 13. The application prints receipts if requested. If the customer requested a printed receipt, give them the cardholder copy. If you enabled merchant receipt printing, keep the merchant copy for your records. Moneris® Go Plus: Using Your Terminal...
-
Page 40: Independent Refund - Card Not Present
4. When prompted, enter the credit card information using the on-screen keypad, then tap Confirm. 5. Follow the prompts on screen to complete the transaction. For a full set of instructions, refer to the Online User Manual for your Moneris Go Plus available at moneris.com/support. Moneris® Go Plus: Using Your Terminal... -
Page 41: Void
You can also tap Scan to scan the QR code from a receipt or tap Search to look for the transaction to be voided. For instructions, refer to Finding a transaction using Scan or Search (page 51). Moneris® Go Plus: Using Your Terminal... - Page 42 card, continue to step 6. Otherwise, skip to step 8. 6. As indicated on-screen, pass the terminal to the customer so they can enter their debit card and respond to any customer prompts. Moneris® Go Plus: Using Your Terminal...
- Page 43 The customer selects a receipt format (or no receipt) by tapping one of the options on screen. b. If the customer selected Text or Email, they are prompted to enter the appropriate information. Moneris® Go Plus: Using Your Terminal...
- Page 44 If you enabled merchant receipt printing, keep the merchant copy for your records. 12. When the “Transaction Complete” prompt appears, tap OK to return to the default screen. 13. The default transaction screen appears. The application is ready to process your next transaction. Moneris® Go Plus: Using Your Terminal...
-
Page 45: Balance Inquiry
OK. Enter the card number and CVV when prompted. Go to step 7. For Moneris gift cards only, you may tap Scan to scan the barcode located on the back of the card. Hold the gift card below the terminal so that the barcode is visible on the screen. -
Page 46: Receipts
Merchant action option Email No action required. Moneris does not store the customer's email address. This means the customer will have to enter their email address each time they wish to receive a receipt by email. Text No action required. -
Page 47: Reprinting Receipts
< 4. Tap the Back icon in the title bar to return to the previous screen. 5. Tap the Main menu icon ≡ and then tap Transactions to return to the default transaction screen. Moneris® Go Plus: Using Your Terminal... -
Page 48: Purchase Receipt Example
The card numbers on a receipt are masked except for the last 4 digits. Masking replaces a card’s numbers with asterisks (e.g., ************1234). The expiry date does not appear on any copy of any receipt. These measures help to prevent fraud. Moneris® Go Plus: Using Your Terminal... -
Page 49: Reports
Moneris Go Plus application on your terminal. Merchant Direct reporting In addition to viewing reports on your Moneris Go Plus, you can also view reports online by logging into Merchant Direct. (For enrolment instructions, refer to the Setting up Your Software guide at moneris.com/en/support/moneris-go/monerisgoplus) Merchant Direct allows you to view and download... - Page 50 Terminal, or Time and date plus User, to summarize all the transactions they completed. Users can access the report and the filters from any of your Moneris Go Plus terminals as long as the user has access to “View other users in reports” in their user role.
-
Page 51: Filtering Transactions On The Reports And End Of Day Screens
Note: Filters are automatically cleared when you navigate away from the Reports screen. When you return to Reports, you will see the default view, that is, all transactions for all users for all terminals for the current 24-hour period. Moneris® Go Plus: Using Your Terminal... -
Page 52: Finding A Transaction Using Scan Or Search
Tap any transaction on the list of search results to see more details. < If no transactions are found, tap the Back icon in the title bar to return to the Search screen. Moneris® Go Plus: Using Your Terminal... -
Page 53: Settings
General application: Change General application settings (page 62) Sync settings with Moneris. Tap Sync to synchronize all settings with Moneris. Changing your own password for low access users: If you do not have access to the Settings menu, and you want to change your own password, refer to Edit user (page 61). -
Page 54: Receipt Settings
Tap the minus ( – ) sign beside the field. or footer Edit a header or Tap the field you wish to edit. footer Note: You can drag a header or footer field to change its order on the receipt. Moneris® Go Plus: Using Your Terminal... -
Page 55: Tip Settings
3. When you are finished with the tip settings, tap Save. The application returns to the Settings menu. ≡ 4. To return to the default transaction screen, tap the Main menu icon, then tap Transactions. Moneris® Go Plus: Using Your Terminal... -
Page 56: Transaction Settings
Cashback: Enable this feature to offer customers cash back on debit card purchases (Interac, Debit Mastercard, and Visa Debit). To enable Cashback, tap the toggle. The other settings will appear. Moneris® Go Plus: Using Your Terminal... -
Page 57: User Management
Continue reading to understand how to manage users and user roles. Users When you received the terminal from Moneris and signed on for the first time, you created a new user. You were automatically assigned the Admin user role. You can now create new users and assign roles to them. - Page 58 4. In the Search field, enter a specific value, such as a username, a user’s first or last name, or even their role. a. The application displays all users that match your search terms. b. Tap on a user to display full details. Moneris® Go Plus: Using Your Terminal...
-
Page 59: User Roles
You can rename the High and Low user roles and change their permissions. If these two roles are not enough, you can also create new user roles to match the roles in your business. Moneris® Go Plus: Using Your Terminal... - Page 60 Tap the User role field and enter a name (for example, Middle). b. Tap the Description field and enter a short description (for example, Supervisors) to indicate who this role might be assigned to. This field is optional. Moneris® Go Plus: Using Your Terminal...
- Page 61 Transactions, Reports, and Settings. Tap the toggle beside each option to enable it as required for the new role. Review the screen images below. 7. Tap Save to save the new user role. Moneris® Go Plus: Using Your Terminal...
-
Page 62: Edit User - Changing Your Own Password
Refer to Users (page 56). b. Tap Save. The application returns to the Edit User screen. c. Tap Save. The application returns to the Main menu. Moneris® Go Plus: Using Your Terminal... -
Page 63: General Application Settings
2 a.m. set it for 4 a.m. If you are open 24 hours, choose a logical break point like a shift change. Recommendation: If you changed the Report reset time, contact Moneris to change your batch close time (usually set to 11 p.m.) to reflect your Report reset time. -
Page 64: End Of Day Process
Moneris will automatically close the batch each night usually at 11 p.m. Please contact Moneris if you need to change this time. If you change your batch close time, remember to change your Report reset time (page 62) so that your terminal reports, including your End of day report, will reflect your daily batch. -
Page 65: Troubleshooting
Troubleshooting Error messages In the table below, find the error message that appears on the terminal and try the solution. If the error message re-appears, contact Moneris Customer Care toll-free at 1-866-319-7450. Error message Problem and solution There may be a problem with the customer’s card. -
Page 66: Equipment Issues
Insert a new paper roll in the printer. If needed, refer to “Install the paper roll” in the Moneris® Go Plus Setting up Your Terminal guide at moneris.com/en/support/moneris-go/monerisgoplus Re-try the operation. If the error message appears again, contact Moneris. System error A communication error occurred. -
Page 67: Merchant Support
Field Services provide assistance with your payment terminals. Can’t find what you are looking for? Call Moneris Customer Care (available 24/7) toll-free at 1-866-319-7450. We’ll be happy to help. You can also send us a secure message 24/7 by logging in to Merchant Direct® at moneris.com/mymerchantdirect. - Page 68 All other marks or registered trade-marks are the property of their respective owners. © 2022 Moneris Solutions Corporation, 3300 Bloor Street West, Toronto, Ontario, M8X 2X2. All Rights Reserved. This document shall not wholly or in part, in any form or by any means, electronic, mechanical, including photocopying, be reproduced or transmitted without the authorized consent of Moneris Solutions Corporation.
Need help?
Do you have a question about the Go Plus and is the answer not in the manual?
Questions and answers