
Related Manuals for Moneris Go Plus


Summary of Contents for Moneris Go Plus
- Page 1 Moneris® Go Plus Integrated Getting Started Guide Documentation Version: 1.0 Documentation Date: September 21, 2023...
-
Page 2: Table Of Contents
Diagram of the back of the Moneris Go Plus ....................7 Connecting the charger to the Moneris Go Plus ................... 8 Connecting the optional charging base to the Moneris Go Plus ..............8 Communication ......................10 Preparing your firewall (Wi-Fi communication) ..................10 Configuring the Moneris Go Plus Integrated App ............ -
Page 3: Document Control
Document Control Rev. Date Summary of changes 21-September-2023 Moneris Go Plus Integrated Getting Started Guide Moneris Go Plus Integrated: Getting Started Guide... -
Page 4: Introduction
Introduction The Moneris Go Plus is a smart solution with cloud integration intended for your point-of-sale application. Use this guide to: Set up the hardware Configure the application and communication settings Synchronize the terminal with the Moneris host ... -
Page 5: Moneris Go Plus Hardware Checklist
Moneris terminal ID consisting of 8 characters beginning with A2. If anything is missing, contact your Moneris Client Consultant for assistance with ordering equipment and setting up the related test account(s). Moneris Go Plus hardware checklist Make sure you have received all the hardware required to install the terminal. - Page 6 Item Description Charging base Moneris Go Plus Integrated: Getting Started Guide...
-
Page 7: Installing The Hardware
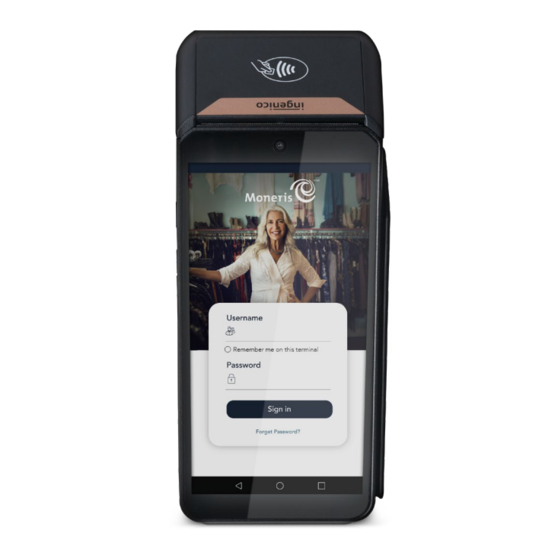
Installing the Hardware Diagram of the front of the Moneris Go Plus Use this diagram to get familiar with the interfaces and ports located in the front of the Moneris Go Plus. Label Hardware Element Function Printer Prints receipts and reports. -
Page 8: Connecting The Charger To The Moneris Go Plus
Continue charging the terminal during the rest of the setup procedures. Connecting the optional charging base to the Moneris Go Plus 5. Unfold the charging cable. Moneris Go Plus Integrated: Getting Started Guide... - Page 9 Wait for the battery charging icon to display. This indicates that the terminal is receiving power and the battery is charging. b. Continue charging the terminal during the rest of the setup procedures. Moneris Go Plus Integrated: Getting Started Guide...
-
Page 10: Communication
Communication To set up the Moneris Go Plus, the terminal must have internet access and be able to communicate with Moneris. This is made possible through the included SIM and cellular capabilities. If you wish to use Wi-Fi to connect the Moneris Go Plus to your network, you can do so during the application setup (4.0 Configuring the Moneris application). -
Page 11: Configuring The Moneris Go Plus Integrated App
Configuring the Moneris Go Plus Integrated App To use the Cloud or Direct integration mode, you need to download the Go Integrated application from the AppStore. The Go Launcher application can be used to select a default Moneris application to launch on start up. - Page 12 The application icon is now available on your terminal home screen. 5. You will need to work with your application provider to obtain instructions on how to configure and use the application. Moneris Go Plus Integrated: Getting Started Guide...
-
Page 13: Open The Launcher Application
Ensure the Go Integrated application is downloaded from the AppStore. 1. From the main screen on your terminal, locate the Launcher icon. 2. Wait while the sync process on your Moneris Go Plus terminal begins. 3. Proceed to next section Configure Cloud and Direct. - Page 14 3. Tap Go to begin configuring your Moneris Go application. 4. Tap English or Français to select language for the initial integrated setup. Note: This screen is used (by the technician) to setup the language for the initial integrated setup only.
- Page 15 5. Tap English or Français to select the language for the integrated Moneris Go Plus terminal to communicate with Moneris. 6. Select the communication settings: Operational mode: Choose between Direct or Cloud Note: The default option is Disabled. Direct will display Port default value of 1180 •...
- Page 16 7. Wait while the sync process begins to retrieve the Moneris Merchant ID. Note: If the sync process is not successful, “Account not activated” message appears to contact Moneris support. 8. Tap on the Merchant ID field. Enter your Merchant ID number received from TMS.
-
Page 17: Accessing Integrated App Settings
Accessing Integrated app settings Follow the instructions below to continue with the integrated mode. 1. From the integrated mode idle screen, swipe inward from the left side of the screen to access settings. Moneris Go Plus Integrated: Getting Started Guide... - Page 18 For Production: 212324 Note: passcodes will be modifiable in Go Portal in a future update 3. From this screen you can access the integrated app setup options to change your integration mode and more. Moneris Go Plus Integrated: Getting Started Guide...
-
Page 19: Enabling Wi-Fi
Enabling Wi-Fi This section explains how to enable Wi-Fi communication on the Moneris Go Plus as part of the software configuration. It follows on from the communication settings in step 6 above. When you tap Wi-Fi in the communication settings, the Android settings appear for Wi-Fi. -
Page 20: Setting Up And Using The Communication Base
Setting up and using the Communication Base Use the optional communication base (if you have it) when there is a weak cellular signal on your terminal. The communication base enables the terminal to communicate with Moneris using your Ethernet connectivity. - Page 21 Continue charging the terminal during the rest of the setup procedures. 6. Continue to How to pair the communication base with the terminal. Moneris Go Plus Integrated: Getting Started Guide...
- Page 22 3. The “Oops!” message may appear. Note: Message appears because there is no established connection. a. Ignore this message. b. Tap the white circle in the navigation bar at the bottom to go to the terminal home screen. Moneris Go Plus Integrated: Getting Started Guide...
- Page 23 5. Tap the Scanning Box located on the top right corner of the screen. a. Lift the terminal off the base. b. Locate the QR code on the back of the base. Moneris Go Plus Integrated: Getting Started Guide...
- Page 24 Scan the QR code using the terminal camera. Note: If the “Invalid barcode!” message appears, tap OK and retry. 7. When the “Connections Available” message appears, tap Pair base. The “Paring the base” popup appears. Moneris Go Plus Integrated: Getting Started Guide...
-
Page 25: Pair Multiple Terminals To One Base
It is best to use the terminal with the base it is paired with. Follow the instructions below to pair the next terminal. Moneris Go Plus Integrated: Getting Started Guide... - Page 26 The “No base can be found.” message may appear. 3. Tap the Scanning Box located on the top right corner of the screen. a. Lift the terminal off the base. b. Locate the QR code on the back of the base. Moneris Go Plus Integrated: Getting Started Guide...
- Page 27 Note: If the “Invalid barcode!” message appears, tap OK and retry. 5. When the “Connections Available” pop-up appears, tap Only use base wifi. Note: Terminal should automatically connect to “ING2.4G_XXXXXX”, this is the communication base. Moneris Go Plus Integrated: Getting Started Guide...
- Page 28 6. When the “Successfully connected to the base wifi.” Message appears, tap OK. Note: If the base Wi-Fi pairing was not successful, the following message will appear: Moneris Go Plus Integrated: Getting Started Guide...
-
Page 29: Maintenance And Care
1. Press and hold the <Power> button on the left side of the terminal for more than 2 seconds until the menu panel appears. 2. Press Restart. 3. The terminal will turn off and turn back on. Moneris Go Plus Integrated: Getting Started Guide... -
Page 30: Terminal Care And Cleaning
Apply water to the microfiber cloth so it is lightly damp and gently wipe down the terminal. Disinfecting After cleaning the terminal, it can be disinfected using a suitable alcohol-based wipe or a disinfectant applied to a microfiber cloth. Do not apply alcohol or disinfectant directly do the device. Moneris Go Plus Integrated: Getting Started Guide... -
Page 31: Troubleshooting
Troubleshooting This section lists possible issues that may occur while setting up your Moneris Go Plus terminal, together with suggested solutions. Issue Solution Touch screen is slow or Ensure other electronic devices are away from the terminal. unresponsive Confirm that the surface of the screen is free from liquids. -
Page 32: Merchant And Integrator Support
Merchant and Integrator Support To obtain support for the Moneris Go Plus unattended solution, follow these directions. Situation Directions You are an integrator developing Contact your assigned Client Consultant or Client Integration an integrated solution Specialist. You are a Merchant configuring a... - Page 33 © 2023 Moneris Solutions Corporation, 3300 Bloor Street West, Toronto, Ontario, M8X 2X2. All Rights Reserved. This document shall not wholly or in part, in any form or by any means, electronic, mechanical, including photocopying, be reproduced or transmitted without the authorized consent of Moneris Solutions Corporation.
Need help?
Do you have a question about the Go Plus and is the answer not in the manual?
Questions and answers