Moneris ICT250 User Manual
Hide thumbs
Also See for ICT250:
- Reference manual (64 pages) ,
- Getting starded manual (38 pages) ,
- Getting started manual (36 pages)
Table of Contents
Advertisement
Advertisement
Table of Contents

Related Manuals for Moneris ICT250


Summary of Contents for Moneris ICT250
- Page 1 Using Your Terminal Moneris iCT250 ® (01/14)
- Page 2 Need help? Call 1-866-319-7450 Record your Moneris merchant number here:...
-
Page 3: Table Of Contents
Contents Moneris iCT250 ....... . . Optional external PINpad ..... . . -
Page 4: Moneris Ict250
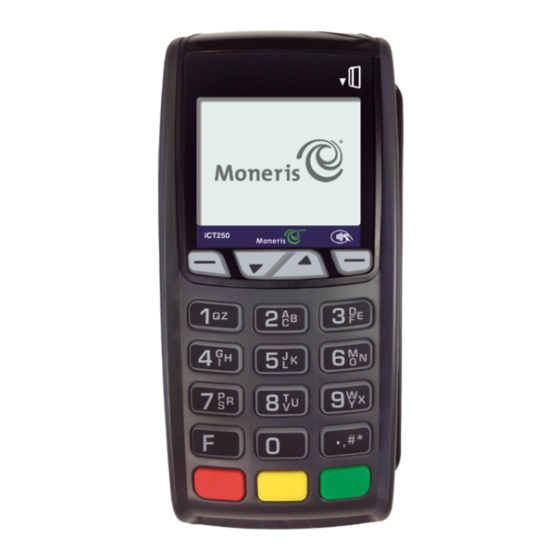
Moneris iCT250 Moneris iCT250 Use this handheld, all-in-one terminal and PINpad to process transactions at the point of sale (POS). When prompted, you (and sometimes your customer) will key in information on the terminal. If your customer is required to key in information, pass the handheld to the customer. - Page 5 Terminal keys Function keys • Move through the menu items on the display. • Select the option displayed above the key: e.g. if YES key, press that key to select YES. displays above the displays above the key, press that key to scroll up. •...
-
Page 6: Optional External Pinpad
General guidelines for the iPP320 PINpad • When the “CONTINUE ON PINPAD” prompt appears on the iCT250 terminal, pass the iPP320 PINpad to your customer. • The customer follows the prompts on the PINpad. -
Page 7: Card Entry Options
Card entry options Insert: Chip cards 1. “SWIPE OR INSERT CARD” or “SWIPE/INSERT/TAP CARD” displays on the terminal or external PINpad if attached. 2. Either you or the customer inserts the card into the device’s chip reader. Note: Unless the device prompts otherwise, do not swipe a chip card even if the card has a magnetic stripe. - Page 8 Manual card entry If all available card entry methods fail, you may manually enter the card number for credit cards and some chip debit cards. 1. “SWIPE CARD” or “SWIPE OR INSERT CARD” or “SWIPE/INSERT/TAP CARD” displays on the terminal or external PINpad if attached.
- Page 9 Maximum Contactless Dollar Value (CDV) • Credit Cards: To determine the maximum CDV for a card, print a Configuration Report (see page 25). Look for the DOMESTIC TXN LIMIT found near the end of the report in the CVM LIMITS section under the card type (see Transaction $ Limits on the Config Report on page 22).
-
Page 10: Financial Transactions
Transactions All instructions in this guide begin at the READY screen. To access the READY screen from any other screen, press the key repeatedly until the READY screen appears. Financial transactions General guidelines 1. If the terminal is configured to use Ethernet, ensure that the Ethernet icon (the top of the terminal display screen) is coloured green. - Page 11 Using your terminal Purchase [100] Credit or debit purchase of goods or services. 1. If PURCHASE is the default, key in a Purchase amount. (If PURCHASE is not the default: Press the key, select TRANSACTIONS, select PURCHASE, and then key in a Purchase amount.) 2.
- Page 12 Cheque Authorization [105] 1. Press the key, select TRANSACTIONS, and select CHEQUE AUTH. 2. Do one of the following: • To do the authorization by credit card, select CREDIT CARD. • To do the authorization by driver’s licence, select DRIVERS LICNCE.
- Page 13 Advice List [109] Completes or cancels a Pre-Auth from a list. Note: The Advice List (P-A ADV LIST) option will appear only if Tip Reporting is enabled. The Advice must be processed on the same terminal as the original Pre-Auth. 1.
- Page 14 Merchant prompts: Purchases/Pre-Auths/Refunds/Voids This table lists in order of appearance the prompts (and the actions to take for each) that you might see on the terminal during a Purchase, Pre-Auth, Refund, or Void. Note: Only some of the prompts listed below will appear for any one transaction.
- Page 15 19). Press the key to continue. RETURN TO CLERK Press the key, and process any APPROVED receipt that prints (see page 21). ######## UPDATE POINTS Refer to the Moneris iCT250 Using Your TO LOYALTY CARD? Terminal for Loyalty guide.
- Page 16 Merchant prompts: Cheque Authorizations This table lists in order of appearance the prompts (and the action to take for each) for this transaction. Merchant prompt Merchant action(s) ENTER DRIVERS Key in the cheque-holder’s driver’s LICENCE NUMBER licence number, and press the key.
- Page 17 Merchant prompts: Advices/Force Posts This table lists in order of appearance the prompts (and the actions to take for each) that you might see on the terminal during an Advice or Force Post. Note: Only some of the prompts listed below will appear for any one transaction.
- Page 18 Press the key, and process any APPROVED receipts that print (see page 21). ######### USE LOYALTY INFO Refer to the Moneris iCT250 Using Your FROM PRE-AUTH? Terminal for Loyalty guide. FIND ORIGINAL To process next Advice: Press the TRANSACTION? (YES). To return to READY screen: Press the key (NO), then press the key.
- Page 19 Customer prompts on terminal This table lists in order of appearance the prompts (and the actions to take for each) that your customers might see on the terminal during a transaction. Note: Only some of the prompts listed below will appear for any one transaction.
- Page 20 Customer prompt Customer action(s) ENTER TIP AMOUNT Keys in a dollar amount (or nothing $0.00 at all), then presses the key. Presses the key to confirm the <TRANSACTION displayed amount. NAME> $#.##-OK? SELECT ACCOUNT For chequing account: Presses the (CHEQUING). For savings account: CHEQUING SAVINGS Presses the key (SAVINGS).
- Page 21 Customer prompts on PINpad This table lists in order of appearance the prompts (and the actions to take for each) that your customers might see on the external PINpad during a transaction. Note: Only some of the prompts listed below will appear for any one transaction.
- Page 22 Customer prompt Customer action(s) Presses the key to confirm the <TRANSACTION displayed amount. NAME> $#.##-OK? For chequing: Presses the key (CHQ). SELECT ACCOUNT For savings: Presses the key (SAV). ENTER PIN & OK Keys in their PIN (Personal Identification Number) and presses the key.
-
Page 23: Receipts
Receipts Signing credit card receipts Merchant copy Always retain this copy for your records, but note: • If a signature line is printed, obtain the cardholder’s signature. • If VERIFIED BY PIN is printed, do not obtain a signature. • If NO SIGNATURE REQUIRED is printed, do not obtain a signature. - Page 24 Card masking To reduce the risk of fraudulent card use, masking and truncation are applied to card numbers printed on receipts. Masking replaces a card’s numbers (except for the last four) with “*”s (e.g., ************1234). Truncation prints only the last four digits of a card (e.g., 1234).
-
Page 25: Reporting
Reporting Masking on reports To reduce the risk of fraudulent card use, masking is applied to card numbers and expiry dates are not printed on reports. Card types on reports Flash transactions are included in Interac totals. Reprint Merchant receipt [66] Prints a duplicate of the Merchant Copy receipt. - Page 26 The report prints, and the READY screen appears. Merchant Subtotals Report [95] Prints a list of transaction type totals by card type for the current batch from the Moneris Host. Grand totals by transaction type are also included. 1. Press the...
- Page 27 5. To print the current date or batch, press the key. key in a date or To select a specific date or batch, batch number, and press the key. The report prints, and the READY screen appears. Tip Totals Report [96] Prints a summary of Tip amounts entered on the terminal for transactions in a specified batch or a specified date range.
-
Page 28: Administrative Transactions
ADMIN, then select LOGOFF. The “PLEASE LOGON” prompt appears within 60 seconds. Re-Initialization [01] The Moneris Merchant Service Centre may ask you to re-initialize your terminal if changes have been made to it or your merchant account. 1. Press the key, select CONFIGURATION, then select INITIALIZATION. -
Page 29: End-Of-Day Process
End-of-day process Merchant close If your merchant account is set up for Merchant Close settlement, you must process a Batch Close transaction in order to have the funds from your POS transactions deposited to your business account. Here’s how: Step 1: Print a Stored Transactions Report [60] Note: Flash transactions are included in Interac totals. - Page 30 System close If your merchant account is set up for System Close settlement, Moneris automatically closes your batch for you at the end of each day. You must verify transaction totals on a daily basis. Here’s how: Step 1: Print a Stored Transactions Report [60] See page 27.
-
Page 31: Troubleshooting
• If the card was inserted: Swipe the card. CARD REMOVED The chip card was removed during the transaction. 1. Retrieve the iCT250 terminal, or the iPP320 PINpad if attached. 2. Press the key on the iCT250 terminal until the READY screen appears. - Page 32 Error message Solution CONTACTLESS If the card has a chip, insert it into the TRANSACTION chip reader on the iCT250, or the iPP320 LIMIT EXCEEDED if attached. If the card does not have a chip, swipe the card. CUSTOMER –...
- Page 33 • If card tapped: If the card has a chip, insert it into the chip reader on the iCT250, or the iPP320 if attached; if it does not have a chip, swipe the card on the iCT250 (do not swipe the card on the iPP320 if attached).
- Page 34 Error message Solution TAP FAILED If the card has a chip, insert it into the PLEASE INSERT iCT250 chip reader; or the iPP320 OR SWIPE CARD if attached. If the card does not have a chip, swipe the card. TIME-OUT The customer took too long to respond to the prompts.
- Page 35 “ETH” port on the magic box. b. Check that the router and hub/switch (if any) are functioning (refer to the Moneris IP Readiness Checklist at moneris.com/checklist to confirm that your firewall rules have been updated).
- Page 36 Neither Moneris or any of its affiliates nor any of our or their respective licensors, licensees, service providers or suppliers warrant or...
Need help?
Do you have a question about the ICT250 and is the answer not in the manual?
Questions and answers