
Related Manuals for Van Raam Balance


Summary of Contents for Van Raam Balance
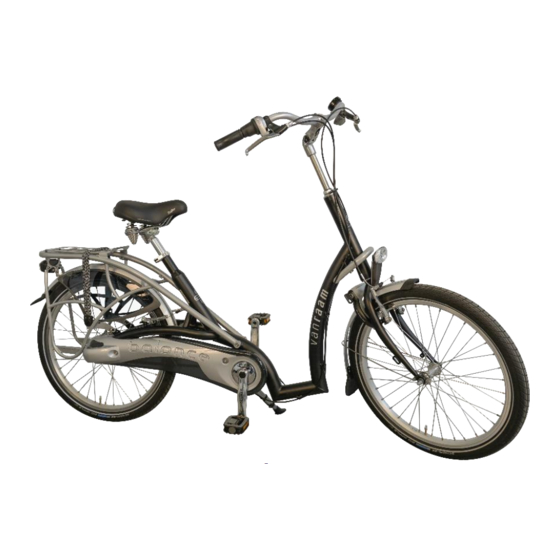
- Page 1 User Manual Balance Van Raam Guldenweg 23 7051 HT Varsseveld, The Netherlands +31 (0)315 – 25 73 70 info@vanraam.com Version 21.01 www.vanraam.com...
-
Page 2: Table Of Contents
Safety measures............................. 5 Adjustment of the bicycle ..........................6 Before the first use ............................8 Electro system Silent ..........................12 Van Raam E-Bike App ..........................22 Accessories..............................24 Technical specifications ..........................26 Maintenance and adjustments to be done by owner ............... 27 Repairs and maintenance to be done by dealer ................. -
Page 3: Manufacturer Contact Details
Conformity Van Raam declares as manufacturer that the Balance bicycle, as described in this manual, has been produced in accordance with the Medical Devices Regulation (EU) 2017/745, risk category 1. All products have been produced in accordance with the 2006/42/EG guidelines. -
Page 4: Delivery
“Form service, maintenance, modifications an warranty claims” in the back of this manual. Indication The Balance can be used by people that have difficulty getting on and off the bicycle, people with neck, shoulder and wrist complaints, and persons with slight balancing problems. -
Page 5: Safety Measures
The manufacturer is not responsible for any damage or injury caused as a result of or during the course of any other type of use. Safety measures Ensure the bicycle is in good condition each time before using it. Check before •... -
Page 6: Adjustment Of The Bicycle
Damaged or worn out parts The replacement and repair of parts (frame, forks, light, brakes, drive mechanism and the handlebars) should always be performed by an authorized dealer. If not, the guarantee ceases to be valid and you will be personally responsible in the event of possible damage. Specific safety parts should always be replaced by new parts! Adjustment of the bicycle Before using the bicycle, adjust it to the measurements of the cyclist. - Page 7 To adjust the saddle: Loosen the screw [A]. Slide the saddle to the correct height. Tighten the screw. Do not pull out the saddle pin further than the mark. The tube will not go into the shank deep enough and will risk breaking off, which can lead to serious injuries.
-
Page 8: Before The First Use
Position handlebars You can tilt the handlebars. This influences the distance from the handlebars to the upper body. Determine your own most comfortable position by using the bike. To tilt the handlebars: Slightly loosen the screws [A] and [B] with an Allen key. Put the handlebars in the desired position and then tighten the screws considerably. - Page 9 Manually operated headlight The headlight has a button with three different modes: ON – ON [50%] – OFF. Adjust the angle of the headlight to its correct position, when the centre of the light beam is about 10 metres in front of the bicycle. The headlight is powered by batteries.
- Page 10 With the “Automatic” mode the rear light automatically turns on and off with the help of light and movement sensors. When the bicycle stands still for a while, the light will automatically turn off. The rear light works on batteries. When the batteries are almost empty, a red LED light on the top starts flashing.
- Page 11 You can manually turn the lighting on and off by briefly pushing the on/off button on the display. When the electric system is turned off, the lighting will turn of automatically. On/off button Make sure there is always a battery on the bike when you are cycling after dark! Once the battery is nearly empty, the motor will no longer provide pedal support power assistance while cycling.
-
Page 12: Electro System Silent
Brake on time and cycle at a moderate speed. Electro system Silent The Silent Electric motor system is a special developed support system by Van Raam for the rehabilitation market. The system is characterized by: A simplicity of operation... - Page 13 In special cases, an individually tailor-made cycling program is necessary. You can obtain information from the dealer about the possibilities of a customized cycling program. Functions: The electric system has the following functions: 4. Indication lights Pedal support while cycling •...
- Page 14 2. Degree of support 1, 2 and 3 The desired support can be set by using one of the support levels 1, 2 or 3. Light support, maximum range. Average support, average range. Maximum support, low range. You can change the level while cycling. The behaviour of the battery depends on a lot of different factors and is strongly influenced by: capacity and voltage of the battery, degree of support that is used, temperature, wind speed, tyre pressure, cycling speed, weight of the user and the...
- Page 15 4. Indication lights The level of charge in the battery is given by five LED lights: four of these are green, the one on the left can show either green or red, if charge is low. The battery is fully charged. When in use, the number of green LED lights on the battery will decrease.
- Page 16 Charging the Battery For the best performance and to prolong the life of the battery, we recommend that you charge the battery at home at room temperature. Gebruik de lader alleen als de omgevingstemperatuur tussen de 0 en 35 graden ligt.
- Page 17 9. Put the battery back in the holder of the cycle. Slide it behind bar [A] and press it firmly on strip [B]. 10. Pull the handle backwards and push the top of the battery to connect as shown in the drawing and close the lock.
- Page 18 Charger: Status indication Green Standby Charging Green Battery full Red, blinking Safety: Polarity inversion; Short; Over temperature; Over power; Over voltage Backup battery (optional) The bike can be supplied with a second battery. To activate the second battery (when the first battery is empty) turn the switch under the luggage carrier to the side of the second battery.
- Page 19 The battery housing and charger housing may never be opened! When there is a • problem, contact your dealer. The Van Raam battery may not be revised due to serious safety risks and the • incorrect functioning of the electric system as a whole.
- Page 20 Please note that any battery will wear over time. The wearing process of the battery is inevitable and depends on several factors, such as usage, number of charge cycles and the ambient temperature. Even if the battery is not used, its capacity will decrease. A worn battery can still be used, but please bear in mind that its charge level may decrease.
- Page 21 Charger Safety Measures: Only charge Van Raam Li-Ion batteries with the included charger. Only connect • the charger to a suitable power point (220-240 Volt AC 50-60 Hz). If the charger is not being used, unplug it from the socket and take the plug out of the battery.
-
Page 22: Van Raam E-Bike App
Van Raam E-Bike App The Van Raam bicycle app is a free smartphone app that you can use while cycling on your electric Van Raam bicycle. What can you do with the Van Raam E-Bike App for your Smart E-Bike? Can be used as a luxury bicycle computer. - Page 23 From the 15th of July, 2020, all electric Van Raam bicycles will be delivered as Smart E-Bikes. You can recognize this by the large sticker with a yellow border on the battery. If you have a Smart E-Bike and you download the updated app, there are even more options.
-
Page 24: Accessories
Accessories Depending on your order, you can use the accessories as described below. Extra accessories are available at your dealer. Crank shortener The crank shortener is fitted to the crank, as illustrated. The pedal can then be fitted into the crank shortener at two positions. - Page 25 Flashing light system To use the flashing lights press the switch [A] to the left or right. To turn off the indicators, move the switch to the centre position. The lights work on a battery. To replace the batteries, turn the screw on the cap and take the orange cap [B] away.
-
Page 26: Technical Specifications
Technical specifications Length (cm) Width (cm) Height (cm) Inseam (cm) 67-82, 76-91*, 85-100 Frame height (cm) 42, 51*, 60 Entry height (cm) Front wheel 24“ Back wheel 24“ Weight (kg) about 22 Max. load luggage rack (kg) Max. user weight (kg) Brakes, front Cantilever brakes Brakes, back... -
Page 27: Maintenance And Adjustments To Be Done By Owner
Maintenance and adjustments to be done by owner Below you can find the instructions for maintenance and adjustments that you can do yourself on a regular basis, which will keep your bicycle in top condition. Cleaning The frame of the bicycle can be cleaned with a damp cloth. For areas that are dirtier you can use a mild detergent. -
Page 28: Repairs And Maintenance To Be Done By Dealer
If you still decide you want to replace components yourself, you are responsible for damage or harm due to incorrectly fitted components. Only use original Van Raam spare parts, which you can buy at you dealer. If requested the dealer will make the necessary information on repair and maintenance available. -
Page 29: Adjustments To Be Done By Dealer
WEEE directive since 15 August 2018. If you wish to have your Van Raam bike recycled, please contact your dealer. They are responsible for complying with the recycling obligation. Ask them about the conditions or view the rules regarding recycling in your place of residence/country. -
Page 30: Handover/Sale To A New Owner
This is also the case if unauthorized maintenance is carried out or if technical changes or additions are made with non-original Van Raam parts without permission of Van Raam. The original CE certification will become nul-and-void if modifications are done by third parties. -
Page 31: Frame Number
Frame number The frame number is printed on the sticker. This sticker is located on the frame, see the image below. Example sticker: Position of sticker: On backside of the saddle tube Version 21.01 31/35... -
Page 32: Service Record, Maintenance, Modifications And Warranty Claims
The following items are changed to the bike: Changed: Date: Carried out: Beware! Please note that if changes are made by a non-authorized Van Raam dealer or no original Van Raam parts or options are used, warranty may void. Version 21.01 32/35... - Page 33 Here you have space to take notes or write down the maintenance on your bike: Version 21.01 33/35...
- Page 34 Version 21.01 34/35...
-
Page 35: Delivery And Service Form
Congratulations on your purchase of your Van Raam bicycle. This bike is produced with utmost care. To guarantee the quality as much as possible Van Raam produces the cycles according to the ISO 9001:2015 quality standards. Van Raam has been certified by DNV GL Business Assurance B.V.
Need help?
Do you have a question about the Balance and is the answer not in the manual?
Questions and answers