
Related Manuals for Van Raam Easy Sport

Summary of Contents for Van Raam Easy Sport
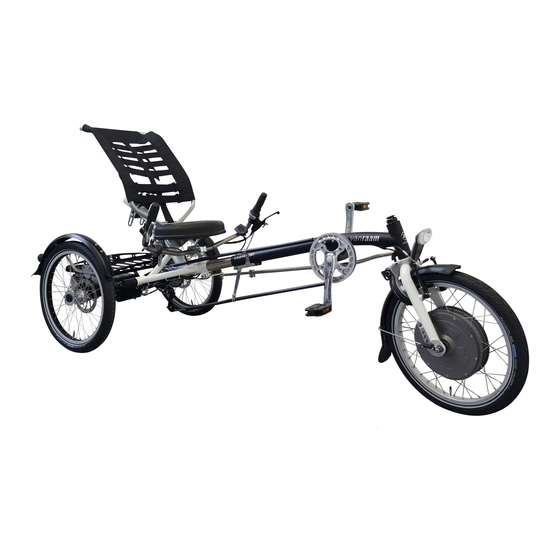
- Page 1 User manual Tricycles Easy Sport Van Raam | Guldenweg 23 | 7051 HT Varsseveld | The Netherlands Version 20.01...
-
Page 2: Table Of Contents
Safety measures ........................3 Adjustment of the tricycle ......................6 Before the first use ........................12 Electro system Silent .......................19 Van Raam E-Bike App ......................28 Accessories..........................29 Technical specifications ......................36 Maintenance and adjustments to be done by owner ............37 Repairs and maintenance to be done by dealer ..............38 Adjustments to be done by dealer ..................39... -
Page 3: Conformity
Conformity Van Raam declares as manufacturer that the tricycles, as described in this manual, are produced in accordance with the 93/42/EEG guidelines, risk category 1. All products have been produced in accordance with the 2006/42/EG guidelines. The declaration of conformity can be found on the Van Raam website. -
Page 4: Indication
Indication Children or adults who cannot use tricycles or vehicles due to their handicap, are able to ride these tricycles. The tricycles can be used by children or adults with neuro-muscular disorders such as paralysis of the brain and muscular dystrophy. This also applies to people suffering from co-ordination problems, loss of balance and limited natural movements. - Page 5 Always lock the tricycle when leaving it unattended. Make sure that you do not reach a dangerous speed when driving downhill and entering tunnels. Brake in time and bike at a moderate speed. In case of pregnancy, extra care is required owing to a higher risk of injury. ...
- Page 6 Load The maximum load should not be exceeded. See information in the index of technical details on page 36. By permitted load we mean the total load, including the load on the luggage rack (or in the basket). Make sure that the permitted load on the luggage rack and in the basket is not exceeded. (maximum 20 kg).
-
Page 7: Adjustment Of The Tricycle
Adjustment of the tricycle Before using the tricycle, adjust it to the measurements of the cyclist. This is of great importance, especially the saddle and the handlebars. If an optimal adjustment of the tricycle, as defined in the instructions, is not possible, you can contact your dealer for a fitting solution. - Page 8 User manual | Tricycles 20.01...
- Page 9 Saddle position and frame length (Easy Sport) The saddle position is correctly adjusted if the cyclist is sitting on the tricycle and puts one foot in the furthest position. Adjust the saddle position in such a way that the leg is stretched but still relaxed.
- Page 10 Position backrest (Easy Sport with comfortable chair) The backrest can be adjusted to the desired position. To do this: 1. Slightly loosen the three nuts. 2. Put the backrest in the desired position and then tighten the nuts again. Firmness backrest (Easy Rider Junior, Easy Rider,...
- Page 11 Position backrest (Easy Sport with recumbent seat) The backrest can be adjusted in the desired position. To do this: 1. Slightly loosen the three screws with an Allen key. 2. Put the backrest in the desired position and then tighten the screws again.
- Page 12 Position handlebars (Easy Sport) You can tilt the handlebars. Determine your own most comfortable position by using the tricycle. To tilt the handlebars: 1. Slightly loosen the screws with an Allen key. 2. Put the handlebars in the desired position and then tighten the screws again considerably.
-
Page 13: Before The First Use
Before the first use Parking brake Always use the parking brake if you park the tricycle and leave it behind. Block the tricycle with the hydro brake when passengers are getting on and off. To operate the parking brake, squeeze the left brake [A] and secure the brake with the lever [B]. - Page 14 Manually operated headlight (Mini, Midi, Maxi, Maxi Comfort, Easy Rider, Easy Rider Junior, Easy Sport) The headlight has a switch (sliding switch) with three positions: Off-Auto-On. The headlight can be manually switched on or off with the “On/Off” position. In the “Auto” position, the headlight turns on or off automatically with the help of light- and movement sensors.
- Page 15 1. Remove the two screws at the back of the front light. 2. Dismantle the rear cover by pressing with the thumb and index finger at the cavity on both sides of the front cover and pulling the rear cover back. 3.
- Page 16 Manually operated rear light (Mini, Midi, Maxi, Maxi Comfort, Easy Rider, Easy Rider Junior, Easy Sport) The rear light has three options which you can choose by pressing the button repeatedly: On- Auto-Off. 1x = ON 2x = AUTO 3x = OFF...
- Page 17 Centrally Operated Lighting The bike has been equipped with centrally operated lighting, with the lighting being connected to the electric system. The lighting will turn on automatically when the electric system is activated. Adjust the angle of the headlight, so that the centre of the light beam is aimed about ten metres in front of the bike.
- Page 18 Check before every ride: The brakes (including the parking brakes) The tyre pressure (recommended: 3 bar) The lights That all parts are fitted properly That the battery is adequately charged (depends on options) Contact your dealer and stop using your tricycle as soon as you observe irregularities during the check! As with all mechanical parts, the tricycle is subject to wear tear and high loading.
- Page 19 High speeds in the bends, driving on rough ground, and sharp bends can lead to the tricycle falling over! Extra attention is essential if a child is using the tricycle or a person with limited powers of perception is using the tricycle! Before a child or an adult with limited powers of perception rides the tricycle independently for the first time, they should practice first under your supervision (or under the supervision of others).
-
Page 20: Electro System Silent
Electro system Silent The Silent Electric motor system is a special developed support system by Van Raam for the rehabilitation market. The system is characterized by: A simplicity of operation Individually adjustable support for cycling Modern and efficient electronics The powerful electric motors... - Page 21 Always turn off the electric system before getting on and off the bike, and when you are walking while holding the bike. 2. Degree of support 1, 2 and 3 The desired support can be set by using one of the support levels 1, 2 or 3. Light support, maximum range.
- Page 22 4. Indication lights The level of charge in the battery is given by five LED lights: four of these are green, the one on the left can show either green or red, if charge is low. The battery is fully charged. When in use, the number of green LED lights on the battery will decrease.
- Page 23 Centrally Operated Lighting The bike is equipped with centrally operated lighting, with the lighting automatically turning on when the electric system is activated. Further instructions can be found in the chapter 'Before the first use'. Other functions The smart display has an automatic dimming function. With an inbuilt light sensor the lights of the display will automatically creating less distraction for the cyclist in darker or more shadowy conditions.
- Page 24 Charging the Battery For the best performance and to prolong the life of the battery, we recommend that you charge the battery at home at room temperature. Only use the charger if the temperature of the environment is between 0 and 35 degrees centigrade.
- Page 25 Charger: Status indication Green Standby Charging Green Battery full Red, blinking Safety: Polarity inversion; Short; Over temperature; Over power; Over voltage It is better for the battery if it is charged regularly, rather than wait until it is completely drained. Never leave the bike with a drained battery! Ensure that the battery is always pushed straight into the holder.
- Page 26 5 ºC. Only use the charger indoors and in non-humid environments, the charger may not get wet. Only use the Van Raam supplied battery. Only charge the battery with the supplied charger! ...
- Page 27 In this case, contact your dealer. Charger Safety Measures Only charge Van Raam Li-Ion batteries with the included charger. Only connect the charger to a suitable power point (220-240 Volt AC 50-60 Hz). If the charger is not being used, unplug it from the socket and take the plug out of the battery.
- Page 28 Do not use the charger if it is visibly damaged or modified. Do not repair the charger! Please contact Van Raam. Never open the charger yourself! While charging, please monitor the charger and the battery. Once the battery is full, ...
-
Page 29: Van Raam E-Bike App
Van Raam E-Bike App The Van Raam bicycle App is a free smartphone application that you can use while cycling with your Van Raam electric bicycle. You can connect the Smart Display with the Van Raam App due Bluetooth connection. -
Page 30: Accessories
Accessories Depending on your order, you can use the accessories as described below. Extra accessories are available at your dealer. Push bar (Husky, Mini, Midi) To fit the push bar:... - Page 31 User manual | Tricycles 20.01...
- Page 32 User manual | Tricycles 20.01...
- Page 33 User manual | Tricycles 20.01...
- Page 35 User manual | Tricycles 20.01...
- Page 36 User manual | Tricycles 20.01...
-
Page 37: Technical Specifications
Technical specifications Easy Rider Easy Rider2 Easy Sport Viktoria Viktor Junior Length of inner leg (cm) 47-73 69-95 65-105 63-81 80-96 Frame height (cm) Length (cm) 195-225 Width (cm) Height (cm) Weight (kg) appr. 34 Boarding height(cm) 20” 20“ 18“... -
Page 38: Maintenance And Adjustments To Be Done By Owner
Maintenance and adjustments to be done by owner Below you can find the instructions for maintenance and adjustments that you can do yourself on a regular basis, which will keep your tricycle in top condition. Cleaning The frame of the tricycle can be cleaned with a damp cloth. For areas that are dirtier you can use a mild detergent. -
Page 39: Repairs And Maintenance To Be Done By Dealer
If you still decide you want to replace components yourself, you are responsible for damage or harm due to incorrectly fitted components. Only use original Van Raam spare parts, which you can buy at you dealer. If requested the dealer will make the necessary information on repair and maintenance available. -
Page 40: Adjustments To Be Done By Dealer
Adjustments to be done by dealer User manual | Tricycles 20.01... -
Page 41: Disposal
Disposal If you want to dispose your tricycle, contact your dealer. You can also contact the local waste disposal company. They will dispose the tricycle according to the regulations of your town. Recycling the Battery If your battery is defective or if you are no longer using it, you must have it recycled. Please contact your dealer. -
Page 42: Guarantee
This is also the case if unauthorized maintenance is carried out or if technical changes or additions are made with non-original Van Raam parts without permission of Van Raam. The original CE certification will become nul-and-void if modifications are done by third parties. -
Page 43: Frame Number
Frame number The frame number is printed on the sticker. This sticker is located on the frame, see the images below. At the Viktoria and Viktor the frame number is stamped in the frame, see the images below for the positions. Example sticker: User manual | Tricycles 20.01... - Page 44 Easy Sport Under the chair tube Positions of frame number, stamped in a plate on the frame (Viktoria and Viktor): User manual | Tricycles 20.01...
-
Page 45: Service Record, Maintenance, Modifications And Warranty Claims
The following items are changed to the bike: Changed: Date: Carried out: Beware! Please note that if changes are made by a non-authorized Van Raam dealer or no original Van Raam parts or options are used, warranty may void. User manual | Tricycles 20.01... - Page 46 Here you have space to take notes or write down the maintenance on your bike: User manual | Tricycles 20.01...
- Page 47 Here you have space to take notes or write down the maintenance on your bike: User manual | Tricycles 20.01...
- Page 48 Here you have space to take notes or write down the maintenance on your bike: User manual | Tricycles 20.01...
- Page 49 Congratulations on your purchase of your Van Raam tricycle. This bike is produced with utmost care. To guarantee the quality as much as possible Van Raam produces the cycles according to the ISO 9001: 2008 quality standards. Van Raam has been certified by TÜV Rheinland Netherlands BV.
Need help?
Do you have a question about the Easy Sport and is the answer not in the manual?
Questions and answers