
Related Manuals for Beef Eater SIGNATURE Series


Summary of Contents for Beef Eater SIGNATURE Series
- Page 1 SIGNATURE SERIES Assembly and Operating Instructions 2000ES, 2000E BUILT IN FOR OUTDOOR USE ONLY...
-
Page 2: Table Of Contents
CONGRATULATIONS CONTENTS Dear Customer, General warnings .................3 Product description ..............4 Congratulations and thank you for choosing our barbecue. Product dimensions ..............6 We are sure you will find it a pleasure to use. Before you use the barbecue, we recommend that you read through the Gas specifications ................ -
Page 3: General Warnings
IMPORTANT SAFETY INSTRUCTIONS • Do not obstruct any ventilation of the barbecue. Please read the user manual carefully and store in a handy place for later reference. • Do not allow children to operate or play near the barbecue. Failure to adhere to the above warnings may cause injury TIPS &... -
Page 4: Product Description
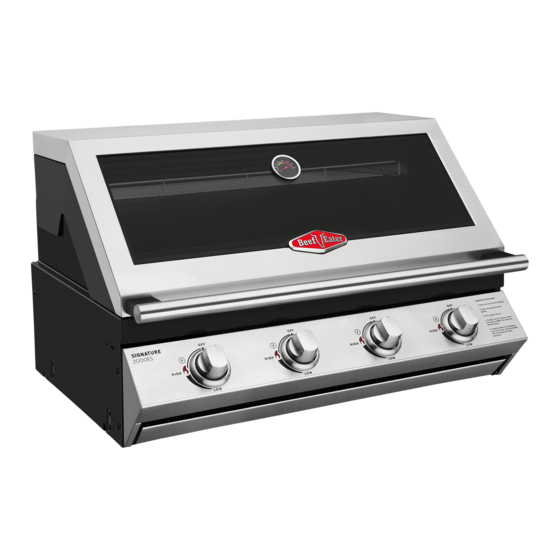
PRODUCT DESCRIPTION 4 Burner built-in barbecue Warming rack x 1 Cast iron hotplate x 1 Cast iron Grill x 1 Vaporiser x 2 Burner x 4 Roasting hood x 1 Thermometer x 1 Burner Box x 1 Support bracket and fasteners x 2 Control Panel x 1 Disposable drip pan Extras can be purchased... - Page 5 PRODUCT DESCRIPTION 5 Burner built-in barbecue Warming rack x 1 Cast iron hotplate x 1 Small cast iron Grill x 1 Large cast iron Grill x 1 Vaporiser x 3 Burner x 5 Roasting hood x 1 Thermometer x 1 Burner Box x 1 Support bracket and fasteners x 2...
-
Page 6: Product Dimensions
PRODUCT DIMENSIONS 817mm 520mm 4 burner Hood closed 550mm 995mm 5 burner Hood open PRODUCT DIMENSIONS... -
Page 7: Gas Specifications
GAS SPECIFICATIONS 4 BURNER 5 BURNER 4 BURNER 5 BURNER NATURAL NATURAL GAS TYPE UNIVERSAL LPG UNIVERSAL LPG Maximum gas consumption 68 MJ/h 85 MJ/h 68 MJ/h 85 MJ/h ø 1.15 mm ø 1.15 mm ø 1.90 mm ø 1.90 mm Injector onfice diameter Number of injectors Regulator pressure... -
Page 8: Natural Gas Installation
NATURAL GAS INSTALLATION NATURAL GAS INSTALLATION 3. Change the aeration shutter WARNING WARNING • Remove the burners from the appliance Conversion of this unit to natural gas must be carried out by • Remove the locating screw from the aeration shutter a qualified licensed person and a Certificate of Compliance must be issued to the owner on completion of the installation •... - Page 9 NATURAL GAS INSTALLATION 5. Connecting the appliance to a natural gas supply • The appliance shall be installed in accordance to AS/ NZS5601 gas installations and any relevant local gas fitting rules. • Remove the fitted LPG gas bottle hose and regulator from the adaptor mounted to the semi-rigid appliance pipe •...
-
Page 10: Installation Warnings
INSTALLATION WARNINGS Choosing a location WARNING WARNING When planning the location and preparing the installation • This appliance shall only be used in an above ground, structure for this appliance note the following: open air situation with natural ventilation without stagnant areas, where gas leakage and products of combustion are rapidly dispersed by wind or natural convection. -
Page 11: Mounting Enclosure Guidelines
MOUNTING ENCLOSURE GUIDELINES Mounting enclosure (gas bottle compartment adjacent) 828mm 4 burner 630mm min. 1006mm 5 burner 40mm Barbecue Support frame for 793mm 4 burner min. gap venting slots 520mm barbecue base 971mm 5 burner Rear wall / splashback Gas bottle Low level Gas bottle compartment to be non-combustible... -
Page 12: Assembling The Barbecue
ASSEMBLING THE BARBECUE Check the Burners and remove the clips • Lower the other end of the burner so the lug locates into the corresponding hole at the rear The burners should already be filled to the barbecue. of the barbecue. There may be transportation clips though, that need to be removed from the back of the burners before placing the barbecue in the installation. - Page 13 ASSEMBLING THE BARBECUE Fit the hanging brackets Fit the cooking plate and grills The appliance can be supported in the enclosure either by Position the cooking plate and grills in the configurations you sitting directly on the base or by hanging the appliance from require ensuring though, that the grills are always positioned the benchtop.
- Page 14 ASSEMBLING THE BARBECUE Setting up the grease tray Locate the grease tray into the barbecue by positioning the tray between the 2 rollers on each side. (see diagram) Position one of the disposable drip pans into the drip pan Push all the way in. carrier.
-
Page 15: Operating Instructions
OPERATING INSTRUCTIONS Control functions To turn the burners off Before lighting the barbecue: • When the cooking is complete, push the knob in and rotate clockwise back to the ‘OFF’ position. • Check that all hoses and gas fittings are tight. Preheating •... -
Page 16: Indirect Cooking/Roasting
INDIRECT COOKING / ROASTING Position the grill plate You may find it useful to purchase a meat thermometer to help take the guess work out of cooking. To achieve the best heat circulation around the food, it is best Meats such as beef, lamb, veal and pork should be to remove the hotplate from the barbecue and position just a about 70˚C/160˚F when medium. -
Page 17: Cleaning And Care
CLEANING AND CARE The cleaning and care instructions are essential for the Cleaning the Burners proper functioning and operation of your appliance over time. • Check main opening of burner regularly for insect nests Failure to adhere to these care instructions may affect your (eg. -
Page 18: Troubleshooting
TROUBLESHOOTING PROBLEM CAUSE CHECK Barbecue will not light Ignition system not working Check to see visible spark at starter probe - if no spark is present when control knob is turned then the unit may need to be serviced or replaced. Contact your BeefEater dealer. -
Page 19: Warranty
For more information on all Beefeater products, or for dimension and installation information, call us. BeefEater is part of the Electrolux Family. To add a touch of professional inspiration to your home, visit electrolux.com © 2018 Electrolux Home Products Pty Ltd. ABN 51 004 762 341 BMAN_SignatureSeries2000_Sep18...
Need help?
Do you have a question about the SIGNATURE Series and is the answer not in the manual?
Questions and answers