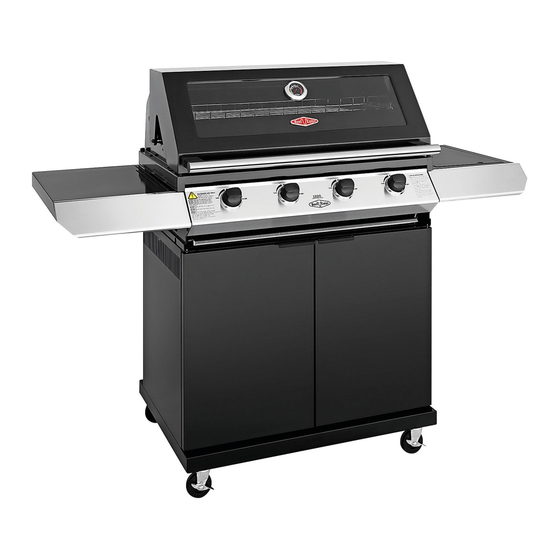
Beef Eater 1200 Series Assembly And Operating Instructions Manual

Beef Eater 1200 Series Assembly And Operating Instructions Manual

Advertisement

Quick Links

Assembly and Operating
Instructions
FOR OUTDOOR USE ONLY
BEEFEATER
1200 SERIES
MODELS:
BMG1230BB
BMG1251BB
BMG1240BB
BMG1231SB
BMG1250BB
BMG1241SB
BMG1230SB
BMG1251SB
BMG1240SB
BBG1230BB
BMG1250SB
BBG1240BB
BMG1231BB
BBG1250BB
BMG1241BB
BBG1230SB
AUSTRALIA / NEW ZEALAND
BBG1240SB
BBG1250SB
BBG1230BB
BBG1240BB
BBG1250BB
BBG1230SB
BBG1240SB
BBG1250SB

Advertisement

Table of Contents
loading

Summary of Contents for Beef Eater 1200 Series

  • Page 1 BEEFEATER Assembly and Operating Instructions 1200 SERIES MODELS: BMG1230BB BMG1251BB BBG1240SB BMG1240BB BMG1231SB BBG1250SB BMG1250BB BMG1241SB BBG1230BB BMG1230SB BMG1251SB BBG1240BB BMG1240SB BBG1230BB BBG1250BB BMG1250SB BBG1240BB BBG1230SB BMG1231BB BBG1250BB BBG1240SB BMG1241BB BBG1230SB BBG1250SB AUSTRALIA / NEW ZEALAND FOR OUTDOOR USE ONLY...
  • Page 2: Table Of Contents

    CONGRATULATIONS CONTENTS Dear customer, Important safety instructions ................3 Gas cylinder safety information ..............6 Congratulations and thank you for choosing our barbecue. Know your barbecue ..................7 We are sure you will find it a pleasure to use. Before you use the barbecue, we recommend that you read through the relevant Contents ......................
  • Page 3: Important Safety Instructions

    IMPORTANT SAFETY INSTRUCTIONS • Do not obstruct any ventilation of the barbecue. Please read the user manual carefully and store in a handy place for later reference. • Do not allow children to operate or play near the barbecue. Failure to adhere to the above warnings may cause injury or IMPORTANT TIPS &...
  • Page 4 IMPORTANT SAFETY INSTRUCTIONS To the installer WARNING WARNING • For fixed installations, in Australia refer also to the Failure to follow these instructions and observe the warnings requirements of AS/NZS5601, local authority, gas, provided in this operations manual could result in fire, electricity, and any other relevant statutory regulations.
  • Page 5 IMPORTANT SAFETY INSTRUCTIONS • Move the appliance during use. TIPS & INFORMATION IMPORTANT • Obstruct any ventilation of barbecue or the cylinder. Should the appliance go out for any reason, turn off all control • Allow the flexible gas supply hose or any electrical cord to knobs and the cylinder gas valve.
  • Page 6: Gas Cylinder Safety Information

    GAS CYLINDER SAFETY INFORMATION Regulator Connection Gas cylinders must be stored outdoors, out of reach of children and must not be stored in a building, garage or any other Check that all control knobs are in the ‘Off’ position. enclosed area. Make sure the cylinder valve is off by turning the valve •...
  • Page 7 Gas Leak Test Procedure Use the following procedure to check for gas leaks. Never use a naked flame to check for gas leaks. In a small container, mix up a solution of water and detergent or soap. Mix the solution well. Make sure that the gas supply valve on the gas cylinder is turned on.
  • Page 8 PRODUCT DESCRIPTION 4 burner mobile barbecue Brace Rack Door catches Grommet Grill plate Door striker plate RH side panel Vaporiser x2 Door catch Base panel Burner x2 Hotplate Caster x2 LH side table Burner box and hood Brake caster x2 Spill tray RH side burner assy LH side panel...
  • Page 9 PRODUCT DIMENSIONS 4 burner mobile barbecue shown Hood closed 3 burner 1377mm 4 burner 1527mm 5 burner 1697mm 3 burner 687mm 4 burner 837mm 550mm 5 burner 1007mm 1217mm 887mm Hood open 27mm 1360mm 930mm 602mm PRODUCT DIMENSIONS...
  • Page 10 ASSEMBLING THE BARBECUE Tools required: Fasteners supplied: 45 x large head 4 x M6x20mm 2 x M3x10mm 12 x fibre washers 4 x M4x8mm M6x12mm This hole indicates the rear side of trolley IMPORTANT TIPS & INFORMATION Ensure the locking type castors are fitted to the front of the trolley, with locks facing outward...
  • Page 11 ASSEMBLING THE BARBECUE Fit screws but do not tighten Large head M6x12mm to position subsequent screws more easily Fit screws but do not tighten Large head M6x12mm to position subsequent screws more easily ASSEMBLING THE BARBECUE...
  • Page 12 ASSEMBLING THE BARBECUE Screw holes indicate the top Fit screws but do not tighten Large head M6x12mm to position subsequent screws more easily Tighten all screws to Large head M6x12mm secure front, rear and side panels ASSEMBLING THE BARBECUE...
  • Page 13 ASSEMBLING THE BARBECUE Clip magnets in place Fit Grommet to Right Side Panel Ensure the flange (protruding rim) of the separation panel engages both the left and right hand side panels, before screwing in. Large head M6x12mm ASSEMBLING THE BARBECUE...
  • Page 14 ASSEMBLING THE BARBECUE First fit lower door pin into the hole on the base assembly. Then depress the upper door pin with your finger, line up with the hole above on the separator panel, and release to allow the pin into the hole. Attach handles to doors with screws...
  • Page 15 ASSEMBLING THE BARBECUE Ensure Gas Regulator Transport Retaining Tie is removed, so Regulator can be fed through notch as shown M6x20 2x LHS 2x RHS ASSEMBLING THE BARBECUE...
  • Page 16 7 001 nutsert (M6 NUTSERT.11) ASSEMBLING THE BARBECUE 7 001 nutsert (M6 NUTSERT.12) 2 001 bolt (M6 X 12 SCREW.1) 2 001 bolt (M6 X 12 SCREW.2) 2 001 bolt (M6 X 12 SCREW.3) 2 001 bolt (M6 X 12 SCREW.4) 2 001 bolt (M6 X 12 SCREW.5) 2 001 bolt (M6 X 12 SCREW.6) 2 001 bolt (M6 X 12 SCREW.7)
  • Page 17 ASSEMBLING THE BARBECUE IMPORTANT TIPS & INFORMATION Remove plastic film if fitted ASSEMBLING THE BARBECUE...
  • Page 18 ASSEMBLING THE BARBECUE ASSEMBLING THE BARBECUE...
  • Page 19 CONNECTING THE SIDE BURNER When connecting to side burner, remove the regulator assy hose (A) as pictured below left:   Gas connection 3/8” SAE Flare with 5/8-18 UNF thread Then connect it to the side burner like this (the 90 degree elbow must be on outside as pictured on left): Connect the gas hose and regulator assembly (A) to the side burner...
  • Page 20 CONNECTING THE SIDE BURNER Connect the other side of gas hose (B) to the BBQ connection using 2 spanners. WARNING WARNING To ensure gas tight connections, complete the gas leak test procedure before and after gas hose connection and after every reconnection of the gas cylinder.
  • Page 21: Natural Gas Conversion

    NATURAL GAS CONVERSION Natural gas installation NOTE: Conversion of this unit to natural gas must be carried out by a qualified licenced person and a Certificate of Compliance must be issued to the owner on completion of the installation conversion. Converting to natural gas (to the installer) This barbecue is supplied set up for Universal LPG and is labelled accordingly.
  • Page 22: Using Your Barbecue

    USING YOUR BARBECUE Before you light the Barbecue WARNING WARNING Perform the following checks: Excess yellow tipping means the combustion is not right, if • Make sure all connections are tight, and leak-tested. Gas that is observed, turn the Barbecue burners off, and refer to regulators fitted with a hand-tightened wheel must be troubleshooting at the end of this manual.
  • Page 23 USING YOUR BARBECUE After Use Operating the side Side Burner It is a good idea to leave the barbecue on for about 10 minutes Do not use oversized cookware or place cookware off-centre after you have finished cooking. This helps to burn away any over the burner as this can cause high temperatures in control excess food residues and oil, and makes cleaning easier.
  • Page 24: Locating Your Barbecue

    LOCATING YOUR BARBECUE Most importantly, this is an outdoor appliance. Ensure your NOTE: Do not modify this appliance. Any deviation from the barbecue is positioned safely away from anything that can catch factory settings could result in a safety hazard. fire.
  • Page 25 LOCATING YOUR BARBECUE Partial Enclosures (Australia Only) This appliance shall only be used in an above ground, open air situation with natural ventilation, without stagnant areas, where gas leakage and products of combustion are rapidly dispersed by wind and natural convection. Any enclosure in which the appliance is used shall comply with one of the following: Any enclosure with walls on all sides, but at least...
  • Page 26: Installing Your Barbecue

    INSTALLING YOUR BARBECUE 1200 SERIES BUILT-IN BBQ INSTRUCTIONS To suit sizes: 3b, 4b and 5b 3 burner 4 burner 5 burner Width 675mm 825mm 994mm Height (min) 230mm Depth (including 20mm clearance at rear) 540mm Clearance at rear (min) 75mm...
  • Page 27 INSTALLING YOUR BARBECUE The Barbecue Cavity Your barbecue has been designed to sit into a cavity or cutout rather than be placed directly onto a flat surface. It is important that the dimensions of the cavity conform exactly to those listed on page 18.
  • Page 28: Cleaning And Storing Your Barbecue

    CLEANING AND STORING YOUR BARBECUE Cleaning Vitreous Enamel Surfaces and Barbecue Cleaning The Burners Control Panel • Check main opening, throat and venturi to each burner Although porcelain enamel will keep its lustrous finish even regularly for insect nests (eg. wasp, ants or spiders). Nests under adverse conditions, it still needs regular cleaning.
  • Page 29: Maintenance

    MAINTENANCE This appliance should be checked and serviced by an authorised service person every 2 years to ensure the appliance remains in a safe operating condition. (These services are not covered by warranty).Replacement parts are available from your authorised BeefEater Dealer. Service and Maintenance Schedules Each Use 6 Monthly...
  • Page 30: Troubleshooting

    TROUBLESHOOTING Condition Possible Cause Solution Empty gas cylinder Replace cylinder Air mixed in hoses Re-ignite and allow operating for a short Flame goes out while in use while, till clears out Blockage Seek professional assistance Gas cylinder valve close Turn off knob button, then open the cylinder valve Air mixed in the hoses Re-ignite and allow operating for a short...
  • Page 31: Warranty

    Warranty FOR SALES IN AUSTRALIA AND NEW ZEALAND APPLIANCE: BEEFEATER DISCOVERY BBQ (c) c osmetic damage which does not affect the operation of the This document sets out the terms and conditions of the product Appliance; warranties for BeefEater Appliances. It is an important document. Please keep it with your proof of purchase documents in a safe place (d) damage to the Appliance caused by: for future reference should there be a manufacturing defect in your (i) negligence or accident;...
  • Page 32 For more information on all Beefeater products, or for dimension and installation information, call into your retailer, phone or email our customer care team or visit our website: AUSTRALIA phone: 1300 307 939 customercare@electrolux.com.au email: web: beefeaterbbq.com NEW ZEALAND phone: 0800 436 245 customercare@electrolux.co.nz email:...

Table of Contents