
Related Manuals for Beef Eater Discovery Series


Summary of Contents for Beef Eater Discovery Series
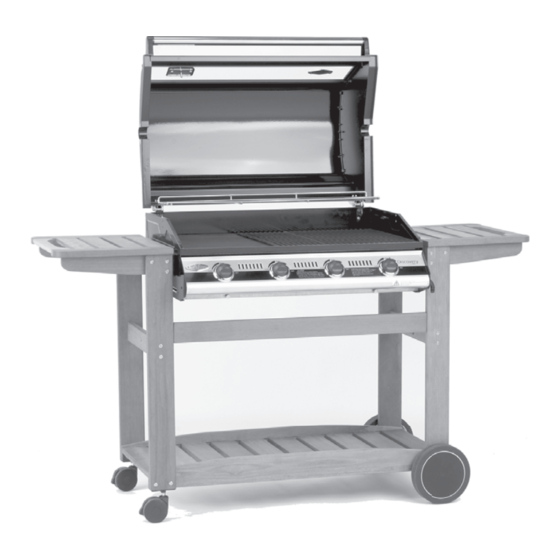
- Page 1 Australia North America Discovery Series Barbecues Assembly And Operating Instructions For outdoor use only bbq.indd 1 3/02/2006 15:21:21...
-
Page 2: Safety Warnings
Safety Warnings We want you to enjoy your barbecuing experience - Failure to follow the WARNING: instructions and observe the warnings provided in this operating manual could result in serious bodily injury or damage to property. Please read these instructions completely before assembly or operation of your barbecue. - Page 3 Safety Warnings electrical cord to come in contact with any heated If there is a fire surface of the appliance. Most fires are caused by a build up of grease, or by an DO NOT wear loose garments or sleeves when using the improper gas connection.
-
Page 4: Locating Your Barbecue
Locating Your Barbecue Most importantly, this is an outdoor appliance. Ensure your barbecue is positioned safely away from anything that can catch fire. Indoor Use Only: Under no circumstances is this barbecue to be used indoors. This includes garages or any other enclosed area. -
Page 5: Installation Options
Installation Options Before proceeding, you need to establish the gas type which your barbecue will run on, and the style of installation you need. GAS AUTHORITY FOR CONFIRMATION OF GAS Natural Gas or LPG/Propane NATURAL Before beginning installation or assembly, check that the gas type which the barbecue is designed for is correct for the gas available to you. -
Page 6: For Built-In Units Only
For Built-In Units Only The Discovery series of barbecues comes in both trolley-mounted and built-in models. These two pages contain information relating to setting up the built-in model only. General Requirements We recommend that this installation be done in a masonry structure and carried out by a professional tradesperson. -
Page 7: Attach The Brackets
For Built-In Units Only The Cylinder Compartment If the gas for your barbecue is to be supplied by a portable LPG/propane cylinder, you will need to ensure that adequate provision is made to house the cylinder safely. The following must be adhered to: Keep out of heat: The cylinder and hose must be sheltered from the sun’s direct heat. -
Page 8: Before You Start
Assembly Instructions Before You Start Note the tools you will need before you begin. Remove any packaging material or protective plastic from components. adjustable spanner/ Phillips Head Check for damaged or missing parts, and consult your retailer if wrench Screwdriver necessary. - Page 9 Assembly Instructions Fit The Vaporizers The Vaporizers are designed to vapourise fats and juices from your food. The Vaporizers reduce flare-ups and help to add that great barbecue flavour. To install the Vaporizer(s), remove all plastic and/or cardboard packaging material and place the Vaporizer into position on the right hand side of the barbecue.
-
Page 10: Connection To Barbecue & Gas Supply
Connection to Barbecue & Gas Supply Before You Begin Check the gas type label as described in the section titled “The Gas Supply” . Ensure all considerations such as clearances from combustibles listed in the “Locating Your Barbecue” section are adhered to. Warning: Contact your local municipality for any building codes regulating the installation of outdoor barbecue appliances. -
Page 11: Leak Test
Connection to Barbecue & Gas Supply • Minimum LPG/propane cylinder capacity for use with this appliance is 4kg / 9 lb. Maximum cylinder capacity is 9 kg / 20 lb. • The gas cylinder used must incorporate a safety collar to protect the valve assembly. Do not use a rusty or dented gas cylinder or cylinder with a damaged gas valve. -
Page 12: Using Your Barbecue
Using Your Barbecue Before You Light The Barbecue Perform the following checks • Make sure all gas connections are tight and leak tested. Gas regulators that are fitted with a hand- tightening wheel should be checked to ensure that the connection is secure. •... -
Page 13: After Use
Using Your Barbecue high flame low flame Controlling The Burners The control knob can now be turned to the desired heat setting, Low, Medium or High. The control knob does not need to be pushed in while selecting the heat setting. Preparing The Plates And Grills Your barbecue has heavy duty enamelled Cast Iron plate and grill. -
Page 14: Getting The Most From Your Barbecue
Getting The Most From Your Barbecue Preheating Your Barbecue Like an oven, preheating your barbecue before cooking produces better results. Because your hood retains heat so efficiently, preheating your barbecue is quicker with the hood down. Turn the outside two burners to high. Close the hood, and allow to preheat for about 8 minutes, Then reduce the burner settings to achieve and maintain the required temperature, by following these guidelines. -
Page 15: Cleaning And Storing Your Barbecue
Cleaning And Storing Your Barbecue Cleaning Vitreous Enamel Surfaces and Barbecue Control Panel Although porcelain enamel will keep its lustrous finish even under adverse conditions, it still needs regular cleaning. After the appliance has been used, wash down the surfaces with hot soapy water. Caustic cleaners should be avoided. -
Page 16: Service And Maintenance
Service And Maintenance This appliance should be checked and serviced by an authorised service person every 2 years to ensure the appliance remains in a safe operating condition. (These services are not covered by warranty). Replacement parts are available from your authorised BeefEater Dealer Each use Every 6 By authorised service... -
Page 17: Warranty Terms
Warranty not in use. warranty card must be provided to Should any part fail due to defective workmanship or faulty materials within verify purchase date and establish • Cleaning and normal wear and the specified period from the date of the warranty period. - Page 18 Spare Parts - Barbecue Body 2 Burner 3 Burner 4 Burner 5 Burner Part Code Code Code Code Barbecue frame 2101 - 2 2101 - 3 2101 - 4 2101 - 5 Grease tray 2012R1 2086R1 2087R1 2088R1 Vaporizer® cast iron 94060 94060 94060...
-
Page 19: Barbecue Dimensions
Spare Parts - Roasting Hood (10) 2 Burner 3 Burner 4 Burner 5 Burner Part Code Code Code Code Handle 2068 - 2 2068 - 3 2068 - 4 2068 - 5 Handle spacer 060225 060225 060225 060225 Glass panel 2065 - 2 2065 - 3 2065 - 4... -
Page 20: Accessories Available
Accessories Available Your retailer can advise on the range of BeefEater accessories available to help you take full advantage of the barbecue cooking opportunities available with your roasting hood. Apron and Mitt Set - handle Poly Cover - protect your Meat Thermometer - takes baking dishes and other investment from the...
Need help?
Do you have a question about the Discovery Series and is the answer not in the manual?
Questions and answers