Beef Eater DISCOVERY 1100S Assembly And Operating Instructions Manual
Hide thumbs
Also See for DISCOVERY 1100S:
- Assembly instructions manual (9 pages) ,
- Assembly and operating instructions manual (24 pages) ,
- Assembly instructions (2 pages)

Related Manuals for Beef Eater DISCOVERY 1100S


Summary of Contents for Beef Eater DISCOVERY 1100S
- Page 1 DISCOVERY Assembly and Operating Instructions 1100 SERIES 1100S, 1100E, 1100 2, 3, 4 OR 5 BURNERS AUSTRALIA / NEW ZEALAND FOR OUTDOOR USE ONLY...
-
Page 2: Table Of Contents
CONGRATULATIONS CONTENTS Dear customer, Important safety instructions ............3 Product description ..............6 Congratulations and thank you for choosing our barbecue. Assembling the barbecue ............7 We are sure you will find it a pleasure to use. Before you use the barbecue, we recommend that you read through the Using your barbecue .............. -
Page 3: Important Safety Instructions
IMPORTANT SAFETY INSTRUCTIONS Please read the user manual carefully and store in a handy WARNING CAUTION place for later reference. This appliance is set up for Universal LPG and is labelled accordingly. A natural gas conversion kit is available if TIPS &... - Page 4 IMPORTANT SAFETY INSTRUCTIONS To the installer WARNING WARNING • For fixed installations, in Australia refer also to the Failure to follow these instructions and observe the requirements of AS5601/AG601, local authority, gas, warnings provided in this operations manual could result in electricity, and any other relevant statutory regulations.
- Page 5 IMPORTANT SAFETY INSTRUCTIONS • Allow children to operate this appliance. IMPORTANT TIPS & INFORMATION • Use charcoal or any other solid fuel in this appliance. Should the appliance go out for any reason, turn off all • Disconnect any gas fittings while the appliance control knobs and the cylinder gas valve.
-
Page 6: Product Description
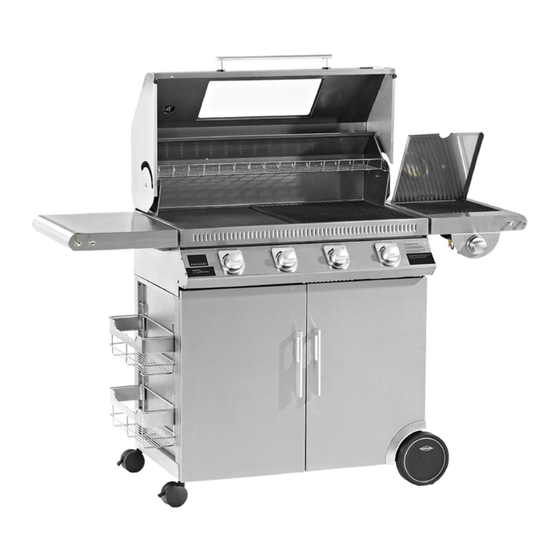
PRODUCT DESCRIPTION BBQ Body Hood Cooking Grill Cooking Plate Side Burner Warming Rack Rotisserie Bracket* Cabinet Trolley** Vaporizers Burner External Baskets*** * Rotisserie is sold separately ** Trolley is packed in a separate carton *** May not be included with all models Images in this manual are for illustrative purposes only. -
Page 7: Assembling The Barbecue
ASSEMBLING THE BARBECUE General Vaporizers are installed individually on the steps above burners, but under the Grill (not required under This barbecue can be mounted onto a mobile trolley. the Plate). They are inserted into the positioning slots like this: The Trolley is packed in a separate carton. -
Page 8: Using Your Barbecue
USING YOUR BARBECUE Before you light the barbecue Light each burner by following this procedure: • Read all instructions before lighting. Perform the following checks: • Open Hood before lighting. • Make sure all connections are tight, and leak-tested. Gas regulators fitted with a hand-tightened wheel must •... - Page 9 USING YOUR BARBECUE After Use Storing Your Barbecue It is a good idea to leave the barbecue on for about When storing barbecue for extended periods, be certain all 10 minutes after you have finished cooking. This helps to controls and cylinder valves are turned off. If storing the burn away any excess food residues and oil, and makes barbecue indoors remove gas cylinder and store the cylinder cleaning easier.
-
Page 10: Product Description For Trolley
PRODUCT DESCRIPTION FOR TROLLEY Bolt pack content Base Panel Side Shelf Circlips x 2 Right Hand Side Panel Side Burner M6 x 12 screw x 29 Left Hand Side Panel Wheels Axel x 2 M6 washer x 33 Rear Panel Wheel x 2 M5 x 10 countersunk screw x 8 Top Front Brace... -
Page 11: Assembling The Trolley
ASSEMBLING THE TROLLEY Turn the Base Panel upside-down, insert the Wheel Axel through the 2 holes, and place a wheel on each side. Secure with a circlip on outside of wheel. Place Cap. insert each castor to its place in the other 2 corners. 2 x ‘A’... - Page 12 ASSEMBLING THE TROLLEY If required, attach the hinge blocks to front of side panels. Note: the block should be on the inside, with only the small bends protruding out. 8 x ‘D’ Attach the Top Brace. Do not tighten. That will be done after fitting the doors.
- Page 13 ASSEMBLING THE TROLLEY Hold each door at ~60° open angle, and insert through opening at door internal skin over the hinge block pins. Ensure correct engagement in both brackets simultaneously. Secure the Cylinder Shield (if included) in place on top, RH side of trolley.
- Page 14 ASSEMBLING THE TROLLEY Adjust the Top Brace (from step 4) to right position, so the doors are closing straight, and tighten the 4 screws. Fit the shelf and Side Burner (or 2 shelves) to the side of the Barbecue. Note: screws to go from the inside of barbecue body out.
- Page 15 ASSEMBLING THE TROLLEY 10. Connect hose and regulator assembly to point C of side burner manifold as shown below and the other end to the gas cylinder. PERFORM LEAK TEST ON ALL CONNECTION POINTS BEFORE PROCEEDING FURTHER CONTENTS...
-
Page 16: Technical Information
TECHNICAL INFORMATION NOTE: Do not modify this appliance. Any deviation from factory settings could result in a safety hazard. 3B = 1409mm 581mm 4B = 1569mm 514mm 5B = 1726mm 3B = 689mm 591mm 4B = 849mm 5B = 1006mm Barbecue manifold inlet thread: 3/8 SAE male flare fitting. -
Page 17: Locating Your Barbecue
LOCATING YOUR BARBECUE Most importantly, this is an outdoor appliance. Ensure your Connect the regulator to the gas cylinder barbecue is positioned safely away from anything that can catch fire. WARNING WARNING Verify ‘Gas Type’ label & data plate attached to side of Outdoor Use Only barbecue is correct for the gas you are about to connect to. -
Page 18: Gas Specifications
GAS SPECIFICATIONS Choosing a location Outdoor area • The vertical clearance above the cooking surface to any example 1 combustible materials must be at least 1000mm. • Cooking with roasting hood closed vents the hot flue gases out the rear of the appliance. A minimum clearance of 450mm to any combustible materials is Outdoor area required. - Page 19 GAS SPECIFICATIONS Before proceeding, you need to establish the gas type which your barbecue will run on, and the style of installation IMPORTANT TIPS & INFORMATION you need. When disconnecting and removing the gas cylinder for the purpose of refilling, always observe the following procedure: Natural gas or LPG/Propane.
- Page 20 GAS SPECIFICATIONS Gas leak test procedure Use the following procedure to check for gas leaks. Never use a naked flame to check for gas leaks. FIG 1 Standard POL regulator (AU/NZ regulator) Gas shutoff valve Tighten in this direction Bleeder valve screw Regulator and hose Gas cylinder Protector cap...
- Page 21 TROUBLESHOOTING CONDITION POSSIBLE CAUSE SOLUTION Empty gas cylinder Replace cylinder Re-ignite and allow operating for a Flame goes out while in use Air mixed in hoses short while, till clears out Blockage Seek professional assistance Turn off knob button, then open the Gas cylinder valve close cylinder valve Re-ignite and allow operating for a...
-
Page 22: Notes
NOTES NOTES... -
Page 23: Warranty
Warranty FOR SALES IN AUSTRALIA AND NEW ZEALAND APPLIANCE: BEEFEATER DISCOVERY BARBECUE 7. You may not make a claim under this warranty unless the defect claimed is This document sets out the terms and conditions of the product due to faulty or defective parts or workmanship. Electrolux is not liable in the warranties for Electrolux Appliances. - Page 24 For more information on all Beefeater products, or for dimension and installation information, call into your retailer, phone or email our customer care team or visit our website: AUSTRALIA phone: 1300 307 939 fax: 1800 356 669 email: customercare@electrolux.com.au web: beefeaterbbq.com NEW ZEALAND phone: 0800 436 245...
Need help?
Do you have a question about the DISCOVERY 1100S and is the answer not in the manual?
Questions and answers